
Related Manuals for Guntermann & Drunck TripleMUX


Summary of Contents for Guntermann & Drunck TripleMUX
- Page 1 TripleMUX/QuadMUX Installation & Operating Instructions Item number: TripleMUX A210 0044 QuadMUX A210 0046 Copyright G&D 2007 06/12/2007 – Version 1.02 Firmware: TM1.04/QM1.02 Subject to errors and alterations...
- Page 2 Guntermann & Drunck GmbH Installation and operating manual TripleMUX/QuadMUX MPORTANT INFORMATION Attention O REDUCE THE RISK OF ELECTRIC SHOCK NEVER OPEN THE DEVICE OR REMOVE ITS COVER F SERVICE IS REQUIRED PLEASE CONTACT OUR TECHNICIANS EAD THIS OPERATING MANUAL CAREFULLY BEFORE SETTING UP THE DEVICE...
-
Page 3: Table Of Contents
Guntermann & Drunck GmbH Installation and operating manual TripleMUX/QuadMUX TripleMUX/QuadMUX Table of contents Description......................5 General information ..................5 Mode of operation..................5 Factory settings / default settings ..............6 Master password ................... 6 User password....................6 Scope of delivery ................... 7 Installation...................... - Page 4 Guntermann & Drunck GmbH Installation and operating manual TripleMUX/QuadMUX 5.2.2.14 Setting the QuickAccess............23 5.2.2.15 Setting the Accesskey ..............24 5.2.2.16 Changing the user password ............24 5.2.2.17 Changing the master password ..........25 5.2.2.18 Setting the OpenAccess ............25 5.2.2.19 Keyboard Type .................26 5.2.2.20 Restoring the factory settings (Set System Defaults) ....26...
-
Page 5: Description
As all the products differ only in the type of graphics card in the computer connected, it is normally the TripleMUX that is being referred to in this manual. The option for scene switching means that the images from the various video sources on one or more computers can be switched to the four monitors connected, according to the user's requirements. -
Page 6: Factory Settings / Default Settings
AutoScan function for automatic pass-through of the scenes • AdonIS can be configured • System can be secured using password assignment. Factory settings / default settings The TripleMUX is configured as follows with the factory settings: • No user password assigned, • Master password permanently set, •... -
Page 7: Scope Of Delivery
Guntermann & Drunck GmbH Installation and operating manual TripleMUX/QuadMUX Scope of delivery Description Item number Switch TripleMUX A210 0044 QuadMUX A210 0046 Power supply PowerCable-2 standard A630 0057 Documentation Triple_QuadMUX German version A 910 0080 Triple_QuadMUX English version A 920 0044... - Page 8 Guntermann & Drunck GmbH Installation and operating manual TripleMUX/QuadMUX Connection cable CPU-MC3-P-2 VGA + 2 x PS/2 to A610 0072 MDR20-M, 2 metre; plus 2 x VGA-M/M-2 3 channel (Triple & QuadMUX) CPU-MC3-P-4 VGA + 2 x PS/2 to A610 0073 MDR20-M, 4 metre;...
-
Page 9: Installation
TripleMUX/QuadMUX Installation In the basic expansion level, 4 computers can be connected to the TripleMUX. Each of these computers can be equipped with a triple video card (QuadMUX: Four-way video card). This procedure will be explained in more detail in this chapter. - Page 10 Alternatively, you can connect keyboard and mouse via USB. The relevant connections for this purpose can be found on the front of the TripleMUX. Once all the connections to the TripleMUX have been established, switch on the device. Page 10...
-
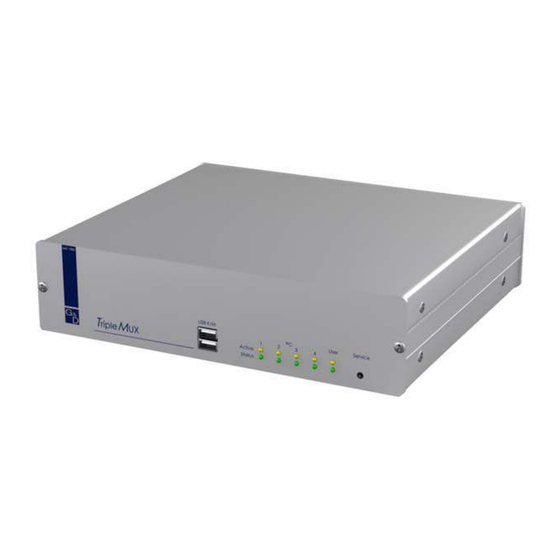
Page 11: Switching The Device On / Led Indicators
Switching the device on / LED indicators After switching on the device using the rocker switch on the rear, the TripleMUX initialises the keyboard and mouse. The user LED (green) comes on immediately after the TripleMUX has been switched on. -
Page 12: System Access And Operation
Guntermann & Drunck GmbH Installation and operating manual TripleMUX/QuadMUX System access and operation The login window If the device is still set to the factory settings (OpenAccess), this window will not be displayed. The login window can only be accessed if the free system access (OpenAccess) has been deactivated. -
Page 13: Keyboard Hotkey Switching
Guntermann & Drunck GmbH Installation and operating manual TripleMUX/QuadMUX Keyboard HotKey switching 4.2.1 Default setting To switch, hold down the CRTL key and then press the key of the required scene. Permissible keys are the alphanumeric characters above the letter block from 1 - 8. -
Page 14: Operating The Adonis
Guntermann & Drunck GmbH Installation and operating manual TripleMUX/QuadMUX 4.3.2 Operating the AdonIS The AdonIS can be operated either using the keyboard or the mouse. 4.3.2.1 Keyboard operation S E L E C T S C E N E <= Name of the scene, can be edited by user, max. -
Page 15: Display Of The Scene Selected
Guntermann & Drunck GmbH Installation and operating manual TripleMUX/QuadMUX 4.3.2.3 Display of the scene selected If the selection is made using the keyboard or mouse, the name and the HotKey of the scene selected is displayed permanently on the screen. -
Page 16: Function Menu
Guntermann & Drunck GmbH Installation and operating manual TripleMUX/QuadMUX Function menu Setup settings and information services are also carried out via the AdonIS. Opening the AdonIS function menu Activate the AdonIS window using the key combination CRTL + NUM. Press key F1. -
Page 17: The Individual Functions
Guntermann & Drunck GmbH Installation and operating manual TripleMUX/QuadMUX The individual functions Back to the SELECT SCENE menu 5.2.1 AutoScan function Triggering the AutoScan function Activating the AutoScan function causes the automatic interconnection of all channels. Even unassigned channels or computers which are switched off can be included in the AutoScan function (e.g. -
Page 18: Console Setup
To save the settings, close this menu using 5.2.2.2 Keyboard layout Adjust the keyboard set used here by TripleMUX to the actual layout of the keyboard connected. For example, you should change the layout if you notice a Y/Z reversal (American/German layout). -
Page 19: Screensaver
(toggle) to select the required option. 5.2.2.3 ScreenSaver The ScreenSaver to be set here is generated by the TripleMUX and bears no relation to the ScreenSaver on the computer. As there is normally only an indirect connection (via the TripleMUX) between the computer and the monitors, you should switch off the computer ScreenSaver to make your work easier. -
Page 20: Assigning The Console Name
Guntermann & Drunck GmbH Installation and operating manual TripleMUX/QuadMUX 5.2.2.5 Assigning the console name In the case of a combined use of multiple G&D devices every G&D unit can be assigned an unique name, the Console Name. Move the cursor to the Console Name row. The existing entry can be... -
Page 21: Setting The Menu Position / Size
5.2.2.10 AdonIS by mouse Here you can activate the support for the special buttons on the Intelli-Explorer mouse for working with the TripleMUX. If you set the entry here to "Yes", the AdonIS, can be opened by pressing button 4 or 5 on the Explorer mouse (left side buttons) as well as using the keyboard. -
Page 22: Definition Of The First Hotkey
Guntermann & Drunck GmbH Installation and operating manual TripleMUX/QuadMUX After moving the cursor to the "AdonIS by Mouse" field, you can use the SPACE key (toggle) or the buttons to select the required option. To save the settings, close the menu using 5.2.2.11 Definition of the first hotkey... -
Page 23: Defining The Second Key (Scene Key)
Guntermann & Drunck GmbH Installation and operating manual TripleMUX/QuadMUX 5.2.2.13 Defining the second key (Scene Key) The second button on the HotKey for triggering the scene switchover can also be modified. Proceed in the same way as the process described to change Hotkey1. -
Page 24: Setting The Accesskey
To run this function you need to be logged on as a master! If you want to change the default value (accessed using ENTER) and protect the TripleMUX with a user password, move the cursor in the Console Setup menu to the "User Password" field and then press the ENTER key. -
Page 25: Changing The Master Password
5.2.2.18 Setting the OpenAccess Note: To run this function you need to be logged on as a master! With access via OpenAccess anyone can access the TripleMUX and the connected PCs. The OpenAccess is defined as follows with the factory settings:... -
Page 26: Keyboard Type
Guntermann & Drunck GmbH Installation and operating manual TripleMUX/QuadMUX On delivery, with the factory settings, the access is active for the OpenAccess. If you want to deactivate this, move the cursor to the OpenAccess entry and press the SPACE key to select from the following alternatives:... -
Page 27: Cascade Setup
MUX4 (permits the number of computers to be increased to up to 16 computers by using a miniMUX4. However, the access to the multi-way graphic is only possible on the PCs directly connected to the TripleMUX. All PCs connected via a miniMUX4 to the TripleMUX transmit only one graphics signals on the other hand.). -
Page 28: Setting The Video Scenes
In this process you define for which video scene a video source on a multi-graphic computer is to be switched to a specific monitor on your workstation. Open the AdonIS for the TripleMUX using the HotKey combination you have set or using the default HotKey CRTL + NUM. -
Page 29: Setting The Scene Designation
Image on monitor A: A1 from TripleMUX = CPU 1 from PC1 Image on monitor B: B1 from TripleMUX = VGA CPU 1.2 from PC1 Image on monitor C: C2 from TripleMUX = VGA CPU 2.2 from PC2 Image on monitor D: D4 from TripleMUX = VGA CPU 4.3 from PC4... - Page 30 Guntermann & Drunck GmbH Installation and operating manual TripleMUX/QuadMUX Select the field to be edited using the arrow keys or using the mouse, after you have logged onto the system using the master password. The master can also edit the greyed out fields as well:...
-
Page 31: Setting The Keyboard/Mouse Scenes
At the same time, this computer will have the keyboard/mouse pointer. In the example menu shown above, the definition has been set in scene "003" that channel 4 is to be operated on the TripleMUX and has the keyboard/mouse pointer. -
Page 32: Usb Keyboard Mode Setup
Sun servers is required after the activation of the keyboard mode SUN German or the keyboard mode SUN US. In the default settings of the TripleMUX, the USB Keyboard Mode "PC Multimedia" is active on all channels: USB KEYBOARD MODE... -
Page 33: Logout
System Info The System Info window, which is opened using the key, cannot be used to make settings at all. Here you will instead find information on the TripleMUX which is relevant for site service staff. closes this window. Page 33... -
Page 34: Mouse Utilities - Utility
Guntermann & Drunck GmbH Installation and operating manual TripleMUX/QuadMUX 5.2.9 Mouse Utilities - Utility If the mouse on one computer is no longer functioning during operation (mouse pointer isn't moving), there is the option of performing a re-initialisation. First check that all the connection cables are correctly connected. Please note that a mouse enable is only carried out for the active channel in question (PC1 to PC4). - Page 35 Guntermann & Drunck GmbH Installation and operating manual TripleMUX/QuadMUX Reset Mouse Select function for Windows operating systems; regardless of the mouse driver set. This applies to: WIN 98, WIN NT, WIN ME, WIN 2000, WIN XP. Move the cursor to the relevant option using the arrow keys.
-
Page 36: Technical Data
Guntermann & Drunck GmbH Installation and operating manual TripleMUX/QuadMUX Technical data Video • Format: VGA (analogue) • Resolution: from 640 x 350 @120 Hz to 1920 x 1440 @ 60 Hz • Video bandwidth: up to 400 MHz • H/V-Sync: 135KHz/150Hz •... - Page 37 Guntermann & Drunck GmbH Installation and operating manual TripleMUX/QuadMUX Housing dimensions (W x H x D in mm) Desktop 19" variant TripleMUX 270 x 88 x 210 19" x 2 HU x 210 QuadMUX 270 x 88 x 210 19" x 2 HU x 210...
- Page 38 Guntermann & Drunck GmbH Installation and operating manual TripleMUX/QuadMUX Appendix: Your master password is: 4658 Please ensure that you remove this appendix from the operating manual! Page 38...
- Page 39 Guntermann & Drunck GmbH Installation and operating manual TripleMUX/QuadMUX Page 39...
- Page 40 G u n t e r m a n n & D r u n c k G m b H S y s t e m D e v e l o p m e n t , G e r m a n y ▪...
Need help?
Do you have a question about the TripleMUX and is the answer not in the manual?
Questions and answers