
Subscribe to Our Youtube Channel
Related Manuals for Guntermann & Drunck DL-MUX2-MC2


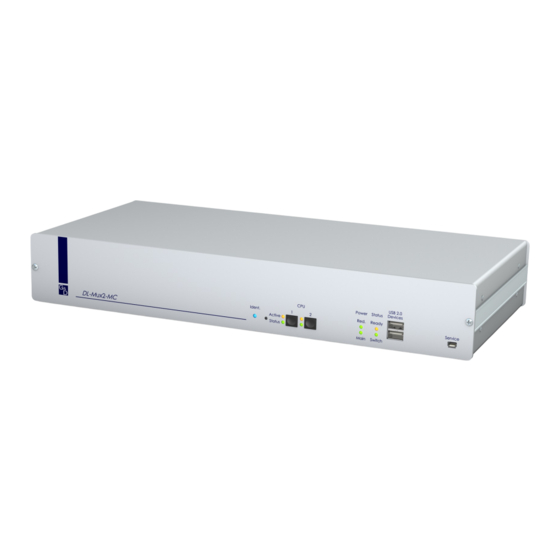
Summary of Contents for Guntermann & Drunck DL-MUX2-MC2
- Page 1 Guntermann & Drunck GmbH www.gdsys.de G&D DL-MUX2-MC2 Installation und Bedienung Installation and Operating Guide A9100266-1.00...
- Page 2 © Guntermann & Drunck GmbH 2015. Alle Rechte vorbehalten. Version 1.00 – 19.08.2015 Firmware: 1.3.000 Guntermann & Drunck GmbH Dortmunder Str. 4a 57234 Wilnsdorf Germany Telefon +49 (0) 2739 8901-100 Telefax +49 (0) 2739 8901-120 http://www.GDsys.de sales@GDsys.de i · G&D DL-MUX2-MC2...
-
Page 3: Table Of Contents
Benutzerauthentifizierung gegenüber der Webapplikation ......18 Konfigurationseinstellungen ................19 Einstellung der Hotkey-Verzögerung ............19 Änderung der Hotkey-Taste ............... 20 Änderung des Select-Key-Sets ..............21 Änderung der Setup-Taste ................22 Unterstützung für Multimedia- und Sun-Sondertasten ........ 23 Unterstützung für Spezialtastaturen ............25 G&D DL-MUX2-MC2 · ii... - Page 4 Mischbetrieb digitaler und analoger Videosignale ..........32 Gleicher Signaltyp innerhalb eines Kanals ..........32 Unterschiedliche Signaltypen innerhalb eines Kanals ........32 Anschluss von USB 2.0-Massenspeichergeräten ..........32 Pin-Belegung der RS232-Buchse ............... 33 Technische Daten ................... 34 iii · G&D DL-MUX2-MC2...
-
Page 5: Sicherheitshinweise
Betreiben Sie dieses Gerät nur mit dem mitgelieferten oder in der Bedienungsan- leitung aufgeführten Netzteil. ! Betreiben Sie das Gerät ausschließlich im vorgesehenen Einsatzbereich Die Geräte sind für eine Verwendung im Innenbereich ausgelegt. Vermeiden Sie extreme Kälte, Hitze oder Feuchtigkeit. G&D DL-MUX2-MC2 · 1... -
Page 6: Der Kvm-Switch »Dl-Mux2
Der KVM-Switch »DL-MUX2« Der KVM-Switch »DL-MUX2« Der KVM-Switch DL-MUX2-MC2 ermöglicht die Bedienung von bis zu zwei Rech- nern über einen Arbeitsplatz. HINWEIS: An die MC2-Variante des KVM-Switches können Sie Rechner mit max. zwei Videoausgängen anschließen. Die Videosignale dieser Rechner werden auf zwei separaten Monitoren des Arbeitsplatzes ausgegeben. -
Page 7: Installation
Beachten Sie hierbei die maximale Kabellänge von fünf Metern zwischen dem KVM-Switch und den anzuschließenden Rechnern. 3. Entscheiden Sie vor der Installation des KVM-Switches, welcher Taster an der Frontseite des Geräts, welchem Rechner zugewiesen werden soll. G&D DL-MUX2-MC2 · 3... -
Page 8: Anschluss Der Geräte Des Arbeitsplatzes
Schnittstelle an. Schließen Sie das DVI-Kabel des zweiten Monitors an diese Monitor 2: Schnittstelle an. USB 2.0: Möchten Sie den angeschlossenen Rechnern USB-Geräte zur Verfügung stellen, schließen Sie diese Geräte an diese Schnittstellen an der Frontseite an. 4 · G&D DL-MUX2-MC2... -
Page 9: Anschluss Der Rechner
DVI-I CPU x.2: Ist der Rechner mit einem DVI-D-Videoausgang ausgestattet, nehmen Sie ein digitales Videokabel zur Hand. Im Falle eines analogen VGA-Ausgangs ist ein analoges Videokabel zu verwenden. Verbinden Sie den zweiten Videoausgang des Rechners mit dieser Schnittstelle. G&D DL-MUX2-MC2 · 5... -
Page 10: Verbindung Mit Bis Zu Zwei Lokalen Netzwerken
Verbinden Sie ein Kaltgeräte-Kabel mit einer Netzsteckdose und dieser Main Power: Buchse. Red. Power: Verbinden Sie – falls gewünscht – ein weiteres Kaltgeräte-Kabel mit einer Netzsteckdose und dieser Buchse. Hierdurch wird eine zweite, redundante Stromversorgung des Gerätes erreicht. 6 · G&D DL-MUX2-MC2... -
Page 11: Inbetriebnahme
Status Ready blinkt Gerät betriebsbereit. Gerät bootet oder interne Kommunikation fehlerhaft. Switch blinkt Gerät betriebsbereit. Interne Kommunikation fehlerhaft. flackert Gerät bootet. HINWEIS: Die LEDs sowie sind zusätzlich auf der Rückseite des Ident. Main Red. Geräte ausgeführt. G&D DL-MUX2-MC2 · 7... -
Page 12: Umschaltung Zwischen Den Rechnern
Betätigen Sie auf der Tastatur des Arbeitsplatzes die Tastenkombination Hotkey+Select-Key Im Auslieferungszustand ist die Umschaltung des Kanals über den Hotkey und die Select-Keys möglich. Strg WICHTIG: Die Umschaltung des Kanals erfolgt, wenn die betätigte Tasten- kombination losgelassen wird. 8 · G&D DL-MUX2-MC2... -
Page 13: Umschaltung Mit Step-Keys
Verwendung der Umschaltbefehle des KVM-Switches. Anschlusseinstellungen Zum Aufbau einer seriellen Verbindung zum KVM-Switch sind die nachfolgend aufgeführten Anschlusseinstellungen durch das serielle Endgerät anzuwenden. Bits pro Sekunde: 9.600 Datenbits: Parität: keine Stoppbits: Flussteuerung: keine G&D DL-MUX2-MC2 · 9... -
Page 14: Umschaltbefehle
Detaillierte Informationen hierzu finden Sie im Abschnitt Erweiterte Funktionen des KVM-Switches des separaten Handbuches zur Bedienung des Webapplikation. Umschaltung via SNMP So schalten Sie die Signalübertragung via SNMP um: Setzen Sie das Managed Object über die SNMP-Managementstation selectedChannel auf die Nummer des aufzuschaltenden Kanals. 10 · G&D DL-MUX2-MC2... -
Page 15: Erstkonfiguration Der Netzwerkeinstellungen
Ändern Sie unbedingt das voreingestellte Passwort des Administratorkontos. Eine detaillierte Anleitung hierzu finden Sie im Handbuch der Webapplikation. 6. Klicken Sie in der Symbolleiste auf das Werkzeugsymbol. 7. Klicken Sie auf die Reiter Konfiguration > Schnittstellen G&D DL-MUX2-MC2 · 11... - Page 16 , um die Daten zu speichern. 11.Klicken Sie auf das Logout -Symbol (s. Abbildung rechts), um die aktive Sitzung der Webapplikation zu beenden. 12.Entfernen Sie die Twisted-Pair-Kabelverbindung zwischen dem Rechner und dem KVM-Switch. 13.Integrieren Sie den KVM-Switch in das lokale Netzwerk. 12 · G&D DL-MUX2-MC2...
-
Page 17: Verwendung Des Reset-Tasters
3. Halten Sie den Taster weiterhin gedrückt und schalten Sie das Gerät ein. 4. Sobald die grüne Switch-LED schnell blinkt, lassen Sie die Taste los. HINWEIS: Die Wiederherstellung der Standardeinstellungen ist alternativ auch über die Webapplikation Config Panel möglich. G&D DL-MUX2-MC2 · 13... -
Page 18: Temporäre Deaktivierung Der Netzfilterregeln
2. Bearbeiten Sie die im Gerät gespeicherten Netzfilterregeln mit der Webapplika- tion Config Panel und speichern Sie die Regeln anschließend ab. WICHTIG: Wird innerhalb von 15 Minuten keine neue Netzfilterkonfiguration erstellt, werden die ursprünglichen Einstellungen wieder aktiviert. 14 · G&D DL-MUX2-MC2... -
Page 19: Konfiguration
Taster, Hotkeys, seriell und IP Reinitialisierung von USB-Eingabegeräten Umschaltung verzögern Nein Übertragungsgeschwindigkeit der USB-K/M- Full Speed Signale einstellen Aktivierung/Deaktivierung des Tastatur-Signals aktiviert Aktivierung/Deaktivierung von Kanälen alle Kanäle aktiviert Aktivierung oder Reset einer PS/2-Maus Wiederherstellung der Standardeinstellungen G&D DL-MUX2-MC2 · 15... -
Page 20: Bedienung Des Setup-Modus
Betätigen Sie nach der Aktivierung des Setup-Modus einen der auf den folgenden Seiten beschriebenen Setup-Keys. So beenden Sie den Setup-Modus ohne Ausführung einer Funktion: Betätigen Sie die -Taste der Tastatur um den Setup-Modus zu beenden. 16 · G&D DL-MUX2-MC2... -
Page 21: Grundlegende Bedienung Der Webapplikation
Im KVM-Switch ist ein SSL-Zertifikat hinterlegt, welches dem Webbrowser bzw. dem Benutzer erlaubt, die Gegenseite zu authentifizieren. WICHTIG: Ersetzen Sie das im Auslieferungszustand des Geräts enthaltene Zertifi- kat durch ein individuelles, gerätebezogenes Zertifikat. Die Erstellung eines sol- chen Zertifikats wird im Handbuch der Webapplikation beschrieben. G&D DL-MUX2-MC2 · 17... -
Page 22: Benutzerauthentifizierung Gegenüber Der Webapplikation
Melden Sie sich hierfür mit dem Administratorkonto in die Webapplikation ein und ändern Sie anschließend das Passwort wie im separaten Handbuch der Webapplikation beschrieben. Die voreingestellten Zugangsdaten zum Administratorkonto lauten: Benutzername: Admin Passwort: 4658 18 · G&D DL-MUX2-MC2... -
Page 23: Konfigurationseinstellungen
4. Geben Sie im Feld Hotkey-Verzögerung die gewünschte Verzögerung in Sekunden ein. Die maximale Verzögerung beträgt 60 Sekunden. Durch Eingabe des Wertes 0 wird die Verzögerung deaktiviert. 5. Klicken Sie auf , um die erfassten Daten zu speichern. G&D DL-MUX2-MC2 · 19... -
Page 24: Änderung Der Hotkey-Taste
Modifizierertasten (Strg, Alt, Alt Gr, Win oder Shift) durch Anklicken des bzw. der entsprechenden Kontrollkästchen(s) aus. Werden mehrere Modizierertasten ausgewählt, so sind diese gemeinsam zu betätigen, um den Hotkey auszulösen! 5. Klicken Sie auf , um die erfassten Daten zu speichern. 20 · G&D DL-MUX2-MC2... -
Page 25: Änderung Des Select-Key-Sets
Optionen: 1…2 Aktivierung der Select-Key-Sets Aktivierung der Select-Key-Sets Num1…2 Num1 Num2 Aktivierung der Select-Key-Sets A…B F1…F2 Aktivierung der Select-Key-Sets 5. Klicken Sie auf , um die erfassten Daten zu speichern. G&D DL-MUX2-MC2 · 21... -
Page 26: Änderung Der Setup-Taste
Taste aus. Setup-Taste Zur Auswahl stehen die Tasten Backspace, Druck, Rollen, Num, Pause, Einfg, , Bild und Space. Entf, Pos 1, Ende, Bild 5. Klicken Sie auf , um die erfassten Daten zu speichern. 22 · G&D DL-MUX2-MC2... -
Page 27: Unterstützung Für Multimedia- Und Sun-Sondertasten
Apple Tastaturmodus für Apple-Rechner Tastaturmodus (amerikanisches Layout) für Sun SUN US SUN DE Tastaturmodus (deutsches Layout) für Sun LK463-kompatible Tastatur LK463 5. Klicken Sie auf , um die erfassten Daten zu speichern. G&D DL-MUX2-MC2 · 23... - Page 28 Solaris Shortcut Key des Sun Keyboards Strg+Alt+F2 Wiederholen Strg+Alt+F3 Eigenschaften Strg+Alt+F4 Zurücknehmen Strg+Alt+F5 Vordergrund Strg+Alt+F6 Kopieren Strg+Alt+F7 Öffnen Strg+Alt+F8 Einfügen Strg+Alt+F9 Suchen Strg+Alt+F10 Ausschneiden Strg+Alt+F11 Hilfe Strg+Alt+F12 Still Strg+Alt+NUM+ Lauter Strg+Alt+NUM- Leiser Strg+Alt+NUM* Compose Strg+Alt+Pause Shutdown Pause+A Stop: 24 · G&D DL-MUX2-MC2...
-
Page 29: Unterstützung Für Spezialtastaturen
Der KVM-Switch interpretiert in der Standardeinstellung alle Eingaben einer PS/2- Tastatur mit dem Scancode-Set 2. Falls das Verkettungszeichen (engl. Pipe, „|”) nicht eingegeben werden kann oder die Pfeiltasten der Tastatur nicht wie erwartet funktionieren, ist die Umstellung auf das Scancode-Set 3 empfehlenswert. G&D DL-MUX2-MC2 · 25... -
Page 30: Switching (De)Aktivieren
Schnittstelle gesteuert werden. serielle Nach Freischaltung der kostenpflichtigen DevCon-Funktion kann zusätzlich über das Internet-Protokoll ( ) mit der Webapplikation Config Panel oder per SNMP umge- schaltet werden. Falls gewünscht, können Sie die Möglichkeiten der Umschaltung einschränken. 26 · G&D DL-MUX2-MC2... -
Page 31: Reinitialisierung Von Usb-Eingabegeräten
Aufforderung (beispielsweise durch Betätigung eines Tasters oder durch Auslösung eines Select-Keys) um. Die Signale des Rechners am aufzuschaltenden Kanal werden sofort an den Arbeits- platz gesendet. Das Videosignal wird bereits nach kurzer Zeit am Monitor dargestellt. G&D DL-MUX2-MC2 · 27... -
Page 32: Übertragungsgeschwindigkeit Der Usb-K/M-Signale Einstellen
Die Signale der USB-Maus und der USB-Tastatur werden vom KVM-Switch stan- dardmäßig im Full-Speed-Modus über eine USB-Verbindung an den aktiven Rechner übertragen. Aktivieren Sie den Low-Speed-Modus eines bestimmten Kanals, falls die Bedienung des Rechners mit der Tastatur und/oder Maus nicht möglich ist. 28 · G&D DL-MUX2-MC2... -
Page 33: Aktivierung/Deaktivierung Des Tastatur-Signals
Optionen: Aktiviert Die Tastatur-Signale werden an den Rechner dieses Kanals übertragen (Standard). Die Tastatur-Signale werden nicht an den Rechner Deaktiviert dieses Kanals übertragen. 5. Klicken Sie auf , um die erfassten Daten zu speichern. G&D DL-MUX2-MC2 · 29... -
Page 34: Aktivierung/Deaktivierung Von Kanälen
Um die Aktivierung oder einen Reset der PS/2-Maus zu erreichen, kann durch den KVM-Switch ein spezieller Befehl an den Rechner gesendet werden. Da die Befehle in Abhängigkeit vom verwendeten Maustyp und Betriebssystem unterschiedlich sind, stehen vier verschiedene Setup-Keys zur Verfügung. 30 · G&D DL-MUX2-MC2... -
Page 35: Wiederherstellung Der Standardeinstellungen
Gerät handelt! 3. Klicken Sie auf die Schaltfläche , um die Standardeinstel- Werkseinstellungen lungen wiederherzustellen. HINWEIS: Die Wiederherstellung der Standardeinstellungen ist alternativ auch durch Betätigung des Reset-Tasters möglich. Weitere Informationen hierzu finden Sie auf Seite 13. G&D DL-MUX2-MC2 · 31... -
Page 36: Weiterführende Informationen
Zeitpunkt Daten auf das Massenspeichergerät schreibt, wird dieser Vorgang abgebrochen. Um einen Datenverlust zu vermeiden, verwenden Sie die Funktion zum sicheren Entfer- nen der Hardware des auf dem Rechner eingesetzten Betriebssystems vor der Umschaltung des Kanals. 32 · G&D DL-MUX2-MC2... -
Page 37: Pin-Belegung Der Rs232-Buchse
Lassen Sie ungenutzte Pins bei der Verkabelung des KVM-Switches mit dem seriellen Endgerät unbelegt! Verbinden Sie Pin 9 nur, falls das serielle Endgerät über die RS 232-Schnittstelle mit Strom +5V DC, max. 100 mA zu versorgen ist! G&D DL-MUX2-MC2 · 33... -
Page 38: Technische Daten
3840 × 2160 @ 60 Hz (Ultra HD) 4096 × 2160 @ 60 Hz nVidia 3D-Vision 120 Hz: 1680 × 1050 @ 120 Hz weitere standardisierte Auflösungen möglich Vertikalfrequenz: 20 Hz bis 120 Hz Horizontalfrequenz: 25 kHz bis 185 kHz 34 · G&D DL-MUX2-MC2... - Page 39 23W@240VAC; 23W@100VAC Gehäuse Material: Aluminium eloxiert Maße (B x H x T): 435 × 66 × 210 mm Gewicht: ca. 2,7 kg Einsatzumgebung Temperatur: +5 bis +45 °C Luftfeuchte: < 80%, nicht kondensierend Konformität CE, RoHs G&D DL-MUX2-MC2 · 35...
- Page 42 Legal details © Guntermann & Drunck GmbH 2015. All rights reserved. Version 1.00 – 19/08/2015 Guntermann & Drunck GmbH Dortmunder Str. 4a 57234 Wilnsdorf Germany Phone +49 2739 8901-100 +49 2739 8901-120 http://www.GDsys.de sales@GDsys.de i · G&D DL-MUX2-MC2...
- Page 43 Table of contents Contents Safety instructions .................... 1 The KVM switch »DL-MUX2-MC2« ............... 2 Scope of delivery ....................2 Installation ....................... 3 Overview of the interfaces ................. 3 Setting up the device ..................3 Connecting the console devices ................4 Connecting the computers .................
- Page 44 The same signal type within one channel ............ 31 Different signal types within one channel ............ 31 Connecting USB 2.0 mass storage devices ............31 Pin assignment of the RS232 socket ..............32 Technical data ....................33 iii · G&D DL-MUX2-MC2...
-
Page 45: Safety Instructions
Operate this device with the provided G&D power pack or with the power pack listed in the manual. ! Operate the device only in designated areas. The devices are designed for indoor use. Avoid exposure to extreme cold, heat or humidity. G&D DL-MUX2-MC2 · 1... -
Page 46: The Kvm Switch »Dl-Mux2-Mc2
The KVM switch »DL-MUX2-MC2« The KVM switch »DL-MUX2-MC2« The KVM switch DL-MUX2-MC2 enables the user to operate up to two computers through one console. NOTE: The MC2 variant of the KVM switch lets you connect computers with up to two video outputs. The video signals of these computers are displayed on two separate console monitors. -
Page 47: Installation
KVM switch and the computers which are to be connected. 3. Before installing the KVM switch, decide which button on the front panel of the device should be assigned to which computer. G&D DL-MUX2-MC2 · 3... -
Page 48: Connecting The Console Devices
Connect the second monitor’s DVI-I cable to this interface. Monitor 2: USB 2.0: If you want USB devices (e.g. a printer or a mass storage device) to be avail- able to the connected computers, connect these devices to the interfaces on the front panel. 4 · G&D DL-MUX2-MC2... -
Page 49: Connecting The Computers
If the computer is equipped with a DVI-D video output, use a digital video cable. If the computer has an analog VGA output, use an analog video cable. Connect the second video output of the computer to this interface. G&D DL-MUX2-MC2 · 5... -
Page 50: Connecting Up To Two Local Networks
Connect an IEC cable to a power outlet and this socket. Red. Power: If desired, connect another IEC cable to a power outlet and this socket. This provides the device with a second, redundant power supply. 6 · G&D DL-MUX2-MC2... -
Page 51: Start-Up
Device is ready for operation. Device is booting or defective internal communication. Switch blinking Device is ready for operation. Defective internal communication. flickering Device is booting. NOTE: The back panel of the device provides additional Ident. Main Red. LEDs. G&D DL-MUX2-MC2 · 7... -
Page 52: Switching Between The Computers
The default setting enables the user to switch the channel with the Ctrl hotkey and the select keys IMPORTANT: The channel is only switched if the pressed key combination is released. 8 · G&D DL-MUX2-MC2... -
Page 53: Switching Via Step Keys
Use the following connection settings for the serial end device to establish a serial connection to the KVM switch. Bits per second: 9.600 Data bits: Parity: none Stop bits: Flow control: none G&D DL-MUX2-MC2 · 9... -
Page 54: Switching Commands
Switching via SNMP How to switch the signal transmission via SNMP: Use the SNMP management station to set the Managed Object selectedChannel to the number of the channel to be switched to. 10 · G&D DL-MUX2-MC2... -
Page 55: Initial Configuration Of The Network Settings
Change the preset password of the administrator account. The manual of the web application provides a detailed description of how to change the preset access data. 6. Click the tools symbol in the toolbar. 7. Click the tabs. Configuration > Interfaces G&D DL-MUX2-MC2 · 11... - Page 56 (see figure on the right) to end the current session Logout of the web application. 12.Remove the twisted pair cable between the computer and the computer or the KVM switch. 13.Integrate the KVM switch into the local network. 12 · G&D DL-MUX2-MC2...
-
Page 57: Using The Reset Button
3. Keep the button pressed and switch on the device. 4. Release the button as soon as the green Switch LED is blinking. NOTE: The default settings can also be reset in the Config Panel web application. G&D DL-MUX2-MC2 · 13... -
Page 58: Temporarily Deactivating The Netfilter Rules
2. Use the Config Panel web application to edit the netfilter rules stored in the device and save these rules. NOTE: The former settings are reactivated if no new netfilter rules are created within 15 minutes. 14 · G&D DL-MUX2-MC2... -
Page 59: Configuration
Reinitialising USB input devices Switching Delay Adjusting the transfer speed of USB K/M Full Speed signals Enabling/disabling the keyboard signal enabled (De)activating channels all channels enabled Activating or resetting a PS/2 mouse Resetting the default settings G&D DL-MUX2-MC2 · 15... -
Page 60: Operating The Setup Mode
How to perform a setup function: After enabling the setup mode, press one of the setup keys described on the fol- lowing pages. How to end the setup mode without performing a function: Press to end the setup mode. 16 · G&D DL-MUX2-MC2... -
Page 61: Basic Operation Of The Web Application
1. Enter the following data in the login box: Username: Enter your username. Password: Enter your user account password. Select language: Select the language for the user interface: (Default): apply default setting English German G&D DL-MUX2-MC2 · 17... -
Page 62: Configuration Settings
General 4. Use the field to enter the desired delay in seconds.. Hotkey Delay The maximum time span for the delay is 60 seconds. The value 0 deactivates the delay. 5. Click to save your changes. 18 · G&D DL-MUX2-MC2... -
Page 63: Changing The Hotkey
(Ctrl, Alt, Alt Gr, Win or Shift) by clicking the particular box(es). If several modifier keys have been selected, they must be pressed at the same time in order to trigger the hotkey! 5. Click to save your changes. G&D DL-MUX2-MC2 · 19... -
Page 64: Changing The Select Key Sets
activate select key sets 1…2 Num1…2 activate select key sets Num1 Num2 A…B activate select key sets F1…F2 activate select key sets 5. Click to save your changes. 20 · G&D DL-MUX2-MC2... -
Page 65: Changing The Setup Key
4. Use the field to select the desired key. Setup key The following keys are provided: Backspace, PrtScr, Scroll, Num, Pause, Insert, Delete, Home, End, PgUp, PgDn and Space. 5. Click to save your changes. G&D DL-MUX2-MC2 · 21... -
Page 66: Support For Multimedia And Special Sun Keys
support for Multimedia special keys Apple keymode for Apple computers SUN US Sun keymode (American layout) SUN DE Sun keymode (German layout) LK463 LK463 compatible keyboard 5. Click to save your changes. 22 · G&D DL-MUX2-MC2... - Page 67 Solaris Shortcut Key of the Sun Keyboard Ctrl+Alt+F2 Again Ctrl+Alt+F3 Props Ctrl+Alt+F4 Undo Ctrl+Alt+F5 Front Ctrl+Alt+F6 Copy Ctrl+Alt+F7 Open Ctrl+Alt+F8 Paste Ctrl+Alt+F9 Find Ctrl+Alt+F10 Ctrl+Alt+F11 Help Ctrl+Alt+F12 Mute Ctrl+Alt+NUM+ Loud Ctrl+Alt+NUM- Quiet Ctrl+Alt+NUM* Compose Ctrl+Alt+Pause Shutdown Pause+A Stop G&D DL-MUX2-MC2 · 23...
-
Page 68: Support For Special Keyboards
The two common scan code sets (sets 2 and 3) contain dif- ferent scan codes. The DL-MUX2-MC2 system interprets all inputs of the PS/2 keyboard with scan code set 2. If the pipe (“|”) cannot be entered or if the arrow keys of the keyboard do not work as expected, it is recommended to switch to scan code set 3. -
Page 69: (De)Activating The Switching
After you purchased and activated the DevCon function, you can use the Config Panel web application or SNMP to switch to the protocol. If desired, the switching possibilities can be limited. G&D DL-MUX2-MC2 · 25... -
Page 70: Reinitialising Usb Input Devices
The computer signals of the selected channel are instantly transmitted to the user workplace. The connected monitor may not support instant switching, thus not displaying any video signal. If that should be the case, do activate the switching delay function. 26 · G&D DL-MUX2-MC2... -
Page 71: Adjusting The Transfer Speed Of Usb K/M Signals
USB connec- tion. Enable the low speed mode of a channel if it is not possible to operate the computer via keyboard and/or mouse. G&D DL-MUX2-MC2 · 27... -
Page 72: Enabling/Disabling The Keyboard Signal
Keyboard Keyboard signals are transmitted to the computer Enabled of this channel (default). Keyboard signals are not transmitted to the computer Disabled of this channel. 5. Click to save your changes. 28 · G&D DL-MUX2-MC2... -
Page 73: (De)Activating Channels
To enable or reset the PS/2 mouse, the KVM switch can be used to send a special command to the computer. Since the commands differ depending on the mouse type and the installed operating system, four different setup keys are provided. G&D DL-MUX2-MC2 · 29... -
Page 74: Resetting The Default Settings
3. Click on to reset the default settings. Default settings NOTE: The default settings can also be reset by pressing the Reset button. Further information regarding this topic can be found on page 13. 30 · G&D DL-MUX2-MC2... -
Page 75: Further Information
In case the computer writes data on the mass storage device at that time, this process is aborted. Before switching the channel, use the Safely remove hardware function of the applied operating system of the computer to avoid data loss. G&D DL-MUX2-MC2 · 31... -
Page 76: Pin Assignment Of The Rs232 Socket
Unused contacts should be left unconnected when connecting the KVM switch to the serial device. Only connect pin 9, if the serial device is to be supplied with power (+5V DC, max. 100 mA) via the RS 232 interface! 32 · G&D DL-MUX2-MC2... -
Page 77: Technical Data
4096 × 2160 @ 60 Hz nVidia 3D-Vision 120 Hz: 1680 × 1050 @ 120 Hz further standardised resolutions possible Vertical frequency: 20 Hz to 120 Hz Horizontal frequency: 25 kHz to 185 kHz G&D DL-MUX2-MC2 · 33... - Page 78 23W@240VAC; 23W@100VAC Casing Material: anodised aluminium Dimensions (W × H × D): 435 × 66 × 210 mm Weight: approx. 2.7 kg Operating environment Temperature: +5 to +45 °C Air humidity: < 80%, non-condensing Conformity CE, RoHs 34 · G&D DL-MUX2-MC2...
- Page 80 Das Handbuch wird fortlaufend aktualisiert und im Internet veröffentlicht. The manual is constantly updated and available on our website. http://gdsys.de/A9100266 Guntermann & Drunck GmbH Dortmunder Str. 4a 57234 Wilnsdorf Germany http://www.GDsys.de sales@GDsys.de...
Need help?
Do you have a question about the DL-MUX2-MC2 and is the answer not in the manual?
Questions and answers