Table of Contents
Advertisement
Quick Links
Item #1007631858
1007631864
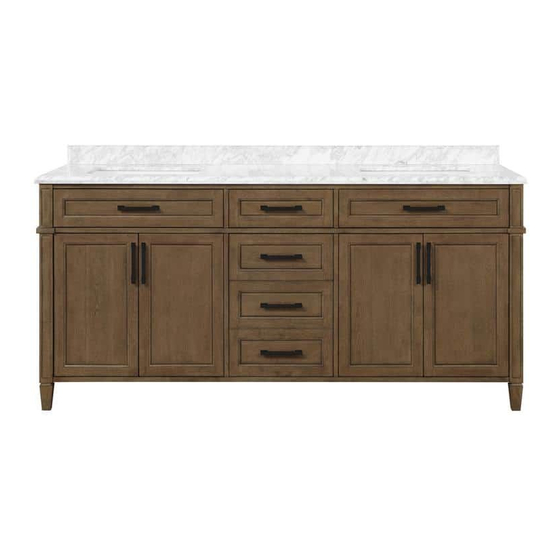
Model # Caville 72AL
Caville 72W
USE AND CARE GUIDE
CAVILLE 72 IN. VANITY
Questions, problems, missing parts?
Before returning to the store, call Home Decorators Collection Customer Service
8 a.m. - 7 p.m., EST, Monday - Friday, 9 a.m. - 6 p.m., EST, Saturday
1-800-986-3460
HOMEDEPOT.COM/HOMEDECORATORS
THANK YOU
We appreciate the trust and confidence you have placed in Home Decorators Collection through the purchase of this vanity. We strive to
continually create quality products designed to enhance your home. Visit us online to see our full line of products available for your home
improvement needs. Thank you for choosing Home Decorators Collection!
Advertisement
Table of Contents

Related Manuals for Home Decorators Collection Caville 72AL


Summary of Contents for Home Decorators Collection Caville 72AL
- Page 1 THANK YOU We appreciate the trust and confidence you have placed in Home Decorators Collection through the purchase of this vanity. We strive to continually create quality products designed to enhance your home. Visit us online to see our full line of products available for your home...
-
Page 2: Table Of Contents
Table of Contents Table Of Contents ........2 Installation . -
Page 3: Warranty
WARRANTY INFORMATION Home Decorators Collection products are manufactured to meet high-quality standards and workmanship and are backed by our 1-Year Warranty. This warranty is provided to the original consumer purchaser and covers any defects in materials or workmanship under normal residential use. -
Page 4: Package Contents
Pre-Installation (continued) PACKAGE CONTENTS Part Description Quantity Countertop Backsplash Vanity Pull-out tray Handle (Pre-assembled) Handle (Optional) Hinge (For tilt-down drawer) (Pre-assembled) Hinge (For doors) (Pre-assembled) Butterfly hinge (Left) (Pre-assembled) Butterfly hinge (Right) (Pre-assembled) Drawer glides (A pair) (Pre-assembled) Drawer glides (A pair) (Pre-assembled) Drawer glides (A pair) (Pre-assembled) Metal ring Metal tube... -
Page 5: Gfci Accesibility Guideline
GFCI Accesibility Guideline GFCI (plug with reset button) □ Prior to vanity installation, ensure that the wall outlet is in □ If you have a back panel, it is permissible to enlarge an unobstructed easily accessible area at the rear of the or make a cut-out in the vanity back panel in order vanity in order to have the GFCI (plug with reset button) to access a wall outlet. -
Page 6: Gfci First Time Usage Guidelines
GFCI First Time Usage Guidelines □ This GFCI is shipped from the factory in the tripped condition and cannot be reset until power is supplied to the device. Plug the GFCI to your receptacle. Ensure that the GFCI is still in the tripped condition by pressing the TEST button. □... -
Page 7: Installation
Installation Unpacking the countertop Attaching the countertop □ Unpack the countertop (A) from its vanity (C) and place it □ Apply lines of silicone onto the top of the vanity (C). □ Place the countertop (A) on top of the vanity (C). on a throw rug or other protective floor covering material to prevent damage to the countertop (A) or floor. - Page 8 Installation (continued) Countertop sealing Attaching the backsplash □ Apply silicone sealant along the edge underneath the □ Wipe off the area on the top of the countertop (A) countertop where it meets the cabinet top trim. where the backsplash (B) will sit using a clean rag. □...
- Page 9 Installation (continued) Completing the assembly Installing the pull-out tray □ Wipe away any seeping silicone from underneath the □ Insert the metal tube (N) and metal ring (M) to the backsplash (B) with a caulk finishing tool. pull-out tray (D). Drying □...
-
Page 10: Drawer Adjustment
Drawer Adjustment How to remove drawer Each drawer is designed to be removed or replaced: □ 1.1. Pull out the drawer until the lock pins located at the bottom of the drawer are easy to reach. □ 1.2. Pull out the lock pins located at the bottom of the drawer to the sides to release the pins. □... - Page 11 Drawer Adjustment How to remove drawer Each drawer is designed to be removed or replaced: □ 1.1. Pull out the drawer until the lock pins located at the sides of the drawer are easy to reach. Pull up the lock pin on the left side of the drawer, and push it down on the right side to release the drawer.
- Page 12 Drawer Adjustment How to remove drawer Each drawer is designed to be removed or replaced: □ 1.1. Pull out the drawer until the lock pins located at the sides of the drawer are easy to reach. Pull up the lock pin on the left side of the drawer, and push it down on the right side to release the drawer.
-
Page 13: How To Adjust The Door's Position
How to adjust the door’s position Door’s in and out adjustment □ To adjust the door front In and Out in-depth, loosen screw (AA), align the door, and tighten screw (AA). Door’s left and right adjustment □ To adjust the door front Left and Right, rotate the adjustment screw (BB). HOMEDEPOT.COM/HOMEDECORATORS Please contact 1-800-986-3460 for further assistance. -
Page 14: Maintenance And Care
Maintenance and Care □ Stone countertops (Granite, Marble, etc.) are surprisingly resilient to stains and scratches. However, as a preventative measure, any spills on the stone surfaces should be wiped up within a reasonable amount of time. Do not let liquid sit on the stone overnight. Stones are most prone to staining by oil and acid, so be sure to blot these spills up as soon as they happen. - Page 15 Questions, problems, missing parts? Before returning to the store, call Home Decorators Collection Customer Service 8 a.m. - 7 p.m., EST, Monday - Friday, 9 a.m. - 6 p.m., EST, Saturday 1-800-986-3460 HOMEDEPOT.COM/HOMEDECORATORS Retain this manual for future use. 2024-10-18...
Need help?
Do you have a question about the Caville 72AL and is the answer not in the manual?
Questions and answers