
Related Manuals for Klarstein DRYFY PRO CONNECT


Summary of Contents for Klarstein DRYFY PRO CONNECT
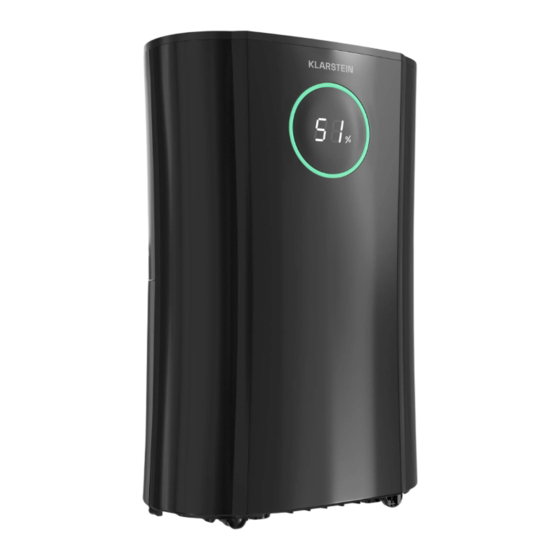
- Page 1 DRYFY PRO CONNECT 24L Luftentfeuchter Dehumidifier Deshumidificador Déshumidificateur Deumidificatore 10046364 10046365 www.klarstein.com...
-
Page 3: Table Of Contents
Sehr geehrte Kundin, sehr geehrter Kunde, wir gratulieren Ihnen zum Erwerb Ihres Gerätes. Lesen Sie die folgenden Hinweise sorgfältig durch und befolgen Sie diese, um möglichen Schäden vorzubeugen. Für Schäden, die durch Missachtung der Hinweise und unsachgemäßen Gebrauch entstehen, übernehmen wir keine Haftung. Scannen Sie den QR-Code, um Zugriff auf die aktuellste Bedienungsanleitung und weitere Informationen rund um das Produkt zu erhalten. -
Page 4: Sicherheitshinweise
SICHERHEITSHINWEISE • Wenn das Netzkabel des Geräts beschädigt ist, müssen Sie sich an den Hersteller des Geräts wenden. Eine Fachwerkstatt oder qualifizierte Techniker wechseln das Gerät für Sie aus, falls eine Gefahr besteht. Lassen Sie das Gerät vor dem ersten Betrieb 2 Stunden lang stehen, bevor Sie es einschalten. •... -
Page 5: Hinweise Zum Kältemittel R290
HINWEISE ZUM KÄLTEMITTEL R290 Warnungen • Die Klimaanlage muss aufrecht gehalten und transportiert werden. Andernfalls kann es zu irreparablen Schäden am Kompressor kommen. Lassen Sie das Gerät mindestens 24 Stunden lang stehen, bevor Sie es in Betrieb nehmen. • Schalten Sie das Gerät vor der Reinigung aus und trennen Sie es vom Stromnetz. -
Page 6: Produktbeschreibung
PRODUKTBESCHREIBUNG Lüftungsschlitze Lufteinlass Griff Auslass für kontinuierliche Luftauslass Entwässerung Lampe 10 Hintere Abdeckung Räder 11 Wassertank Bedienfeld 12 Stromkabel Vorfilter / Aktivkohlefilter... -
Page 7: Bedienfeld Und Tastenfunktionen
BEDIENFELD UND TASTENFUNKTIONEN Bedienfeld Tastenfunktionen POWER: Zum Ein- und Ausschalten des Geräts. MODE: Zum Auswählen der Funktionen des Geräts für: SMART / HIGH / LOW und FAN. Das Gerät wechselt beim ersten Einschalten in die SMART-Funktion und bleibt in diesem Modus, bis eine andere Art der Programmierung gewählt wird. - Page 8 TIMER (Zeitschaltuhrfunktion): Drücken Sie auf Timer, um die Zeit zu programmieren, das Licht "TIMER" leuchtet, während der Timer programmiert wird. Vergewissern Sie sich vor dem Programmie- ren, dass die Timerfunktion nicht aktiviert ist (das Licht muss aus sein)! Die folgenden Timer-Programme sind verfügbar. Verzögerte Einschaltfunktion (das Gerät befindet sich im Standby-Modus).
- Page 9 Fernbedienung MODE: Zum Auswählen der Funktionen des Geräts für: SMART/HIGH/LOW und FAN. Das Gerät startet. Wenn Sie das Gerät zum ersten Mal einschalten, ist die SMART-Funktion aktiv und bleibt in diesem Zustand, bis Sie einen anderen Modus wählen. Stellen Sie die Lüftergeschwindigkeit je nach Luftfeuchtigkeit auf hoch oder niedrig.
-
Page 10: Inbetriebnahme
INBETRIEBNAHME Aktivkohlefilter (Desodorierungsfunktion) Nehmen Sie den Kohlefilter aus dem Beutel und setzen Sie ihn auf den Filter. Siehe Bild unten. Wir empfehlen Ihnen, den Aktivkohlefilter alle 3 Monate zu wechseln, damit der Raum immer frisch bleibt. Ausleeren des Wassertanks Leeren Sie den Wassertank regelmäßig. Wenn er voll ist, schaltet sich der Luftentfeuchter automatisch aus und die Anzeige für den vollen Tank leuchtet auf. - Page 11 Austausch und Wartung des Luftfilters Bei regelmäßigem Gebrauch kann der Filter durch Staub und Partikel verstopft werden. Daher sollte der Filter alle ein bis zwei Wochen gereinigt werden. Folgen Sie diesen Schritten Entfernen Sie den Filter, indem Sie ihn vorsichtig herausziehen. Reinigen Sie den Filter mit einem Staubsauger oder mit Wasser.
-
Page 12: Pflege Und Reinigung
• Der Abstand zwischen dem Lufteinlass und -auslass und angrenzendem Material sollte mindestens 15 cm betragen. • Wenn sich das Gerät abschaltet, schalten Sie es innerhalb von fünf Minuten wieder ein, um eine längere Lebensdauer des Geräts zu gewährleisten. • Wenn Sie den Luftentfeuchter längere Zeit nicht verwenden, ziehen Sie bitte den Netzstecker. -
Page 13: Gerätesteuerung Per Smartphone
Fernsteuerung des Geräts über Ihr Smartphone, sondern gibt Ihnen auch Zugriff auf zusätzliche Informationen. Folgen Sie diesen Schritten, um Ihr Smartphone mit dem DryFy Pro Connect zu verbinden: Laden Sie zuerst die Klarstein-App herunter, indem Sie mit Ihrem Smartphone den QR-Code scannen (siehe unten) oder laden Sie diese direkt aus dem App Store oder bei Google Play herunter. -
Page 14: Fehlersuche Und Fehlerbehebung
Das WiFi des DryFy Pro Connect ein- und ausschalten Die WiFi-Verbindung einschalten: Drücken Sie die WIFI-Taste 3 Sekunden lang, um das WiFi-Modul im Gerät zu aktivieren. Das WiFi-Symbol blinkt und das Gerät sucht automatisch nach anderen WiFi-Geräten in der Umgebung. - Page 15 Der Bedienungsschal- Ist der Wassertank an der richtigen Stelle platziert? ter ist auf "ON", aber Ist der Netzstecker in der richtigen Position einge- das Gerät ist nicht in steckt? Betrieb. Ist die Sicherung defekt? Ist der Strom ausgeschaltet? Die Entfeuchtungs- Ist das vordere Filternetz verschmutzt? menge ist zu niedrig.
-
Page 16: Hinweise Zur Entsorgung
HINWEISE ZUR ENTSORGUNG Wenn es in Ihrem Land eine gesetzliche Regelung für die Entsorgung von elektrischen und elektronischen Geräten gibt, weist dieses Symbol auf dem Produkt oder auf der Verpackung darauf hin, dass dieses Produkt nicht mit dem Hausmüll entsorgt werden darf. Stattdessen muss es zu einer Sammelstelle für das Recycling von Elektro- und Elektronikgeräten gebracht werden. -
Page 17: Technical Data
Dear Customer, Congratulations on purchasing this equipment. Please read this manual carefully and take care of the following hints to avoid damages. Any failure caused by ignoring the items and cautions mentioned in the instruction manual is not covered by our warranty and any liability. Scan the QR code to get access to the latest user manual and other information about the product. -
Page 18: Safety Instructions
SAFETY INSTRUCTIONS • If the machine`s power supply cord is damaged, you must entrust the manufacturers of the machine. Maintenance service center or qualified technicians will change for you, in case of any danger.Lassen Sie das Gerät vor dem ersten Betrieb 2 Stunden lang stehen, bevor Sie es einschalten. •... -
Page 19: Notes On Refrigerant R290
NOTES ON REFRIGERANT R290 Warnings • The air conditioning system must be kept and transported upright. Otherwise, irreparable compressor damage may occur. Leave the unit for at least 24 hours before putting it into operation. • Switch off the device and disconnect it from the power supply before cleaning. •... -
Page 20: Product Description
PRODUCT DESCRIPTION Louvers Prefilter / Activated carbon filter Handle Air inlet Air outlet Continuous drain port Lamp 10 Back cover Wheels 11 Water tank Control panel 12 Power cord... -
Page 21: Control Panel And Key Functions
CONTROL PANEL AND KEY FUNCTIONS Control panel Key functions P0WER: Starts or Stops appliance. MODE: Select the functions of the unit for:SMART / HIGH / LOW / and FAN. The appliance will go. SMART function the first time it is switched on and remains in this mode until other type of programming is chosen. - Page 22 TIMER (timer function): Press timer to program time and „TIMER“ light comes on while timer is programmed. Before programming make sure that the timer function has not been actived (the light must be off)! The following timer programs are available. Delayed power-on function (the appliance is in stand-by status) USE key „UP“...
- Page 23 Remote Control MODE:MODE: Select the functions of the unit for: SMART/HIGH/LOW/and FAN. The appliance will start. The first time the device is switched on, the SMART function is active and remains in this state until until another mode is selected. Depending on your relative humidity conditions, turn the fan speed to high or low.
-
Page 24: Use And Operation
USE AND OPERATION Carbon filter (deodorant function) Take out the carbon filter from bag and insert it on the filter. See picture below. Suggest to change the carbon filter every 3 months, it always keep the room fresh. Emptying the water tank Empty the water tank regularly when full, the air dehumidifier turns off automatically and the tank full indicator is turned on... - Page 25 Replacement and maintenance of air filter When used regularly, the filter may become clogged with dust and particles. Therefore the filter should be cleaned every one or two weeks. Follow these steps Remove the filter by pulling it out carefully. Clean the filter with a vacuum cleaner or with water.
-
Page 26: Care And Cleaning
• Air inlet and outlet and the distance between the adjacent material to keep 15 cm above. • After the machine is stopped, please restart in five minutes to make sure that the machine is used for longer service life. •... -
Page 27: Device Control By Smartphone
Make sure your smartphone is connected to the same WiFi network that the DryFy Pro Connect is to be connected to. Open the Klarstein app. Sign in to your account. If you do not have an account, sign up in the Klarstein app. Follow the instructions from the app. -
Page 28: Troubleshooting
Turn the WiFi of the DryFy Pro Connect on and off Turn on WiFi connection: Press the WIFI button for 3 seconds to activate the wifi module inside the device. The WiFi icon will flash and the device will automatically search for other WiFi devices in the area. - Page 29 Troubleshooting Problem Possible Cause and Suggested Solution The operation switch Is the water tank placed in the right position? is “ON”,but the ma- Is the power plug inserted right position? chine is not operation. Is the fuse broken? Is the power off? The dehumidification Is the front filter net dirty? amount is too low.
-
Page 30: Disposal Considerations
DISPOSAL CONSIDERATIONS If there is a legal regulation for the disposal of electrical and electronic devices in your country, this symbol on the product or on the packaging indicates that this product must not be disposed of with household waste. Instead, it must be taken to a collection point for the recycling of electrical and electronic equipment. -
Page 31: Fiche Technique
Chère cliente, cher client, Nous vous félicitons d'avoir acheté cet appareil. Veuillez lire attentivement ce manuel et tenir compte des conseils suivants afin d'éviter tout dommage. Toute défaillance causée par l'ignorance des éléments et des précautions mentionnés dans le manuel d'instructions n'est pas couverte par notre garantie et notre responsabilité. -
Page 32: Consignes De Sécurité
CONSIGNES DE SÉCURITÉ • Si le cordon d'alimentation de la machine est endommagé, remettez-vous en aux fabricants de la machine. Un centre de service de maintenance ou des techniciens qualifiés le changeront pour vous, afin d'éviter tout danger. Avant d'utiliser l'appareil pour la première fois, laissez-le reposer pendant 2 heures avant de l'allumer. -
Page 33: Notes Sur Le Réfrigérant R290
NOTES SUR LE RÉFRIGÉRANT R290 Mises en garde • Le système de climatisation doit être maintenu et transporté en position verticale. Dans le cas contraire, le compresseur risque d'être irrémédiablement endommagé. Laissez l'appareil reposer pendant au moins 24 heures avant de le mettre en service. •... -
Page 34: Description Du Produit
DESCRIPTION DU PRODUIT Ventilation Pré filtre / Filtre à charbon actif Poignée Entrée d'air Sortie d'air Orifice de vidange continue Lampe 10 Cache arrière Roues 11 Réservoir d'eau Panneau de contrôle 12 cordon d'alimentation... -
Page 35: Panneau De Commande Et Fonctions Clés
PANNEAU DE COMMANDE ET FONCTIONS CLÉS Panneau de contrôle Fonctions clés POWER : démarre et arrête l'appareil MODE : Sélectionnez les fonctions de l'appareil : SMART / HIGH / LOW / et FAN. L'appareil démarre. Fonction SMART lors de la première mise en marche et reste dans ce mode jusqu'à... - Page 36 TIMER (fonction minuterie) : Appuyez sur la minuterie pour pro- grammer l'heure et le voyant « TIMER » s'allume pendant que la minuterie est programmée. Avant de programmer, assurez-vous que la fonction minuterie n'est pas activée (la lumière doit être éteinte) ! Les programmes horaires suivants sont disponibles.
- Page 37 Contrôle à distance MODE : Sélectionnez les fonctions de l'appareil : SMART / HIGH / LOW / et FAN. L'appareil démarre. Lors de la première mise sous tension de l'appareil, la fonction SMART est active et reste dans cet état jusqu'à ce qu'un autre mode soit sélectionné.
-
Page 38: Fonctionnement Et Utilisation
FONCTIONNEMENT ET UTILISATION Filtre à charbon (fonction désodorisante) Sortez le filtre à charbon du sac et insérez-le sur le filtre. Voir photo ci-dessous. Il est conseillé de changer le filtre à charbon tous les 3 mois, il gardera la pièce fraîche. Vider le réservoir d'eau Videz régulièrement le réservoir d'eau lorsqu'il est plein, le déshumidificateur d'air s'éteint... - Page 39 Remplacement et entretien du filtre à air Lorsqu'il est utilisé régulièrement, le filtre peut être obstrué par de la poussière et des particules. Le filtre doit donc être nettoyé toutes les une ou deux semaines. Suivez ces étapes Retirez le filtre avec précaution. Nettoyez le filtre avec un aspirateur ou avec de l'eau.
-
Page 40: Entretien Et Nettoyage
• Entrée et sortie d'air doivent être à distance minimale de 15 cm des objets adjacents. • Une fois la machine arrêtée, veuillez attendre cinq minutes pour redémarrer, pour assurer à la machine une durée de vie plus longue. • Si le déshumidificateur n'est pas utilisé... -
Page 41: Contrôle De L'appareil Par Smartphone
à distance par smartphone, mais vous donne également accès à des informations supplémentaires. Suivez ces étapes pour connecter votre smartphone au DryFy Pro Connect : Téléchargez d'abord l'application Klarstein en scannant le code QR avec votre smartphone (voir ci-dessous), ou téléchargez-la directement depuis l'App... -
Page 42: Dépannage
Activer et désactiver le WiFi du DryFy Pro Connect Activez la connexion WiFi : appuyez sur le bouton WIFI pendant 3 secondes pour activer le module WiFi à l'intérieur de l'appareil. L'icône WiFi clignote et l'appareil recherche automatiquement d'autres appareils WiFi à portée. - Page 43 L'interrupteur de Le réservoir d'eau est-il placé dans la bonne position ? fonctionnement est La fiche d'alimentation est-elle insérée dans la bonne sur « ON », mais la position ? machine ne fonc- tionne pas. Le fusible est-il hors service ? L'alimentation est-elle coupée ? La quantité...
-
Page 44: Informations Pour Le Recyclage
INFORMATIONS POUR LE RECYCLAGE S'il existe une réglementation légale pour l'élimination des appareils électriques et électroniques dans votre pays, ce symbole sur le produit ou sur l'emballage indique que ce produit ne doit pas être jeté avec les ordures ménagères. En revanche, il doit être déposé... -
Page 45: Dati Tecnici
Gentile cliente, Congratulazioni per aver acquistato questo dispositivo. Leggere attentamente il manuale e rispettare le seguenti indicazioni per evitare danni. Malfunzionamenti causati dalla mancata osservanza delle indicazioni e delle avvertenze nel manuale d'uso non sono coperti dalla garanzia. Scansionare il codice QR per accedere al manuale d'uso più... -
Page 46: Avvertenze Di Sicurezza
AVVERTENZE DI SICUREZZA • Se il cavo di alimentazione del dispositivo è danneggiato, contattare il produttore. Per evitare pericoli, la riparazione e la manutenzione devono essere realizzate da centri autorizzati o tecnici qualificati. • Lasciare in posizione il dispositivo per due ore prima di accenderlo, in particolare dopo il trasporto. -
Page 47: Note Sul Refrigerante R290
NOTE SUL REFRIGERANTE R290 Avvertenze • Il dispositivo deve essere posizionato e trasportato in posizione verticale. In caso contrario, potrebbero risultare danni irreparabili al compressore. Lasciare in posizione il dispositivo per almeno 24 ore prima di metterlo in funzione. • Spegnere il dispositivo e scollegarlo dall'alimentazione prima di pulirlo. -
Page 48: Descrizione Del Prodotto
DESCRIZIONE DEL PRODOTTO Alette Prefiltro/filtro ai carboni attivi Impugnatura Ingresso dell'aria Uscita dell'aria Scarico continuo dell'acqua Luce 10 Copertura posteriore Rotelle 11 Serbatoio dell'acqua Pannello di controllo 12 Cavo di alimentazione... -
Page 49: Pannello Di Controllo E Funzione Dei Tasti
PANNELLO DI CONTROLLO E FUNZIONE DEI TASTI Pannello di controllo Funzione dei tasti POWER: accendere e spegnere il dispositivo. MODE: selezionare le funzioni del dispositivo - SMART/HIGH/LOW e FAN. Il dispositivo si avvia. SMART: si attiva alla prima accensione e il dispositivo rimane in questa modalità... - Page 50 TIMER (funzione timer): premere "TIMER" per programmare il timer e la spia corrispondente si accende durante la programmazione. Prima della programmazione, assicurarsi che la funzione timer non sia stata attivata (la spia deve essere spenta)! Sono disponibili le seguenti programmazioni per il timer. Accensione programmata (il dispositivo si trova in standby).
- Page 51 Telecomando MODE: selezionare le funzioni del dispositivo - SMART/HIGH/LOW e FAN. Il dispositivo si avvia. Alla prima accensione del dispositivo, viene attivata la funzione SMART e tale modalità viene mantenuta fino a quando ne viene selezionata un'altra. In base al livello di umidità, impostare la velocità della ventola alta o bassa. Quando il dispositivo è...
-
Page 52: Utilizzo
UTILIZZO Filtro ai carboni (per eliminare gli odori) Togliere il filtro ai carboni dal sacchetto e posizionarlo. V. immagine seguente. Consigliamo di cambiare il filtro ai carboni ogni 3 mesi, in modo da tenere fresca l'aria nelle stanze. Svuotare il serbatoio Svuotare il serbatoio quando è... - Page 53 Sostituzione e manutenzione del filtro dell'aria L'utilizzo regolare può causare l'intasamento del filtro con polvere e altre particole. Pulire il filtro ogni settimana o ogni due settimane. Seguire questi passaggi. Rimuovere il filtro con cura. Pulirlo con un aspirapolvere o con acqua.
-
Page 54: Pulizia E Manutenzione
• Tenere 15 cm di spazio libero in corrispondenza delle aperture di ingresso e uscita dell'aria. • Dopo aver spento il dispositivo, attendere cinque minuti prima di riavviarlo, in modo da estenderne la vita utile. • Se il deumidificatore non viene utilizzato per lunghi periodi di tempo, staccare la spina. -
Page 55: Controllo Del Dispositivo Con Smartphone
CONTROLLO DEL DISPOSITIVO CON SMARTPHONE Se il dispositivo viene integrato nella rete WiFi di casa, è possibile controllarlo comodamente con la app Klarstein. La app non consente solo di controllare il dispositivo dallo smartphone, ma offre anche accesso a ulteriori informazioni. -
Page 56: Risoluzione Dei Problemi
Accendere e spegnere il WiFi di DryFy Pro Connect Accendere la connessione WiFi: premere il tasto WiFi per 3 secondi per attivare il modulo WiFi all'interno del dispositivo. L'icona del WiFi lampeggia e il dispositivo inizia automaticamente a cercare altri dispositivi WiFi nelle vicinanze. - Page 57 Risoluzione dei problemi Problema Possibile causa e soluzione consigliata L'interruttore è in Il serbatoio è posizionato correttamente? posizione "ON", ma La spina di alimentazione è collegata correttamente? il dispositivo non funziona. Il fusibile è guasto? L'alimentazione è disattivata? L'umidità è troppo Il filtro è...
-
Page 58: Avviso Di Smaltimento
AVVISO DI SMALTIMENTO Se nel vostro Paese vige una normativa sullo smaltimento dei dispositivi elettrici ed elettronici, questo simbolo sul prodotto o sulla confezione indica che il prodotto non deve essere smaltito nei rifiuti domestici. Deve invece essere portato in un punto di raccolta per il riciclaggio di dispositivi elettrici ed elettronici. -
Page 59: Datos Técnicos
Estimado cliente: Enhorabuena por la compra de este equipamiento. Lea atentamente este manual y preste atención a las siguientes indicaciones para evitar daños. Cualquier fallo causado por ignorar los puntos y precauciones mencionados en el manual de instrucciones no está cubierto por nuestra garantía ni por ninguna responsabilidad. -
Page 60: Instrucciones De Seguridad
INSTRUCCIONES DE SEGURIDAD • Si el cable de alimentación de la máquina está dañado, debe confiar en los fabricantes de la máquina. Centro de servicio de mantenimiento o técnicos cualificados cambiarán por usted, en caso de cualquier peligro. • Deje el aparato en reposo durante al menos dos horas antes de encenderlo, especialmente después del transporte. -
Page 61: Notas Sobre El Refrigerante R290
NOTAS SOBRE EL REFRIGERANTE R290 ADVERTENCIAS • El sistema de aire acondicionado debe mantenerse y transportarse en posición vertical. De lo contrario, pueden producirse daños irreparables en el compresor. Deje la unidad durante al menos 24 horas antes de ponerla en funcionamiento. -
Page 62: Descripción Del Producto
DESCRIPCIÓN DEL PRODUCTO Persianas Prefiltro / Filtro de carbón activado Tirador Entrada de aire Salida de aire Puerto de drenaje continuo Lámpara 10 Contraportada Ruedas 11 Depósito de agua Panel de control 12 Cable de alimentación... -
Page 63: Panel De Control Y Funciones De Las Tecla
PANEL DE CONTROL Y FUNCIONES DE LAS TECLA Panel de control Funciones P0WER: Arranca o para el aparato. MODO: Seleccione las funciones de la unidad para:SMART / ALTO / BAJO / y VENTILADOR. El aparato se irá. SMART la primera vez que se enciende y permanece en este modo hasta que se elija otro tipo de programación. - Page 64 TIMER (función temporizador): Pulse el temporizador para progra- mar el tiempo y la luz "TIMER" se enciende mientras el temporizador está programado. Antes de programar asegúrese de que la función temporizador no está activada (el piloto debe estar apagado). Están disponibles los siguientes programas de temporizador.
- Page 65 Mando a distancia MODE:MODE: Selecciona las funciones de la unidad para: SMART/HIGH/LOW/y FAN. El aparato se enciende. La primera vez que se enciende el aparato, la función SMART está activa y permanece en este estado hasta que se seleccione otro modo.
-
Page 66: Uso Y Funcionamiento
USO Y FUNCIONAMIENTO Filtro de carbón (función desodorante) Saque el filtro de carbón de la bolsa e introdúzcalo en el filtro. Vea la imagen a continuación. Sugerimos cambiar el filtro de carbón cada 3 meses, para mantener siempre fresca la habitación. - Page 67 Sustitución y mantenimiento del filtro de aire Cuando se utiliza regularmente, el filtro puede obstruirse con polvo y partículas. Por lo tanto, el filtro debe limpiarse cada una o dos semanas. Siga estos pasos Extraiga el filtro tirando de él con cuidado. Limpie el filtro con un aspirador o con agua.
-
Page 68: Cuidado Y Limpieza
• Entrada y salida de aire y la distancia entre el material adyacente a mantener 15 cm por encima. • Después de parar la máquina, por favor reinicie en cinco minutos para asegurarse de que la máquina se utiliza para una vida útil más larga. •... -
Page 69: Control Del Dispositivo Con El Móvil
CONTROL DEL DISPOSITIVO CON EL MÓVIL Si integra el dispositivo en su red WiFi doméstica, podrá manejarlo cómoda- mente a través de la aplicación Klarstein asociada. La aplicación no sólo le permite controlar el dispositivo a distancia a través de su smartphone, sino que también le da acceso a información adicional. -
Page 70: Solución De Problemas
Activar y desactivar el WiFi del DryFy Pro Connect Encender la conexión WiFi:Pulsa el botón WIFI durante 3 segundos para activar el módulo wifi dentro del dispositivo. El icono WiFi parpadeará y el dispositivo buscará automáticamente otros dispositivos WiFi en la zona. - Page 71 Solución de problemas Problema Posible causa y solución sugerida El interruptor de ¿El depósito de agua está colocado en la posición funcionamiento está correcta? en "ON", pero la má- ¿Está el enchufe en la posición correcta? quina no funciona. ¿Está roto el fusible? ¿Está...
-
Page 72: Consideraciones Sobre La Eliminación
CONSIDERACIONES SOBRE LA ELIMINACIÓN Si en su país existe una normativa legal para la eliminación de aparatos eléctricos y electrónicos, este símbolo en el producto o en el embalaje indica que este producto no debe desecharse con la basura doméstica. En su lugar, debe llevarse a un punto de recogida para el reciclado de aparatos eléctricos y electrónicos. - Page 76 www.klarstein.com...
Need help?
Do you have a question about the DRYFY PRO CONNECT and is the answer not in the manual?
Questions and answers