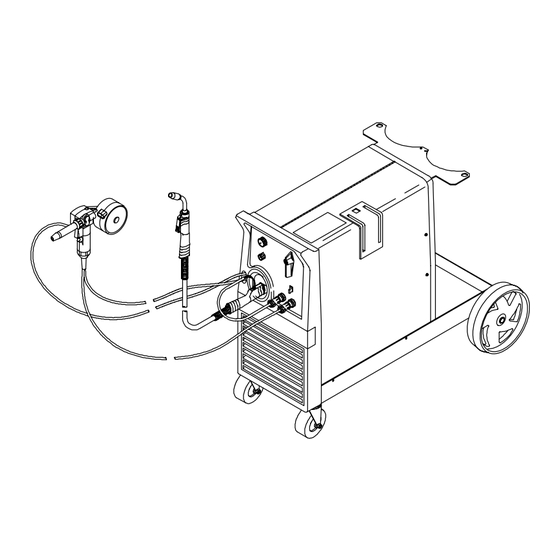
Page 5
SECTION 1 – SAFETY PRECAUTIONS - READ BEFORE USING som _nd_4/98 1-1. Symbol Usage Means Warning! Watch Out! There are possible hazards with this procedure! The possible hazards are shown in the adjoining symbols. This group of symbols means Warning! Watch Out! possible Y Marks a special safety message.
Page 6
ARC RAYS can burn eyes and skin. BUILDUP OF GAS can injure or kill. D Shut off shielding gas supply when not in use. Arc rays from the welding process produce intense D Always ventilate confined spaces or use visible and invisible (ultraviolet and infrared) rays that can burn eyes and skin.
1-3. Additional Symbols For Installation, Operation, And Maintenance FIRE OR EXPLOSION hazard. MOVING PARTS can cause injury. D Do not install or place unit on, over, or near D Keep away from moving parts such as fans. combustible surfaces. D Keep all doors, panels, covers, and guards D Do not install unit near flammables.
1-5. EMF Information Considerations About Welding And The Effects Of Low Frequency 1. Keep cables close together by twisting or taping them. Electric And Magnetic Fields 2. Arrange cables to one side and away from the operator. Welding current, as it flows through welding cables, will cause electro- magnetic fields.
SECTION 1 – CONSIGNES DE SECURITE – LIRE AVANT UTILISATION som _nd_fre 4/98 1-1. Signification des symboles Signifie Mise en garde ! Soyez vigilant ! Cette procédure présente des risques de danger ! Ceux-ci sont identifiés par des symboles adjacents aux directives. Ce groupe de symboles signifie Mise en garde ! Soyez vigilant ! Il y a des Y Identifie un message de sécurité...
Page 10
LES RAYONS DE L’ARC peuvent pro- LES ACCUMULATIONS DE GAZ ris- voquer des brûlures dans les yeux et quent de provoquer des blessures ou sur la peau. même la mort. Le rayonnement de l’arc du procédé de soudage D Fermer l’alimentation du gaz protecteur en cas de génère des rayons visibles et invisibles intenses non utilisation.
1-3. Dangers supplémentaires en relation avec l’installation, le fonctionnement et la maintenance Risque D’INCENDIE OU DES ORGANES MOBILES peuvent D’EXPLOSION. provoquer des blessures. D Ne pas placer l’appareil sur, au-dessus ou à proxi- D Rester à l’écart des organes mobiles comme le mité...
1-4. Principales normes de sécurité Safety in Welding and Cutting, norme ANSI Z49.1, de l’American Wel- Safe Handling of Compressed Gases in Cylinders, CGA Pamphlet P-1, ding Society, 550 N.W. Lejeune Rd, Miami FL 33126 de la Compressed Gas Association, 1235 Jefferson Davis Highway, Suite 501, Arlington, VA 22202.
SECTION 2 – INSTALLATION 2-1. Welding Power Source And MIG Gun Specifications Amps Input at Rated Output, 50 or 60 Hz, Single-Phase Rated Output Max. Open Circuit 200 (208) V 230 V Voltage 160 A at 26 VDC, 6.36 5.45 60% Duty Cycle 2.1* 1.8*...
2-3. Welding Power Source Duty Cycle And Overheating Duty Cycle is percentage of 10 min- utes that unit can weld at rated load without overheating. If unit overheats, thermostat(s) opens, output stops, and cooling fan runs. Wait fifteen minutes for unit to cool.
2-5. Spool Gun Duty Cycle And Overheating CAUTION WELDING LONGER THAN RATED DUTY CYCLE can damage gun and void warranty. • Do not weld at rated load longer than shown below. • Using gasless flux cored wire reduces gun duty cycle. warn7.1 8/93 Definition .023 To .035 in (0.6 To 0.9 mm) Aluminum Wire...
2-7. Installing Cylinder Rack Wheels Welding Power Source Block front casters to prevent Crimp movement. Block up rear of unit. Dual Cylinder Support Bracket Chain Install supplied chains onto dual bracket. Dual Cylinder Rack Axle Wheel Washer Retaining Ring Install axle, wheel, washer, and retaining ring to both sides as shown.
2-8. Installing Work Clamp Work Cable Boot Route cable through front panel opening. Slide boot onto work cable. Negative (–) Output Terminal Connect cable to terminal and cover connection with boot. Close door. Tools Needed: 1/2, 3/4 in 802 713 2-9.
2-12. Installing Gas Supply Obtain gas cylinders and chain to running gear, wall, or other stationary support so cylinders cannot fall and break off valve. Cylinder Valve Remove cap, stand to side of valve, and open valve slightly. Gas flow blows dust and dirt from valve. Close valve.
2-13. Installing MIG Wire Spool and Adjusting Hub Tension Use compression spring with 8 in (200 mm) spools. When a slight force is needed to turn spool, tension is set. Tools Needed: 15/16 in ST-072573-B OM-202 487 Page 16...
2-14. Installing Spool Gun Wire Spool And Threading Welding Wire Thumb Screw Spool Cover Remove thumb screw and spool Tools Needed: cover. Hub Tension Nut Wire Spool Install spool so wire feeds from top. Turn hub tension nut just so a slight drag is felt on the wire spool.
2-15. Positioning Jumper Links Check input voltage available at site and listed on the machine rating label. Jumper Links Access Door Open door. 200 VOLTS Jumper Link Label Check label – only one is on unit. Input Voltage Jumper Links Move jumper links to match input 230 VOLTS voltage.
2-17. Selecting A Location And Connecting Input Power Rating Label Supply correct input power. Plug (NEMA Type 6-50P) Receptacle (NEMA Type 6-50R) Connect plug to receptacle. Input And Grounding 18 in (457 mm) of Y Do not move or operate unit Conductors space for airflow where it could tip.
2-18. Threading Welding Wire Wire Spool Welding Wire Inlet Wire Guide Pressure Adjustment Knob Drive Roll Outlet Wire Guide Gun Conduit Cable Lay gun cable out straight. Tools Needed: Hold wire tightly to keep it from unraveling. 6 in (150 mm) Open pressure assembly.
Page 25
2-19. Installing Optional Curved Or 9 in Straight Barrel Y Turn Off and disconnect input power. Contact Adapter Remove existing barrel from contact adapter. Gas Hose Disconnect gas hose from gas nipple. Straight Barrel Curved Barrel Locking Nut Before tightening locking nut on the curved barrel, the barrel can be rotated to the desired position.
2-20. Using Gun/Cable Holder Side Panel Latch Cable Holder Press latch down to release and open door. Holster (2) Wrap cable around cable holder, and place gun nozzle into holster. 802 726 OM-202 487 Page 22...
SECTION 3 – OPERATION 3-1. Controls Voltage Control Turn control clockwise to increase voltage. Wire Speed Control Turn control clockwise to increase wire feed speed. Arc Length Control Power Switch Spool Gun Receptacle MIG Gun Receptacle Ref. 200 034 OM-202 487 Page 23...
SECTION 4 – MAINTENANCE &TROUBLESHOOTING 4-1. Routine Maintenance Maintain more often Y Disconnect power during severe conditions. before maintaining. 3 Months Replace unreadable labels Repair or replace cracked weld cable Clean and tighten weld terminals 6 Months Remove drive roll and Blow out or vacuum inside.
4-4. Replacing Gun Contact Tip Y Turn Off power. Nozzle Contact Tip Cut off welding wire at contact tip. Remove nozzle. Remove contact tip and install new contact tip. Reinstall nozzle. Tools Needed: Ref. 800 797-C 4-5. Changing Drive Roll and Wire Inlet Guide Securing Screw Inlet Wire Guide Loosen screw.
4-6. Aligning Drive Rolls and Wire Guide Y Turn Off power. View is from top of drive rolls look- ing down with pressure assembly open. Drive Roll Securing Nut Correct Incorrect Drive Roll Wire Guide Welding Wire Drive Gear Insert screwdriver, and turn screw in or out until drive roll groove lines up with wire guide.
4-7. Cleaning Or Replacing Gun Liner Tools Needed: Y Disconnect gun from unit first. 5/16 in, 10 mm Head Tube Remove nozzle, contact tip, and adapter. 5/16 in 10 mm Remove liner. Lay gun cable out straight before installing new liner. To Reassemble Gun: Blow out gun casing.
4-8. Replacing Switch And/Or Head Tube Y Disconnect gun first. Remove handle locking nut. Slide handle. Remove switch housing. Note: If installing new switch, push switch lead connectors onto terminal of new switch (polarity is not important). Install switch back into handle, and secure with handle locking nut. If replacing head tube, continue to end of figure.
Page 35
4-9. Changing Drive And Push Rolls On Spoolmate 185 Y Turn Off power at welding power source first. Drive Roll Cover Remove cover. Changing Push Roll: To remove push roll: Push Roll Screw Washer Push Roll Remove screw and washer, and lift out push roll.
4-10. Changing Liner On Spoolmate 185 Y Turn Off power at welding power source first. Nozzle Contact Tip Liner Remove and replace liner. Reinstall parts as shown. Tools Needed: Ref. 801 891-A 4-11. Troubleshooting Trouble Remedy No weld output; wire does not feed. Be sure line disconnect switch is On (see Section 2-17).
Trouble Remedy Low, high, or erratic wire speed. Readjust front panel settings (see Section 3-1). Change to correct size drive rolls (see Section 4-5). Readjust drive roll pressure (see Section 2-18). Replace inlet guide, contact tip, and/or liner if necessary (see Sections 4-4 and 4-7). Check position of input jumper links (see Section 2-15).
SECTION 6 – MIG WELDING (GMAW) GUIDELINES 6-1. Typical MIG Process Connections Y Weld current can damage electronic parts in vehicles. Disconnect both battery Regulator/ cables before welding on a Flowmeter vehicle. Place work clamp as close to the weld as possible.
6-2. Typical MIG Process Control Settings NOTE These settings are guidelines only. Material and wire type, joint design, fitup, position, shielding gas, etc. affect settings. Test welds to be sure they comply to specifications. Material thickness determines weld parameters. 1/8 or Convert Material .125 in Thickness to...
6-3. Holding And Positioning Welding Gun NOTE Welding wire is energized when gun trigger is pressed. Before lowering helmet and pressing trigger, be sure wire is no more than 1/2 in (13 mm) past end of nozzle, and tip of wire is positioned correctly on seam. Hold Gun and Control Gun Trigger Workpiece...
6-4. Conditions That Affect Weld Bead Shape NOTE Weld bead shape depends on gun angle, direction of travel, electrode extension (stickout), travel speed, thickness of base metal, wire feed speed (weld current), and voltage. ° Push ° Perpendicular Drag GUN ANGLES AND WELD BEAD PROFILES Short Normal Long...
6-5. Gun Movement During Welding NOTE Normally, a single stringer bead is satisfactory for most narrow groove weld joints; however, for wide groove weld joints or bridging across gaps, a weave bead or multiple stringer beads works better. Stringer Bead – Steady Movement Along Seam Weave Bead –...
6-8. Troubleshooting – Excessive Spatter Excessive Spatter – scattering of molten metal particles that cool to solid form near weld bead. S-0636 Possible Causes Corrective Actions Wire feed speed too high. Select lower wire feed speed. Voltage too high. Select lower voltage range. Electrode extension (stickout) too long.
6-10. Troubleshooting – Excessive Penetration Excessive Penetration – weld metal melting through base metal and hanging underneath weld. Excessive Penetration Good Penetration S-0639 Possible Causes Corrective Actions Excessive heat input. Select lower voltage range and reduce wire feed speed. Increase travel speed. 6-11.
6-13. Troubleshooting – Burn-Through Burn-Through – weld metal melting completely through base metal resulting in holes where no metal remains. S-0640 Possible Causes Corrective Actions Excessive heat input. Select lower voltage range and reduce wire feed speed. Increase and/or maintain steady travel speed. 6-14.
6-16. Common MIG Shielding Gases This is a general chart for common gases and where they are used. Many different combinations (mixtures) of shielding gases have been developed over the years. The most commonly used shielding gases are listed in the following table.
Page 53
Hardware is common and not available unless listed. 802 728 Figure 7-3. Panel, Rear w/Components (Figure 7-1 Item 2) Item Dia. Part Mkgs. Description Quantity Figure 7-3. Panel, Rear w/Components (Figure 7-1 Item 2) ... . . 049399 NUT, 312–18 PUSH ON .63D .07H STL .
Page 54
Hardware is common and not available unless listed. 802 720 Figure 7-4. Panel, Front w/Components Item Dia. Part Mkgs. Description Quantity Figure 7-4. Panel, Front w/Components (Figure 7-1 Item 17) ... . . 199898 PANEL,FRONT CONTROL .
Page 56
Item Dia. Part Mkgs. Description Quantity Figure 7-6. Wire Drive And Gears (Figure 7-2 Item 25) 197633 ... . . 602009 SCREW,.250-20 x 1.25 soc hd gr 8 ........
Page 57
Table 7-1. Drive Roll And Wire Guide Kits Note Base selection of drive rolls upon the following recommended usages: V-Grooved rolls for hard wire. U-Grooved rolls for soft and soft shelled cored wires. U-Cogged rolls for extremely soft shelled wires (usually hard surfacing types). V-Knurled rolls for hard shelled cored wires.
Page 58
Hardware is common and not available unless listed. 801 900-C Figure 7-7. Spool Gun Assembly OM-202 487 Page 54...
Warranty Effective January 1, 2000 (Equipment with a serial number preface of “LA” or newer) This limited warranty supersedes all previous manufacturers Limited Warranty shall not apply to: warranties and is exclusive with no other guarantees or warranties expressed or implied. Consumable components;...
Owner’s Record Please complete and retain with your personal records. Model Name Serial/Style Number Purchase Date (Date which equipment was delivered to original customer.) Distributor Address City State Resources Available Always provide Model Name and Serial/Style Number. Contact your Distributor for: Welding Supplies and Consumables Options and Accessories Personal Safety Equipment...
Need help?
Do you have a question about the Auto Arc Micro-Pulse 2000 and is the answer not in the manual?
Questions and answers