Table of Contents
Advertisement
Available languages
Available languages
Quick Links
Advertisement
Table of Contents

Related Manuals for EINHELL GP-LC 36/30 Li BL


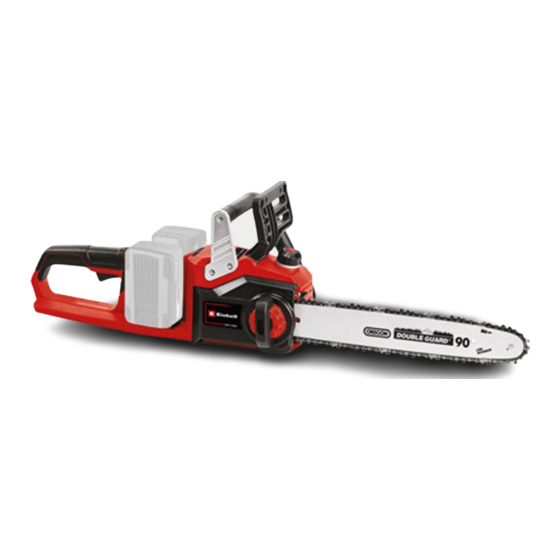
Summary of Contents for EINHELL GP-LC 36/30 Li BL
- Page 1 GP-LC 36/30 Li BL คู ่ ม ื อ การใช้ ง าน เลื ่ อ ยโซ่ ไ ร้ ส าย Original operating instructions Cordless Chainsaw Art.-Nr.: 45.018.85 I.-Nr.: 21014 Anl_GP_LC_36_30_Li_BL_SPK7_THA.indb 1 Anl_GP_LC_36_30_Li_BL_SPK7_THA.indb 1 25.04.2024 09:23:24 25.04.2024 09:23:24...
- Page 2 - 2 - Anl_GP_LC_36_30_Li_BL_SPK7_THA.indb 2 Anl_GP_LC_36_30_Li_BL_SPK7_THA.indb 2 25.04.2024 09:23:26 25.04.2024 09:23:26...
- Page 3 - 3 - Anl_GP_LC_36_30_Li_BL_SPK7_THA.indb 3 Anl_GP_LC_36_30_Li_BL_SPK7_THA.indb 3 25.04.2024 09:23:27 25.04.2024 09:23:27...
- Page 4 min. - 4 - Anl_GP_LC_36_30_Li_BL_SPK7_THA.indb 4 Anl_GP_LC_36_30_Li_BL_SPK7_THA.indb 4 25.04.2024 09:23:30 25.04.2024 09:23:30...
- Page 5 - 5 - Anl_GP_LC_36_30_Li_BL_SPK7_THA.indb 5 Anl_GP_LC_36_30_Li_BL_SPK7_THA.indb 5 25.04.2024 09:23:35 25.04.2024 09:23:35...
- Page 6 - 6 - Anl_GP_LC_36_30_Li_BL_SPK7_THA.indb 6 Anl_GP_LC_36_30_Li_BL_SPK7_THA.indb 6 25.04.2024 09:23:36 25.04.2024 09:23:36...
- Page 7 Li-Ion - 7 - Anl_GP_LC_36_30_Li_BL_SPK7_THA.indb 7 Anl_GP_LC_36_30_Li_BL_SPK7_THA.indb 7 25.04.2024 09:23:37 25.04.2024 09:23:37...
- Page 8 คํ า เตื อ น! 2. ส่ ว นประกอบของตั ว เครื ่ อ ง เมื ่ อ ใช้ เ ครื ่ อ งมื อ โปรดปฏิ บ ั ต ิ ต ามข้ อ ควรระวั ง ด้ า นความ ปลอดภั ย เพื ่ อ หลี ก เลี ่ ย งการบาดเจ็ บ และความเสี ย หาย โปรด 2.1 ส่...
- Page 9 • คู ่ ม ื อ การใช้ ง านเบื ้ อ งต้ น โปรดใส่ ท ี ่ ค รอบหู • คํ า แนะนํ า ด้ า นความปลอดภั ย ผลกระทบของเสี ย งอาจทํ า ให้ เ กิ ด ความเสี ย หายต่ อ การได้ ย ิ น ค่...
- Page 10 5. ก่ อ นเริ ่ ม ใช้ ง านเครื ่ อ งมื อ ทํ า ให้ ค วามยาวเปลี ่ ย นไปดั ง นั ้ น โปรดตรวจสอบความตึ ง ของโซ่ ทุ ก ๆ 10 นาที แ ละปรั บ อี ก ครั ้ ง ตามความต้ อ งการ โดยเฉพาะ อย่...
- Page 11 ในส่ ว นที ่ 12 "ตั ว แสดงสถานะการชาร์ จ " สามารถตรวจสอบ 6. การใช้ ง าน ตารางพร้ อ มคํ า อธิ บ ายของไฟ LED บนเครื ่ อ งชาร์ จ ได้ 6.1 การใช้ ง านสวิ ต ซ์ เ ปิ ด -ปิ ด หากก้...
- Page 12 ความปลอดภั ย ด้ ว ยตั ว เอง ให้ ส ่ ง มาซ่ อ มแซมด้ ว ยแผนกบริ ก าร สวมอุ ป กรณ์ ป ้ อ งกั น เสี ย งและแว่ น ตานิ ร ภั ย ที ่ ไ ด้ ร ั บ อนุ ญ าติ เ ท่ า นั ้ น เมื...
- Page 13 เลื ่ อ ยออกจากการตั ด ปิ ด สวิ ต ซ์ แ ละวางไว้ บ นพื ้ น จากนั ้ น ผู ้ ใ ช้ บุ ค คลในบริ เ วณใกล้ เ คี ย งได้ ร ั บ บาดเจ็ บ สาหั ส งานต้ อ งออกจากเขตอั น ตรายโดยใช้ เ ส้ น ทางหลบหนี ท ี ่ ว างแผน ไว้...
- Page 14 การลั บ คมโซ่ เ ลื ่ อ ย อนุ ญ าตเมื ่ อ ได้ ร ั บ ความยิ น ยอมอย่ า งชั ด แจ้ ง จาก Einhell ประสิ ท ธิ ภ าพในการใช้ ง านเลื ่ อ ยไฟฟ้ า จะเกิ ด ขึ ้ น ได้ เ ฉพาะใน...
- Page 15 11. การแก้ ไ ขปั ญ หา อั น ตราย! ก่ อ นแก้ ไ ขปั ญ หาให้ ป ิ ด เครื ่ อ งและดึ ง แบตเตอรี ่ อ อก ตารางด้ า นล่ า งมี ร ายการอาการผิ ด ปกติ แ ละอธิ บ ายสิ ่ ง ที ่ ส ามารถแก้ ไ ขปั ญ หาได้ หากปฏิ บ ั ต ิ ต ามแล้ ว ปั ญ หายั ง คงมี อ ยู ่ โปรดติ ด ต่ อ ศู...
- Page 16 12. ไฟแสดงสถานะเครื ่ อ งชาร์ จ สถานะบ่ ง ชี ้ คํ า อธิ บ ายสถานะ ไฟ LED สี ไฟ LED สี แดง เขี ย ว ดั บ กระพริ บ เครื ่ อ งชาร์ จ พร้ อ มใช้ ง าน มี ก ารเชื ่ อ มต่ อ กั บ แหล่ ง จ่ า ยไฟหลั ก แต่ ไ ม่ ม ี ก ้ อ นแบตเตอรี ่ อ ยู ่ ใ นเครื ่ อ งชาร์ จ ติ...
- Page 17 โปรดลงทะเบี ย นการรั บ ประกั น สิ น ค้ า ผ่ า นช่ อ งทางอิ น เทอร์ เ น็ ต กลุ ่ ม สิ น ค้ า แบรนด์ Einhell ลู ก ค้ า ต้ อ งสแกน QR Code ของ Serial...
-
Page 18: Safety Regulations
2. Layout and items supplied Danger! When using the equipment, a few safety pre- cautions must be observed to avoid injuries and 2.1 Layout (Fig. 1-3, 10, 11, 12) damage. Please read the complete operating 1. Claw stop instructions and safety regulations with due care. 2. -
Page 19: Proper Use
3. Proper use Total vibration values (vector sum of three direc- tions) were determined in accordance with EN 62841-1 and EN 62841-4-1. The chainsaw is intended for felling trees and for cutting trunks, branches, wooden beams, boards Handle under load etc. - Page 20 5.1 Assembly of the cutter rail and the saw protective gloves when working on the chainsaw chain to protect yourself against injury. • Carefully unpack all parts and check that they are complete (Fig. 2-3). Notice! Never operate the chain if it is not lub- •...
-
Page 21: Operation
6. Operation If the battery pack fails to charge, check for the following: • voltage at the power socket 6.1 Switching on/off • whether there is good contact at the charging Switching on • contacts of the charging unit Plug in the battery on the equipment. •... -
Page 22: Working With The Chainsaw
Danger! Never use the saw if the safety equip- Safety clothing ment is not working properly. Never try to repair Always wear appropriate tight-fi tting safety safety related protection systems yourself – al- clothing like special trousers which protect ways have any work done by our service depart- against cuts, protective gloves and safety shoes. - Page 23 Making the felling cut (Fig. 17) the fi rst cut (B) (this prevents the chainsaw from The felling cut should be positioned at least 50 being trapped). mm above the horizontal felling notch. Make the felling cut (B) parallel to the horizontal felling If the weight of the tree trunk is resting on both notch.
-
Page 24: Cleaning, Maintenance And Ordering Of Spare Parts
instructions. in the section “Assembly of the cutter rail and the • Never operate the saw above shoulder height. saw chain”. • Never cut with the upper edge or the tip of the sword. Checking the automatic chain lubrication • Always hold the chainsaw firmly with both You should check the operation of the automatic hands. -
Page 25: Notes On Environmental Protection / Disposal
The reprinting or reproduction by any other me- ans, in whole or in part, of documentation and papers accompanying products is permitted only with the express consent of the Einhell Germany Subject to technical changes. - 25 - Anl_GP_LC_36_30_Li_BL_SPK7_THA.indb 25 Anl_GP_LC_36_30_Li_BL_SPK7_THA.indb 25... -
Page 26: Troubleshooting
11. Troubleshooting Danger! Before troubleshooting, switch off the equipment and pull out the battery. The table below contains a list of fault symptoms and explains what you can do to remedy the problem if your tool fails to work properly. If the problem still persists after working through the list then please con- tact your nearest service workshop. -
Page 27: Charger Indicator
12. Charger indicator Indicator status Explanations and actions Red LED Green LED Off Flashing Ready for use The charger is connected to the mains and is ready for use; there is no battery pack in the charger Off Charging The charger is charging the battery pack in quick charge mode. The char- ging times are shown directly on the charger. -
Page 28: Service Information
* Not necessarily included in the scope of delivery! Please register the product warranty of Einhell brand products. Customers must scan the QR Code of the Serial number in the product or QR code on the box, to additional 6 months warranty for the whole battery and battery charger (Note: Promotion is change without prior notice. - Page 29 - 29 - Anl_GP_LC_36_30_Li_BL_SPK7_THA.indb 29 Anl_GP_LC_36_30_Li_BL_SPK7_THA.indb 29 25.04.2024 09:23:39 25.04.2024 09:23:39...
- Page 30 - 30 - Anl_GP_LC_36_30_Li_BL_SPK7_THA.indb 30 Anl_GP_LC_36_30_Li_BL_SPK7_THA.indb 30 25.04.2024 09:23:39 25.04.2024 09:23:39...
- Page 31 - 31 - Anl_GP_LC_36_30_Li_BL_SPK7_THA.indb 31 Anl_GP_LC_36_30_Li_BL_SPK7_THA.indb 31 25.04.2024 09:23:39 25.04.2024 09:23:39...
- Page 32 EH 04/2024 (01) Anl_GP_LC_36_30_Li_BL_SPK7_THA.indb 32 Anl_GP_LC_36_30_Li_BL_SPK7_THA.indb 32 25.04.2024 09:23:39 25.04.2024 09:23:39...
Need help?
Do you have a question about the GP-LC 36/30 Li BL and is the answer not in the manual?
Questions and answers