
Related Manuals for Grundig CMS 4000 BT DAB+


Summary of Contents for Grundig CMS 4000 BT DAB+
- Page 1 Micro HiFi-System User Manual CMS 4000 BT DAB+ M 3050 BT DAB+ DE - EN - FR 01M-GLR7641-2522-06 01M-GLR7621-2522-06...
- Page 2 ----------------------------------------------------------------------------------------------------------------------------------------------------------------------------- DEUTSCH 05-21 ENGLISH 22-36 FRANÇAIS 37-52 2...
- Page 3 ----------------------------------------------------------------------------------------------------------------------------------------------------------------------------- AUDIO SOURCE FMANTENNA SPEAKEROUTPUT +R–+L– 3...
- Page 4 ----------------------------------------------------------------------------------------------------------------------------------------------------------------------------- STANDBY SLEEP OPEN/CLOSE INTRO SOURCE INFO REP/MENU FASTREWIND/ FASTFORWARD/ PREVIOUS NEXT PLAY/ PAUSE STOP/AUTO 10-/TUN- TUNE 10+/TUN+ MEMORY/ FOLD- PROG FOLD+ VOLUME+ VOLUME- CLOCK MUTE/ALARM 4...
-
Page 5: Bedeutungdersymbole
BittelesenSiezunächstdieseAnleitung! Sehr geehrte Kundin, sehr geehrter Kunde, Vielen Dank, dass Sie sich für dieses Gerät der Marke Grundig entschieden haben. Wir sind über- zeugt, dass Sie mit diesem Gerät, das mit den höchsten Qualitätsanforderungen und modernster Technologie hergestellt wurde, beste Ergebnisse erzielen werden. Bitte lesen Sie die gesamte Bedie- nungsanleitung und alle anderen Begleitdokumente aufmerksam, bevor Sie das Gerät verwenden;... -
Page 6: Aufstellenundsicherheit
AUFSTELLENUNDSICHERHEIT --------------------------------------------- Beachten Sie bitte folgende Hinweise: stecker und schließen Sie ihn nach einigen Se- kunden wieder an. Die HiFi-Anlage ist für die Wiedergabe von Tonsignalen bestimmt. Jede andere Verwen- Sie dürfen die HiFi-Anlage auf keinen Fall öff- dung ist ausdrücklich ausgeschlossen. nen. - Page 7 AUFSTELLENUNDSICHERHEIT --------------------------------------------- Der Blitz im Dreieck weist auf nicht iso- lierte „gefährliche Spannung“ im Inne- ren des Gerätes hin, die zu gefährli- chen Stromschlägen führen kann. WARNUNG: Damit es nicht zu Stromschlägen kommt, nehmen Sie niemals Abdeckung oder Rückwand ab – im Inneren befinden sich keine Teile, die Sie selbst warten können.
-
Page 8: Auf Einen Blick
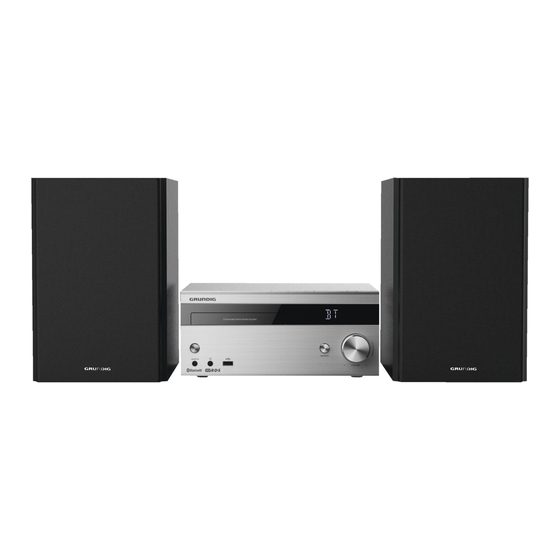
AUFEINENBLICK - ----------------------------------------------------------------------------------- DieBedienelementederHiFi-An- DieRückseite lage SPEAKER Klemmen zum Anschließen OUTPUT(6�) der Lautsprecherkabel. Die Abbildungen des Gerätes finden Sie auf Sei- te 3. +R–+L– R = rechter Kanal, L = linker Kanal, DieVorderseite FMANTENNA Antennenbuchse für das Ka- CD-Fach. bel der Hausantenne oder die beiliegende Behelfsan- Öffnet und schließt das CD-... - Page 9 AUFEINENBLICK --------------------------------------------------------------------------------------------------------- REP/MENU Im externen Datenmedienmodus: Wiederholung eines Titels, einer CD, eines Albums oder einer Wied- ergabeliste; Wiedergabe von Titeln in zufälliger Reihenfolge. CLOCK Zur Einstellung der Zeit. Im Betrieb mit Datenträgern: Wäh- len Titel vorwärts oder rückwärts; Im Stand-by und Timer-Betrieb: Zum Einstellen der Stunden/Minu- ten.
-
Page 10: Kopfhörer Anschließen
ANSCHLIESSEN/VORBEREITEN - ------------------------------------------------------ Lautsprecheranschließen Tonausgangs-Buchsen des externen Gerätes mit handelsüblichem Audiokabel an die Buch- Litzen der Lautsprecherkabel in die Klemmen sen »AUDIOIN« der HiFi-Anlage anschließen. »SPEAKER OUTPUT (6 �) R L« der HiFi- Anlage stecken. Kopfhöreranschließen Hinweise: Klinkenstecker (ø 3,5 mm) des Kopfhörers in Hierbei linken und rechten Kanal beachten die Buchse »... - Page 11 ANSCHLIESSEN/VORBEREITEN - ------------------------------------------------------ Beim Einlegen der Batterie (AAA 1.5V) darauf achten, dass der Pluspol (+) nach oben zeigt. Batteriefach-Abdeckung (Schraubverschluss) auflegen und festdrehen. Batteriefach-Abdeckung (Schraubverschluss) auflegen. Hinweise: Setzen Sie die Batterie keiner extremen Hit- ze wie z.B. durch Sonneneinstrahlung, Hei- zungen, Feuer, etc.
- Page 12 TUNER-BETRIEB - ----------------------------------------------------------------------------------------------------------------- AutomatischerProgrammsuch- Wiederholen Sie die Schritte 1 und 2 um wei- tere Radiosender entsprechend zu speichern. lauffürFM-Rundfunk-Programme Drücken Sie kurz die Taste »MEMORY/ Wenn das Gerät erstmals an das Stromnetz an- geschlossen wird oder nach einem Reset, startet PROG«...
- Page 13 TUNER-BETRIEB - ----------------------------------------------------------------------------------------------------------------- – Das Gerät schaltet nach 15 Minuten zurück Drücken Sie » « wiederholt, um die Pro- in den ECO-Modus. grammquelle FM-TUNER auszuwählen. DAB-Modus, drücken Im ECO-Modus » « drücken und für 2 Sekun REPEAT/MENU » « -Für den Zugang ins den gedrückt halten.
-
Page 14: Allgemeine Funktionen
ALLGEMEINEFUNKTIONEN - ------------------------------------------------------------------ Ein-undAusschalten Nur durch Ziehen des Netzsteckers ist die HiFi- Anlage vom Stromnetz getrennt! Schalten Sie die Hi-Fi-Anlage durch Drücken der Taste » « am Gerät ein. – Die zuletzt aktive Programmquelle wird auto- matisch gewählt. Hinweis: Die Hi-Fi-Analge kann auch durch Drücken der Taste »... - Page 15 EINSTELLUNGEN ------------------------------------------------------------------------------------------------------------ Zeiteinstellung » « und bestätigen Sie mit der Taste » ALARM «. Zur Einstellung der Zeit muss Ihr Mikrosystem – Die Stunde ticken. zunächst in den Ruhezustand versetzt werden. Wählen Sie die Zeit mit der Taste » « Halten Sie dann die »...
- Page 16 BETRIEBMITDIGITALENDATENTRÄGER - ---------------------- BetriebmitCD´s delt es sich um eine Standardschnittstelle. Alle aktuell bekannten MP3-Chipkonzepte wurden Das Gerät ist geeignet für bei ihrer Entwicklung berücksichtigt. Wegen Musik-CDs, die mit dem der rasanten Weiterentwicklung im MP3- nebenstehenden Logo Bereich und täglich neuer Hersteller kann die versehen sind (CD-DA) Kompatibilität von MP3-Playern/USB-Memory bzw.
- Page 17 BETRIEBMITDIGITALENDATENTRÄGER - ---------------------- oder AnderenTiteloderOrdnerwählen USB-Stecker des USB-Memory Sticks in die Beim Abspielen von Musik-CDs können Titel ge- wählt werden, beim Abspielen von MP3/WMA- Buchse » « der HiFi-Anlage stecken. Files können auch Ordner gewählt werden. Gerät mit » «...
-
Page 18: Bluetooth-Betrieb
Am Bluetooth Zuspielgerät die Suchfunktion Wiedergabe-Pause mit » II« wählen, starten. Wiedergabe fortsetzen dazu erneut » II« – Nach kurzer Zeit wird Ihre Grundig Connec- drücken; ted Hifi System am Blue-tooth Zuspielgerät den vorherigen Titel mit » « wählen, den angezeigt. -
Page 19: Einhaltungvonrohs-Vorgaben
INFORMATIONEN - ------------------------------------------------------------------------------------------------------ IhrePflichtenalsEndnutzer Abgabe eines neuen Gerätes, ein Altgerät des Endnutzers der gleichen Geräteart, das im We- Dieses Produkt erfüllt die Vorgaben sentlichen die gleichen Funktionen wie das neue der EU-WEEE-Direktive (2012/19/ Gerät erfüllt, am Ort der Abgabe oder in unmit- EU). - Page 20 INFORMATIONEN - ------------------------------------------------------------------------------------------------------ Den genauen Wortlaut der Konformitätserklärung USB (DOC) finden Sie auf der GRUNDIG Homepage USB 2.0 für Format FAT 32/16 www.grundig.com/downloads/doc. StromverbrauchimBereitschaftsmodus: Bei diesem Produkt handelt es sich um 0,43 W. ein Gerät der Klasse II bzw. ein dop- Der Zeitraum, nach dem die Energieverwaltungs- pelt isoliertes Elektrogerät.
-
Page 21: Grundigkundenberatungszentrum
INFORMATIONEN - ------------------------------------------------------------------------------------------------------ GRUNDIGKundenberatungszen- trum MontagbisFreitag von8.00bis18.00Uhr Deutschland: 0911 / 59 059 730 Österreich: 0820 / 220 33 22 * * gebührenpflichtig (0,145 €/Min. aus dem Festnetz, Mobilfunk: max. 0,20 €/Min.) Haben Sie Fragen? Unser Kundenberatungszentrum steht Ihnen werktags stets von 8.00 – 18.00 Uhr zur Verfügung. -
Page 22: Meanings Of The Symbols
Please read this user manual first! Dear Valued Customer, Thank you for preferring this Grundig appliance. We hope that you get the best results from your appliance which has been manufactured with high quality and state-of-the-art technology. For this rea- son, please read this entire user manual and all other accompanying documents carefully before us- ing the appliance and keep it as a reference for future use. -
Page 23: Set-Up And Safety
SETUP AND SAFETY ----------------------------------------------------------------------------- Please note the following instructions: Attention should be drawn to the environmen- tal aspects of battery disposal. The hi-fi system is designed for the playback of audio signals. All other uses are expressly DO NOT INGEST THE BATTERY, CHEMI- prohibited. - Page 24 SETUP AND SAFETY ----------------------------------------------------------------------------- WARNING: To reduce the risk of electric shock, do not remove cover (or back) as there are no user-serviceable parts inside. Refer servicing to qualified personnel. The exclamation point within an equilat- eral triangle is intended to alert the user to the presence of important operating and maintenance instructions in the literature ac- companying the appliance.
- Page 25 OVERVIEW ---------------------------------------------------------------------------------------------------------------------------------- The hi-fi system controls The remote control See the figure on page 3. Switches the hi-fi system to standby mode and from standby mode to The front of the device the last input source selected. CD compartment. Opens and closes the CD com- Opens and closes the CD com- partment.
- Page 26 OVERVIEW ---------------------------------------------------------------------------------------------------------------------------------- In tuner mode: press and hold down to start the reverse or forwards frequency search; press briefly to change the frequen- cy backwards or forwards in steps. In external data media mode: search for a certain passage for- wards or backwards.
-
Page 27: Connection And Preparation
CONNECTION AND PREPARATION --------------------------------------- Connecting the loudspeakers Connecting the headphones Insert the wires of the loudspeaker cable into Insert the headphone plug (3.5 mm) into the »SPEAKER OUTPUT (6 �) R L« fasteners » « socket on the hi-fi system. on the hi-fi system. -
Page 28: Tuner Mode
CONNECTION AND PREPARATION --------------------------------------- Tighten the battery compartment screws. Environmental note: Batteries, including those which do not con- Notes: tain heavy metal, should not be disposed Do not expose the batteries to extreme heat, of with household waste. Always dispose caused for example by direct sunlight, heat- of used batteries in accordance with local ers or fire. -
Page 29: Dab Operation
TUNER MODE ------------------------------------------------------------------------------------------------------------------------ To display information on the current RDS sta- In ECO mode, press »CLOCK« once. – The clock is displayed. tion, press »INFO« repeatedly. – The following displays appear in sequence: –The device switches back to ECO mode after The name of the radio station. -
Page 30: General Functions
GENERAL FUNCTIONS --------------------------------------------------------------------------------------- Switching on and off The only way to disconnect the hi-fi system from the mains supply is to pull out the plug. Switch on the hi-fi by pressing » « on the de- vice. – The last input source used is automatically selected. - Page 31 SETTINGS --------------------------------------------------------------------------------------------------------------------------------------- Time Setting Select the time by pressing button » « or » « and confirm using the » ALARM « To set the time, your micro system must be in button. standby mode first. Then press and hold the –...
- Page 32 EXTERNAL DATA MEDIA MODE ------------------------------------------------------- Using CDs was developed. Due to rapid progress in MP3 technology and new manufacturers The device is suitable for appearing every day, the compatibility of music CDs displaying the MP3 players/USB memory sticks can only logo shown here (CD- be partially guaranteed.
-
Page 33: Stopping Playback
EXTERNAL DATA MEDIA MODE ------------------------------------------------------- Connecting an MP3 player or a USB Stopping playback memory stick To stop playback, press » «. – When playback starts again, it begins from Switch the device to standby mode by pressing the first track. »... -
Page 34: Bluetooth Mode
II« again to resume playback; iliary device. press » « to select the previous track and – After a short time, your Grundig Connected » « for the next track. Hifi System will be displayed on the Bluetooth Note that the data transmission range can auxiliary device. -
Page 35: Package Information
EC and 2011/65/EU. 0.43 W. You can find the CE declaration of conformity for the device in the form of a pdf file on the Grundig The period of time after which the power man- Homepage www.grundig.com/downloads/doc. agement function switches the equipment auto- matically into the condition providing standby mode: 15 minutes. -
Page 36: Dimensions And Weight
INFORMATION ------------------------------------------------------------------------------------------------------------------ The power consumption if all wireless network ports are activated: 7.7 W. Dimensions and weight Device dimensions: W x H x D 260 x 120 x 233mm Device weight: 2.09 kg Loudspeaker dimensions: W x H x D 172 x 260 x 240mm Loudspeaker weight: 2.48 kg Technical and design modifications are reserved. -
Page 37: Signification Des Symboles
Avant toute chose, veuillez lire ce manuel d’utilisation ! Chère cliente, cher client, Merci d’avoir choisi cet appareil Grundig. Nous espérons que cet appareil, fabriqué dans des instal- lations modernes et soumis à un processus de contrôle qualité rigoureux, vous offre les meilleures performances possible. - Page 38 CONFIGURATION ET SÉCURITÉ -------------------------------------------------------- Tenez compte des instructions suivantes : Le système hi-fi doit uniquement être utilisé dans un climat modéré. Le système hi-fi est conçu pour la restitution de signaux audio. Tout autre usage est formelle- Ne posez pas de récipients contenant du li- ment interdit.
- Page 39 CONFIGURATION ET SÉCURITÉ -------------------------------------------------------- commande et la pile (AAA,1,5 V) hors de la AVERTISSEMENT : Pour toute information à portée des enfants. caractère électrique ou concernant la sécurité, veuillez vous reporter aux informations figurant L’ingestion accidentelle d’une pile (AAA,1,5 V) sur le boîtier de l'appareil, avant de procéder à...
-
Page 40: Vue D'ensemble
VUE D'ENSEMBLE ---------------------------------------------------------------------------------------------------------- Les commandes du système hi-fi + R– + L – R = canal droit, L = canal gauche. Voir le schéma en page 3. FM ANTENNA Prise d'antenne pour l'antenne La partie avant de l'appareil de toit ou l'antenne auxiliaire fournie. - Page 41 VUE D'ENSEMBLE ---------------------------------------------------------------------------------------------------------- En mode Support de données ex- terne : sélectionnez les pistes vers l'avant ou vers l'arrière. En mode veille et de minuterie : pour régler l'heure / minutes. En mode Tuner: une pression prolon- gée permet de lancer une recherche de fréquence vers l'arrière ou vers l'avant ;...
- Page 42 BRANCHEMENT ET PRÉPARATION ------------------------------------------- Branchement des haut-parleurs Recourrez à des câbles audio standard pour connecter les sorties audio du dispositif ex- Insérez les fils du câble du haut-parleur terne à la prise »AUX IN« du système hi-fi. »SPEAKER OUTPUT dans les attaches (6 �) R L«...
-
Page 43: Insérez Des Piles Dans La Télécommande
BRANCHEMENT ET PRÉPARATION ------------------------------------------- Insérez des piles dans la télé- commande Retirez le film de protection de la pile. Changer la pile de la télécom- mande Desserrez les vis du compartiment à pile Retirez le compartiment de la pile. Insérez la pile (AAA 1.5V) en vous assurant que la borne positive (+) soit orientée vers le bas. -
Page 44: Mode Tuner
MODE TUNER ---------------------------------------------------------------------------------------------------------------------- Recherche automatique des sta- Sélection de la source d'entrée tions radios FM du tuner Vous pouvez lancer la recherche automatique Sélectionnez la source d'entrée TUNER en des stations après le branchement du système hi- appuyant sur la touche »SOURCE« de la télé- fi sur l'alimentation secteur. - Page 45 MODE TUNER ---------------------------------------------------------------------------------------------------------------------- Ensuite, appuyez sur « TUN– 10– » ou sur « TUN+ 10+ » pour faire défiler les options du menu: – Full scan:: Pour rechercher et enregistrer toutes les stations de radio DAB disponibles. – Manual: Pour capter manuellement une sta- tion DAB.
- Page 46 FONCTIONS D'ORDRE GÉNÉRAL ------------------------------------------------- Mise sous tension et hors tension Le seul moyen de déconnecter le système hi-fi du secteur consiste à débrancher sa fiche. Mettez le système hi-fi en marche en appuyant sur » « de l'appareil. – La dernière source d'entrée utilisée a été sélectionnée automatiquement.
- Page 47 RÉGLAGES ------------------------------------------------------------- Réglage de l’heure ou « TuneR ». Appuyez sur le bouton « » ou sur « » et confirmez à l'aide du 1 Pour régler l'heure, votre micro-chaîne doit ALARM bouton « ». tout d'abord être en mode veille. Appuyez –...
-
Page 48: Utilisation Des Cd
MODE MÉDIA DE DONNÉES EXTERNES -------------------------- Utilisation des CD Connexion d'un lecteur MP3 ou d'une clé USB L'appareil est adapté pour les CD audio portant le La prise » « est incompatible avec des logo représenté (CD-DA), concentrateurs USB et ne peut être connectée ainsi que pour les CD-R directement à... - Page 49 MODE MÉDIA DE DONNÉES EXTERNES -------------------------- Connexion d'un lecteur MP3 ou Répétition de la piste en cours d'une clé USB Appuyez brièvement sur »REP« pendant cours de la lecture. Mettez l'appareil en mode veille en appuyant sur » «. Sélection d'une autre piste Branchez l'interface USB du lecteur MP3 à...
-
Page 50: Mode Bluetooth
Lancez la fonction recherche sur le périphé- liaire Bluetooth. rique auxiliaire Bluetooth. Remarques : – Après un court instant, votre Grundig Diverses fonctions peuvent également être Connected Hifi System va s'afficher sur le commandées sur le Micro Hi-Fi System. périphérique auxiliaire Bluetooth. -
Page 51: Conformité Avec La Directive
La déclaration de conformité CE de l'appareil est disponible en format PDF à la page d'accueil de DEEE et Mise au rebut des appa- Grundig www.grundig.com/downloads/doc. reils usagés : Cet équipement est un appareil élec- Cet appareil est conforme à la directive DEEE. - Page 52 INFORMATIONS ------------------------------------------------------------------------------------------------------------- Période de temps après laquelle la fonction de gestion de l'alimentation fait passer automatique- ment l'équipement en mode veille : 15 minutes. Consommation d'énergie si tous les ports réseau sans fil sont activés : 7,7 W Dimensions et poids Dimensions de l'appareil (avec attaches filetées) : L x H x L 260 x120 x 233 mm Poids de l'appareil : 2.09 kg...
- Page 53 Beko Grundig Deutschland GmbH Rahmannstraße 3 65760 Eschborn www.grundig.com...
Need help?
Do you have a question about the CMS 4000 BT DAB+ and is the answer not in the manual?
Questions and answers