Advertisement
Quick Links
EstesRockets.com
AGES
18
+
IMPORTANT: Please record date found on decal and keep for future reference. ______________
READ ALL INSTRUCTIONS. Make sure you have all parts and supplies. Test fit all parts before applying glue. Refer to your glue manufacturer's dry times during build.
SCISSORS
HOBBY KNIFE
SOFT LEAD
PENCIL
032417
x4
032416
Fin Half
Fin Half
F
T
032851
Vacuum
Form Wrap
031940
Engine Mount
A
D
038358
Aramid Cord
V
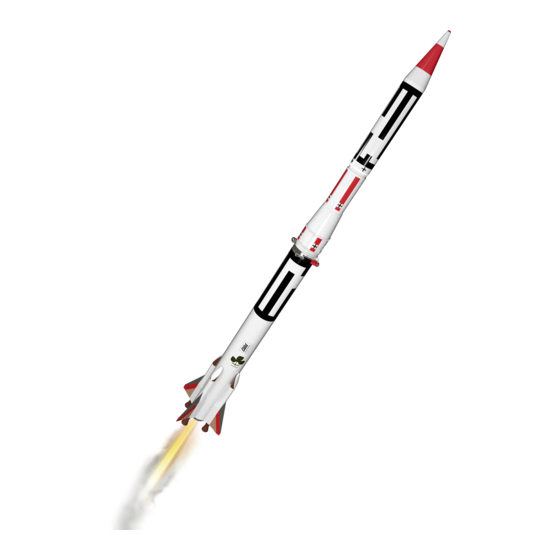
1:18 ATHENA H
MODEL ROCKET INSTRUCTIONS
KEEP FOR FUTURE REFERENCE
RULER
FINE
YELLOW GLUE
SANDPAPER
x4
M
085705
Clay
O
G
x2
032418-E
Spin Ring
090050B-9725
Centering Ring
C
B
090050A-9725
Centering Ring
w/ Notch
N
031971
Body Tube
031972
Body Tube
038374
Elastic
shock cord
H
x2
038181
Launch Lug
SUPPLIES
EPOXY
CA GLUE
K
x2
072412
Engine Retainer Set
P
032418-C
Spin Ring Top
090051-9725
Laser Cut
I
Raceway
E
L
073241
Nose Cone/
Transition
090001-9725
1
MASKING
SPRAY
WHITE
TAPE
ADHESIVE
PRIMER
R
x2
032418-A
Spin Motor Half
J
Q
032418-D
Spin Ring Bottom
Decals
9725
Skill Level
EXPERT
PAINT
CLEAR COAT
(Listed on Pg. 5)
(OPTIONAL)
S
x2
032418-B
Spin Motor Half
032419
Scale Launch Lug
U
035814
Nylon Parachute
Paint masks / marking guides
Roll pattern paint masks
Advertisement

Related Manuals for Estes PRO II Athena H


Summary of Contents for Estes PRO II Athena H
- Page 1 9725 1:18 ATHENA H EstesRockets.com AGES Skill Level EXPERT MODEL ROCKET INSTRUCTIONS KEEP FOR FUTURE REFERENCE IMPORTANT: Please record date found on decal and keep for future reference. ______________ READ ALL INSTRUCTIONS. Make sure you have all parts and supplies. Test fit all parts before applying glue. Refer to your glue manufacturer's dry times during build. SUPPLIES SCISSORS HOBBY KNIFE...
- Page 2 ASSEMBLE ENGINE MOUNT & INSTALL ARAMID CORD Apply yellow glue 0.5 in. from opposite end of engine mount tube Apply yellow glue to the end of engine mount Slide centering ring over the end of engine mount tube . Make sure the centering ring is ush with the end of the engine mount tube.
- Page 3 ATTACH FINS Attach n assembly to base of body tube aligning n with the n lines marked on the body tube. Apply CA glue to entire Be sure the n base is ush with the end of mounting surface of body tube n assembly.
- Page 4 INSTALL ENGINE RETAINER Apply epoxy to the inside of engine retainer Roughen the inside of engine retainer with Place engine retainer a piece of sandpaper. on engine mount tube with notches facing towards the rocket. LET DRY ASSEMBLE FORWARD SECTION After pieces have been separated, roll one Using a sharp hobby knife,...
- Page 5 ATTACH SPIN RINGS Mark all lines from guide onto Wrap guide around the shoulder the shoulder. Be sure to mark the “zero line” all the way up of the forward section. Align the the transition as this will be overlap section with the mold necessary for aligning the seam on transition .
- Page 6 PAINT INSTRUCTIONS (CONTINUED) Cut out the nose cone paint mask from Place mask over nose cone and mark Cut out upper BT paint mask from the roll pattern paint mask template page marking guide template sheet and tape around the circumference of the nose and align the overlap with the 180˚...
- Page 7 FRONT LEFT BACK RIGHT...
- Page 8 Tie shock cord to transition 3 in. (7.6 cm) Double knot FLIGHT PREPARATION Push recovery wadding down towards end of 7-10 SQUARES body tube ESTES ® RECOVERY WADDING Wrap shroud lines loosely and insert parachute into body tube NOTE: Recovery wadding and parachute must slide easily into body tube.
-
Page 9: Engine Preparation
ENGINE PREPARATION Trim off excess tape. Use one each. PLUG STARTER Wrap 6 to 8 layers of masking tape over end of engine, overlapping the bottom ¼ in. ENGINE TIP MUST TOUCH PROPELLANT WARNING: FLAMMABLE To avoid serious injury, read instructions & NAR Safety Code included with engines. - Page 10 Push the plug in place. Repeat steps under Countdown and Launch. © 2024 Estes Industries, LLC • All Rights Reserved Estes Industries, LLC • 1295 H Street, Penrose, CO 81240-9698 • Made in Guangdong, China PN 090004-9725 (5-24)
Need help?
Do you have a question about the PRO II Athena H and is the answer not in the manual?
Questions and answers