Advertisement
www.estesrockets.com
ESTES INDUSTRIES
1295 H Street
Penrose CO 81240
PRINTED IN CHINA
ASSEMBLY TIP:
Read all instructions before beginning work
on your model. Make sure you have all parts and supplies.
Use these instructions for each of your Super Shot" rockets.
1. ROCKET STREAMER ATTACHMENT
Typical rocket
(your design
may vary)
A. Pull the nose cone out of
the rocket body.
2. PREPARE STREAMER FOR FLIGHT
A. Loosely crumple and
insert 1/4 of a square
of recovery wadding
into rocket body
NOTE: Only Estes wadding (#302274) recommended.
3. PREPARE ENGINE FOR FLIGHT
WARNING : FLAMMABLE
To avoid serious injury, read instructions & NAR
Safety Code included with engines.
PREPARE YOUR ENGINE ONLY WHEN
YOU ARE OUTSIDE AT THE LAUNCH SITE
PREPARING TO LAUNCH!
If you do not use your prepared engine, remove
your engine.
the igniter before storing
D. Twist retainer ring into
locked position to hold
engine in place.
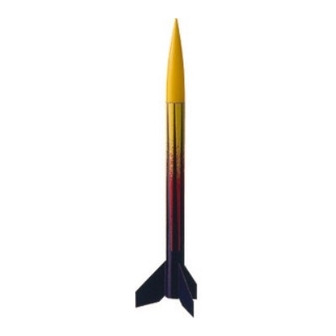
SUPER SHOT
MINI FLYING MODEL
ROCKET INSTRUCTIONS
KEEP FOR FUTURE REFERENCE
NOSE CONE
IMPORTANT:
Wadding must be in place and slide
freely for rocket to work properly!
B. FOLD
STREAMER
A. Separate igniter and
igniter plug.
E. Hold rocket upside down
and drop in igniter. Igniter
must touch propellant.
SHOCK CORD
B. Measure 1 (2.5 cm) from the nose cone and tie
streamer to shock cord with a double knot.
D. Wrap shock cord loosely around
C. ROLL
B. Twist off retainer ring
at rear of rocket.
F. Insert igniter
G. Firmly push igniter
plug.
plug all the way in.
TM
(2.5 cm)
streamer. Insert streamer into rocket.
Streamer should slide easily into body
tube. If fit is too tight, unfold and repack.
C. Slide engine into rocket
body as shown.
H. Bend igniter wires
back as shown.
#1887
1
Advertisement
Table of Contents

Related Manuals for Estes SUPER SHOT Series


Summary of Contents for Estes SUPER SHOT Series
- Page 1 Streamer should slide easily into body into rocket body tube. If fit is too tight, unfold and repack. C. ROLL NOTE: Only Estes wadding (#302274) recommended. 3. PREPARE ENGINE FOR FLIGHT WARNING : FLAMMABLE To avoid serious injury, read instructions & NAR Safety Code included with engines.
- Page 2 Put a new igniter all the way inside the engine without bending it. Push the plug in place. Repeat the steps under Countdown and Launch. NO DRY GRASS OR WEEDS ' 2004 Estes-Cox Corp. All rights reserved. P/N 61000 (12/04)
Need help?
Do you have a question about the SUPER SHOT Series and is the answer not in the manual?
Questions and answers