Advertisement
Available languages
Available languages
Quick Links
Advertisement

Related Manuals for HOMCOM A71-034V00


Summary of Contents for HOMCOM A71-034V00
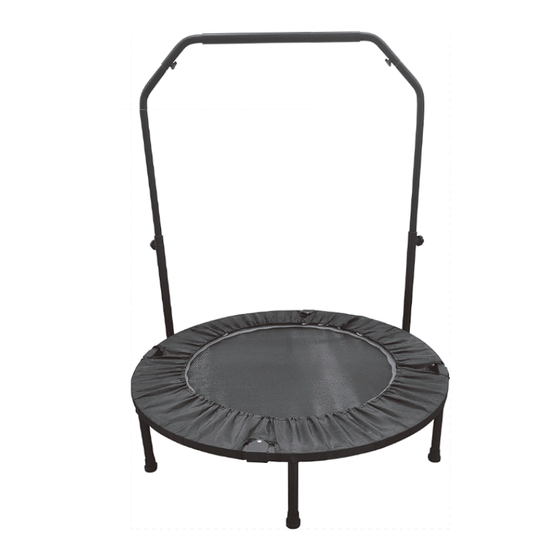
- Page 1 IN230300102V04_UK_FR_ES_DE_IT A71-034V00 Yoga Trampoline *The maximum user weight is 100 Kg *Please check the legs of the trampoline are firmly installed. IMPORTANT, RETAIN FOR FUTURE REFERENCE: READ CAREFULLY UESR’S MANUAL...
- Page 2 Product Size: Ø102cm (Ø40") Attention:The trampoline must be assembled by an adult according to the assembly instruc- tions and inspected before first use. Attention:Follow the manufacturer's instructions when jumping with/without shoes Attention:Empty your pockets and hands before jumping Attention:Always jump in the middle of the mat, not on the sides. Attention:Do not eat while jumping Attention:Each jump should not exceed 30 minutes, and at least 10 minutes of rest is required...
- Page 5 Product analysis diagram Armrest cross Right armrest bracket Trampoline Pentagonal screw Bracket link Triangle screw Safety bolt Leg tube...
-
Page 6: Part List
Part list 1.Trampoline x1 2.Protective case x1 3.Armrest bracket x2 4.Bracket link x2 5.Armrest cross x1 6.Leg tube x6 7.Lock pin x2 8.Pentagonal screw x2 9.Long pentagonal screw x2 10.Safety bolt x2... -
Page 7: Installation Steps
Installation steps Fig. 1 Fig. 2 Fig. 3 Fig. 4 Fig. 5 Step 1: Place the trampoline on the floor in its folded position (Fig. 1), pull the left and right sides, so the trampoline is in a semi circle. Ensure the folding clamp stick is close to the ground (Fig. - Page 8 Fig. 6 Fig. 7 Fig. 8 Fig. 9 Fig. 10 Fig. 11 Step 5: Remove the silent foot pad and insert it into the lower armrest upright (Figure 6). Then put the silent foot pad back into the foot tube (Figure 7). Step 6: Connect the armrest adjustment rods together with 10# screws (Figure 8).
-
Page 9: Manuel De L'utilisateur
IN230300102V04_UK_FR_ES_DE_IT A71-034V00 Trampoline de yoga * Le poids maximum de l'utilisateur est de 100 kg * Veuillez vérifier que les pieds du trampoline sont solidement installés. IMPORTANT - CONSERVEZ CES INFORMATIONS POUR VOTRE CONSULTATION ULTÉRIEURE: LISEZ ATTENTIVEMENT MANUEL DE L'UTILISATEUR... - Page 10 Taille du produit : Ø102cm (Ø40") Attention : Le trampoline doit être assemblé par un adulte selon les instructions de montage et inspecté avant la première utilisation. Attention : Suivez les instructions du fabricant lorsque vous sautez avec ou sans chaussures. Attention : Videz vos poches et vos mains avant de sauter.
- Page 12 ATTENTION...
- Page 13 Diagramme d'analyse du produit Barre transversale du bras Support de bras droit Trampoline Vis pentagonale Lien de support Vis triangulaire Boulon de sécurité Tube de jambe...
-
Page 14: Liste Des Pièces
Liste des pièces 1.Trampoline x1 2.Housse protectrice x1 3.Support de bras x2 4.Lien de support x2 5.Barre transversale du bras x1 6.Tube de jambe x6 7.Goupille de verrouillage 8.Vis pentagonale x2 9.Longue vis pentagonalex2 10.Boulon de sécurité x2... -
Page 15: Étapes D'installation
Étapes d'installation Fig. 1 Fig. 2 Fig. 3 Fig. 4 Fig. 5 Étape 1 : Placez le trampoline sur le sol dans sa position repliée (Fig. 1), tirez sur les côtés gauche et droit pour que le trampoline soit en demi-cercle. Assurez-vous que le dispositif de verrouillage est proche du sol (Fig. - Page 16 Fig. 6 Fig. 7 Fig. 8 Fig. 9 Fig. 10 Fig. 11 Étape 5 : Retirez le tamis de pied silencieux et insérez-le dans le montant d'accoudoir inférieur (Figure 6). Ensuite, remettez le tamis de pied silencieux dans le tube de pied (Figure 7).
- Page 17 IN230300102V04_UK_FR_ES_DE_IT A71-034V00 Trampolín de yoga El peso máximo del usuario no puede exceder 100 Kg. *Comprueba que las patas del trampolín estén firmemente instaladas. IMPORTANTE - CONSERVE ESTA INFORMACIÓN PARA SU CONSULTA POSTERIOR: LEER DET ALLA DAMENTE MANUAL DE INSTRUCCIONES...
-
Page 18: Instrucciones De Mantenimiento
Dimensiones del producto: Ø102cm (Ø40") INSTRUCCIONES DE SEGURIDAD Y USO Atención: El trampolín debe ser ensamblado por un adulto según las instrucciones de montaje e inspeccionado antes del primer uso. Atención: Siga las instrucciones del fabricante al saltar con/sin zapatos. Atención: Vacíe sus bolsillos y manos antes de saltar. - Page 21 Diagrama de análisis de producto Barra transversal Soporte de reposabrazos Trampolín Tornillo pentagonal Bracket link Tornillo largo pentagonal Perno de seguridad Tubo de la pata...
-
Page 22: Lista De Piezas
Lista de piezas 1.Trampolín x1 2.Funda protectora x1 3.Soporte de reposabrazos x2 4.Bracket link x2 5.Barra transversal x1 6.Tubo de la pata x6 7. Pasador de bloqueo x2 8. Tornillo pentagonal x2 9.Tornillo largo pentagonal x2 10.Perno de seguridad x2... -
Page 23: Pasos De Instalación
Pasos de instalación Fig. 1 Fig. 2 Fig. 3 Fig. 4 Fig. 5 Paso 1: Coloca el trampolín en el suelo en su posición plegada (Fig. 1), tira de los lados izquierdo y derecho para que el trampolín quede en forma de semicírculo. Asegúrate de que el dispositivo de sujeción plegable esté... - Page 24 Fig. 6 Fig. 7 Fig. 8 Fig. 9 Fig. 10 Fig. 11 Paso 5: Retire la almohadilla de pie silenciosa e insértela en el montante del reposabra- zos inferior (Figura 6). Luego coloque la almohadilla de pie silenciosa de nuevo en el tubo del pie (Figura 7).
- Page 25 IN230300102V04_UK_FR_ES_DE_IT A71-034V00 Yogatrampolin *Das maximale Benutzergewicht beträgt 100 kg. *Bitte überprüfen Sie, ob die Beine des Trampolins fest installiert sind. WICHTIG - BITTE HEBEN SIE DIESE ANLEITUNG FÜR EINE SPÄTERE BEZUGNAHME AUF: SORGFÄLTIG DURCHLESEN MONTAGEANLEITUNG...
- Page 26 Produktabmessungen: Ø102cm (Ø40") SICHERHEITS- UND GEBRAUCHSANWEISUNGEN Achtung: Das Trampolin muss von einem Erwachsenen gemäß der Montageanleitung zusam- mengebaut und vor der ersten Benutzung überprüft werden. Achtung: Befolgen Sie die Anweisungen des Herstellers, wenn Sie mit/ohne Schuhe springen. Achtung: Leeren Sie Ihre Taschen und Hände, bevor Sie springen. Achtung: Springen Sie immer in der Mitte der Matte, nicht an den Seiten.
- Page 28 ACHTUNG...
- Page 29 Produktanalyse-Diagramm Armlehrenkreuz Rechter Armlehrenhalter Trampolin Pentagon-Schraube Halteklammer Dreiecksschraube Sicherungsbolzen Beinrohr...
- Page 30 Teileliste 1.Trampolin x1 2.Schutzabdeckung x1 3.Armlehrenhalter x2 4.Halteklammer x2 5.Armlehrenkreuz x1 6.Beinrohr x6 7.Sicherungssplint x2 8.Pentagon-Schraube x2 9.Lange Pentagon-Schraube x2 10.Sicherungsbolzen x2...
- Page 31 Installationsanleitung Abb. 1 Abb. 2 Abb. 3 Abb. 4 Abb. 5 Schritt 1: Platzieren Sie das Trampolin im zusammengeklappten Zustand auf dem Boden (Abb. 1), ziehen Sie dann die linken und rechten Seiten, sodass das Trampolin einen Halbkreis bildet. Stellen Sie sicher, dass die Klappklammer nah am Boden ist (Abb.
- Page 32 Abb. 6 Abb. 7 Abb. 8 Abb. 9 Abb. 10 Abb. 11 Schritt 5: Entfernen Sie das lautlose Fußpolster und stecken Sie es in den unteren Arm- lehnenpfosten (Abb. 6). Setzen Sie dann das lautlose Fußpolster wieder in das Fußrohr ein (Abb. 7). Schritt 6: Verbinden Sie die Armlehnenverstellstangen mit 10#-Schrauben (Abb.
-
Page 33: Istruzioni Di Assemblaggio
IN230300102V04_UK_FR_ES_DE_IT A71-034V00 Trampolino da yoga *Il peso massimo dell'utente è di 100 Kg *Assicurati che le gambe del trampolino siano installate saldamente. IMPORTANTE - CONSERVARE QUESTE INFORMAZIONI PER CONSULTARLE IN SEGUITO: LEGGERE ATTENTAMENTE ISTRUZIONI DI ASSEMBLAGGIO... -
Page 34: Istruzioni Per La Manutenzione
Dimensioni del prodotto: Ø102cm (Ø40") ISTRUZIONI DI SICUREZZA E UTILIZZO Attenzione: Il trampolino deve essere assemblato da un adulto secondo le istruzioni di montaggio e ispezionato prima del primo utilizzo. Attenzione: Seguire le istruzioni del produttore quando si salta con/senza scarpe. Attenzione: Svuotare le tasche e le mani prima di saltare. - Page 37 Diagramma di analisi del prodotto Croce del bracciolo Staffa del bracciolo destro Trampolino Vite pentagonale Collegamento della staffa Vite triangolare Bullone di sicurezza Tubo della gamba...
-
Page 38: Elenco Delle Parti
Elenco delle parti 1.Trampolin x1 2.Custodia protettiva x1 3.Staffa del bracciolo x2 4.Collegamento della staffa x2 5.Croce del bracciolo x1 6.Tubo della gamba x6 7.Spina di bloccaggio x2 8.Vite pentagonale x2 9.Vite pentagonale lunga x2 10.Bullone di sicurezza x2... - Page 39 Passaggi di installazione Fig. 1 Fig. 2 Fig. 3 Fig. 4 Fig. 5 Passo 1: Posiziona il trampolino sul pavimento nella sua posizione piegata (Fig. 1), tira i lati sinistro e destro, in modo che il trampolino sia in un semicircolo. Assicurati che il morsetto pieghevole sia vicino al suolo (Fig.
- Page 40 Fig. 6 Fig. 7 Fig. 8 Fig. 9 Fig. 10 Fig. 11 Passo 5: Rimuovere il piedino silenzioso e inserirlo nel montante del bracciolo inferiore (Fig. 6). Poi rimettere il piedino silenzioso nel tubo del piede (Fig. 7). Passo 6: Collegare le aste di regolazione del bracciolo con viti 10# (Fig.
- Page 41 Importador/Fabricante/REP: Spanish Aosom, S.L. C/ Roc Gros, nº 15. 08550, Els Hostalets de Balenyà, Spain. B66295775 atencioncliente@aosom.es TEL: 931294512 Importé par/Fabricant/REP : MH France 2, rue Maurice Hartmann 92130 Issy-les-Moulineaux France Fabriqué en Chine Importeur/Hersteller/REP: MADE IN CHINA MH Handel GmbH IMPORTATO DA/Produttore/REP: Wendenstraße 309 AOSOM Italy srl...
Need help?
Do you have a question about the A71-034V00 and is the answer not in the manual?
Questions and answers