Table of Contents
Advertisement
Quick Links
Advertisement
Table of Contents

Related Manuals for Robe ROBIN LEDBeam 150 FW RGBA


Summary of Contents for Robe ROBIN LEDBeam 150 FW RGBA
- Page 1 QR code for user manual Version 2.0...
-
Page 2: Table Of Contents
ROBIN LEDBeam 150 FW RGBA ROBIN LEDBeam 150 FWQ RGBA Table of contents 1. Safety instructions ......................3 2. Fixture exterior view ...................... 5 3. Installation........................6 3.1 Connection to the mains .................... 6 3.2 Rigging the fixture ...................... 7 3.3 Eggcrate installation....................8... -
Page 3: Safety Instructions
FOR YOUR OWN SAFETY, PLEASE READ THIS USER MANUAL CAREFULLY BEFORE POWERING OR INSTALLING YOUR ROBIN LEDBeam 150 FW ! Save it for future reference. This device has left our premises in absolutely perfect condition. In order to maintain this condition and to en- sure a safe operation, it is absolutely necessary for the user to follow the safety instructions and warning notes written in this manual. - Page 4 When choosing the installation spot, please make sure that the fixture is not exposed to extreme heat, moisture or dust. Do not block the lens array with any object when the fixture is under operation. The cooling openings in head and base of the fixture should never be covered with cloth or other materials, and never must be blocked.
-
Page 5: Fixture Exterior View
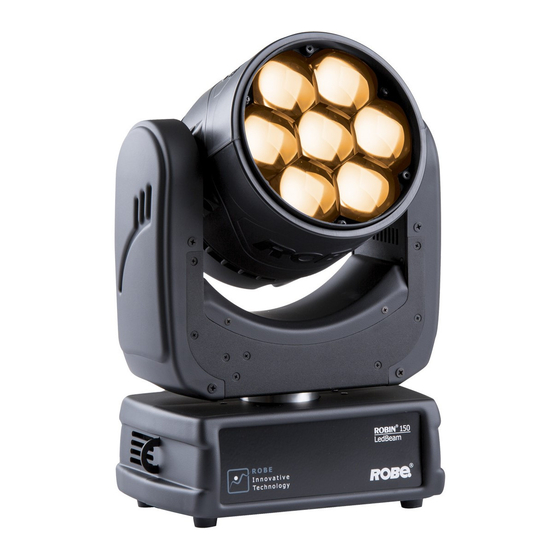
2. Fixture exterior view 1 - Lens array 2 - Yoke 3 - Mains IN 4 - Attachment point for a safety wire 5 - Mains OUT 6 - Control panel 7 - DMX IN 8 - DMX OUT 9 - Base 10 - Slots for mounting bracket omega CL... -
Page 6: Installation
3. Installation Fixtures must be installed by a qualified electrician in accordance with all national and local electrical and construction codes and regulations. 3.1 Connection to the mains For protection from electric shock, the fixture must be earthed! The ROBIN LEDBeam 150 FW is equipped with auto-switching power supply that automatically adjusts to any 50-60Hz AC power source from 100-240 Volts. -
Page 7: Rigging The Fixture
3.2 Rigging the fixture The installation of the fixture has to be built and constructed in a way that it can hold 10 times the weight for 1 hour without any harming deformation. The installation must always be secured with a secondary safety attachment, e.g. an appropriate catch net. This secondary safety attachment must be constructed in a way that no part of the installation can fall down if the main attachment fails. -
Page 8: Eggcrate Installation
Rigging via omega bracket: 1-Omega bracket 2-Clamp 3-Truss 4-Attachment point 5-Safety chain When installing fixtures side-by-side, avoid illuminating one fixture with another! 3.3 Eggcrate installation Disconnect the fixture from mains before installing the eggcrate . Screw the eggcrate (1) on the lens array module via the three screws (2). -
Page 9: Dmx-512 Connection
3.4 DMX-512 connection The fixture is equipped with 5-pin XLR sockets for DMX input and output. Only use a shielded twisted-pair cable designed for RS-485 and 5-pin XLR-plugs and connectors in order to connect the controller with the fixture or one fixture with another. DMX output DMX input XLR socket:... -
Page 10: Wireless Dmx Operation
3.5. Wireless DMX operation The external ROBE Wireless CRMX Dongle allows receiving wireless DMX. This device is equipped with the Lumen Radio CRMX module and antenna for receiving DMX signal. CRMX module operates on the 2.4 GHz band. ROBE Wireless CRMX Dongle... -
Page 11: Control Menu Map
4. Control menu map Default settings=Bold print Level 1 Level 2 Level 3 Level 4 Level 5 Level 6 Level 7 DMXA Set DMXA 001-512 DMX Pres Mode 1 Mode 2 Info POn Time Total Reset DMX In 0-255 Dimm F 0-255 Hea Temp Current... - Page 12 Level 1 Level 2 Level 3 Level 4 Level 5 Level 6 Level 7 Sta Alone Music T On, Off Auto Run Test Prog 1 Prog 2 Prog 3 Pr Play Test Prg Prog 1 Prog 2 Prog 3 Pr Edit Prog 1 Step 1 Prog 2...
-
Page 13: Control Menu
5. Control menu The ROBIN LEDBeam 150 FW is equipped with 2-row LCD display which allows to set the fixture´s behaviour according to your needs, obtain information on its operation, test its various parts and lastly program it, if it has to be used in a stand-alone mode. -
Page 14: Personality (Pers)
5.3 Personality (Pers) DMX Pres - DMX preset. Use the menu to select desired channel mode. Mode 1 - 22 control channels Mode 2 - 16 control channels Pan Rev - Pan reverse. The item allows to invert pan movement. Tilt Rev - Tilt reverse. -
Page 15: Manual Control (Manual)
-06...-01 - Frequence levels 1-6 under selected frequency. 00 - Selected frequency (Standard or High) 01...06 - Frequence levels 1-6 above selected frequency. Temp Uni - Temperature unit. Use the menu item to change temperature unit from °C to °F. I Ef Pos - Init effect positions. -
Page 16: Reset
a red colour coarse Red F a red colour fine Green a green colour coarse Green F a green colour fine Blue a blue colour coarse Blue F a blue colour fine Amber an amber colour Amber F an amber colour fine a colour temperature correction C Mix C a colour mix control... - Page 17 If you use the Robe Universal Interface, connect a USB port of your computer with the Robe Universal Interface by means of the USB cable and DMX input of the fixture with the DMX output of the Robe Universal Interface via a DMX cable.
-
Page 18: Rdm
6. Select correct "COM " number if you use a Flash cable RS232/DMX or select "Robe Universal Interface 1 " if you use the Robe Universal Interface/Robe Universal Interface WTX and then click on the "Connect" button. 7. If the connection is OK, click the “Start Uploading" button to start software uploading. It will take several minutes to perform software update. -
Page 19: Error And Information Messages
DEVICE_HOURS PARAMETER_DESCRIPTION ROBE_DMX_INPUT ROBE_WIRELESS_UNLINK 7. Error and information messages Short Err The message informs you that short circuit has occured on the LED PCB. Tilt Err This message will appear after the reset of the fixture if the head´s magnetic-indexing circuit malfunctions (sensor failed or magnet is missing) or the stepping motor is defective or its driving IC on the PCB. -
Page 20: Technical Specifications
8. Technical Specifications Electrical Power supply:......electronic auto-ranging Input voltage range:....supply 100-240V, 50-60Hz Fuse:........T 3.15A Max. power consumption ..220W (power factor=0.97, I=0.98A at 230V) Mains input: 16A max. (US 13A max.) Optic Light source: 7 x high power RGBA multichip LEDs Min LED life expectancy: 20.000 hours RGBA/CMY colour mixing Variable CTO 2700K-8000K... - Page 21 Connection DMX data in/out: Locking 5-pin XLR AC power input: Chassis connector Neutrik PowerCon, A-type, NAC3MPA AC power output: Chassis connector Neutrik PowerCon, B-type, NAC3MPB Rigging Mounting points: pair of 1/4-turn locks Mounting horizontally or vertically via Omega bracket Temperatures Maximum ambient temperature : 45°...
-
Page 22: Maintenance And Cleaning
Accessories 1x Mounting bracket Omega CL assembled (P/N 99010420) Optional accessories (P/N 10980127) ROBE Wireless CRMX Dongle (P/N1305 1731) Mains Cable PowerCon In/open ended, 2m (P/N 1305 1724) Mains Cable PowerCon In/Schuko, 2m (P/N 1305 1725) Mains Cable PowerCon In/CEE 16A, 2m... -
Page 23: Replacing Fuse
9.1 Replacing fuse 1.Replace the fuse by a fuse of the same type and rating only. Before replacing the fuse, unplug mains lead! 2. Remove the plastic covers of the base (3) by unscrewing 5 fastening screws (1) and (2) on each cover. 3. -
Page 24: Photometric Diagrams
10. Photometric diagrams... - Page 25 June 22, 2022 Copyright © 2018 -2022 Robe Lighting - All rights reserved All Specifications subject to change without notice Made in ROBE Lighting s.r.o., Palackého 416, 757 01 Valašské Meziříčí, Czech Republic...
- Page 26 DMX protocol Robin LEDBeam 150 RGBA/LEDBeam 150Q RGBA/LEDBeam 150 FWQ RGBA/LEDBeam 150 FW RGBA - DMX protocol Version: 1.3 Mode 1-Standard 16-bit, Mode 2 -Reduced 8-bit Mode/channel Type of Function Value control Pan (8 bit) 0 - 255 Pan movement by 450° (128=default) proportional Pan Fine (16 bit) 0 - 255...
- Page 27 DMX protocol Mode/channel Type of Function Value control 174-175 Tungsten effect simulation (1200W) On step 176-177 Tungsten effect simulation (2000W) On step 178-179 Tungsten effect simulation (2500W) On step 180-181 Tungsten effect simulation Off step 182-184 Reserved PWM output frequency of LEDS: Standard (300Hz)** step PWM output frequency of LEDS: High (600Hz)** step...
- Page 28 DMX protocol Mode/channel Type of Function Value control Filter 115 (Peacock Blue) 37-38 step 39-40 Filter 126 (Mauve) step 41-42 Filter 117 (Steel Blue) step 43-44 Filter 118 (Light Blue) step Filter 122 (Fern Green) 45-46 step Filter 182 (Light Red) 47-48 step Filter 121 (Filter Green)
- Page 29 DMX protocol Mode/channel Type of Function Value control 236-245 Rainbow effect (with fade time) from slow-> fast proportional 246-255 Rainbow effect (without fade time) from slow-> fast proportional Red/Cyan (8 bit)* 0 - 255 Colour saturation control - coarse 0-100% (255=default) proportional Red/Cyan (16bit)* 0 - 255...
- Page 30 Dimmer intensity - fine (16 bit) 0 - 255 Fine dimming (0=default) proportional *Select RGA or CMY mixing mode on channel "Power/Special functions" . Copyright ©2018-2022 Robe Lighting s.r.o. - All rights reserved All Specifications subject to change without notice Page 5...
- Page 31 Colours on Virtual Colour Wheel Green Blue Amber Colour name (DMX) (DMX) (DMX) (DMX) Filter 4 (Medium Bastard Amber) Filter 25 (Sunset Red) Filter 19 (Fire) Filter 26 (Bright Red) Filter 58 (Lavender) Filter 68 (Sky Blue) Filter 36 (Medium Pink) Filter 89 (Moss Green) Filter 88 (Lime Green) Filter 90 (Dark Yellow Green)
- Page 32 Green Blue Amber Colour name (DMX) (DMX) (DMX) (DMX) Filter 172 (Lagoon Blue) Filter 194 (Surprise Pink) Filter 180 (Dark Lavender) Filter 181 (Congo Blue) Filter 197 (Alice Blue) Filter 201 (Full C.T. Blue) Filter 202 (Half C.T. Blue) Filter 203 (Quarter C.T. Blue) Filter 204 (Full C.T.
Need help?
Do you have a question about the ROBIN LEDBeam 150 FW RGBA and is the answer not in the manual?
Questions and answers