
Subscribe to Our Youtube Channel
Related Manuals for NuWave Brio 10Q


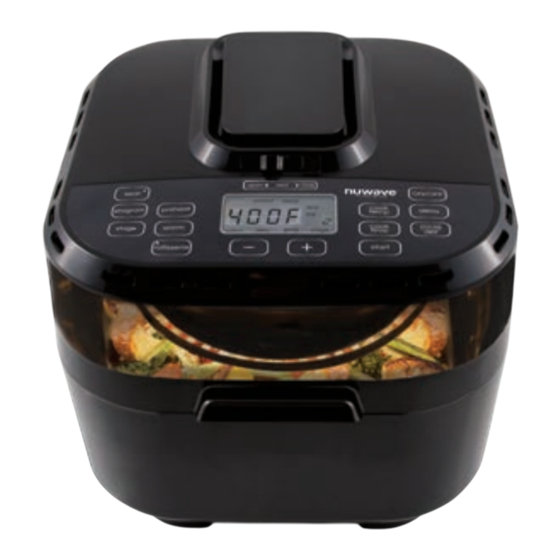
Summary of Contents for NuWave Brio 10Q
- Page 1 NuWave ® Brio Healthy Digital ® 10Q Air Fryer Owner’s Manual & Complete Recipe Book...
- Page 2 As a special thank-you for registering your NuWave unit, you’ll automatically receive an additional 6 months added to your limited manufacturer’s warranty!* All you have to do is follow these simple steps. Using your smartphone or smart device, scan the QR code located on the unit label on the back of the unit.
- Page 3 months for an additional warranty! DOWNLOAD THE QR CODE APP TO YOUR MOBILE DEVICE Open your mobile app store (App Store, Google Play). Search for "QR code readers." QR code readers Simply download the QR code reader to your phone, open it, scan the code and you are ready to go.
- Page 5 1-877-689-2838...
- Page 7 1-877-689-2838...
- Page 8 GUIDE The following guide indicates the amount of time, temperature, and weight for the various food types that are listed below. Shake/ Time Temp Suggested Food Type Additional Notes Amount Flip (min) (˚F) Frozen French Toast Flip 8-10 8 oz Sticks Frozen Hash Brown Flip...
-
Page 9: Table Of Contents
TABLE OF CONTENTS OWNER'S MANUAL Grilled Ham and Cheese ......40 Important Safeguards ......10-11 Tortilla-Crusted Tilapia ......41 Additional Safeguards ......12 Salmon with Orange Curry Sauce ... 42 Parts Description ........13 Turkey Sliders ......... 43 Apple-Glazed Pork Tenderloin....44 Operating Instructions .......14-19 Citrus Green Beans ......... -
Page 10: 10 Owner's Manual
IMPORTANT SAFEGUARDS READ ALL INSTRUCTIONS When using electrical units, basic safety precautions should always be followed including the following: 1. Do not touch hot surfaces. Use handles or knobs. 2. To protect against electrical shock, do not immerse cord, plugs, or the Brio in water or other liquids. - Page 11 IMPORTANT SAFEGUARDS (Continued) SEE OPERATING INSTRUCTIONS BEFORE USE Electrical Information A short power-supply cord (or detachable power-supply cord) is provided to reduce the risk resulting from becoming entangled in or tripping over a longer cord. Longer detachable power-supply cords or extension cords are available and may be used if care is exercised in their use.
-
Page 12: Additional Safeguards
8. Never use a towel or other material or object to block the air vents. 9. If any trouble arises during operation, any service MUST be done by NuWave, LLC or authorized by the manufacturer for repairs. 10. The appliance is not intended to be operated by means of an external timer or separate remote-control system. -
Page 13: Parts Description
PARTS DESCRIPTION 1. Air Fryer Power Base Part #: 37257 2. Base Tray Part #: 37251 3. Rotisserie Fork & Skewer Part #: 37252 4. Skewers Part #: 37253 5. Reversible Wire Rack Part #: 37254 6. Non-Stick Inner Basket Net Part #: 37255 7. -
Page 14: Operating Instructions
OPERATING INSTRUCTIONS Before Use: 1. Remove all the packaging materials. 2. Remove the glue and labels on the appliance. 3. Clean the Base Tray, Rotisserie Fork, Skewers, Reversible Wire Rack, Non-Stick Inner Basket Net, and Non-Stick Inner Basket thoroughly with hot water, a nonabrasive sponge, and a mild dish detergent, or in the dishwasher, top rack only. - Page 15 OPERATING INSTRUCTIONS (CONTINUED) Vent Switch • Adjust the Vent Switch to the “close” position to help keep moisture within the Brio. • Adjust the Vent Switch to the “open” position to have the Brio function as a true air fryer. On/Off Function 1.
- Page 16 OPERATING INSTRUCTIONS (CONTINUED) Adjusting Time Default cooking time is 15 minutes. 1. Press "cook time", “00:15” and “time” will flash. 2. Adjust the cooking time by pressing "+" or "-". Sear Function Default cooking time and temperature is 8 minutes at 400˚F. 1.
- Page 17 OPERATING INSTRUCTIONS (CONTINUED) 3. Set the cooking temperature and time. • Warm can be set from 1 minute up to 24 hours. • Warm will always be the last cooking function executed by the Brio. Delay Function 1. Press “delay”. “00:00” and “time” will be displayed. •...
-
Page 18: Rotisserie Function
CONTROL PANEL OPERATION (Continued) OPERATING INSTRUCTIONS (CONTINUED) Note: Up to 100 different recipes can be stored (1-100). Memory Recall 1. Press "program". “000” will displayed. 2. Press "+" or "-" to select the desired program. • Up to 10 cooking functions may be stored with each memory entry (cooking time, temperature). -
Page 19: Rotisserie Assembly
OPERATING INSTRUCTIONS (CONTINUED) Example: Rotisserie for 1 hour at 350˚F, at stage 2. 1. Press "stage". Set cook time and temperature for 10 minutes at 400ºF. 2. Press "stage". 3. Press "rotisserie". 4. Press "cook time". • Press "+" or "-" until "1:00" is displayed. 5. -
Page 20: Care & Maintenance
CARE & MAINTENANCE Unplug the Brio and make sure it cools down completely before before removing parts and cleaning. 1. Using the handles, remove the Base Tray (with Non-Stick Inner Basket). 2. Lift the Non-Stick Inner Basket up and out of the Base Tray. Cleaning the Brio Clean the Brio after every use or in between a large amount of batches. -
Page 21: Troubleshooting
TROUBLESHOOTING PROBLEM: POSSIBLE CAUSE(S): RESOLUTION(S): The Brio is not The Brio is not plugged Insert the plug into an operating. in. Did not press "ON/ appropriate grounded power OFF". socket. Press "ON/OFF". Place Non-Stick Inner Basket Non-Stick Inner Basket into the Base Tray. is not in the Brio. - Page 22 TROUBLESHOOTING (Continued) PROBLEM: POSSIBLE CAUSE(S): RESOLUTION(S): French fries are fried You did not soak the Soak potato sticks in a unevenly in the Brio. potato sticks properly bowl of water for at least before you fried them. 30 minutes, remove them, and dry with paper towels.
-
Page 23: Limited Warranty
The Manufacturer will provide the necessary parts and labor to repair any part of the NuWave Brio Healthy Digital 10Qt. Air Fryer at NuWave, LLC Service Department. After the expiration of the warranty, the cost of the labor and parts will be the responsibility of the owner. -
Page 24: Recipes
RECIPES 24 Recipes... -
Page 25: Prime Rib
Prime Rib (Serves 4) Time and Temp: Ingredients: Prep Time: 10 minutes 1(3- to 4-pound) rib roast Cook Time: 23-25 minutes 2 tablespoons extra-virgin olive oil Temp: 350˚F Sea salt Fresh cracked black pepper to taste Directions: Press “preheat”. Set temperature to 350°F for 23-25 minutes a pound. Press "start". Season rib roast with oil, salt and pepper. -
Page 26: Twice Baked Potatoes
While potatoes are baking, combine sour cream, broccoli, bacon, salt, pepper, butter, and milk in medium bowl; set aside. Once fully baked, remove potatoes from NuWave Brio and let cool. When potatoes are cool to the touch, cut each in half lengthwise and scoop out the insides. -
Page 27: Roasted Brussel Sprouts
Roasted Brussels Sprouts (Serves 4) Time and Temp: Ingredients: Prep Time: 10 minutes 1 pound fresh Brussels sprouts Cook Time: 15 minutes 2 teaspoons olive oil Temp: 390˚F ½ teaspoon kosher salt ½ teaspoon black pepper ½ teaspoon garlic powder Directions: Remove any tough or bruised leaves on the outer portions of Brussels sprouts. -
Page 28: Home Fries
Home Fries (Serves 6) Time and Temp: Prep Time: 40 minutes Cook Time: 15 minutes Temp: 390˚F Ingredients: 1½ teaspoons paprika 6 medium russet potatoes ½ teaspoon black pepper 2 tablespoons oil ½ teaspoon salt ½ tablespoon garlic powder Directions: Boil potatoes in salted water for 40 minutes or until fork-tender. -
Page 29: Air-Baked Eggs
Air-Baked Eggs (Serves 3) Time and Temp: Ingredients: Prep Time: 10 minutes 3 ramekins Cook Time: 7-10 minutes 6 ounces diced ham Temp: 300˚F 3 large eggs, divided 3-6 spinach leaves (optional) 3 teaspoons milk, divided Cooking spray or butter Salt and pepper to taste Directions: Press “preheat”. -
Page 30: Air-Fried Tortilla Chips
Air-Fried Tortilla Chips (Serves 4) Time and Temp: Ingredients: Prep Time: 5 minutes 8 corn tortillas Cook Time: 4 minutes 1 teaspoon olive oil Temp: 390˚F Salt to taste Directions: Press “preheat”. Set to 390˚F for 4 minutes. Brush tortillas with olive oil. Cut tortillas into triangles. -
Page 31: Classic Bacon Cheeseburger
Classic Bacon Cheeseburger (Serves 4) Time and Temp: Ingredients: Prep Time: 5 minutes 1½ lbs ground beef Cook Time: 16-18 minutes 8 slices cooked bacon, cooked Temp: 360˚F 1 egg 2 tablespoons Worcestershire sauce ½ cup fresh chopped onions 2 tablespoons hamburger seasoning 4 slices cheese 4 slices tomatoes 4 leaves lettuce... -
Page 32: Buffalo Wings
Buffalo Wings (Serves 4) Time and Temp: Ingredients: Prep Time: 10 minutes 2 pounds chicken wings (if needed, Cook Time: 25 minutes cut into drummettes and flats and separate) Temp: 390˚F ½ teaspoon salt ½ teaspoon pepper ½ teaspoon garlic powder ¼... -
Page 33: Spinach-Stuffed Chicken
Spinach-Stuffed Chicken (Serves 2) Time and Temp: Ingredients: Prep Time: 15 minutes 2 (1-pound) boneless, skinless chicken Cook Time: 31-35 minutes breasts Temp: 360˚F 2 cups breadcrumbs 1 tablespoon butter, melted 1 tablespoon olive oil ¼ cup chopped red pepper (optional) ¼... -
Page 34: Chicken Satay
Chicken Satay (Serves 4) Time and Temp: Ingredients: Prep Time: 15 minutes 1 pound boneless chicken thighs Cook Time: 6-8 minutes ½ cup soy sauce Temp: 390˚F ½ cup pineapple juice ¼ cup sesame oil 4 garlic cloves, chopped fine 4 scallions, chopped 1 tablespoon grated ginger 2 teaspoons toasted sesame seeds... -
Page 35: Grilled Chicken Tenders
Grilled Chicken Tenders (Serves 3) Time and Temp: Ingredients: Prep Time: 5 minutes ½ pound boneless chicken tenders Cook Time: 15 minutes ¼ cup creamy Caesar dressing Temp: 390˚F 1 tablespoon olive oil Dash garlic powder ½ teaspoon dried basil leaves 1 teaspoon dried minced onion Dash pepper Directions:... -
Page 36: Parmesan Chicken Tenders
Parmesan Chicken Tenders (Serves 4) Time and Temp: Prep Time: 10 minutes Cook Time: 8-12 minutes Temp: 330˚F Ingredients: 1 cup coarse dry breadcrumbs Cooking spray 1 pound chicken tenders ¼ cup all-purpose flour 1 tablespoon Italian seasoning 2 large eggs 1 teaspoon garlic powder ½... -
Page 37: Butter-Infused Chicken
Butter-Infused Chicken (Serves 6-8) Time and Temp: Chicken Ingredients: Prep Time: 15 minutes 1 (3- to 5-pound) whole chicken Cook Time: 10-12 minutes a pound 4 tablespoons seasoned salt Temp: 375˚F 3 tablespoons black pepper Butter Paste Ingredients: 1 stick butter 4 teaspoons garlic powder 2 tablespoons dried oregano 1 onion, sliced... -
Page 38: Cajun Shrimp
Cajun Shrimp (Serves 2) Time and Temp: Ingredients: Prep Time: 5 minutes ½ pound shrimp, peeled and deveined Cook Time: 6 minutes ¼ teaspoon cayenne pepper Temp: 390˚F ½ teaspoon Old Bay Seasoning ® ¼ teaspoon smoked paprika 1 tablespoon olive oil Pinch salt Directions: Press “preaheat”. -
Page 39: Chimichurri Skirt Steak
Chimichurri Skirt Steak (Serves 2) Time and Temp: Prep Time: 1 hr 30 minutes Cook Time: 10-15 minutes Temp: 390˚F Sauce Ingredients: ½ cup extra-virgin olive oil 1 bunch flat-leaf parsley, roughly chopped 1 teaspoon salt (about 1 cup, packed) 1 teaspoon pepper 5 large garlic cloves, roughly chopped (about 3 tablespoons) -
Page 40: Grilled Ham And Cheese
Grilled Ham and Cheese (Serves 2) Time and Temp: Ingredients: Prep Time: 10 minutes 4 slices white bread Cook Time: 4-5 minutes 2 slices American cheese Temp: 360˚F 2 slices of thinly sliced ham ¼ cup melted butter Directions: Press “preheat”. Set to 360˚F for 4-5 minutes. Brush each bread slice with melted butter on one side. -
Page 41: Tortilla-Crusted Tilapia
Tortilla-Crusted Tilapia (Serves 2) Time and Temp: Prep Time: 5 minutes Cook Time: 15 minutes Temp: 375˚F Ingredients: 1 teaspoon seasoned salt 1 whole jalapeño, seeded, 18 whole tortilla chips and deveined 1 whole large egg, beaten ¾ cup cilantro 2 whole tilapia fillets ½... -
Page 42: Salmon With Orange Curry Sauce
Salmon with Orange Curry Sauce (Serves 2) Time and Temp: Prep Time: 10 minutes Cook Time: 8-10 minutes Temp: 375˚F Salmon Ingredients: Curry Sauce Ingredients: 1½ pounds salmon, cut into 2 fillets 2 tablespoons salt ½ cup mayonnaise 2 tablespoons pepper 2 teaspoons curry powder 2 cups spinach ¾... -
Page 43: Turkey Sliders
Turkey Sliders (Serves 2) Time and Temp: Prep Time: 5 minutes Cook Time: 10 minutes Temp: 390˚F Ingredients: 1 pound ground turkey ½ teaspoon garlic powder 2 slices Colby Jack cheese, each cut ½ teaspoon salt in half ½ teaspoon pepper 4 dinner rolls, each cut in half Directions: Press “preheat”. -
Page 44: Apple-Glazed Pork Tenderloin
Apple-Glazed Pork Tenderloin (Serves 4) Time and Temp: Prep Time: 20 minutes Cook Time: 15 minutes Temp: 390˚F Ingredients: 1(1½-pound) pork tenderloin 2 tablespoons salt 2 tablespoons pepper 1 onion, chopped ⅓ cup apple vinegar ½ cup chicken broth ½ teaspoon cinnamon ½... -
Page 45: Citrus Green Beans
Citrus Green Beans (Serves 4) Time and Temp: Ingredients: Prep Time: 10 minutes 1 pound green beans, washed, Cook Time: 10 minutes stems removed Temp: 390˚F Juice of 1 lemon Pinch salt Black pepper to taste ¼ teaspoon olive oil Directions: Press “preheat”. -
Page 46: Crispy Tofu
Crispy Tofu (Serves 6) Time and Temp: Prep Time: 10 minutes Cook Time: 8-10 minutes Temp: 350˚F Ingredients: 2 tablespoons Sriracha sauce 12 ounces low-fat, extra-firm tofu 2 tablespoons low-sodium soy sauce 1 teaspoon sesame oil 1 teaspoon oil 1 teaspoon teriyaki sauce 1 tablespoon honey Directions: Cut tofu into 1-inch cubes;... -
Page 47: Bacon-Wrapped Onion Rings
Bacon-Wrapped Onion Rings (Serves 2) Time and Temp: Prep Time: 10 minutes Cook Time: 8-10 minutes Temp: 390˚F Ingredients: 1 large white onion 1 pound bacon 3 tablespoons Sriracha sauce (optional) Directions: Cut onion horizontally into ½-inch-thick slices. Separate into individual rings. Brush each onion ring with Sriracha. -
Page 48: Party Meatballs
Party Meatballs (Serves 4) Time and Temp: Prep Time: 20 minutes Cook Time: 15 minutes Temp: 350˚F Ingredients: 1 tablespoon lemon juice 1 pound ground beef ½ cup brown sugar ¾ cup tomato ketchup ½ teaspoon dry mustard 1 tablespoon Tabasco sauce ®... -
Page 49: Pasta Bake
Pasta Bake (Serves 4) Time and Temp: Prep Time: 5 minutes Cook Time: 18 minutes Temp: 390˚F Ingredients: 1 tablespoon salt ½ box dried penne pasta noodles 1 tablespoon pepper 2 cups heavy whipping cream 1 teaspoon garlic powder ⅓ cup milk 5 slices chopped Canadian bacon 1 cup shredded sharp cheese 1 cup chopped broccoli... -
Page 50: Philly Cheesesteak Braid
Philly Cheesesteak Braid (Serves 6-8) Time and Temp: Prep Time: 15 minutes Cook Time: 12-15 minutes Temp: 350˚F Ingredients: 1 pound skirt steak, thinly sliced ½ cup mozzarella cheese, shredded 2 tablespoons melted butter 1 (8-ounce) tube crescent dough 1 tablespoon olive oil Pinch flour ½... -
Page 51: Cheesy Rice-Stuffed Meatloaf
Cheesy Rice-Stuffed Meatloaf (Serves 4-6) Time and Temp: Prep Time: 15 minutes Cook Time: 15-20 minutes Temp: 350˚F Ingredients: 1 pound ground beef 1 egg ½ cup chopped yellow pepper 2 tablespoons Worcestershire sauce ½ cup chopped green pepper 2 tablespoons salt ½... -
Page 52: Santa Fe Bell Pepper
Santa Fe Stuffed Bell Peppers (Serves 4) Time and Temp: Prep Time: 10 minutes Cook Time: 9 minutes Temp: 360˚F Ingredients: 1½ cups cooked rice 1 cup mozzarella cheese, shredded 1 red pepper 1 cup frozen corn medley 1 yellow pepper 1 tablespoon cayenne pepper 1 green pepper 2 tablespoons seasoning salt... -
Page 53: Kale Chips
Kale Chips (Serves 4) Time and Temp: Prep Time: 5 minutes Cook Time: 2-3 minutes Temp: 390˚F Ingredients: 1 head kale, separated 1 teaspoon olive oil 1 teaspoon soy sauce Directions: Press “preheat”. Set to 390˚F for 2-3 minutes. Remove the center stems from each piece of kale. Cut leaves into 1½-inch pieces. Wash kale pieces and dry thoroughly. -
Page 54: Roasted Tomatoes
Roasted Tomatoes (Serves 4) Time and Temp: Prep Time: 5 minutes Cook Time: 20 minutes Temp: 320˚F Ingredients: 2 tomatoes Dried rosemary to taste Dried parsley to taste Dried sage to taste Dried oregano to taste Black pepper Dried basil to taste Cooking spray Dried thyme to taste ½... -
Page 55: Roasted Root Vegetables
Roasted Root Vegetables (Serves 4) Time and Temp: Prep Time: 10 minutes Cook Time: 35 minutes Temp: 330˚F Ingredients: 4 celery stalks, peeled, cut into chunks 2 carrots, peeled, halved, cut into 1 teaspoon ground cumin seeds chunks 1 teaspoon ground coriander 2 parsnips, peeled, halved, cut into 1 tablespoon vegetable oil chunks... -
Page 56: Apple Pie
Apple Pie (Serves 2-3) Time and Temp: Prep Time: 10 minutes Cook Time: 30 minutes Temp: 320˚F Ingredients: 2 tablespoons sugar 1 premade frozen pie crust ½ teaspoon vanilla extract Cooking spray 1 tablespoon butter 1 large apple, cored and chopped 1 beaten egg 2 teaspoons lemon juice 1 tablespoon raw sugar... -
Page 57: Banana And Nutella ® Wontons
Banana and Nutella Wontons ® (Serves 4) Time and Temp: Prep Time: 10 minutes Cook Time: 6-8 minutes Temp: 350˚F Ingredients: 1 egg 8 wonton wrappers 1 teaspoon water 8 teaspoons Nutella ® Cinnamon sugar or powdered sugar 1 banana (for garnish) Directions: Press “preheat”. -
Page 58: Pineapple Crescents
Pineapple Crescents (Serves 4) Time and Temp: Prep Time: 20 minutes Cook Time: 10 minutes Temp: 350˚F Ingredients: ½ pineapple ½ cup shredded coconut 1 small sprig fresh mint 1 cup vanilla yogurt Directions: Cut pineapple into ½-inch-thick slices. Cut slices in half and remove the core. Press “preheat”. -
Page 59: Apple Pie Egg Rolls
Apple Pie Egg Rolls (Yield: 6 Egg Rolls) Time and Temp: Prep Time: 15 minutes Cook Time: 8-10 minutes Temp: 390˚F Ingredients: Pinch salt 8 tablespoons unsalted butter 2 tablespoons all-purpose flour 3 Granny Smith apples, peeled, cored, 2 tablespoons lemon juice cut into ¼-inch cubes 6 egg roll wrappers ½... -
Page 60: Berry Cheesecake Egg Rolls
Berry Cheesecake Egg Rolls (Yield: 6 Egg Rolls) Time and Temp: Prep Time: 10 minutes Cook Time: 8-10 minutes Temp: 390˚F Ingredients: 4 ounces cream cheese, softened 3 tablespoons sugar ½ teaspoon lemon juice ½ cup mixed berries 6 egg roll wrappers ¼... -
Page 61: Easy Blueberry Muffins
Easy Blueberry Muffins (Yield: 12 Muffins) Time and Temp: Prep Time: 10 minutes Cook Time: 14-16 minutes Temp: 300˚F Ingredients: 1 (6.5-ounce) box muffin mix ¼ cup blueberries Cooking spray Directions: Prepare muffin mix according to package directions. Gently fold in blueberries into prepared batter. Spray 12 Silicone Egg (Cupcake) Liners with cooking spray. -
Page 62: Indian Eggplant, Bell Pepper And Za'atar
Indian Eggplant, Bell Pepper, and Za'atar (Serves: 4-6) Time and Temp: Prep Time: 10 minutes Cook Time: 30-40 minutes Temp: 375˚F Ingredients: 6 small white or purple eggplant 1 large red or green bell pepper 1 medium red onion, large dice 2 tablespoons extra-virgin olive oil Sea salt to taste Za’atar to taste... -
Page 63: Garlic-Roasted Game Hens
Garlic Roasted Game Hens with Caraway and Roasted Carrots (Serves: 2-4) Time and Temp: 8-10 fresh cloves garlic, peeled 2 sprigs fresh thyme Prep Time: 10 minutes 2 ounces white wine Cook Time: 1 hour Extra-virgin olive oil to taste Temp: 300˚F Sea salt Ingredients:... -
Page 64: Peppered Sirloin Brochette
Peppered Sirloin Brochette with Peppers and Onions (Serves:2-4) Time and Temp: Prep Time: 10 minutes Cook Time: 12-14 minutes Temp: 375˚F Ingredients: 1 (12-ounce) beef sirloin, cut into 2-inch cubes 1 medium red onion, large dice 1 large red bell pepper, large dice 2 tablespoons fresh ground pepper 1 teaspoon sea salt 1 teaspoon chili flakes (optional) -
Page 65: Smoked Bacon-Wrapped Pork Tenderloin With Granny Smith Apples
Smoked Bacon-Wrapped Pork Tenderloin with Roasted Granny Smith Apples (Serves 4-6) Time and Temp: 16 ounces Yukon Gold potatoes, quartered Prep Time: 15 minutes 2 tablespoons extra-virgin olive oil Cook Time: 40 minutes 2 Granny Smith apples, cored, quartered, Temp: 375˚F skin left on Ingredients: Sea salt... -
Page 66: Spanish
NuWave ® Brio Healthy Digital ® 10Q Air Fryer Manual del Usuario... - Page 67 QR ubicado en la etiqueta de su producto en la parte posterior de la unidad. Se le dirigirá a la página de registro del producto NuWave con el número de serie único de su producto que se ingresa automáticamente en el campo correspondiente.
- Page 68 !para una garantía !para una garantía adicional de adicional de meses meses DESCARGUE LA APLICACIÓN QR CODE EN SU DISPOSITIVO MÓVIL Abra su tienda de aplicaciones móviles (App Store, Google Play). Busque "lectores de códigos QR." Lectores de códigos QR Simplemente descargue el lector de códigos QR a su teléfono, ábralo, escanee el código y estará...
- Page 69 GUÍA La siguiente guía indica la cantidad de tiempo, temperatura y peso para los distintos tipos de alimentos que se enumeran a continuación. Agitar/ Tiempo Temp Notas Cantidad Tipo de Alimento Sugerida Voltear (min) Adicionales (˚F) Palitos de pan francés Voltear 8-10 8 oz...
-
Page 70: Medidas De Seguridad Importantes
GUÍA Agitar/ Tiempo Temp Notas Cantidad Tipo de Alimento Sugerida Voltear (min) (˚F) Adicionales Rollitos primavera Agitar 16 oz Nuggets de pollo Agitar 8-12 12 oz Palitos de pescado Pescado Agitar 6-10 12 oz congelados Palomitas rellenas Agitar 8-10 12 oz Aros de cebolla Agitar 12-16... - Page 71 MEDIDAS DE SEGURIDAD IMPORTANTES 8. No permita que el cable cuelgue del borde de la mesa o mostrador ni toque las superficies calientes. 9. No lo coloque sobre una estufa o cerca de un quemador eléctrico o de gas caliente ni en un horno caliente. 10.
- Page 72 GUARDE ESTAS INSTRUCCIONES VEA LAS INSTRUCCIONES DE FUNCIAMIENTO ANTES DE USAR Información eléctrica Se proporciona un cable de suministro de energía corto (o cable de suministro de energía desmontable) para reducir el riesgo resultante de enredarse o tropezar con un cable más largo. Los cables de alimentación desmontables más largos o los cables de extensión están disponibles y se pueden usar si se tiene cuidado en su uso.
- Page 73 9. Si surge algún problema durante la operación, cualquier servicio DEBE ser realizado por NuWave , LLC o autorizado por el fabricante para reparaciones. 10. El aparato no está diseñado para ser operado por medio de un temporizador externo o un sistema de control remoto separado.
-
Page 74: Descripción De Partes
DESCRIPCIÓN DE PARTES 1. Air Fryer power base Parte #: 37257 2. Bandeja de la Base Parte #: 37251 3. Trinche para Rostizar Parte #: 37252 4. Brocheta Parte #: 37253 5. Soporte de Alambre Reversible Parte #: 37254 6. Rejilla para Freir en la Cesta Parte #: 37255 7. -
Page 75: Instrucciones De Funcionamiento
INSTRUCCIONES DE FUNCIONAMIENTO Antes del primer uso: 1. Retire todos los materiales de embalaje. 2. Retire el pegamento y las etiquetas del aparato. 3. Limpie a fondo la Bandeja de la Base, el Trinche para rostizar, las Agujas, la Rejilla Reversible, la Cesta Antiadherente y su Malla a fondo con agua caliente, una esponja no abrasiva y un detergente suave para platos, o solo en el lavavajillas, en la rejilla superior. - Page 76 INSTRUCCIONES DE FUNCIONAMIENTO Interruptor de Ventilación • Ajuste el Interruptor de Ventilación a la posición “close” para ayudar a mantener humedad dentro de la Brio. • Ajuste el Interruptor de Ventilación a la posición “open” para hacer que la Brio funcione como una verdadera freidora de aire. Función de Encendido/Apagado 1.
- Page 77 INSTRUCCIONES DE FUNCIONAMIENTO Nota: • Durante la cocción, el tiempo restante hará una cuenta regresiva y ":" parpadeará. Presione "cook temp" para ver la temperatura de cocción actual. La pantalla regresará a la cuenta regresiva del tiempo de cocción original después de 3 segundos.
- Page 78 INSTRUCCIONES DE FUNCIONAMIENTO • Si cocina otro lote de alimentos poco después de cocinar el primer lote, no es necesario precalentar inmediatamente ya que la Brio ya estará caliente. • Para cocinar alimentos por más tiempo, continúe cocinando en incrementos de 2 a 3 minutos hasta alcanzar la consistencia deseada.
- Page 79 INSTRUCCIONES DE FUNCIONAMIENTO Función de Programar El botón "program" representa memoria de entrada y memoria de recuperación. Introduzca la receta >> Presione "program" >> Presione "+" o "- " para elegir el número para guardarlo >> Presione "program". 1. Presione "stage". Se mostrarán "00:00", "time" y "stage 1". •...
- Page 80 INSTRUCCIONES DE FUNCIONAMIENTO Función de Rostizar 1. Presione "rotisserie". Se mostrarán "325F" y "temp" y el punto sobre "rotisserie" parpadeará. • El tiempo se establece en predeterminado por 1 hora. 2. Presione "cook temp" para ajustar la temperatura. • Con cada entrada de memoria se pueden almacenar hasta 10 funciones de cocción (tiempo de cocción, temperatura).
- Page 81 INSTRUCCIONES DE FUNCIONAMIENTO Ejemplo Rostizador por 1 hora para 350°F en la Etapa 2. 1. Presione "stage". Establezca el tiempo de cocción y la temperatura durante 10 minutos a 400ºF. 2. Presione "stage". 3. Presione "rotisserie". 4. Presione "cook time". •...
- Page 82 INSTRUCCIONES DE FUNCIONAMIENTO Ensamble del Asador Para ensamblar aves y otras carnes en el trinche del rostizador, siga los pasos e ilustraciones a continuación: Inserte la aguja del rostizador Empuje la aguja a través del en el extremo de la carne con centro de la carne hasta que el trinche rectangular como se atraviese la comida por completo...
- Page 83 INSTRUCCIONES DE FUNCIONAMIENTO Coloque el segundo trinche del Coloque el extremo rectangular rostizador en el otro extremo del trinche del rostizador de la aguja y empuje el trinche ensamblado en el orificio de hacia adelante hasta que perfore soporte del eje. (Vea la Fig. 3). el extremo de la carne.
-
Page 84: Cuidado Y Mantenimiento
CUIDADO Y MANTENIMIENTO Desconecte la Brio y asegúrese de que se enfríe completamente antes de retirar las piezas y limpiarla. 1. Con las asas, retire la Bandeja de la Base (con la Cesta Interior Antiadherente). 2. Levante la Cesta Interior Antiadherente y sáquela de la Bandeja de la Base. - Page 85 CUIDADO Y MANTENIMIENTO Almacenamiento Desenchufe la Brio y deje que la unidad se enfríe completamente. Asegúrese de que todas las piezas se hayan limpiado y secado. Almacene en un lugar fresco y seco. IMPORTANTE - No sumerja la Brio en agua ni intente hacer un ciclo en el lavavajillas.
-
Page 86: Solución De Problemas
SOLUCIÓN DE PROBLEMAS PROBLEMA POSIBLE CAUSA(S) SOLUCIÓN(ES) La Brio no está La Brio no está Inserte el enchufe en funcionando. enchufada. No una toma de corriente presionó "ON/OFF". con conexión a tierra La Cesta Interior apropiada. Presione "ON/ Antiadherente no está OFF". - Page 87 SOLUCIÓN DE PROBLEMAS PROBLEM POSSIBLE RESOLUTION(S) CAUSE(S) Sale humo blanco Se están friendo Al cocinar ingredientes del producto. alimentos grasientos. grasos en la Brio, grandes La Cesta Interior cantidades de aceite pueden Antiadherente o la fumar e infiltrarse en la Cesta Bandeja de la Base Interior Antiadherente o en contienen residuos...
- Page 88 SOLUCIÓN DE PROBLEMAS Póngase en contacto con el Servicio de Atención al Cliente si se pro- duce alguno de estos errores: Código Terminal del Corto circuito Error Sobrecalentamiento sensor abierta del sensor 88 Manual Del Usuario...
-
Page 89: Garantía Limitada
El fabricante proporcionará las piezas y el trabajo necesarios para reparar cualquier parte de la Freidora de Aire Digital NuWave Brio Healthy 10Q en el Departamento de Servicio de NuWave, LLC. Después de la expiración de la garantía, el costo de la mano de obra y las piezas será... - Page 90 GARANTÍA LIMITADA productos comprados a un distribuidor no autorizado. PARA OBTENER SERVICIO El propietario tendrá la obligación y la responsabilidad de: Pagar todos los servicios y partes no cubiertos por la garantía; Prepago del envío hacia y desde el Departamento de Servicio para cualquier parte o sistema devuelto bajo esta garantía;...
- Page 91 ACERCA DEL FUNCIONAMIENTO O LA GARANTÍA DEL PRODUCTO, CONTÁCTENOS A NUWAVE, LLC. LEA SU MANUAL DEL PROPIETARIO: Si aún tiene alguna pregunta sobre el funcionamiento o la garantía del producto, contacte a NuWave, LLC al: 1-877-689-2838 o envíe un correo electrónico a help@nuwavenow.com. Manual Del Usuario...
- Page 92 For patent information please go to: www.nuwavenow.com/legal/patent Designed and Developed in USA by: NuWave, LLC 1795 N. Butterfield Road Libertyville, IL 60048, U.S.A. Customer Service: 1-877-689-2838 • help@nuwavenow.com Item No: BM37100 Made in China Rev: 07 BS ©2019 NuWave, LLC • All Rights Reserved. 1-14-19...
Need help?
Do you have a question about the Brio 10Q and is the answer not in the manual?
Questions and answers