
Related Manuals for NuWave BRIO 6Q


Summary of Contents for NuWave BRIO 6Q
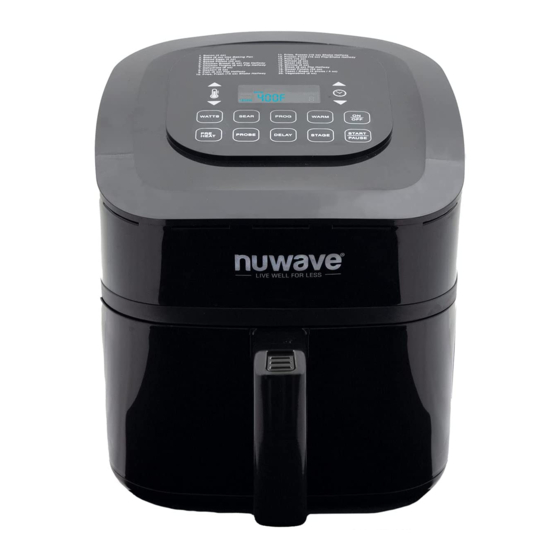
- Page 1 OWNER’S MANUAL & COMPLETE RECIPE BOOK Digital Air Fryer with Temperature Probe nuwavenow.com...
- Page 2 As a special thank-you for registering your NuWave unit, you’ll automatically receive an additional 6 months add- ed to your limited manufacturer’s warranty!* All you have to do is follow these simple steps. Using your smartphone or smart device, scan the QR code located on the unit label on the back of the unit.
- Page 3 for an additional months warranty! DOWNLOAD THE QR CODE APP TO YOUR MOBILE DEVICE Open your mobile app store (App Store, Google Play). Search for "QR code readers." QR code readers Simply download the QR code reader to your phone, open it, scan the code and you are ready to go.
- Page 4 OUR PRODUCTS OUR PRODUCTS Primo Brio Combo Grill Oven 3Q Air Fryer ® ® Model #: 20701 Model #: 36011 Brio Brio 4.5Q Air Fryer 6Q Air Fryer ® ® Model #: 36102 Model #: 37005 Brio ® Brio 10Q Air Fryer The Ultimate Air Fryer Oven ®...
- Page 5 Nutri-Pot ® Duet Pressure Cooker ™ & Air Fryer Combo 6Q Digital Pressure Cooker Model #: 33801 Model #: 33101 Nutri-Pot ® 8Q Digital Pressure Cooker Olio Rice & Multi-Cooker ™ Model #: 33201 Model #: 33701 Mosaic ™ Precision Induction Wok Jubilee Smokeless Grill ™...
-
Page 6: Model
OUR PRODUCTS PIC Flex (Induction Cooktop) PIC Pro Chef (Induction Cooktop) Model #: 30532 Model #: 30701 PIC Double (Induction Cooktop) BruHub 3-in-1 Coffee Maker ® Model #: 30602 Model #: 45011 Moxie Vacuum Moxie ® ® High-Performance High-Performance Blender Blender Model #: 28101 Model #: 28202... -
Page 7: Model
7-Piece 10.5-inch Duralon Non-Stick Cookware Duralon Non-Stick Everyday ® ® Model #: 31420 Model #: 31434 11-inch 9.5-inch Duralon Duralon Non-Stick Fry Pan Non-Stick Fry Pan ® ® Model #: 32708 Model #: 32707 8-inch 3-Quart Duralon Duralon Non-Stick Fry Pan Non-Stick Grill Pan ®... -
Page 8: Table Of Contents
TABLE OF CONTENTS OWNER’S MANUAL Important Safeguards ..........10-13 Parts & Accessories ............14-15 Assembly Guide ............16-17 Instructions..............18-32 Recipes Air-Fried Spinach Ravioli with Pesto Sauce.....34 Air-Fried Shrimp with Cocktail Sauce ......35 Bacon-Wrapped Scallops ..........36 BBQ Chicharrons .............37 BBQ Wings with Pink Peppercorns........38 Blue Bacon-Stuffed Mushrooms ........39 Cajun Roasted Potatoes ..........40 Cajun Salmon with Mustard Greens ........41... - Page 9 Five-Spice Duck Breast ...........55 Fried Pickles ..............56 Homemade Chicken Tenders with Honey Mustard ..57 Honey-Butter Pork Tenderloin ..........58 Italian Sausage with Rigatoni Pasta ........59 Jumbo Lump Crab Cakes ..........60 Korean Wings ..............61 Mongolian Beef ..............62 Mozzarella Sticks .............63 Polish Kielbasa with Peppers and Onions .......64 Reuben Sandwich ............65 Scotch Eggs ..............66 Sesame Beef ..............67...
-
Page 10: Important Safeguards
IMPORTANT SAFEGUARDS HOUSEHOLD USE ONLY • READ ALL INSTRUCTIONS BEFORE USE WARNING: When using the Brio, basic safety precautions should always be followed: 1. Do not touch hot surfaces. Use handles or knobs. 2. To protect against electrical shock, do not immerse cord, plugs, or the Brio in water or other liquids. - Page 11 14. Unplug the Brio from outlet when not in use and before cleaning. Allow the Brio to cool before cleaning, putting on or taking off parts. 15. Keep manual handy for future reference. ADDITIONAL SAFEGUARDS SEE INSTRUCTIONS BEFORE USE Electrical Information A short power-supply cord (or detachable power- supply cord) is provided to reduce the risk resulting from becoming entangled in or tripping over a...
-
Page 12: Important Safeguards
IMPORTANT SAFEGUARDS HOUSEHOLD USE ONLY • READ ALL INSTRUCTIONS BEFORE USE SAVE THESE INSTRUCTIONS Read and understand the entire manual before using the Brio. DO NOT USE THE UNIT FOR OTHER THAN INTENDED USE. Note: Put the Brio on a surface that is horizontal, even, and stable. - Page 13 9. Never use a towel or other material or object to block the air vents. 10. If any trouble arises during operation, any service MUST be done by NuWave LLC or authorized by the manufacturer for repairs. 11. The Brio is not intended to be operated by means of an external timer or separate remote-control system.
-
Page 14: Parts & Accessories
PARTS & ACCESSORIES 1. Bacon (4 oz) 11. Fries, Frozen (16 oz) Shake Halfway 2. Bake (8 oz) Use Baking Pan 12. Frozen Food (16 oz) 3. Baked Eggs (2 oz) 13. Pork (16 oz) 4. Baked Potato (32 oz) 14. - Page 15 Air Fryer Power Base Part #: 37210 Fry Pan Basket Part #: 37202 Fry Pan Basket Net Part #: 37204 Fry Pan Divider Part #: 37205 4 Silicone Tabs Part #: 37207 Base Tray Part #: 37201 Probe Part #: 36261 nuwavenow.com nuwavenow.com...
-
Page 16: Assembly Guide
ASSEMBLY GUIDE Assembling the Brio CAUTION: DO NOT use the Brio without the Base Tray and Fry Pan Basket with Net. DO NOT touch the insides of the Base Tray, Fry Pan Basket, and Net immediately after cooking. Parts will be hot. ONLY hold the Base Tray and Fry Pan Basket by the handle. - Page 17 For Best Results Shaking Food Some foods require shaking halfway through cooking. To properly shake the food, hold the handle, remove the Base Tray with Fry Pan Basket from the appliance, and shake. Once the food has been adequately shaken, slide the Base Tray with Fry Pan Basket back into the Brio.
-
Page 18: Instructions
INSTRUCTIONS Function Buttons ON/OFF: The ON/OFF button turns the unit on and off and stops all cooking functions. START/PAUSE: When the START/PAUSE button is pressed, the unit begins or pauses cooking. The START/PAUSE button is also used to mute and unmute the Brio’s beeping sounds for a quiet operation if desired. - Page 19 PROBE: Use the PROBE button to set the Digital Temperature Probe’s target temperature as-well-as to view the foods internal temperature during cooking. Use the [↑] and [↓] buttons to adjust the Digital Temperature Probe target temperature. Order of Cooking Sequence: 1.
- Page 20 INSTRUCTIONS 3. To un-pause and go back to cooking, slide the Fry Pan Basket with Base Tray back into the Brio or press the START/PAUSE button again. 4. Once the unit finishes cooking, the LED display will show End with three (3) beep sounds. 5.
- Page 21 Note: Cooking temperature can be adjusted at any time before or during the cooking process. Once the display is switched to temperature display, it will remain in the temperature display. TIME 1. To set a different cooking time, press the [↑] and [↓] buttons above and below the time icon.
- Page 22 INSTRUCTIONS • The unit will begin preheating to the set temperature. • The LED display will show set cooking/preheat temperature (flashing), pre, and temp. • During preheat the cooking temperature can be adjusted by using the [↑] and [↓] buttons above and below the temperature icon.
- Page 23 3. Adjust Stage 2 cooking temperature and time by using the [↑] and [↓] buttons. 4. To set additional stage cooking settings, repeat steps 2 and 3. The number above stage will change as you continue to press the STAGE button and set temperature and time.
- Page 24 INSTRUCTIONS SEAR Sear 1 will ALWAYS be directly before regular stage cooking and Sear 2 will ALWAYS be directly after regular stage cooking. Sear 1 Default sear 1 temperature is 400F and default sear 1 time is five (5) minutes (00:05). 1.
- Page 25 5. Press the START/PAUSE button to begin cooking. The LED display will show sear 1 (flashing), 2, time, and the set sear 1 time with the “:” flashing. 6. Once the Sear 1 cycle is complete the unit will beep one (1) time and automatically go into regular stage cooking.
- Page 26 INSTRUCTIONS WARM 1. Press the WARM button to engage the warm function and keep your food warm after cooking until you’re ready to serve. 2. The LED display will show 145F, temp and warm. 3. Use the [↑] and [↓] buttons above and below the temperature icon to adjust the warm temperature.
- Page 27 PROGRAM The PROGRAM button represents Memory Entry (the storage of frequently used cooking sequences) and Memory Recall (retrieval of cooking sequences). Program slots number 1~100 are designated for preset programs. Slots 101~200 are for your own unique programs. The unit comes with 100 pre-programed cooking recipes along with an additional 100 memory slots to add your own unique recipes the way you like them cooked.
- Page 28 INSTRUCTIONS 4. Use the [↑] and [↓] buttons to choose the desired program number to save the program to (101~200). 5. Press the PROGRAM button again to store and save the program to your chosen program number. The program is now stored and available for future recall. 6.
- Page 29 • Press the STAGE button, the LED display will show sear 1, Set sear 1 time, and time. • Press the STAGE button again, the LED display will show stage 1, det stage 1 time, and time. • Press the STAGE button a third time, the LED display will show stage 2, Set sear 2 time, and time.
- Page 30 INSTRUCTIONS • Press the PROGRAM button again to save and store the edits. 2. Edit During Cooking • During cooking, press the STAGE button until the function you would like to edit shows in the LED display. • Use the [↑] and [↓] buttons to adjust the cooking temperature and time.
- Page 31 PROBE Use the Digital Temperature Probe to accurately cook to your preferred internal temperature. To use the probe, connect the probe to the unit. 1. Set your cooking functions and stages as desired. 2. Press the PROBE button. The LED display with show current probe temperature, temp, and probe.
- Page 32 INSTRUCTIONS Probe Temp Guide Temp. Rare Medium Medium Medium Well Time °F °F Rare °F °F Well °F °F Minutes Chicken Breast 5 - 8 Steak 1" thick 3 - 8 Burgers ¼ lb 5 - 7 Pork Chops ¾" thick 5 - 7 Fish Fillets ½"...
-
Page 33: Recipes
Recipes nuwavenow.com nuwavenow.com... -
Page 34: Air-Fried Spinach Ravioli With Pesto Sauce
Air-Fried Spinach Ravioli with Pesto Sauce (Serves 4) Time and Temp: Prep: 15 minutes Cook: 9 minutes Temp: 350°F Ingredients: 2 c bread crumbs, Italian ¼ c Parmesan cheese 1 t olive oil 1 c buttermilk 24 spinach ravioli, fresh For Pesto Sauce: 1 c basil, fresh 3 cloves garlic... -
Page 35: Air-Fried Shrimp With Cocktail Sauce
Air-Fried Shrimp with Cocktail Sauce (Serves 4) Time and Temp: Prep: 10 minutes Cook: 5-7 minutes Temp: 400°F Ingredients: 1 lb raw shrimp (30-40 count), peeled, deveined, tails left of 1 t garlic powder ½ t black pepper 1 t sea salt 2 c panko bread crumbs 2 eggs, lightly beaten 1 c all-purpose flour... -
Page 36: Bacon-Wrapped Scallops
Bacon-Wrapped Scallops (Serves 4) Time and Temp: Prep: 8 minutes Cook: 5-6 minutes Temp: 400°F Ingredients: 20 raw sea scallops 5 slices bacon 1 t paprika Oil spray 20 toothpicks Directions: 1. Drain and rinse scallops. Place on paper towels to soak up moisture. -
Page 37: Bbq Chicharrons
BBQ Chicharrons (Serves 2) Time and Temp: Prep: 3 minutes Cook: 3 minutes Temp: 400°F Ingredients: ½ c pork rind pellets Cooking spray BBQ Seasoning: 2 T sea salt 2 T sugar 2 T smoked paprika 1½ T black pepper, ground 1 t onion powder 1 t garlic powder 1 t celery seeds... -
Page 38: Bbq Wings With Pink Peppercorns
BBQ Wings with Pink Peppercorns (Serves 2) Time and Temp: Prep: 5 minutes Cook: 20 minutes Temp: 400°F Ingredients: 1 lb chicken wings 1 t canola oil ¼ t fresh black pepper For Sauce: ½ c barbecue sauce 1 T green onion, thinly sliced 1 T pink peppercorns, slightly crushed Directions: 1. -
Page 39: Blue Bacon-Stuffed Mushrooms
Blue Cheese Bacon-Stuffed Mushrooms (Serves 2) Time and Temp: Prep: 10 minutes Cook: 15 minutes Temp: 350°F Ingredients: 6 large mushrooms 3 strips bacon 2 T butter ¼ c white onions, small dice 2 cloves garlic, minced ½ c blue cheese, crumbled ½... -
Page 40: Cajun Roasted Potatoes
Cajun-Roasted Potatoes (Serves 4) Time and Temp: Prep: 10 minutes Cook: 25 minutes Temp: 375°F Ingredients: 4 russet potatoes 2 T extra-virgin olive oil 1 T Cajun spice Sea salt Freshly ground black pepper Directions: 1. Scrub potatoes and cut into wedges. Place in a bowl and toss with olive oil until completely covered. -
Page 41: Cajun Salmon With Mustard Greens
Cajun Salmon with Mustard Greens (Serves 2) Time and Temp: Prep: 3 minutes Cook: 3 minutes Temp: 360°F Ingredients: 2 (8-oz) salmon fillets 1 T olive oil ¼ t smoked paprika ½ t seafood seasoning ¼ t cayenne pepper Cooking spray For Mustard Greens: 1 lb mustard greens, washed, torn into large pieces 3 cloves garlic, minced... -
Page 42: Char Siu
Char Siu (Serves 6) Time and Temp: Prep: 12 minutes Cook: 400°F 10 minutes, 320°F 10 minutes Total Cook: 20 minutes Temp: 400°F 10 minutes, 320°F 10 minutes Ingredients: 4 lbs pork belly, skin removed 4 T char siu sauce Sesame seeds Homemade Char Siu Sauce: 2 T Shaoxing cooking wine... -
Page 43: Chicago-Style Hot Dogs
Chicago-Style Hot Dogs (Serves 4) Time and Temp: Prep: 5 minutes Cook: 5 minutes Temp: 400°F Ingredients: 8 beef hot dogs 8 poppy seed hot dog buns ½ c yellow mustard ½ c neon-green relish ½ c yellow onions, diced 8 pickle spears 16 sport peppers 16 tomato wedges... -
Page 44: Chicken Cordon Bleu
Chicken Cordon Bleu (Serves 2) Time and Temp: Prep: 10 minutes Cook: 10-12 minutes Temp: 375°F Ingredients: 2 chicken breasts, boneless 1 slice ham 1 slice Swiss cheese 2 garlic cloves, minced, divided 1 egg, beaten ½ c breadcrumbs 1 T tarragon, dried 1 T thyme, dried 1 t parsley, finely chopped Sea salt and black pepper... -
Page 45: Chicken Fajita Egg Rolls
Chicken Fajita Egg Rolls (Serves 6) Time and Temp: Prep: 15 minutes Cook: 10 minutes Temp: 400°F Ingredients: 12 egg roll wrappers 1 red bell pepper, small dice 1 pkg. fajita seasoning 8 oz black beans, rinsed, drained 2 oz diced green chilies ½... -
Page 46: Chicken Parmesan With Marinara
Chicken Parmesan with Marinara (Serves 4) Time and Temp: Prep: 15 minutes Cook: 9 minutes Temp: 350°F Ingredients: 1lb chicken breasts, boneless, skinless, sliced horizontally (makes 4 pieces) 1 c panko bread crumbs ¾ c marinara sauce ½ c mozzarella cheese, shredded ½... -
Page 47: Chili-Coffee-Rubbed Ny Strip Steak
Chili-Coffee-Rubbed NY Strip Steak (Serves 2) Time and Temp: Prep: 3 minutes Cook: 5-7 minutes Temp: 400°F Ingredients: 2 (7-oz) NY strip steaks ¼ c espresso coffee powder ¼ c ancho chile powder ¼ c brown sugar, packed 2 T smoked paprika 2 T sea salt 1 T ground cumin Directions:... -
Page 48: Crab Rangoon
Crab Rangoon (Serves 4) Time and Temp: Prep: 15 minutes Cook: 9 minutes Temp: 350°F Ingredients: 8 oz cream cheese ½ c crab meat, drained, and crumbled 2 green onions, thinly sliced 2 t garlic, minced 2 t Worcestershire sauce ½... -
Page 49: Crispy Beef
Crispy Beef (Serves 4) Time and Temp: Prep: 6 minutes Cook: 6-8 minutes Temp: 360°F Ingredients: 1 lb beef sirloin tip, cut into 1-inch strips 1 (16-oz) jar cheese pasta sauce 1½ c soft bread crumbs 2 T olive oil ½... -
Page 50: Crispy Pork Chops With Roasted Broccoli Crowns
Crispy Pork Chops with Roasted Broccoli Crowns (Serves 6) Time and Temp: Prep: 15 minutes Cook: 33 minutes Temp: 400°F Ingredients: 2 T Parmesan cheese, 6 pork chops, boneless grated 2 eggs, beaten ½ t sea salt plus ¾t extra ½... -
Page 51: Croque Monsieur
Croque Monsieur (Serves 4) Time and Temp: Prep: 13 minutes Cook: 10 minutes Temp: 400°F Ingredients: Sandwich: 8 slices hardy sourdough bread 6 oz Gruyère cheese, grated ¼ c Parmesan cheese, grated 5 oz ham, thinly sliced Bechamel Sauce: 1½ c milk ¼... -
Page 52: Devils On Horseback
Devils on Horseback (Serves 10) Time and Temp: Prep: 13 minutes Cook: 10 minutes Temp: 400°F Ingredients: 40 dates, pitted, left whole ½ c blue cheese, crumbled 20 slices bacon, each cut in half Chives, thinly sliced (for garnish) Hoisin sauce, for dipping (optional) Directions: 1. -
Page 53: Filet Mignon
Filet Mignon (Serves 2) Time and Temp: Prep: 15 minutes Cook: 9 minutes Temp: 350°F Ingredients: 2 filet mignon steaks 2 slices thick bacon Olive oil Sea salt Freshly ground black pepper Toothpicks Directions: 1. Preheat Brio at 400°F for 15 minutes. 2. -
Page 54: Fish And Chips With Homemade Tartar Sauce
Fish and Chips with Homemade Tartar Sauce (Serves 4) Time and Temp: Prep: 10 minutes Cook: 15 minutes Temp: 360°F Ingredients: For Tartar Sauce: 2 catfish fillets ½ c mayonnaise ¼ c tortilla chips (optional) or 2 T pickles or cornichons, premade fries finely minced 4 slices of wholemeal bread... -
Page 55: Five-Spice Duck Breast
Five-Spice Duck Breast (Serves 2) Time and Temp: Prep: 10 minutes Cook: 12-14 minutes Temp: 400°F Ingredients: 2 duck breasts, boneless, skin on 6 T soy sauce 1 T Chinese five-spice 1 T mirin 1 T honey Sea salt and black pepper Directions: 1. -
Page 56: Fried Pickles
Fried Pickles (Serves 4) Time and Temp: Prep: 10 minutes Cook: 10 minutes Temp: 400°F Ingredients: 1 (32-oz) jar pickles, whole 1 c panko bread crumbs 2 eggs, beaten ⅓ c Parmesan cheese, grated ¼ t dill, dried Sea salt Directions: 1. -
Page 57: Homemade Chicken Tenders With Honey Mustard
Homemade Chicken Tenders with Honey Mustard (Serves 2) Time and Temp: Prep: 10 minutes Cook: 12-14 minutes Temp: 375°F Ingredients: Honey Mustard: 8 chicken tenders 1 T Dijon mustard 2 eggs, beaten 1 T honey 1 c bread crumbs 1 T white vinegar ½... -
Page 58: Honey-Butter Pork Tenderloin
Honey-Butter Pork Tenderloin (Serves 6) Time and Temp: Prep: 5 minutes Cook: 12-15 minutes Temp: 360°F Ingredients: 1 (1½-lb) pork tenderloin, trimmed ¾ c water 4 t butter 2 t honey ½ t Cajun seasoning ½ t black pepper, ground Directions: 1. -
Page 59: Italian Sausage With Rigatoni Pasta
Italian Sausage with Rigatoni Pasta (Serves 2) Time and Temp: Prep: 10 minutes Cook: 13-14 minutes Temp: 400°F Ingredients: 1 lb rigatoni pasta 1 lb Italian sausage, cooked and crumbled 2 basil leaves, chiffonade 1 bell pepper, sliced into strips 1 c grape tomatoes, each halved 1½... -
Page 60: Jumbo Lump Crab Cakes
Jumbo Lump Crab Cakes (Serves 4) Time and Temp: Prep: 15 minutes Cook: 10 minutes Temp: 360°F Ingredients: 1 egg 2 c cooked crab meat ½ c panko bread crumbs 1 T all-purpose flour plus 1c extra ½ c mayonnaise ½... -
Page 61: Korean Wings
Korean Wings (Serves 2) Time and Temp: Prep: 10 minutes Cook: 20 minutes Temp: 400°F Ingredients: 1 lb chicken wings 1 t canola oil ¼ t freshly ground black pepper For Sauce: 1½ T sambal 1 T Sriracha 1 T black bean paste Directions: 1. -
Page 62: Mongolian Beef
Mongolian Beef (Serves 4) Time and Temp: Prep: 10 minutes Cook: 10 minutes Temp: 400°F Ingredients: 2 lbs beef tenderloin beef chuck, cut into strips ¼ c cornstarch 2 T cooking oil 1 T fresh ginger, minced 1 T garlic, minced ½... -
Page 63: Mozzarella Sticks
Mozzarella Sticks (Serves 4) Time and Temp: Prep: 15 minutes Cook: 12 minutes Temp: 400°F Ingredients: 1 lb mozzarella cheese, whole brick 2 eggs 3 T nonfat milk 1 c plain bread crumbs 1 T basil, fresh, minced 1 T oregano, fresh, minced 1 T parsley, minced ¼... -
Page 64: Polish Kielbasa With Peppers And Onions
Polish Kielbasa with Peppers and Onions (Serves 6) Time and Temp: Prep: 5 minutes Cook: 10 minutes Temp: 400°F Ingredients: 1 red bell pepper, sliced into strips 1 green bell pepper, sliced into strips 1 red onion, sliced into strips 2 lbs Polish kielbasa, cut into coins Sea salt and freshly ground black pepper Cooking spray... -
Page 65: Reuben Sandwich
Reuben Sandwich (Serves 2) Time and Temp: Prep: 5 minutes Cook: 8 minutes Temp: 400°F Ingredients: 4 slices rye bread 10 slices corned beef 3 T of sauerkraut (with caraway seeds) 4 T Thousand Island dressing 4 slices of Swiss cheese Butter-flavored cooking spray Directions: 1. -
Page 66: Scotch Eggs
Scotch Eggs (Serves 6) Time and Temp: Prep: 5 minutes Cook: 10 minutes Temp: 360°F Ingredients: 6 hard-boiled eggs, peeled 3 eggs, raw, divided 1½ c bread crumbs, divided 1½ lbs pork sausage ½ c flour Cooking spray Directions: 1. In a large mixing bowl, combine 1 raw egg, ½c bread crumbs, and pork sausage. -
Page 67: Sesame Beef
Sesame Beef (Serves 4) Time and Temp: Prep: 10 minutes Cook: 5-7 minutes Temp: 400°F Ingredients: 1 lb beef strips, any cut of choice ¼ c soy sauce ¼ c ketchup 2 T honey 2 t sesame seed oil 1 T sesame seeds 2 t cornstarch Directions: 1. -
Page 68: Southern Fried Chicken Thighs
Southern Fried Chicken Thighs (Serves 6) Time and Temp: Prep: 15 minutes Cook: 9 minutes Temp: 350°F Ingredients: 6-8 chicken thighs, bone-in 2 c flour 1 c buttermilk 1 T garlic powder 1 T black pepper 1 T paprika 1 t sea salt 1 t onion powder 1 t cumin ½... -
Page 69: Spiced Avocado Fries With Creole Sauce
Spiced Avocado Fries with Creole Sauce (Serves 2) Time and Temp: Prep: 5 minutes Cook: 12 minutes Temp: 400°F Ingredients: 2 avocados 4 T ground coriander 3 limes, juice and zest 2 c oats 1 T dried or fresh basil 2 T taco seasoning Sea salt Freshly ground black pepper... -
Page 70: Spicy Rumaki
Spicy Rumaki (Serves 8) Time and Temp: Prep: 10 minutes Cook: 14-16 minutes Temp: 400°F Ingredients: ½ lb chicken livers, cleaned and rinsed, cut into ½-inch cubes 1 lb bacon slices, each cut into thirds 1 (5-oz) can whole water chestnuts, quartered 1 jalapeño pepper, thinly sliced 2 cloves garlic, minced 2 t fresh ginger, minced... -
Page 71: Stuffed Peppers
Stuffed Peppers (Serves 4) Time and Temp: Prep: 15 minutes Cook: 20 minutes Temp: 400°F Ingredients: 1 t sea salt 4 red bell peppers 1 t fresh ground 1 lb ground beef black pepper 1 white onion, minced 2 t Worcestershire sauce 3 cloves of garlic, minced 2 c cheddar cheese, 1 c tomato sauce, divided... -
Page 72: Sweet And Sour Chicken
Sweet and Sour Chicken (Serves 4) Time and Temp: Prep: 10 minutes Cook: 15-17 minutes Temp: 360°F Ingredients: 4 chicken breasts, boneless, skinless, large dice 2 cloves garlic, minced 1 red onion, large dice 1 red pepper, seeded, large dice 1 green pepper, seeded, large dice 1 c sugar ½... -
Page 73: Yakitori
Yakitori (Serves 6) Ingredients: ⅓C rice wine ½C sugar 2T ginger, minced 2t garlic, minced ⅓C soy sauce 2 lbs chicken, cut into strips Directions: 1. Combine rice wine, soy sauce, sugar, ginger, garlic, and soy sauce into a saucepan. Bring up to a boil until thickened. -
Page 74: Cleaning & Maintenance
CLEANING & MAINTENANCE CLEANING & MAINTENANCE Cleaning Clean the Brio after every use or in between a number of large batches. The Fry Pan Basket and the Base Tray have a non-stick coating with a stainless steel Basket Net. Do not use metal utensils or harsh abrasives when cleaning as this can damage the coating. -
Page 75: Troubleshoot Guide
TROUBLESHOOT GUIDE The Brio is not turning on or working. 1. The Brio is not plugged in. 2. Did not press “ON/OFF” button. 3. Base Tray with Fry Pan Basket is not in the Brio. 4. Insert the plug into an appropriate grounded power socket. - Page 76 TROUBLESHOOT GUIDE White smoke is coming out of the product. 1. You are frying greasy foods. The Fry Pan Basket and Fry Pan Basket Net or Base Tray contains greasy residue from previous uses. 2. When preparing greasy ingredients in the air fryer, large amounts of oil can smoke and infiltrate Fry Pan Basket.
- Page 77 Error Message: Solution(s): Probe not connected to the unit. Plug Prb1 the Brio into the appropriate power socket. The Probe target internal temperature is Prb2 set higher than set cooking temperature. Probe short Circuit. Contact Customer Service Department Prb3 at 1-877-689-2838 or help@ nuwavenow.com.
-
Page 78: Limited Warranty
Manufacturer will provide the necessary parts and labor to repair Manufacturer will provide the necessary parts and labor to repair any part of the Brio at NuWave LLC Service Department. After the any part of the Brio at NuWave LLC Service Department. After the... - Page 79 If you still have any questions about operation or warranty of the If you still have any questions about operation or warranty of the product, please contact NuWave LLC at: 1-877-689-2838 or product, please contact NuWave LLC at: 1-877-689-2838 or email help@nuwavenow.com.
-
Page 80: Spanish
MANUAL DEL PROPIETARIO Freidora de Aire Digital con Sensor Digital Integrado nuwavenow.com nuwavenow.com... - Page 81 Temp. Del Sensor Poco Bien Temp. Término Cocido Tiempo Cocido Punto Cocido °F °F Well °F Minutos °F Rare °F °F Pechuga de pollo 5 - 8 Bistec 1”de grosor 3 - 8 Hamburguesas ¼ lb 5 - 7 Pork Chops ¾" thick 5 - 7 Chuletas de Cerdo de 2 - 3...
- Page 82 QR ubicado en la etiqueta de su producto en la parte posterior de la unidad. Se le dirigirá a la página de registro del producto NuWave con el número de serie único de su producto que se ingresa automáticamente en el campo correspondiente.
- Page 83 !para una garantía !para una garantía adicional de adicional de meses meses DESCARGUE LA APLICACIÓN QR CODE EN SU DISPOSITIVO MÓVIL Abra su tienda de aplicaciones móviles (App Store, Google Play). Busque “lectores de códigos QR.” lectores de códigos QR Simplemente descargue el lector de códigos QR a su teléfono, ábralo y escanee el código, ya está...
-
Page 84: Medidas De Seguridad Importantes
MEDIDAS DE SEGURIDAD IMPORTANTES USO DOMÉSTICO SOLAMENTE • LEA TODAS LAS INSTRUCCIONES ANTES DE USAR Al usar unidades eléctricas, siempre se deben seguir las precauciones básicas de seguridad, incluidas las siguientes: 1. No toque las superficies calientes. Utilice mangos o perillas. 2. - Page 85 13. Desenchufe la Brio del contacto cuando no esté en uso y antes de limpiarla. Permita que la Brio se enfríe antes de limpiar, poner o quitar partes. 14. La Brio no está diseñada para ser operada por medio de un temporizador externo o un sistema de control remoto separado.
-
Page 86: Model
MEDIDAS DE SEGURIDAD IMPORTANTES USO DOMÉSTICO SOLAMENTE • LEA TODAS LAS INSTRUCCIONES ANTES DE USAR GUARDE ESTAS INSTRUCCIONES Lea y comprenda todo el manual antes de usar la Brio. NO UTILICE LA UNIDAD PARA OTRO USO QUE NO SEA EL PREVISTO. Nota: Coloque la Brio en una superficie que sea horizontal, uniforme y estable. - Page 87 8. Nunca use una toalla u otro material u objeto para bloquear las salidas de aire. 9. Si surge algún problema durante la operación, cualquier servicio DEBE ser realizado por NuWave LLC o autorizado por el fabricante para reparaciones. 10. El aparato no está diseñado para ser operado por medio de un temporizador externo o un sistema de control remoto separado.
- Page 88 PARTES Y ACCESORIOS PARTES Y ACCESORIOS 11. Fries, Frozen (16 oz) Shake Halfway 1. Bacon (4 oz) 2. Bake (8 oz) Use Baking Pan 12. Frozen Food (16 oz) 3. Baked Eggs (2 oz) 13. Pork (16 oz) 4. Baked Potato (32 oz) 14.
- Page 89 Base de Potencia de la Freidora de Aire Parte #: 37210 Canastilla Parte #: 37202 Malla de la Canastilla Parte #: 37204 Divisor de la Canastilla Parte #: 37205 4 Pestañas de Silicón Parte #: 37207 Bandeja de la Base Parte #: 37201 Sensor Parte #: 36261...
-
Page 90: Model
GUÍA DE MONTAJE GUÍA DE MONTAJE Montaje de la Brio PRECAUCIÓN: NO utilice la Brio sin la Bandeja de la Base o la Cesta con la Malla. NO toque el interior de la Bandeja de la Base, la Cesta ni la Malla inmediatamente después de cocinar. - Page 91 Mover los Alimentos Algunos alimentos requieren agitarse a la mitad de la cocción. Para agitar adecuadamente los alimentos, sostenga el asa, retire la Bandeja de la Base con la cesta de sartén del aparato y agite. Una vez que la comida se haya agitado adecuadamente, deslice la bandeja de la base con la...
- Page 92 INSTRUCCIONES INSTRUCCIONES Botones de Función ON/OFF: El botón ON/OFF enciende y apaga la unidad y detiene todas las funciones de cocción. START/PAUSE: Cuando se presiona el botón START/ PAUSE, la unidad inicia o hace una pausa en la cocción. El botón START/PAUSE también se usa para silenciar y activar el sonido de los pitidos del Brio para una operación silenciosa, si así...
- Page 93 PROGRAM: La unidad viene con 100 recetas de cocina preprogramadas junto con 100 ranuras de memoria adicionales para agregar sus propias recetas únicas a su gusto. Use el botón PROGRAM para encontrar o guardar recetas programadas. PROBE: Use el botón PROBE para configurar la temperatura objetivo de la sonda digital de temperatura, así...
- Page 94 INSTRUCCIONES START/PAUSE 1. Presione el botón de START/PAUSE para comenzar a cocinar. ":" parpadeará indicando que la unidad está cocinando. 2. Para hacer una pausa en la cocción, presione el botón de START/PAUSE o simplemente retire la cesta con la bandeja de la base.
- Page 95 6. Para detener el ciclo de demora en cualquier momento, simplemente presione el botón DELAY. La unidad finalizará el ciclo de demora y pasará directamente a la siguiente función de cocción. 7. Una vez transcurrido el tiempo de demora, la unidad pasará...
- Page 96 INSTRUCCIONES • 205° F - 275° F, el tiempo máximo de cocción es de 99 horas, 99 minutos (99:99). • 280° F - 345° F, el tiempo máximo de cocción es de 10 horas (10:00). • 350° F - 400° F, el tiempo máximo de cocción es de 1 hora (01:00).
- Page 97 • Si no se realiza ninguna acción en los cinco (5) minutos de espera, la unidad pasará automáticamente al modo de espera. 5. Coloque su comida en la unidad, deslice la canastilla con la bandeja de la base hacia atrás en el Brio. La unidad comenzará...
- Page 98 INSTRUCCIONES 6. Presione el botón de START/PAUSE para comenzar a cocinar. La unidad cocinará con los parámetros establecidos. 7. Cuando la unidad haya terminado de cocinar, la pantalla LED mostrará End y emitirá tres (3) pitidos. 8. El botón STAGE también se usa para desplazarse por la función de cocción que se ha configurado para una receta en particular.
- Page 99 4. Presione el botón de START/PAUSE para comenzar a cocinar. La pantalla LED mostrará sear 1 (flashing), time, y el tiempo de sellado (00:05 predeterminado) con el ":" parpadeando. 5. Una vez que se complete el ciclo Sear 1, la unidad pasará...
- Page 100 INSTRUCCIONES Sear 2 La temperatura de sear 2 predeterminada es 400F y el tiempo de sear 2 predeterminada son cinco ( 5 ) minutos (00: 05 ). 1. Presione el botón ON/OFF y ajuste la temperatura y el tiempo de cocción para la etapa 1 de cocción. 2.
- Page 101 5. Use los botones [↑] y [↓] encima y debajo del icono de tiempo para ajustar el tiempo de mantener caliente. 6. Presione el botón START/PAUSE para comenzar a cocinar. La unidad pasará por el ciclo de cocción de la etapa regular y luego se calentará a la temperatura establecida y al tiempo establecido.
- Page 102 INSTRUCCIONES Recuperación de Memoria Presione el botón PROGRAM. La pantalla LED mostrará prog y 1. 1. Use los botones [↑] y [↓] para elegir el número de programa que desea recuperar. Puede configurar los botones [↑] y [↓] (ícono de temperatura o ícono de tiempo) para desplazarse por los números de programa.
- Page 103 5. Presione el botón PROGRAM nuevamente para almacenar y guardar el programa en el número de programa elegido. El programa está ahora almacenado y disponible para su posterior recuperación. 6. La unidad continuará cocinando la receta programada. Programe su propia receta después de cocinar 1.
- Page 104 INSTRUCCIONES Ejemplo: • Use los botones [↑] y [↓] hasta que llegue al número del programa, como ejemplo usaremos # 114. • Presione el botón STAGE, la pantalla LED mostrará sear 1, Set sear 1 time y time. • Presione el botón STAGE nuevamente, la pantalla LED mostrará...
- Page 105 Edición de un Programa Puede editar los programas que creo antes o durante el proceso de cocción, y guardar los cambios. 1. Editar antes de cocinar • Presione el botón PROGRAM y busque el número de programa para editar usando los botones [↑] y [↓]. •...
- Page 106 INSTRUCCIONES Note: Guardar indica que ha habido un cambio en la configuración del programa durante la cocción. 3. Si ya ha guardado los cambios en un número de programa durante la cocción, no hay nada más que deba hacer. El programa editado está disponible para su posterior recuperación.
- Page 107 PROBE Use la sonda digital de temperatura para cocinar con precisión a su temperatura interna preferida. Para utilizar la sonda, conecte la sonda a la unidad. 1. Configure sus funciones y etapas de cocción como desee. 2. Presione el botón PROBE. La pantalla LED mostrará current probe temperature, temp y probe.
- Page 108 LIMPIEZA Y MANTENIMIENTO LIMPIEZA Y MANTENIMIENTO Limpieza Limpie el aparato después de cada uso o entre varios lotes grandes. La canastilla y la bandeja de la base tienen un revestimiento antiadherente con una cesta de acero inoxidable. No utilice utensilios metálicos o abrasivos fuertes al limpiar, ya que esto puede dañar el revestimiento.
- Page 109 GUÍA DE RESOLUCIÓN DE PROBLEMAS La Freidora Digital de Aire Brio no funciona. 1. El aparato no está conectado. No se presionó el botón ON/OFF. 2. No está la Canastilla en Brio. 3. Conecte la clavija en un contacto apropiado. Presione el botón ON/OFF después de seleccionar los ajustes.
- Page 110 SOLUCIÓN DE PROBLEMAS Sale humo blanco del aparato. 1. Está friendo alimentos grasosos. La Cacerola tiene residuos grasosos de los usos anteriores. 2. Cuando se preparen alimentos grasosos en Brio pueden surgir grandes cantidades de humo y adherirse a la Cacerola. La grasa producirá humo blanco y la Cacerola puede calentarse más de lo habitual.
- Page 111 Sensor de temperatura NTC sobrecalentado. Apague la unidad Err1 para enfriarla. Si la unidad no funciona después de enfriarse, póngase en contacto con Soporte de NuWave. Cortocircuito en el Sensor de Err1 temperatura NTC. Póngase en contacto con Soporte de NuWave.
- Page 112 La Freidora de Aire Digital NuWave Brio 6Q EL FABRICANTE GARANTIZA La Freidora de Aire Digital de 6Q NuWave Brio, incluida la bandeja de la base, el divisor, la canastilla, la malla y el sensor, deben estar libres de defectos del fabricante.
- Page 113 EL FUNCIONAMIENTO O LA GARANTÍA DEL PRODUCTO, CONTACTE A NUWAVE LLC. LEA SU MANUAL DEL USUARIO Si tuviera alguna duda sobre el funcionamiento o la garantía del producto, contacte a NuWave LLC al: 1-877-689-2838 o escriba a help@nuwavenow.com. nuwavenow.com nuwavenow.com...
-
Page 114: Presets & Notes
100 PRESETS Quick Meals 1. Bacon (4oz) 2. Bake (8oz) 3. Baked Eggs (2oz) 4. Baked Potato 5. Chicken Breast (8oz) 6. Chicken Thighs (8oz) 7. Dehydrate (8oz) 8. Dessert (8oz) 9. Fish (6oz) 10. Fries, Fresh (16oz) Shake Halfway 11. - Page 115 Cooking Temp. Probe Temp. Time 400°F 5 minutes 400°F 40 minutes 400°F 6 minutes 380°F 15 minutes 380°F 15 minutes 400°F 12 minutes 390°F 6 minutes 400°F 15 minutes 370°F 15 minutes 400°F 5 minutes 250°F 12 minutes 400°F 5 minutes 400°F 10 minutes 400°F...
- Page 116 100 PRESETS 30. Green Beans 31. Kale Leaves 32. Mushrooms 33. Onions (pearl) 34. Parsnips (1/2-inch cubes) 35. Peppers (1/2-inch cubes) 36. Potatoes (small baby 1.5 lbs) 37. Potatoes (1-inch cubes) 38. Squash (1/2-inch cubes) 39. Sweet Potato (baked whole) 40.
- Page 117 400°F 5 minutes 250°F 12 minutes 400°F 5 minutes 400°F 10 minutes 400°F 15 minutes 400°F 15 minutes 400°F 15 minutes 400°F 12 minutes 400°F 12 minutes 400°F 32 minutes 400°F 4 minutes 400°F 12 minutes Cooking Temp. Probe Temp. Time 370°F 165°F...
- Page 118 100 PRESETS Beef 60. Burger (4 oz) 61. Beef Eye Round Roast (4 lbs) 62. Filet Mignon (8 oz) 63. Flank Steak (1.5 lbs) 64. London Broil (2 lbs) 65. Meatballs (1-inch) 66. Meatballs (3-inch) 67. Ribeye, bone-in (20 oz) 68.
- Page 119 Cooking Temp. Probe Temp. Time 370°F 125°F/MR 55 minutes 390°F 125°F/MR 6 minutes 400°F 125°F/MR 8 minutes 400°F 125°F/MR 12 minutes 400°F 125°F/MR 12 minutes 380°F 125°F/MR 10 minutes 380°F 125°F/MR 22 minutes 400°F 125°F/MR 10 minutes 400°F 125°F/MR 15 minutes Cooking Temp.
- Page 120 100 PRESETS 89. Frozen Chicken Patty 90. Mozzarella Sticks (10 oz) Dehydrated Food 91. Kale Chips 92. Mushrooms 93. Apple 94. Banana 95. Beef Jerky 96. Granola 97. Kiwi 98. Mango 99. Orange 100. Sundried Tomatoes NOTES Food 100 presets...
- Page 121 400°F 8 minutes 400°F 8 minutes 125°F 10 hours 125°F 2½ hours 125°F 8 hours 135°F 8 hours 135°F 8 hours 160°F 8 hours 115°F 8 hours 135°F 6 hours 135°F 10 hours 125°F 10 hours 145°F 8 hours Cooking Temp. Probe Temp.
- Page 122 NOTES Food 100 presets...
- Page 123 Cooking Temp. Probe Temp. Time nuwavenow.com nuwavenow.com...
- Page 124 For patent information please go to: www.nuwavenow.com/legal/patent Designed & Developed in USA by: NuWave LLC 1795 N. Butterfield Road Libertyville, IL 60048, U.S.A. Customer Service: 1-877-689-2838 • help@nuwavenow.com Item No: BM 37005 Made in China Rev. 09-OG ©2019 NuWave LLC • All Rights Reserved. 05-16-19...
Need help?
Do you have a question about the BRIO 6Q and is the answer not in the manual?
Questions and answers