
Related Manuals for Motorola Milestone GSM 850


Summary of Contents for Motorola Milestone GSM 850
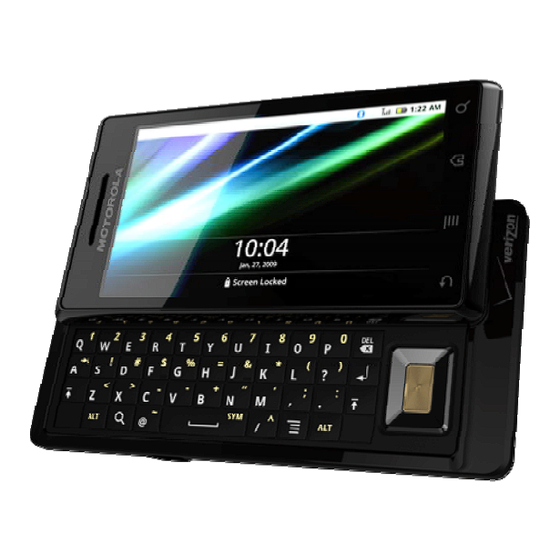
- Page 1 Assembly/Disassembly Manual Motorola Milestone GSM 850, 900,1800,1900, UMTS 2100, 1900, 850, Diversity 2100, aGPS...
- Page 2 Assembly/Disassembly Manual – Motorola Milestone MOTOROLA and the Stylized M Logo are registered in the US Patent & Trademark Office. All other product or service names are the property of their respective owners. The Bluetooth trademarks are owned by their proprietor and used by Motorola, Inc. under license. © Motorola, Inc.
-
Page 3: Table Of Contents
Assembly/Disassembly Manual – Motorola Milestone Table of Contents Tools and Test Equipment......................4 Disassembly ..........................5 Removing the Battery Cover and Battery ................6 Removing the Rear housing ....................8 Removing the Main PCB ..................... 13 Removing Camera Assembly....................16 Removing the Keyboard Frame ................... -
Page 4: Tools And Test Equipment
Assembly/Disassembly Manual – Motorola Milestone Tools and Test Equipment The following table lists tools and test equipment recommended for disassembly and reassembly of DROID telephones. Use either the listed items or equivalents. Table 1. General Test Equipment and Tools Motorola Part Number... -
Page 5: Disassembly
Assembly/Disassembly Manual – Motorola Milestone Disassembly The procedures in this section provide instructions for the disassembly/ assembly of DROID phones. Tools and equipment used for the phone are listed in Table 1, preceding. Many of the integrated devices used in this equipment are vulnerable to damage from electrostatic discharge (ESD). -
Page 6: Removing The Battery Cover And Battery
Assembly/Disassembly Manual – Motorola Milestone Removing the Battery Cover and Battery All batteries can cause property damage and/or bodily injury, such as burns if a conductive material, such as jewelry, keys, or beaded chains touch exposed terminals. The conductive material may complete an electrical circuit (short circuit) and become quite hot. - Page 7 Assembly/Disassembly Manual – Motorola Milestone 4. Lift the top edge of the battery first then lift it completely out of the battery compartment. Figure 3. Removing the battery There is a danger of explosion if the Lithium Ion battery is replaced incorrectly. Replace only with the same type of battery or equivalent as recommended by the battery manufacturer.
-
Page 8: Removing The Rear Housing
Assembly/Disassembly Manual – Motorola Milestone Removing the Rear housing This product contains static-sensitive devices. Use anti-static handling procedures to prevent electrostatic discharge (ESD) and component damage. 1. Using the flat wedge tool, remove the camera/flash lens cover by prying from illustrated corner. - Page 9 Assembly/Disassembly Manual – Motorola Milestone 3. Using a flat wedge tool, pry of the antenna cap. Do not reuse antenna cap Figure 6. Removing the antenna cap 4. Using a flat wedge tool, pry off the battery label. Figure 7. Removing the battery label...
- Page 10 Assembly/Disassembly Manual – Motorola Milestone 5. Using a Torx driver with a T-5 bit, remove 7 screws of the phone. Discard screws. Do not reuse. Figure 8. Remove main screws (7 points) 6. Pry away the housing center hook feature.
- Page 11 Assembly/Disassembly Manual – Motorola Milestone 7. Using a flat wedge tool, starting near the headset disengage the locking tab by prying 45 degrees. Figure 10. Releasing locking tab near headset jack 8. Continue sliding the wedge tool around near the USB connector and disengage the next locking tab.
- Page 12 Assembly/Disassembly Manual – Motorola Milestone 9. Continue releasing the next tab at the bottom side of the phone. Figure 12. Releasing locking tab near bottom side 10. Release the next tab located next to the volume keys. Figure 13. Releasing locking tab near volume key 11.
-
Page 13: Removing The Main Pcb
Assembly/Disassembly Manual – Motorola Milestone 12. Slowly lift up the rear housing pivoting from the bottom edge and shift housing side to side until bottom snaps are released. Do not use prying tools at the bottom edge of the housing as it may cause damage to the main antenna coating of the acoustic assembly Figure 15. - Page 14 Assembly/Disassembly Manual – Motorola Milestone 2. Using a torx driver with T5IP bit, remove the 3 PCBscrews. Figure 17. Removing PCB screws (3 points) 3. Using a flat wedge tool, pry off the side key flex connector. Figure 18. Disengage side key flex connector...
- Page 15 Assembly/Disassembly Manual – Motorola Milestone 4. Using a flat wedge tool, pry off the slider flex connector. Figure 19. Disengaging slider flex connector 5. Carefully fold over the main PCB and disconnect the keyboard connector. Figure 20. Disengaging keyboard flex connector...
-
Page 16: Removing Camera Assembly
Assembly/Disassembly Manual – Motorola Milestone 6. Using a pointed tool, pry off main PCB shield. Figure 21. Removing PCB shield Removing Camera Assembly 1. Using a flat wedge tool, pry off the camera assembly connector. Figure 22. Removing camera assembly flex... - Page 17 Assembly/Disassembly Manual – Motorola Milestone 2. Lift away the connector rubber seal to remove. Figure 23. Removing the connector rubber seal October 27, 2009...
-
Page 18: Removing The Keyboard Frame
Assembly/Disassembly Manual – Motorola Milestone Removing the Keyboard Frame 1. Using a pointed tool, remove all side buttons. Figure 24. Removing Power/Lock key Figure 25. Removing Volume keys October 27, 2009... - Page 19 Assembly/Disassembly Manual – Motorola Milestone Figure 26. Removing camera key 2. Using a pointed tool, release the RF coax cable from the 2 retaining clips. Figure 27. Removing the RF coax cable 3. Using a flat wedge tool, disengage the RF coax connector.
- Page 20 Assembly/Disassembly Manual – Motorola Milestone 4. Using a flat wedge tool, pry off the vibrator flex cable. Figure 29. Disengaging the vibrator flex cable 5. Using a pointed tool, peel off the water seal adhesive. Figure 30. Removing the water seal adhesive 6.
-
Page 21: Removing The Slider Assembly
Assembly/Disassembly Manual – Motorola Milestone Removing the slider assembly 1. While the slider is closed, using a driver with JIS #00 cross bit, remove the 4 indicated screws. Due to high torque settings, approximately 7 lbs (31 N) of downward force is required to remove screws. - Page 22 Assembly/Disassembly Manual – Motorola Milestone 3. Fully open the slide to gain access to the final screw. 4. Using the driver with JIS #00 cross bit, remove the final screw. Figure 34. Removing slider screw (1 points) 5. Using a flat wedge tool, pry off the dynamic flex metal cover.
- Page 23 Assembly/Disassembly Manual – Motorola Milestone 6. Carefully peel away the dynamic flex from the chassis in the direction shown to prevent damage. Figure 36. Lifting dynamic flex from chassis 7. Carefully separate the slider chassis from the slider housing and using a flat wedge tool, reach inside to lift dynamic flex away from chassis.
- Page 24 Assembly/Disassembly Manual – Motorola Milestone 8. Reach further inside to lift the second area of adhesive for the dynamic flex. Figure 38. Lifting the second adhesive from the dynamic flex 9. Open the slider in a position where the dynamic flex openings for the slider plate and slider chassis are aligned.
- Page 25 Assembly/Disassembly Manual – Motorola Milestone 10. Carefully feed the dynamic flex through the opening. Figure 40. Feeding dynamic flex 11. Slide the slider plate to separate from slider chassis. Figure 41. removing slider plate October 27, 2009...
-
Page 26: Remove Dynamic Flex
Assembly/Disassembly Manual – Motorola Milestone Remove Dynamic Flex 1. Using tweezers, peel the water ingress seal starting from the illustrated corner. Figure 42. Removing water ingress seal (display connector side) 2. Using tweezers, lift the zip connector latch then pull the display flex away from the connector. - Page 27 Assembly/Disassembly Manual – Motorola Milestone Figure 44. Removing the water ingress seal (ITO connector side) 4. Using a pointed tool, lift the ZIF connector lock and then pull the ITO flex away from the connector. Figure 45. Removing the ITO flex connector 5.
-
Page 28: Removing The Display Module
Assembly/Disassembly Manual – Motorola Milestone 6. Carefully peel away the dynamic flex from the display module. Figure 47. Removing dynamic flex Removing the Display module 1. Using a flat wedge tool, carefully pry the display off the slider housing. Figure 48. Removing display module... -
Page 29: Removing Keypad, Mylar, And Keypad Flex
Assembly/Disassembly Manual – Motorola Milestone 2. Carefully lift the display module as illustrated. Figure 49. Lifting the display module Removing Keypad, Mylar, and Keypad flex 1. Using a pointed tool, separate the keypad from the mylar starting from the illustrated corner. - Page 30 Assembly/Disassembly Manual – Motorola Milestone 3. Continue lifting the keypad as you slide around the navigation key. Figure 51. Continue lifting keypad around navigation key 4. Continue lifting from the top edge. and then completely remove when the end is reached.
- Page 31 Assembly/Disassembly Manual – Motorola Milestone 5. Using a pointed tool, separate the EL panel from the keypad flex, then peel off. Figure 53. Removing EL panel 6. Using a pointed tool, lift the keypad flex from the slider chassis. Figure 54. Lifting the keypad flex...
-
Page 32: Removing Headset Jack
Assembly/Disassembly Manual – Motorola Milestone 7. After lifting the keypad flex from the slider chassis, feed the flex through the chassis opening as illustrated. Remove the foam pad from the flex connector for easier removal if the flex assembly is going to be reused Figure 55. -
Page 33: Assembly
Assembly/Disassembly Manual – Motorola Milestone Assembly Slider Outer Assembly 1. Apply 3M CA-100 glue to magnet cavity. Figure 57. Gluing magnet 2. Place magnet in cavity and wipe off excess glue. Figure 58. Place magnet 3. Place earpiece speaker grill on alignment fixture, the place slider housing over fixture and manually press in area to activate adhesive. - Page 34 Assembly/Disassembly Manual – Motorola Milestone 4. Place an adhesive strip in the plastic insert mold for the slider side stoppers. Remove adhesive backing. Figure 60. Slider side stopper adhesive (4 points) 5. Place 4 plastic slider stoppers in the illustrated locations. Insure that the orientation is correct.
-
Page 35: Lens Assembly
Assembly/Disassembly Manual – Motorola Milestone 7. Place slider housing over LCD gasket alignment fixture and manually press. Figure 63. Pressing slider housing over LCD gasket Lens Assembly 1. Remove the adhesive backing of the main lens assembly. Insure that the work station is free of dust and no foreign materials are introduced when working with lens assemblies Figure 64. - Page 36 Assembly/Disassembly Manual – Motorola Milestone 2. Starting at the top of the slider housing, align lens to housing. Insure that the ITO flex is fed through the housing opening Figure 65. Aligning main lens Figure 66. ITO fed through opening 3.
-
Page 37: Display Assembly
Assembly/Disassembly Manual – Motorola Milestone 4. Place the grounding adhesives on the slider housing as illustrated. Figure 68. Place ground adhesives Avoid touching the inside lens and prevent any foreign materials from sitting on the lens Display Assembly 1. Remove any foreign materials from lens and display air or a lens cloth. -
Page 38: Hydra-Flex Assembly
Assembly/Disassembly Manual – Motorola Milestone Hydra-flex Assembly 1. Before placing Hydra-flex, insure that non-conductive adhesives are placed in illustrated areas. Figure 70. Placing adhesives on hydra-flex 2. Also insure that ground adhesives are placed on the other side of the hrdra-flex. - Page 39 Assembly/Disassembly Manual – Motorola Milestone 4. Remove earpiece speaker adhesive backing and align speaker to slider housing. 5. Press in speaker area to activate adhesive. Figure 73. Pressing earpiece speaker 6. Insert the ITO flex in connector and lock ZIF connector. Insure white line indicator is aligned with ZIF connector.
- Page 40 Assembly/Disassembly Manual – Motorola Milestone 8. Place a pad over the display flex as illustrated. Figure 76. Placing a pad over display flex 9. Place a water ingress seal over the display connector as illustrated. Press in surrounding areas to insure good adhesion.
-
Page 41: Slider Assembly
Assembly/Disassembly Manual – Motorola Milestone 11. Place a water detect indicator and pad over the ITO ingress seal. Figure 79. Placing pad and water detect indicator Slider Assembly 1. Remove the backing of the EL dome assembly and place in alignment fixture. - Page 42 Assembly/Disassembly Manual – Motorola Milestone 3. Using a press fixture, press assembly and hold for 5 seconds. Figure 82. Press keyboard assembly 4. Place a pad and kapton tape in illustrated areas. Figure 83. Placing a pad and kapton tape on slider chassis 5.
- Page 43 Assembly/Disassembly Manual – Motorola Milestone 6. Using the alignment posts, align the slider chassis and the keyboard flex assembly over the alignment fixture. Figure 85. Aligning the slider chassis and keyboard flex assembly 7. Place a pad and speaker grill on the slider plate as illustrated.
- Page 44 Assembly/Disassembly Manual – Motorola Milestone 9. Place a pad over the metal stiffener of the keyboard flex assembly connector. Figure 88. Placing pad over metal stiffener 10. Remove the adhesive backing for the ground tape. Figure 89. Removing backing for ground tape 11.
- Page 45 Assembly/Disassembly Manual – Motorola Milestone 12. Carefully feed the dynamic flex through the slider opening. Figure 91. Feeding dynamic flex 13. Carefully pull the dynamic flex through the opening. Use caution when pulling dynamic flex through opening to prevent damage Figure 92.
- Page 46 Assembly/Disassembly Manual – Motorola Milestone Using a driver with JIS #00 cross bit and torque setting of 1.8 in-lbs(20.34 N-cm), install 4 screws in the indicated order. Figure 94. Installing slider screws (4 points) 15. Fully open the slide and install the next screw using the same bit size and settings.
- Page 47 Assembly/Disassembly Manual – Motorola Milestone 17. Fully close the slider and using the same bit size and setting, install the screws in the indicated order. Figure 97. Install slider screws at bottom (4 points) 18. Remove the adhesive backing and use the alignment holes to position the dynamic flex to the slider chassis.
- Page 48 Assembly/Disassembly Manual – Motorola Milestone 19. Press on the dynamic flex to activate adhesive. Also push down any excess flex into the slider slot. Press excess Figure 99. Pressing on dynamic flex 20. Slide the dynamic flex retaining clip in the direction illustrated.
-
Page 49: Main Pcb Assembly
Assembly/Disassembly Manual – Motorola Milestone Main PCB Assembly 1. Slightly open the slider. Figure 101. Opening slider 2. Assemble the front housing to the slider assembly by latching to the hooks (1) and aligning to the screw openings (2). Figure 102. Aligning front housing to slider... - Page 50 Assembly/Disassembly Manual – Motorola Milestone 3. Guide the 3 flex assemblies on the inside of the front housing. Figure 103. Guiding flexes to inside of housing 4. Lift the side flex connector to insure it lays over the housing. Insure that side flex connector is not under housing Figure 104.
- Page 51 Assembly/Disassembly Manual – Motorola Milestone 5. Press down on Front housing to fully seat on slider assembly. Figure 106. Fully seat front housing on slider assembly 6. Place foam coax support on slider assembly. Figure 107. Foam support 7. Place rubber grommet around USB connector.
- Page 52 Assembly/Disassembly Manual – Motorola Milestone 9. Attached camera assembly to main board. Figure 110. Attaching camera assembly 10. Clip the boot strap over the main board shields. Figure 111. Attaching the boot strap 11. Flip main board over to the other side and wrap board grommet around the BTB connectors.
- Page 53 Assembly/Disassembly Manual – Motorola Milestone 12. Position main board at a 90 degree angle and attach the dynamic flex connector. Insure that all flex connectors fully snap into place Figure 113. Connecting the dynamic flex connector 13. Connect the side button flex connector.
- Page 54 Assembly/Disassembly Manual – Motorola Milestone 15. Fold over the main board on the slider assembly. Figure 116. Placing main board 16. Press down on the main board to insure it’s seated and aligned properly. Figure 117. Aligning main board 17. Using a driver with T5IP torx bit, install 3 PCB screws in the indicated order with a torque setting of 1.0 in-lbs (11.30 N-cm).
-
Page 55: Antenna / Acoustic Chamber Assembly
Assembly/Disassembly Manual – Motorola Milestone Antenna / Acoustic Chamber Assembly 1. Remove the adhesive backing from the audio gasket and place in alignment fixture. Figure 119. Audio gasket alignment 2. Using the alignment fixture, place the audio board over the audio gasket and press to activate adhesive. - Page 56 Assembly/Disassembly Manual – Motorola Milestone 6. Remove the backing of the loudspeaker adhesive and place over alignment fixture. Figure 123. Placing loudspeaker adhesive 7. Using the alignment fixture, place the loudspeaker over the adhesive layer and press. Figure 124. Applying adhesive layer to loudspeaker 8.
- Page 57 Assembly/Disassembly Manual – Motorola Milestone 10. Remove the adhesive backing from the audio board assembly. Figure 127. Placing adhesive on audio board 11. While holding the side flex up, attach the audio board to the main assembly. Figure 128. Placing audio board 12.
-
Page 58: Rear Housing Assembly
Assembly/Disassembly Manual – Motorola Milestone 13. Attach the side flex connector. Avoid any scratches or damage to acoustic chamber antenna coating Figure 130. Attaching the side flex connector Rear Housing Assembly 1. Apply a water detect indicator in the indicated area. - Page 59 Assembly/Disassembly Manual – Motorola Milestone 3. Install the RF coax cable with the connector that does not have a black marking on the audio board antenna connector. No mark Figure 133. Attaching RF coax connector on audio board 4. Clamp the RF coax wire to the indicated clip.
- Page 60 Assembly/Disassembly Manual – Motorola Milestone 6. Attach the RF coax connector with a black marking on the main board RF connector. Black marking Figure 136. Attaching RF coax to main board 7. Position the RF coax cable so that it runs along the foam guides.
- Page 61 Assembly/Disassembly Manual – Motorola Milestone 9. Place volume key in the correct orientation. Notch Figure 139. Placing volume key 10. Place the power key in the correct orientation. Figure 140. Placing Power Key 11. Place adhesive strip on rear housing.
- Page 62 Assembly/Disassembly Manual – Motorola Milestone 12. Place headset jack on housing. Press to insure good adhesion. Figure 142. Placing headset jack 13. Insure that the headset jack is flush with the housing. Figure 143. Headset flush with housing 14. Blow air in flash and camera lens area to insure no foreign materials are present.
- Page 63 Assembly/Disassembly Manual – Motorola Milestone 15. Perform a final inspection to insure that the side keys are placed, acoustic assembly is aligned, SD card insulator is placed, and rubber connector cover is placed. Figure 145. Final inspection before assembly 16. Starting from the camera side, attach the rear housing to the assembly.
- Page 64 Assembly/Disassembly Manual – Motorola Milestone 18. Press the rest of the rear housing against the front housing assembly until all side locking tabs are engaged. Figure 148. Assembly of rear housing 19. Carefully push the rear housing hook into the screw post.
-
Page 65: Final Assembly
Assembly/Disassembly Manual – Motorola Milestone Final Assembly 1. Remove the adhesive backing and attach the antenna cap as illustrated. Figure 151. Attaching antenna cap 2. Insert the battery label tab in the corner near the SD card holder. Figure 152. Insert battery label tab 3. - Page 66 Assembly/Disassembly Manual – Motorola Milestone 4. Press on battery label to insure good adhesion. Figure 154. Press on battery label 5. Position the slider in a fully open position. Figure 155. Slider in open position 6. Slide the keypad under the slider edge and press into position.
- Page 67 Assembly/Disassembly Manual – Motorola Milestone 7. Beginning from the camera side, attach the camera/flash cover on the housing and press to insure good adhesion. Figure 157. Placing camera/flash cover 8. Starting from one side, attach the speaker grill and press to insure good adhesion.
- Page 68 Assembly/Disassembly Manual – Motorola Milestone 10. Using the lens cover press, press the lens cover for 5 seconds. Figure 160. Press lens cover (Required Fixture) October 27, 2009...
Need help?
Do you have a question about the Milestone GSM 850 and is the answer not in the manual?
Questions and answers