Table of Contents
Advertisement
Quick Links
Owner's Instruction and Operation Manual
Model Number:
CGPS2100
5770
Report #: F20-578
Certified to ASTM E1509-2022 and CAN/ULC
S627:2023
Mobile Home / Transportable Building Approved
* All Pictures In This Manual Are For Illustrative Purposes Only. Actual Product May Vary.
Save These Instructions In A Safe Place For Future Reference.
SAFETY NOTICE: If this heater is not properly installed, a house fire may result. For
your safety, follow the installation instructions. Never use make-shift compromises
during the installation of this heater. Contact local building or fire officials about
permits, restrictions and installation requirements in your area. NEVER OPERATE
THIS PRODUCT WHILE UNATTENDED.
CAUTION! Please read this entire manual before you install or use your new room
heater. Failure to follow instructions may result in property damage, bodily injury, or
even death. Improper Installation Will Void Your Warranty!
U.S. Environmental Protection Agency
Certified to comply with 2020 particulate
emissions standards.
THIS MANUAL IS SUBJECT TO CHANGE WITHOUT NOTICE.
World Marketing of America, Inc, 12256 William Penn Hwy, Mill Creek, PA 17060
R
Email: info@worldmkting.com PH: 1-800-776-9425
CALIFORNIA PROPOSITION 65 WARNING:
This product can expose you to chemicals including carbon
monoxide, which is known to the State of California to cause
cancer, birth defects, and/or other reproductive harm. For
more information, go to
854127-1902N
www.P65warnings.ca.gov
Advertisement
Table of Contents

Related Manuals for Comfort Glow CGPS2100


Summary of Contents for Comfort Glow CGPS2100
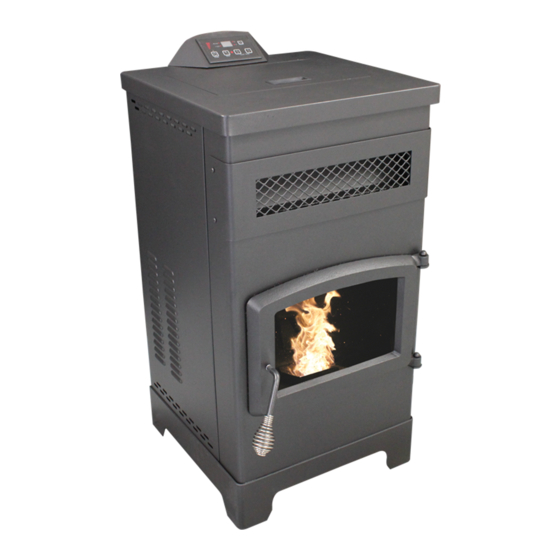
- Page 1 Owner’s Instruction and Operation Manual Model Number: CGPS2100 5770 Report #: F20-578 Certified to ASTM E1509-2022 and CAN/ULC S627:2023 Mobile Home / Transportable Building Approved * All Pictures In This Manual Are For Illustrative Purposes Only. Actual Product May Vary.
-
Page 2: Specifications
Your pellet stove has been approved for installation in the USA and Canada. It may also be installed in a manufactured or mobile home. This manual describes the installation and operation of the Comfort Glow, CGPS2100, 5770 wood heater. This heater meets the 2020 US Environmental Protection Agency’s wood pellet emissions limits for wood heaters sold after May 15, 2020. -
Page 3: Installation Checklist
INSTALLATION CHECKLIST Your Wood Stove should be installed by a qualified installer only. An NFI qualified Installer can be found at www.nficertified.org/public/find-an-nfi-pro/ CUSTOMER SERVICE 1-800-776-9425 COMMISSIONING CHECKLIST This checklist is to be completed in full by the qualified person who installs this unit. Keep this page for future reference. Failure to install and commission according to the manufacturer’s instructions and complete this checklist will invalidate the warranty. -
Page 4: Installation
INSTALLATION CAUTION: SAFETY NOTICE BURNING FUEL CREATES CARBON MONOXIDE AND • IF THIS STOVE IS NOT PROPERLY INSTALLED, A CAN BE HAZARDOUS TO YOUR HEALTH IF NOT HOUSE FIRE MAY RESULT. TO REDUCE THE RISK OF PROPERLY VENTED. FIRE, FOLLOW THE INSTALLATION INSTRUCTIONS. •... -
Page 5: Outside Air Supply
INSTALLATION of the fuel loading and ash removal openings. Floor protection must extend under and 2” (51 mm) to each side of the chimney tee for an interior vertical installation. Canada: Require a minimum of 475 mm [18”] beyond the front of the unit and 203 mm [8”] beyond each side of the unit. -
Page 6: Venting Requirements
INSTALLATION SECURING APPLIANCE TO THE FLOOR VENTING REQUIREMENTS Use the designated holes to secure the unit to the floor. WARNING: • INSTALL VENT AT CLEARANCES SPECIFIED BY THE VENT MANUFACTURER. • DO NOT CONNECT THE PELLET VENT TO A VENT SERVING ANY OTHER APPLIANCE OR STOVE. -
Page 7: Pellet Vent Type
INSTALLATION PELLET VENT TYPE C. Minimum 3-foot (0.91m) clearance from any adjacent building. A certified 3-inch or 4-inch type “PL” pellet vent exhaust D. Minimum 7-foot (2.13m) clearance from any grade system must be used for installation and attached to the when adjacent to public walkways. -
Page 8: Through The Wall Installation
INSTALLATION THROUGH THE WALL INSTALLATION a 3” (76 mm) clearance should be maintained from the (RECOMMENDED INSTALLATION) outside wall and a clean out tee should be placed on the pipe with a 90-degree turn away from the house. At this point, a 3ft (0.91m) (minimum) section of pipe should be added with a horizontal cap, which would complete the installation. -
Page 9: Control Panel Overview
OPERATION INSTRUCTIONS NEVER OPERATE THIS PRODUCT WHILE UNATTENDED HOW YOUR HEATER WORKS • Once the heater reaches a set temperature, the room fan will come on. Your pellet heater operates on a timer based auger fuel feed system, that is controlled by a digital circuit board. DISPLAY The fuel is delivered from the auger into a burn pot, which •... -
Page 10: Proper Fuel
OPERATION INSTRUCTIONS 10. Salt water driftwood or other previously salt water Pellets can be screened before being placed in hopper saturated materials; to remove most fines. 11. Unseasoned wood; or • Binders – Some pellets are produced with materials to hold the together, or “bind”... -
Page 11: Damper Control
OPERATION INSTRUCTIONS This pellet stove has been certified by the US EPA to OPEN meet strict 2020 guidelines. To Ensure this unit produces the optimal minimal emissions, it is critical to follow the following guidelines. To achieve a “high burn” your stove should be set on setting 5 with the damper 50% closed. -
Page 12: Shutdown Procedure
OPERATION INSTRUCTIONS 2. If the combustion blower fails, an air pressure switch CAUTION: will automatically shut down the auger. • THE HOPPER AND STOVE TOP WILL BE HOT NOTE: Opening the stove door for more than 30 seconds DURING OPERATION; THEREFORE, YOU SHOULD during operation will cause enough pressure change to ALWAYS USE SOME TYPE OF HAND PROTECTION activate the air switch, shutting the fuel feed off. -
Page 13: Maintenance
MAINTENANCE NEVER OPERATE THIS PRODUCT WHILE UNATTENDED FLY ASH CAUTION: This accumulates in the horizontal portion of an exhaust • FAILURE TO CLEAN AND MAINTAIN THIS UNIT AS run. Though non-combustible, it may impede the normal INDICATED CAN RESULT IN POOR PERFORMANCE, SAFETY HAZARDS, FIRE, AND EVEN DEATH. -
Page 14: Spring Shutdown
MAINTENANCE out the chimney, exposure to the gases in closed or from your U.S. Stove dealer. If glass is broken, follow these confined areas can be dangerous. Make sure you stove removal procedures: gaskets and chimney joints are in good working order 1. -
Page 15: Maintenance Schedule
MAINTENANCE MAINTENANCE SCHEDULE Monthly or Daily Weekly as needed Use the following as a guide under average use conditions. Gaskets around door and door glass should be inspected Burn Pot Stirred Empty and repaired or replaced when necessary. Combustion Brushed Chamber Ashes Check... -
Page 16: Troubleshooting Guide
TROUBLE SHOOTING GUIDE When your stove acts out of the ordinary, the first reaction is to call for help. This guide may save time and money by enabling you to solve simple problems yourself. Problems encountered are often the result of only five factors: 1) poor fuel;... - Page 17 TROUBLE SHOOTING GUIDE If there is no current going to the combustion blower, check all wire Control board not sending power to combustion connections. If all wires are properly connected, you have a bad blower. control board. There should be a 5-volt current (approximately) going to the air switch Control board not sending power to air switch.
-
Page 18: Convection Blower Shuts Off And Comes Back On
TROUBLE SHOOTING GUIDE Display is Flashing “E4” Possible Causes Possible Remedies: (Unplug stove first when possible) The air inlet, burnpot, interior combustion air Follow all cleaning procedures in the maintenance section of the chambers, combustion blower, or exhaust pipe owner’s manual. are blocked with ash or foreign material. -
Page 19: Smoke Smell Coming Back Into The Home
TROUBLE SHOOTING GUIDE STOVE FEEDS PELLETS, BUT WILL NOT IGNITE Possible Causes Possible Remedies: (Unplug stove first when possible) Push the air damper in closer to the side of the stove for startup. In some situations it may be necessary to have the damper completely Air damper open too far for ignition. - Page 20 TROUBLE SHOOTING GUIDE STOVE WILL NOT FEED PELLETS, BUT FUEL FEED LIGHT COMES ON AS DESIGNED Possible Causes Possible Remedies: (Unplug stove first when possible) Wait for the stove to cool for about 30 - 45 minutes. Locate the High Limit High limit switch has tripped or is thermodisc and press the reset button on the back of it.
-
Page 21: Wiring Diagram
WIRING DIAGRAM ... -
Page 22: Repair Parts
REPAIR PARTS... - Page 23 REPAIR PARTS Part # Description Part # Description 892183 Main Weldment 892198 Warm Air Outlet Grill 83538 Shaft Collar - Ignitor Tube 80915 RTD Temperature Probe 892184 Hopper 892203 Hinge Pin 892185 Auger Housing Weld. 80941 PCBA, Controller 892186 Plate, Auger Bushing 892200 Vented Side Panel, Right 892187 Auger 892201 Vented Side Panel, Left...
-
Page 24: Service Record
SERVICE RECORD It is recommended that your heating system is serviced regularly and that the appropriate Service Interval Record is completed. SERVICE PROVIDER Before completing the appropriate Service Record below, please ensure you have carried out the service as described in the manufacturer’s instructions. -
Page 25: Limited Warranty
LIMITED WARRANTY Limited Warranty (Wood and Pellet Stoves) Warranty Period Branded Solid Fuel Burning Products Component Parts Labor Pellet Wood Component Parts Covered by this Warranty Cast Iron Components, Steel liners, Retainers, Gaskets, Firebrick and All 2 Years from Electrical Components. All Parts including handles, external enameled Date of Purchase components and other material except as covered by Warranty conditions, Warranty Exclusions, and Warranty Limitations listed. -
Page 26: Limitations Of Liability
LIMITED WARRANTY • WMAI’s obligation under this warranty does not extend to the appliance’s capability to heat the desired space. Information is provided to assist the consumer and the dealer in selecting the proper appliance for the application. Consideration must be given to appliance location and configuration, environmental conditions, insulation and air tightness of the structure.
Need help?
Do you have a question about the CGPS2100 and is the answer not in the manual?
Questions and answers