
Related Manuals for Cameo ORON H2


Summary of Contents for Cameo ORON H2
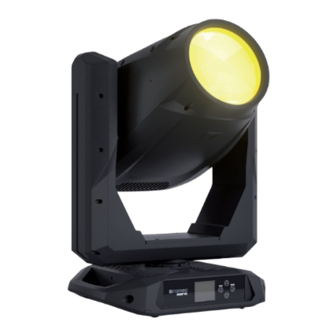
- Page 1 USER´S MANUAL BEDIENUNGSANLEITUNG MANUEL D`UTILISATION MANUAL DE USUARIO INSTRUKCJA OBSŁUGI MANUALE D‘ USO ANIMATION WHEEL ORON ® IP65 HYBRID PHOSPHOR-LASER MOVING HEAD CLORONH2...
-
Page 3: Table Of Contents
CONTENTS / INHALTSVERZEICHNIS / CONTENU / CONTENIDO / TREŚĆ / CONTENUTO ENGLISH INFORMATION ON THIS USER MANUAL INTENDED USE EXPLANATIONS OF TERMS AND SYMBOLS SAFETY INSTRUCTIONS NOTES ON PORTABLE OUTDOOR DEVICES PACKAGING CONTENT CONNECTIONS AND OPERATING/DISPLAY ELEMENTS OPERATION SET-UP AND INSTALLATION CARE, MAINTENANCE, AND REPAIR DIMENSIONS TECHNICAL DATA... - Page 4 FRANÇAIS INFORMATIONS SUR CE MANUEL D'UTILISATION UTILISATION PRÉVUE EXPLICATION DES TERMES ET PICTOGRAMMES CONSIGNES DE SÉCURITÉ REMARQUES À PROPOS DES APPAREILS PORTABLES POUR EXTÉRIEUR CONTENU DU CARTON CONNECTEURS, CONTRÔLES ET INDICATEURS UTILISATION MONTAGE ET INSTALLATION ENTRETIEN, MAINTENANCE ET RÉPARATION DIMENSIONS CARACTÉRISTIQUES TECHNIQUES EXPLICATION DE LA CLASSE DE PROTECTION IP DISTANCE MINIMALE PAR RAPPORT À...
- Page 5 POLSKI INFORMACJE NA TEMAT NINIEJSZEJ INSTRUKCJI OBSŁUGI ZAMIERZONE ZASTOSOWANIE INSTRUKCJE BEZPIECZEŃSTWA UWAGI DOTYCZĄCE PRZENOŚNYCH URZĄDZEŃ DO ZASTOSOWAŃ ZEWNĘTRZNYCH ZAWARTOŚĆ OPAKOWANIA PRZYŁĄCZA, ELEMENTY OBSŁUGI I WSKAŹNIKI OBSŁUGA KONFIGURACJA I INSTALACJA PIELĘGNACJA, KONSERWACJA I NAPRAWA WYMIARY DANE TECHNICZNE WYJAŚNIENIE KLASY OCHRONY IP MINIMALNA ODLEGŁOŚĆ...
-
Page 6: Information On This User Manual
This device has been developed and manufactured to the highest quality standards to ensure many years of trouble-free operation. Please read this user manual carefully to be able to quickly put your new Cameo Light product to optimum use. Further information about Cameo Light is available on our website CAMEOLIGHT.COM INFORMATION ON THIS USER MANUAL •... - Page 7 This symbol identifies hazards that can cause electric shock. This symbol indicates hazardous areas or hazardous situations. This symbol indicates hazards caused by hot surfaces. This symbol indicates that you must avoid looking or staring at the light source. This symbol indicates that intense light sources categorised under risk group 3 may cause skin or eye damage.
-
Page 8: Danger Zone
DANGER ZONE For risk group 3 devices, the danger zone refers to the area in which the optical radiation poses a significant risk to health. This area is marked with a warning symbol in the following illustration. Optical radiation Risk of serious eye damage or blindness 1. - Page 9 DANGER: 1. Do not open the device, and do not make any modifications to it. 2. If your device no longer functions properly, if liquids or objects get inside it, or if it has been damaged in any other way, switch it off immediately and disconnect it from the power supply.
- Page 10 WARNING: 1. Use the device only in the prescribed manner. 2. Operate the device only with the accessories recommended and intended by the manufacturer. 3. During installation, observe the safety regulations applicable in your country. 4. After connecting the device, check all cable routes to avoid damage or accidents, for example, due to tripping hazards.
-
Page 11: Personal Protective Equipment
CAUTION! IMPORTANT NOTES ON LIGHTING PRODUCTS! 1. This device is a risk group 3 device. Risk of serious skin and eye damage! Never look into the light source or the light beam, not even for a short time! Do not look directly into the lamp with optical instruments such as magnifying glasses or binoculars! Do not expose the skin to the light beam or its reflections! 2. - Page 12 WARNING: Devices with wireless signal transmission are not suitable for use in sen- sitive areas in which radio operation can lead to potentially detrimental interactions. These include: • Hospitals, health centres, or other healthcare facilities that provide patient treatment with qualified personnel and equipment. •...
-
Page 13: Notes On Portable Outdoor Devices
BLACKOUT ZONES DMX can be used to set up zones (viewing area, stage area, and similar) where a blackout is automatically activated as soon as the light beam reaches a zone via pan and tilt movement. Only one of the three available blackout zones can be activated at a time. -
Page 14: Packaging Content
5-pin DMX connections. 2 × omega mounting bracket included. Operating voltage: 100 – 240 V AC. The light supports the remote device management (RDM) standard. Remote device management allows the user to monitor the status and configuration of RDM devices using an RDM-capable controller, such as the optionally available Cameo UNICON (item number CLIREMOTE). -
Page 15: Connections And Operating/Display Elements
Connection via supplied mains cable (when not in use, always close with the rubber sealing cap). POWER OUT IP65 mains output socket with rubber sealing cap. Enables power supply to other CAMEO lights. Ensure that the total current consumption of all connected devices does not exceed the value specified on the device in amperes (A) (when not in use, always close the rubber sealing cap). - Page 16 ANTENNA The antenna for wireless DMX control is located inside the base of the device. ATTENTION: In order to provide protection from water sprays in accordance with the IP65 protection class, the special DMX input and output sockets must be used with special IP65-rated XLR connectors, or they must be closed using the rubber sealing caps.
- Page 17 The battery-powered display can be activated even if the device is disconnected from the mains. To do this, press and hold MENU for approximately 10 seconds. You can now access device information and change and save system settings without mains connection. The external control of the light is not activated in this case. For this reason, the display shows that there is no control signal even if the device has a control signal.
-
Page 18: Operation
When the light is correctly connected to the mains, “Software update ... please wait”, the software version, “Welcome to Cameo”, and “... RESET” are shown on the display during start-up and mo- tor reset. After this process, the light is ready for operation, and the previously activated operating mode is launched. -
Page 19: Wireless Dmx
Stand-alone operating modes Slave operating mode Illuminant temperature Bluetooth activated Illuminant temperature Bluetooth deactivated W-DMX status W-DMX status Operating mode Error message Error message Scene or loop and signal output Note on the main display in the operating modes with external control: In the event that the control signal is interrupted, the characters in the centre of the display begin flashing;... -
Page 20: Network (Network)
CONTROL MENU (Control) The “Control” menu is used to select the various operating modes and set their options in the respective sub-menus. SETTING THE DMX START ADDRESS (DMX Address) Starting from the main display, press MENU to access the main menu. Use and to select the Control menu and press ENTER. - Page 21 Information on the sub-menu items in the “Network” menu and the corresponding setting options can be found in the table below (select with and , confirm with ENTER, change the value or status with and , confirm with ENTER). Art-Net network Control via Art-Net Control via sACN...
- Page 22 STAND-ALONE MENU (Stand Alone) In the stand-alone operating modes “Play Scene” and “Play Loop”, the control signal of the corre- sponding operating mode can be output to slave units via XLR (Master/Alone -> Master). If you do not want to output the control signal, deactivate the output (Master/Alone -> Alone). Activate one of the eight available scenes (Scene 1–8) or one of the eight available loops (Loop 1–8).
- Page 23 SLAVE MODE (Slave) Starting from the main display, press MENU to access the main menu. Use and to select the Control menu item and confirm with ENTER. Now select the menu item Slave and confirm again. Activate the output of the control signal in the master unit (Control -> Stand Alone -> Master/ Alone ->...
- Page 24 Pairing with compatible, ready-to-pair wireless devices Setting of the connection key Receiver standard = (only avail- CRMX able with Receiver standard = operating CRMX2 mode = RX) Selection of CRMX universe A to H RGB code for colour Colour display of the universe Universe Code Metadata...
- Page 25 Light intensity increases linearly with DMX value Light intensity can be finely adjusted at lower DMX values and broadly adjusted at higher DMX values Light intensity can be broadly adjusted at lower DMX values and finely adjust- ed at higher DMX values Light intensity can be finely adjusted at lower and higher DMX values and Dimmer...
- Page 26 Gobo wheel always rotates clockwise Gobo wheel rotates the shortest distance Gobo wheel jumps directly back to the desired gobo when the relevant value is reached Continuous rotation of the gobo wheels Gobo wheel always Gobo and rotates clockwise colour Gobo wheel rotates the wheel shortest distance...
- Page 27 Last command is retained The last selected stand-alone operating mode is Oper- activated ational status 10-second fade to blackout with DMX signal Activates blackout fault Activates blackout, and the device head is directed downwards Save Save all current settings as user preset A settings Save all current settings as user preset B in three...
- Page 28 Pre-programmed sequence to test all components Pre-programmed sequence to test all components under maximum load Activate all motors individually with values of 000 to 255 Do not reset service operation time Reset service operating time For service purposes only SYSTEM INFORMATION (System Info) Starting from the main display, press MENU to access the main menu.
-
Page 29: Set-Up And Installation
Status information Display of the temperature of the corresponding component Setting of the temperature unit (press ENTER to change) Display of the speed of the corresponding fan Total operating time Time in use Lamp operating time Operating time since the last reset of the service operating time MAC address RDM unique identifier... - Page 30 USE POSITION...
-
Page 31: Care, Maintenance, And Repair
CARE, MAINTENANCE, AND REPAIR In order to ensure the long-term, proper functioning of the device, it must be regularly cleaned and, if necessary, serviced. The care and maintenance required depends on the intensity of use and the environment in which it is used. We recommend a visual inspection before each oper- ation. -
Page 32: Dimensions
DIMENSIONS (mm) -
Page 33: Technical Data
TECHNICAL DATA Item no.: CLORONH2 Product type: IP65 PHOSPHOR LASER MOVING HEAD Type: Moving head Source QTY: Light source type: Laser phosphor engine, 260 W Light source minimum lifetime (L70): >12,000 h (Lifetime defined as time to 70%/L70) Colour temperature (light source): 8000 K Colour temperature (output): 6500 K... - Page 34 650 Hz, 1530 Hz, 3600 Hz, PWM: 12 kHz, 18.9 kHz, 25 kHz Dimmer curves: Linear / exponential / logarithmic / S-curve Strobe: 1 Hz–20 Hz Control: DMX, RDM, Art-Net, sACN, WDMX/CRMX 4-button navigation Control elements: (MENU / ENTER / UP / DOWN) Display: Backlit 2"...
-
Page 35: Explanation Of Ip Protection Class
EXPLANATION OF IP PROTECTION CLASS 1. An IP protection class only reflects protection against solid objects and water. It does not de- scribe general weather resistance, such as protection from UV radiation and temperature. 2. The first identification digit indicates protection against dust, solid objects, and contact: IP2X Protected against solid foreign objects ≥... -
Page 36: Disposal
DISPOSAL PACKAGING: 1. Packaging can be recycled using the usual disposal methods. 2. Please separate the packaging in accordance with the disposal laws and recycling regulations in your country. DEVICE: 1. This device is subject to the European Directive on Waste Electrical and Electronic Equipment, as amended. -
Page 37: Deutsch
Dieses Gerät wurde unter hohen Qualitätsanforderungen entwickelt und gefertigt, um viele Jahre einen reibungslosen Betrieb zu gewährleisten. Bitte lesen Sie diese Bedienungsanleitung sorgfäl- tig, damit Sie Ihr neues Produkt von Cameo Light schnell und optimal einsetzen können. Weitere Informationen über Cameo Light erhalten Sie auf unserer Website CAMEOLIGHT.COM INFORMATIONEN ZU DIESER BEDIENUNGSANLEITUNG •... - Page 38 4. ACHTUNG: Mit dem Wort ACHTUNG, evtl. in Kombination mit einem Symbol, wird auf Situatio- nen oder Zustände hingewiesen, die zu Sach- und/oder Umweltschäden führen können. Dieses Symbol kennzeichnet Gefahren, die einen elektrischen Schlag verursachen können. Dieses Symbol kennzeichnet Gefahrenstellen oder gefährliche Situationen. Dieses Symbol kennzeichnet Gefahren durch heiße Oberflächen.
-
Page 39: Sicherheitshinweise
Dieses Symbol kennzeichnet ergänzende Informationen zur Bedienung des Produkts. GEFAHRENZONE Bei Geräten der Risikogruppe 3 bezieht sich die Gefahrenzone auf den Bereich, in dem die optische Strahlung eine erhebliche Gefahr für die Gesundheit darstellt. Die- ser Bereich ist in der folgenden Abbildung mit einem Warnsymbol gekennzeichnet. Optische Strahlung Risiko von schweren Augenschäden oder Erblindung 1. - Page 40 GEFAHR: 1. Öffnen Sie das Gerät nicht und verändern Sie es nicht. 2. Wenn Ihr Gerät nicht mehr ordnungsgemäß funktioniert, Flüssigkeiten oder Gegen- stände in das Geräteinnere gelangt sind, oder das Gerät anderweitig beschädigt wurde, schalten Sie es sofort aus und trennen es von der Spannungsversorgung. Dieses Gerät darf nur von autorisiertem Fachpersonal repariert werden.
- Page 41 GEFAHR: 1. Erstickungsgefahr! Kunststoffbeutel und Kleinteile müssen außer Reichweite von Personen (einschließlich Kindern) mit eingeschränkten körperlichen, sensorischen oder geistigen Fähigkeiten aufbewahrt werden. 2. Gefahr durch Herabfallen! Stellen Sie sicher, dass das Gerät sicher installiert ist und nicht herunterfallen kann. Verwenden Sie ausschließlich geeignete Stative bzw.
-
Page 42: Persönliche Schutzausrüstung
5. Vermeiden Sie, dass Erschütterung oder Schläge auf das Gerät einwirken. 6. Beachten sie die IP-Schutzart, sowie die Umgebungsbedingungen wie Temperatur und Luftfeuchtigkeit entsprechend der Spezifizierung. 7. Geräte können stetig weiterentwickelt werden. Bei abweichenden Angaben zu Be- triebsbedingungen, Leistung oder sonstigen Geräteeigenschaften zwischen Bedie- nungsanleitung und Gerätebeschriftung, hat immer die Angabe auf dem Gerät Priorität. - Page 43 Der Betrieb von Sendeanlagen unterliegt behördlichen Bestimmungen. Diese können regional unterschiedlich ausfallen und müssen vor Inbetriebnahme vom Betreiber überprüft werden (z.B. Funkfrequenz und Sendeleistung). WARNUNG: Geräte mit kabelloser Signalübertragung sind nicht für den Betrieb in sensiblen Bereichen, in denen Funkbetrieb zu möglichen Wechselwirkungen führen kann, geeignet.
- Page 44 BLACKOUT ZONEN Per DMX können Zonen (Zuschauer-, Bühnenbereich etc.) eingerichtet werden, in denen Blackout automatisch aktiviert wird, sobald der Lichtstrahl eine Zone per Pan- und Tilt-Bewegung erreicht. Dabei kann jeweils nur eine der drei verfügbaren Blackout Zonen aktiviert werden. Blackout Zonen einrichten: 1.
-
Page 45: Hinweise Für Ortsveränderliche Outdoor-Geräte
DMX-Anschlüsse. 2x Omega-Montagebügel inklusive. Betriebsspannung 100 V - 240 V AC. Der Scheinwerfer verfügt über den RDM-Standard (Remote Device Management). Diese Geräte- fernverwaltung ermöglicht die Statusabfrage und Konfiguration von RDM-Endgeräten über einen RDM-fähigen Controller, wie den optional erhältlichen Cameo UNICON (Artikelnummer CLIREMOTE). -
Page 46: Anschlüsse, Bedien- Und Anzeigeelemente
Anschluss mit Hilfe des mitgelieferten Netzkabels (bei Nichtgebrauch stets mit der Gummidicht- kappe verschließen). POWER OUT IP65 Netzausgangsbuchse mit Gummidichtkappe. Dient der Netzversorgung weiterer CAMEO Scheinwerfer. Achten Sie darauf, dass die gesamte Stromaufnahme aller angeschlossenen Geräte den auf dem Gerät in Ampere (A) angegebenen Wert nicht überschreitet (bei Nichtgebrauch stets mit der Gummidichtkappe verschließen). - Page 47 DRUCKAUSGLEICHSELEMENT Druckausgleichselement zur Vermeidung von Kondenswasserbildung im Gehäuseinneren. Um die einwandfreie Funktion zu gewährleisten, ist das Element vor Verschmutzung zu schützen. ANTENNE Die Antenne für die Steuerung per Wireless DMX befindet sich im Inneren der Gerätebasis. ACHTUNG: Um den Spritzwasserschutz nach Schutzklasse IP65 bei den DMX-Buch- sen zu gewährleisten, müssen die speziellen DMX Eingangs- und Ausgangsbuchsen korrekt mit den IP65 Spezial-XLR-Steckern verschlossen sein, bzw.
- Page 48 HINWEISE: • Vergewissern Sie sich vor dem Navigieren im Gerätemenü, dass die Bedieneinheit trocken und sauber ist, damit ihre Funktionalität nicht beeinträchtigt wird. • Wasser auf der Bedieneinheit kann z.B. im Outdoor-Betrieb zu Fehlbedienung des Scheinwer- fers führen. Aktivieren Sie daher nach der Konfiguration des Scheinwerfers die Lock-Funk- tion, um eine Fehlbedienung durch Wasser zu verhindern (Settings ->...
-
Page 49: Bedienung
Sobald der Scheinwerfer korrekt am Stromnetz angeschlossen ist, wird während des Startvor- gangs und des Motoren-Resets „Software Update ...please wait“, die Software-Version, „Welco- me to Cameo“ und „...RESET“ im Display angezeigt. Nach diesem Vorgang ist der Scheinwerfer betriebsbereit und die Betriebsart, die zuvor aktiviert war, wird gestartet. -
Page 50: Wireless Dmx
Stand-Alone-Betriebsarten Betriebsart Slave Leuchtmitteltemperatur Bluetooth deaktiviert Leuchtmitteltemperatur Bluetooth aktiviert W-DMX Status W-DMX Status Betriebsart Fehlermeldung Fehlermeldung Szene bzw. Loop und Signalausgabe Hinweis zur Hauptanzeige in den Betriebsarten mit externer Steuerung: Sobald das Steu- er-Signal unterbrochen wird, beginnen die Zeichen in der Mitte des Displays zu blinken, liegt das Steuer-Signal wieder an, stoppt das Blinken. - Page 51 KONTROLLMENÜ (Control) Das Kontrollmenü ermöglicht die Auswahl der verschiedenen Betriebsarten und deren Einstellopti- onen in den entsprechenden Untermenüs. DMX-STARTADRESSE EINSTELLEN (DMX Address) Ausgehend von der Hauptanzeige gelangen Sie durch Drücken auf MENU in das Hauptmenü (Main Menu). Wählen Sie mit Hilfe von und das Kontrollmenü Control aus und drücken auf ENTER.
- Page 52 Informationen zu den Untermenüpunkten im Netzwerkmenü und den entsprechenden Einstellop- tionen finden Sie in untenstehender Tabelle (Auswahl mit und , bestätigen mit ENTER, Wert bzw. Status ändern mit und , bestätigen mit ENTER). Network Artnet Artnet Steuerung per Artnet Protocol sACN Steuerung per sACN...
- Page 53 STAND-ALONE-MENÜ (Stand Alone) In den Stand-Alone-Betriebsarten Play Scene und Play Loop kann das Steuersignal der entspre- chenden Betriebsart via XLR an Slave-Einheiten ausgegeben werden (Master/Alone -> Master). Ist die Ausgabe des Steuersignals nicht gewünscht, deaktivieren Sie die Ausgabe (Master/Alone -> Alone).
- Page 54 SLAVE-BETRIEB (Slave) Ausgehend von der Hauptanzeige gelangen Sie durch Drücken auf MENU in das Hauptmenü. Mit Hilfe von und wählen Sie nun den Menüpunkt Control aus und bestätigen mit ENTER. Wäh- len Sie dann Slave aus und bestätigen abermals. Aktivieren Sie die Ausgabe des Steuersignals in der Master-Einheit (Control ->...
- Page 55 Link/Force to Koppeln mit kompatiblen, koppelberei- Linking pair ten Drahtlos-Geräten Linking Key Einstellen des Verbindungsschlüssels CRMX Mode Empfangsstandard = CRMX (nur verfüg- CRMX bar, wenn Linking Key Empfangsstandard = Operating CRMX2 CRMX2 Mode = RX) CRMX Auswahl CRMX Univer- A - H Universe sum A bis H Red, Orange,...
- Page 56 Bedienelemente nach ca. 60 Sekun- Display den ohne Eingabe gesperrt (LOCKED). On after 60s Entsperren: Ca. 5 Sekunden lang UP Display Einstel- Autolock und DOWN gleichzeitig drücken. lungen Autolock-Funktion deaktiviert Die Lichtintensität steigt linear mit Linear dem DMX-Wert an Die Lichtintensität lässt sich im unteren DMX-Wertbereich fein und Exponential im oberen DMX-Wertbereich grob...
- Page 57 Blackout bei Kopfbewegung Move in Black Kopf- Kein Blackout bei Kopfbewegung Move- bewe- Verlangsamte Motorbewegungen für ment gungen leiseren Betrieb Silent Movement einstellen Funktion deaktiviert Goborad dreht immer Clockwise im Uhrzeigersinn Position Goborad dreht den Shortest Way kürzesten Weg Goborad springt bei Gobo Wheel Erreichen des entspre- Snap...
- Page 58 Konstant mittlere Lüftergeschwindigkeit bei reduzier- Lüfterein- Constant Mid stellun- ter Helligkeit, falls notwendig Constant High Konstant hohe Lüftergeschwindigkeit Hold Letzter Befehl wird gehalten Betrieb- Die zuletzt ausgewählte Stand Alone Betriebsart wird Last Stand Alone szustand aktiviert Signal Fade to Black DMX-Si- 10 Sekunden Fade zu Blackout Fail...
- Page 59 Pan/Tilt Pan/Tilt Motoren zurücksetzen Reset Head Motoren im Gerätekopf zurücksetzen Alle Motoren zurücksetzen Vorprogrammierte Sequenz zum Testen aller Test Sequence Komponenten Vorprogrammierte Sequenz zum Testen aller Test Stress Test Komponenten unter Maximallast Alle Motoren einzeln mit Werten von 000 bis Motor Test 255 ansteuern Service-Betriebszeit nicht zurücksetzen...
-
Page 60: Aufstellung Und Montage
Operational: DMX Data: Wireless Status RDM Identify: Statusinformationen RF Link: Link State: Light Source xxx °C/°F Anzeige der Temperatur der entspre- chenden Komponente Base xxx °C/°F Temperature °C Einstellen der Temperatureinheit (zum Temperature Unit Ändern ENTER drücken) °F Fan Speed xxxx RPM Anzeige der Drehzahl des entsprechenden Lüfters Total... - Page 61 GEBRAUCHSLAGE...
-
Page 62: Pflege, Wartung Und Reparatur
PFLEGE, WARTUNG UND REPARATUR Um die einwandfreie Funktion des Geräts auf Dauer zu gewährleisten, muss es regelmäßig ge- pflegt und bei Bedarf gewartet werden. Der Pflege- bzw. Wartungsbedarf steht in Abhängigkeit der Nutzungsintensität und -umgebung. Wir empfehlen generell eine Sichtprüfung vor jeder Inbetrieb- nahme. -
Page 63: Abmessungen
ABMESSUNGEN (mm) -
Page 64: Technische Daten
TECHNISCHE DATEN Artikel-Nr.: CLORONH2 Produkttyp: IP65 PHOSPHOR-LASER MOVING HEAD Typ: Moving Head Bezugsmenge: Typ der Lichtquelle: Laser-Phosphor-Engine, 260 W "> 12,000 h Mindestlebensdauer der Lichtquelle (L70): (Lebenszeit definiert als Zeit bis 70 %/L70)" Farbtemperatur (Lichtquelle): 8000 K Farbtemperatur (Leistung): 6500 K Farbmischung: CMY + CTO CTO-Rad:... - Page 65 Functions, Colour/Gobo Wheel Scroll/Snap, Geräteeinstellungen: Auto Lock, PAN/TILT Speed, Lamp Default, Fan Modes, Sun Protection, Sleep Mode 650 Hz, 1530 Hz, 3600 Hz, 12 kHz, 18.9 kHz, PWM: 25 kHz Dimmer-Kurven Linear; Exponentiell; Logarithmisch; S-Kurve Stroboskop: 1 Hz – 20 Hz Steuerung: DMX, RDM, Art-Net, sACN, WDMX/CRMX 4-Tasten-Navigation (MENU / ENTER / UP /...
-
Page 66: Erläuterungen Zur Ip-Schutzart
ERLÄUTERUNGEN ZUR IP-SCHUTZART 1. Eine IP-Schutzart gibt ausschließlich den Schutz gegen feste Gegenstände, sowie Wasser wie- der. Sie beschreibt keine allgemeine Witterungsbeständigkeit, wie beispielsweise Schutz gegen UV-Strahlung und Temperatureinflüsse etc. 2. Die erste Kennziffer bezeichnet den Schutz gegen Staub, feste Gegenstände und Berührung: IP2X Geschützt gegen feste Fremdkörper mit Durchmesser ≥... -
Page 67: Entsorgung
ENTSORGUNG VERPACKUNG: 1. Verpackungen können über die üblichen Entsorgungswege dem Wertstoffkreislauf zugeführt werden. 2. Bitte trennen Sie die Verpackung entsprechend der Entsorgungsgesetze und Wert- stoffverordnungen in Ihrem Land. GERÄT: 1. Dieses Gerät unterliegt der europäischen Richtlinie für Elektro- und Elektronik-Alt- geräte in der jeweils geltenden aktuellen Fassung. - Page 68 CE-Konformitätserklärung Konformitätserklärungen für Produkte, die den Niederspannungs-, EMV- und RoHS-Richtlinien unterliegen, können unter info@adamhall.com angefragt werden. Konformitätserklärungen für Produkte, die der Funkanlagenrichtlinie unterliegen, können unter www.adamhall.com/compliance/ heruntergeladen werden. Druckfehler und Irrtümer, sowie technische oder sonstige Änderungen sind vorbehalten!
-
Page 69: Français
Veuillez lire attentivement ce manuel d'utilisation afin de pouvoir utiliser rapidement et de manière optimale votre nouveau produit Cameo Light. De plus amples informations sur Cameo Light sont disponibles sur notre site web CAMEOLIGHT.COM INFORMATIONS SUR CE MANUEL D'UTILISATION •... - Page 70 3. MISE EN GARDE : Le terme MISE EN GARDE, éventuellement associé à un pictogramme, est utilisé pour indiquer des situations ou des conditions pouvant entraîner des blessures. 4. ATTENTION : Le mot ATTENTION, éventuellement associé à un pictogramme, fait référence à des situations ou à des conditions qui peuvent entraîner des dommages matériels et/ou environnementaux.
- Page 71 Ce pictogramme indique les sources lumineuses intenses. Ce symbole indique que le produit ne comporte aucune pièce nécessitant un entre- tien. Seul le personnel autorisé peut effectuer des travaux de maintenance ou de service. Ce pictogramme indique des informations supplémentaires concernant le fonctionne- ment du produit.
-
Page 72: Consignes De Sécurité
CONSIGNES DE SÉCURITÉ AVERTISSEMENT ! Rayonnement optique Risque de lésions oculaires graves ou de cécité 1. L'appareil est destiné exclusivement aux effets d'éclairage dans l'air. 2. N'utilisez pas l'appareil pour éclairer des personnes. Il ne convient pas à une utili- sation dans des zones résidentielles. 3. - Page 73 3. Pour déconnecter l'appareil du réseau sur tous les contacts, il ne suffit pas d'ap- puyer sur l'interrupteur marche/arrêt de l'appareil. 4. Assurez-vous que le fusible installé correspond au type imprimé sur l’appareil. 5. Assurez-vous que des mesures appropriées ont été prises contre les surtensions (par exemple, la foudre).
- Page 74 ATTENTION : 1. N'installez pas et ne faites pas fonctionner l'appareil à proximité de radiateurs, de bouches de chaleur, de poêles ou d'autres sources de chaleur. Veillez toujours à ce que l'appareil soit installé de manière à ce qu'il soit suffisamment refroidi et ne puisse pas surchauffer.
- Page 75 ÉQUIPEMENTS INDIVIDUELS DE PROTECTION Portez des équipements de protection approprié lors du montage, de l'installation et du démontage de l'appareil : • Gants de protection • Chaussures de sécurité • Lunettes de sécurité LB4 conformes à la norme EN 207 (à porter impérativement lors de l'installation) TRANSMISSION DE SIGNAUX PAR RADIO (PAR EXEMPLE, W-DMX...
- Page 76 En outre, la transmission DMX sans fil ne doit pas être utilisée pour déclencher des dispositifs générateurs de flammes ou pyrotechniques, des effets à explosion ou pour contrôler des effets de gaz ou de liquides. Ces dispositifs peuvent être des canons à CO2, des canons à...
-
Page 77: Remarques À Propos Des Appareils Portables
Mise en place de zones de blackout : 1. Paramètres de l'appareil : Valeur 004 - 005 Enable Savings BO Zone 2. Définissez un carré (zone de blackout) via les paramètres Save Position 1 à Save Position 4 (les valeurs de panoramique et d'inclinaison définies pour les positions respectives) 3. -
Page 78: Contenu Du Carton
Le projecteur est compatible avec le protocole RDM (Remote Device Management). Ce protocole de gestion à distance permet à l'utilisateur de contrôler l'état et la configuration des appareils RDM à l'aide d'un contrôleur compatible RDM, tel que le Cameo UNICON disponible en option (numéro d'article CLIREMOTE). -
Page 79: Connecteurs, Contrôles Et Indicateurs
RENVOI SECTEUR (POWER OUT) Embase secteur IP65 avec capuchon d'étanchéité en caoutchouc. Permet d'alimenter d'autres projecteurs CAMEO. Assurez-vous que l'intensité totale consommée par tous les projecteurs connectés en cascade ne dépasse pas la valeur spécifiée sur l'appareil en ampères (A). Lorsque le renvoi secteur n'est pas utilisé, protégez-le toujours avec le capuchon d'étanchéité... -
Page 80: Écran À Cristaux Liquides
ÉLÉMENT DE COMPENSATION DE LA PRESSION Élément de compensation de la pression destiné à éviter toute condensation à l'intérieur du boî- tier. Pour assurer son bon fonctionnement, cet élément doit être protégé de la saleté. ANTENNE L'antenne pour le contrôle DMX sans fil est située à l'intérieur de la base de l'appareil. ATTENTION : Afin d'assurer une protection efficace contre les projections d'eau, conformément à... -
Page 81: Verrouillage Du Panneau
À NOTER : • Avant de naviguer dans le menu de l'appareil, assurez-vous que les commandes tactiles sont sèches et propres, afin que leur fonctionnement ne soit pas altéré. • La présence d'humidité sur le panneau de commande peut entraîner un mauvais fonction- nement du projecteur, par exemple en extérieur. - Page 82 VERROUILLAGE DU BASCULEMENT Dispositif de verrouillage mécanique em- pêchant la rotation de la tête du projecteur dans le sens vertical pendant le transport LOCK (7 positions possibles). Débranchez l'appa- reil et faites glisser le levier de verrouillage dans le sens de l'axe de rotation de l'incli- naison, en déplaçant la tête de l'appareil verticalement jusqu'à...
-
Page 83: Utilisation
Lorsque le projecteur est correctement branché sur le secteur, les mentions "Software update ... please wait", la version du logiciel, "Welcome to Cameo", et "... RESET" s'affichent à l'écran pendant le démarrage et la réinitialisation du moteur. Le projecteur est ensuite prêt à fonctionner, dans le dernier mode activé... -
Page 84: Wireless Dmx
Note sur l'écran principal dans les modes de fonctionnement avec contrôle externe : en cas d'interruption du signal de contrôle, les caractères au centre de l'écran se mettent à cligno- ter ; le clignotement s'arrête dès le retour du signal de contrôle. Message d'erreur : si le symbole d'avertissement (triangle avec point d'exclamation) apparaît à... - Page 85 RÉGLAGE DU MODE DE FONCTIONNEMENT DMX (DMX Mode) En partant de l'écran principal, appuyez sur MENU pour accéder au menu principal. En utilisant et , sélectionnez le menu Control et appuyez sur ENTER. Sélectionnez ensuite l'élément de menu DMX Mode et confirmez à nouveau. Utilisez et pour régler le mode de fonctionne- ment DMX souhaité...
- Page 86 Configuration de Dépend du réseau, du sous-réseau et de l'univers absolu l'univers Art-Net Configuration du réseau Art-Net Configuration du sous-réseau Dépend de l'univers absolu Art-Net Configuration de l'univers Art-Net Réglage de l'adresse IP : réglez le premier bloc, confirmez, réglez le deuxième bloc, confirmez. Réglage du masque de sous-réseau : réglez le premier bloc, confirmez, réglez le deuxième bloc, confirmez.
- Page 87 Vous trouverez dans le tableau ci-dessous des informations sur les sous-menus du menu "Stand Alone" et les options de réglage correspondantes (sélectionnez avec et , confirmez avec ENTER, modifiez la valeur ou l'état avec et , confirmez avec ENTER). Modes autonomes (Stand Alone) Le signal de contrôle est renvoyé...
- Page 88 PARAMÈTRES SYSTÈME (Settings) En partant de l'écran principal, appuyez sur MENU pour accéder au menu principal. Sélectionnez Settings à l'aide de et et confirmez avec ENTER. Vous trouverez dans le tableau ci-dessous des informations sur les sous-menus du menu "Set- tings"...
- Page 89 Appairage avec des appareils sans fil compatibles et prêts à être appairés Réglage de la clé de connexion Récepteur standard = (disponible CRMX uniquement en mode de Récepteur standard = fonctionne- CRMX2 ment RX) CRMX Sélection de l'univers Universe CRMX A à H Code RGB pour l'affi- Colour chage des couleurs de...
- Page 90 Les contrôles sont verrouillés après environ 60 secondes sans saisie (LOCKED). Pour déverrouiller : appuyez simultanément sur les touches UP et DOWN pendant environ 5 secondes Fonction Autolock désactivée L’intensité lumineuse augmente linéai- rement avec la valeur DMX L’intensité lumineuse varie finement pour les valeurs DMX basses, et plus grossièrement pour les valeurs DMX élevées L’intensité...
- Page 91 Noir (blackout) lorsque la lyre bouge Pas de noir lorsque la lyre bouge Ralentissement des mouvements du moteur pour un fonctionnement plus silencieux Fonction désactivée La roue de gobos tourne toujours dans le sens des aiguilles d'une montre La roue de gobos tourne sur la distance la plus courte La roue de gobos...
- Page 92 Activation de l'occultation et orientation de la tête de l'appareil vers le bas Fonction désactivée Contrôle automatique du ventilateur Ventilateur désactivé et luminosité fortement réduite Vitesse du ventilateur constante et faible, luminosité réduite si nécessaire Vitesse constante et moyenne du ventilateur, lumino- sité...
- Page 93 Vous trouverez dans le tableau ci-dessous des informations sur les sous-menus du menu "Service" et les options de réglage correspondantes (sélectionnez avec et , confirmez avec ENTER, modifiez la valeur ou l'état avec et , confirmez avec ENTER). Service Rétablir les réglages d'usine Rétablir les valeurs du preset utilisateur A...
- Page 94 Vous trouverez dans le tableau ci-dessous des informations sur les sous-menus du menu "System Info" et les options de réglage correspondantes (sélectionnez avec et , confirmez avec ENTER). System info Affichage de la version du micrologi- ciel de l'appareil Modèle de module Wireless DMX CLORONH2-xxxx Nom de l'appareil Numéro de version du matériel...
-
Page 95: Montage Et Installation
Adresse MAC Identifiant unique en mode RDM Affichage des valeurs DMX présentes Affichage des erreurs en cas de dysfonctionnement Affichage des tableaux des modes DMX MONTAGE ET INSTALLATION DANGER : Le montage au plafond nécessite une grande expérience, notamment pour calculer les valeurs limites de charge du matériel d’installation et vérifier régulièrement la sécurité... -
Page 96: Entretien, Maintenance Et Réparation
POSITION D'UTILISATION ENTRETIEN, MAINTENANCE ET RÉPARATION Afin de garantir son bon fonctionnement à long terme, l'appareil doit être régulièrement net- toyé et, si nécessaire, passer en maintenance. Le besoin d'entretien et de maintenance dépend de l'intensité de l'utilisation et de l'environnement dans lequel l'appareil est utilisé. Nous vous recommandons de procéder à... - Page 97 1. Les surfaces du boîtier doivent être nettoyées avec un chiffon propre et humide. Veillez à éviter toute infiltration d’humidité dans l’appareil. 2. Les entrées et sorties d'air doivent être régulièrement débarrassées de la poussière et des saletés. Si vous utilisez de l'air comprimé, veillez à ne pas endommager l'appareil (dans ce cas, il faut bloquer les ventilateurs avant d'envoyer l'air comprimé).
-
Page 98: Dimensions
DIMENSIONS (mm) -
Page 99: Caractéristiques Techniques
CARACTÉRISTIQUES TECHNIQUES Référence : CLORONH2 Type de produit : LYRE ASSERVIE À LASER PHOSPHORE IP65 Type : Lyre asservie Nombre de sources lumineuses : Type de source lumineuse : Moteur à phosphore laser, puissance 260 W > 12 000 heures Durée de vie minimale de la source lumi- (Durée de vie définie comme le temps écoulé... - Page 100 Retournement de l'écran, activation/désacti- vation du rétroéclairage de l'écran, erreur de signal, inversion du panoramique, inversion de l'inclinaison, retour d'information, déplacement en noir, test, réinitialisation, valeurs utilisateur Paramètres de l'appareil : par défaut, fonctions de blackout, défilement/ interruption de la roue de couleurs/de gobos, verrouillage automatique, vitesse du panora- mique/d'inclinaison, défaut de la lampe, modes de ventilateur, protection solaire, mode veille...
-
Page 101: Explication De La Classe De Protection Ip
∞, Ne jamais diriger le faisceau vers Distance de danger des personnes Diamètre de la lentille 178 mm Dimensions (L x H x P) : Voir le graphique Masse : 32 kg Livré avec câble secteur de 1 m avec connec- Autres caractéristiques : teur Seetronic IP65 et 2 supports de montage Omega (CLOMEGABRACKET5) Accessoires (en option) : Insert SIP en mousse EPP... -
Page 102: Distance Minimale Par Rapport À La Surface Éclairée
DISTANCE MINIMALE PAR RAPPORT À LA SURFACE ÉCLAIRÉE Ce pictogramme, accompagné de la distance en mètres (m), indique la distance minimale entre le projecteur et la surface éclairée. Pour connaître la valeur applicable à ce projecteur, veuillez vous référer aux spécifications techniques de ce manuel et aux indications figurant sur l'appareil. -
Page 103: Déclarations Du Fabricant
DÉCLARATIONS DU FABRICANT Garantie et limitation de responsabilité du fabricant Adam Hall GmbH | Adam-Hall-Str. 1 | 61267 Neu-Anspach | Allemagne Courriel : Info@adamhall.com / +49 (0)6081 9419-0 Nos conditions de garantie et notre limitation de responsabilité actuelles peuvent être consultées en ligne à... -
Page 104: Español
Este aparato ha sido desarrollado y fabricado siguiendo las normas de calidad más exigentes para garantizarle muchos años de funcionamiento sin problemas. Lea atentamente este manual de usuario para poder utilizar su nuevo producto Cameo Light de forma rápida y óptima. Encontrará más información sobre Cameo Light en nuestra página web CAMEOLIGHT.COM INFORMACIÓN SOBRE ESTE MANUAL DE USUARIO... - Page 105 4. ATENCIÓN: La palabra ATENCIÓN, posiblemente en combinación con un símbolo, indica situa- ciones o condiciones que pueden provocar daños a la propiedad y/o al medioambiente. Este símbolo indica peligro de descarga eléctrica. Este símbolo indica las zonas o situaciones peligrosas. Este símbolo indica peligro por superficie a alta temperatura.
-
Page 106: Instrucciones De Seguridad
Este símbolo indica información adicional sobre el funcionamiento del equipo. ZONA DE PELIGRO Para los equipos pertenecientes al grupo de riesgo 3, la zona de peligro se refiere al área en la que la radiación óptica representa un riesgo elevado para la salud. Esta zona está... - Page 107 PELIGRO: 1. No abra el equipo ni intente modificarlo. 2. Si el equipo deja de funcionar correctamente, si han entrado líquidos u objetos en el interior del equipo o si este ha sufrido algún otro desperfecto, apáguelo inme- diatamente y desconéctelo de la corriente eléctrica. Este equipo solo puede ser reparado por técnicos autorizados.
- Page 108 PELIGRO: 1. ¡Peligro de asfixia! Las bolsas de plástico y las piezas pequeñas deben mantenerse fuera del alcance de las personas (incluidos los niños) con capacidades físicas, sensoriales o mentales reducidas. 2. ¡Peligro por caída del equipo! Asegúrese de que el equipo está bien instalado y no se puede caer.
- Page 109 6. Respete la clase de protección IP, así como las condiciones ambientales, como la temperatura y la humedad, de acuerdo con las especificaciones. 7. Los equipos pueden perfeccionarse constantemente. En caso de que la información sobre las condiciones de funcionamiento, el rendimiento u otras propiedades del aparato especificada en el manual del usuario difiera de la información del etiquetado del aparato, siempre tendrá...
- Page 110 Apantallamiento (como muros, estructuras metálicas, agua). Saturación del espectro de radio (redes inalámbricas potentes). Interferencias Radiación electromagnética (videowalls LED, reguladores de intensidad de luces). Todas las especificaciones sobre el alcance se refieren a la operación en campo libre con línea directa visual y sin interferencias. El funcionamiento de los transmisores de radio está...
- Page 111 Los daños causados por fuentes de luz externas quedan excluidos de la garantía del fabricante ZONAS SIN ILUMINACIÓN Se puede utilizar DMX para definir zonas (zona de espectadores, zona de escenario y similares) en las que se desactive automáticamente la iluminación en cuanto el haz de luz alcance dicha zona durante los giros horizontales y verticales.
-
Page 112: Notas Sobre Los Dispositivos Portátiles De Exterior
El foco es compatible con el estándar RDM (Remote Device Management). La gestión remota de dispositivos permite consultar el estado y la configuración de los dispositivos RDM conectados me- diante un controlador compatible RDM, como el Cameo UNICON, disponible como opción (ref.: CLI- REMOTE) -
Page 113: Conexiones, Mandos E Indicadores
Salida de alimentación eléctrica IP65 con tapón protector de goma. Permite la alimentación de otros focos CAMEO. Asegúrese de que el consumo total de corriente de todas las unidades conec- tadas no supere el valor especificado en amperios (A) en el equipo (cuando no se utilice, cierre siempre el tapón protector de goma). -
Page 114: Pantalla Lcd
ELEMENTO DE IGUALACIÓN DE PRESIONES Elemento de igualación de presiones para evitar la condensación en el interior de la carcasa. Para garantizar su correcto funcionamiento, el elemento debe protegerse de la suciedad. ANTENA La antena para el control por DMX inalámbrico se encuentra en el interior del equipo. ATENCIÓN: Para proteger los conectores DMX y de red de las salpicaduras de agua de acuerdo con el grado de protección IP65, deben utilizarse conectores de entrada y salida especiales con grado de protección IP65, o bien taparlos con tapones de... - Page 115 NOTA: • Antes de desplazarse por el menú del equipo, asegúrese de que el panel de control está seco y limpio para que funcione correctamente. • La humedad en el panel de control puede provocar un funcionamiento incorrecto del foco, por ejemplo, en exteriores.
-
Page 116: Funcionamiento
Cuando el foco está correctamente conectado a la red eléctrica, en la pantalla se mostrará «Software update ... please wait», la versión del software, «Welcome to Cameo», y «... RESET» durante el encendido del equipo y el reinicio de motores. Tras este proceso, el foco está listo para funcionar y se activa el último modo operativo que estuviera activado. - Page 117 Modos operativos Autónomo Modo operativo Esclavo Temperatura de Bluetooth activado Temperatura de Bluetooth desactivado la luminaria la luminaria Estado W-DMX Estado W-DMX Modo operativo Mensaje Mensaje de error de error Escena o bucle y salida de señal Nota sobre la pantalla principal en los modos operativos con control externo: Si se desconecta la señal de control del equipo, los caracteres del centro de la pantalla empezarán a parpadear;...
- Page 118 MENÚ DE CONTROL (Control) El menú «Control» permite seleccionar los distintos modos operativos y las opciones de ajuste en los submenús. CONFIGURACIÓN DE LA DIRECCIÓN DE INICIO DMX (DMX Address) Desde la pantalla principal, pulse MENU para entrar en el menú principal. Con y , seleccione el menú...
- Page 119 En la siguiente tabla encontrará información sobre los submenús del menú «Network» y las opcio- nes de ajuste correspondientes (seleccione con y , confirme con ENTER, cambie el valor o el estado con y , y confirme con ENTER). Red Art-Net Control por Art-Net Control por sACN...
- Page 120 Desde la pantalla principal, pulse MENU para entrar en el menú principal. Con y , seleccione la opción de menú Control y confirme con ENTER. Seleccione ahora la opción de menú Stand Alone y confirme de nuevo. En la siguiente tabla encontrará información sobre los submenús del menú «Stand Alone» y las opciones de ajuste correspondientes (seleccione con ...
- Page 121 AJUSTES DEL SISTEMA (Settings) Desde la pantalla principal, pulse MENU para entrar en el menú principal. Utilice y para seleccionar Settings y confirme con ENTER. En la siguiente tabla encontrará información sobre los submenús del menú «Settings» y las opcio- nes de ajuste correspondientes (seleccione con ...
- Page 122 CRMX Seleccionar universo Universe CRMX A a H Código RGB para re- Colour presentación cromática Code del universo Universe Metadata Cadena de 16 caracteres con nombre personalizable que identifica el universo Bluetooth activado Ajustes Bluetooth desactivado inalám- Solicitud de PIN bricos activada (por defecto, 081569) Solicitud de PIN desac-...
- Page 123 La intensidad luminosa aumenta de forma lineal con el valor DMX Ajustar la intensidad luminosa con precisión en los valores DMX bajos y de forma más brusca en los valores DMX altos Ajustar la intensidad luminosa de forma más brusca en los valores DMX bajos y con precisión en los valores DMX altos Ajustes...
- Page 124 La rueda de gobos gira siempre en el sentido de las agujas del reloj La rueda de gobos gira en el sentido que implique la distancia más corta La rueda de gobos cambia directamente al gobo deseado cuando se alcanza el valor correspondiente Giro continuo de las ruedas de gobos...
- Page 125 Velocidad intermedia y constante del ventilador con Ajustes brillo reducido, si fuese necesario del venti- lador Velocidad alta y constante del ventilador Se conserva el último comando Se activa el último modo operativo autónomo selec- Estado cionado operativo Desvanecimiento de 10 segundos hasta oscureci- con fallo miento de señal...
- Page 126 Reiniciar los motores de giro horizontal/vertical Reiniciar los motores de la cabeza del equipo Reiniciar todos los motores Secuencia preprogramada para probar todos los componentes Secuencia preprogramada para probar todos los componentes con carga máxima Activar cada uno de los motores con valores de 000 a 255 No restablecer las horas de funcionamiento Restablecer las horas de funcionamiento...
-
Page 127: Instalación Y Montaje
Información de estado Mostrar la temperatura del equipo Unidad para la temperatura (pulse ENTER para cambiar) Mostrar la velocidad de los ventiladores Horas totales de funcionamiento Tiempo operativo útil Horas de funcionamiento de la lám- para Horas de funcionamiento desde el último restablecimiento del tiempo de mantenimiento Dirección MAC... - Page 128 POSICIÓN DE USO...
-
Page 129: Cuidado, Mantenimiento Y Reparación
CUIDADO, MANTENIMIENTO Y REPARACIÓN Para garantizar el buen funcionamiento del equipo a largo plazo, hay que limpiarlo con regularidad y, si es necesario, hacerle las revisiones necesarias. Los requisitos de limpieza y mantenimiento dependen de la intensidad de uso y del entorno en el que se utilice. Se recomienda una inspec- ción visual antes de cada puesta en marcha. -
Page 130: Dimensiones
DIMENSIONES (mm) -
Page 131: Características Técnicas
CARACTERÍSTICAS TÉCNICAS Referencia: CLORONH2 Tipo de producto: CABEZA MÓVIL FÓSFORO LÁSER IP65 Tipo: Cabeza móvil Fuentes: Tipo de fuente de luz: Motor de fósforo láser, 260 W >12.000 h Vida útil mínima de la fuente de luz (L70): (vida útil definida como tiempo hasta el 70 %/ L70) Temperatura de color (fuente de luz): 8.000 K... - Page 132 Invertir pantalla, activar/desactivar la ilumina- ción de la pantalla, error de señal, inversión horizontal, inversión vertical, retroalimentación, apagado, test, restablecimiento, valores por Configuración del equipo: defecto de usuario, funciones de oscurecimien- to, scroll/snap rueda de colores gobos, bloqueo automático, velocidad horizontal/vertical, valores por defecto de la lámpara, modos de ventilación, protección solar, modo En espera 650 Hz, 1.530 Hz, 3.600 Hz, 12 kHz, 18,9 kHz,...
-
Page 133: Explicación De La Clase De Protección Ip
Peso: 32 kg Cable eléctrico de 1 m con conector Seetronic Otras características: IP65 y 2 soportes de montaje en omega (CLO- MEGABRACKET5) incluidos Accesorios (opcional): Inserto SIP de espuma EPP EXPLICACIÓN DE LA CLASE DE PROTECCIÓN IP 1. La protección IP solo refleja la protección contra objetos sólidos y el agua. No describe la resis- tencia general a la intemperie, como la protección contra la radiación UV ni la temperatura. -
Page 134: Distancia Mínima A Materiales Normalmente Inflamables
DISTANCIA MÍNIMA A MATERIALES NORMALMENTE INFLAMABLES Este símbolo con la especificación de la distancia en metros (m) indica la distancia mínima entre el foco y los materiales normalmente inflamables. Consulte las características técnicas de este manual para conocer el valor válido de este equipo. RECICLAJE EMBALAJE: 1. - Page 135 RoHS (2011/65/UE) RED (2014/53/UE) Declaración de conformidad CE Las declaraciones de conformidad de los productos sujetos a las directivas LVD, EMC y RoHS pueden solicitarse a info@adamhall.com Las declaraciones de conformidad de los productos sujetos a la RED pueden descargarse de www.adamhall.com/compliance/ ¡Sujeto a erratas y errores, así...
-
Page 136: Polski
Urządzenie to zostało opracowane i wyprodukowane zgodnie z najwyższymi standardami jakości, aby zapewnić wiele lat bezawaryjnej pracy. Proszę uważnie przeczytać niniejszą instrukcję obsłu- gi, aby móc szybko optymalnie wykorzystać swój nowy produkt Cameo Light. Więcej informacji na temat Cameo Light znajdą Państwo na naszej stronie internetowej CAMEOLIGHT.COM INFORMACJE NA TEMAT NINIEJSZEJ INSTRUKCJI OBSŁUGI... - Page 137 4. UWAGA: hasło ostrzegawcze UWAGA, ewentualnie w połączeniu z symbolem, odnosi się do sy- tuacji lub warunków, które mogą spowodować szkody materialne i/lub szkody dla środowiska. Ten symbol wskazuje na zagrożenia, które mogą spowodować porażenie prądem. Ten symbol oznacza niebezpieczne obszary lub niebezpieczne sytuacje. Ten symbol oznacza zagrożenia spowodowane gorącymi powierzchniami.
-
Page 138: Instrukcje Bezpieczeństwa
Ten symbol oznacza dodatkowe informacje na temat działania produktu. STREFA ZAGROŻENIA W przypadku urządzeń z grupy ryzyka 3 strefa zagrożenia odnosi się do obszaru, w którym promieniowanie optyczne stwarza znaczące ryzyko uszczerbku na zdrowiu. Obszar ten jest oznaczony symbolem ostrzegawczym na poniższym rysunku. Promieniowanie optyczne Ryzyko poważnego uszkodzenia oczu lub ślepoty 1. - Page 139 NIEBEZPIECZEŃSTWO: 1. Proszę nie otwierać urządzenia i nie wprowadzać żadnych modyfikacji. 2. Jeśli urządzenie przestanie działać prawidłowo, jeśli do jego wnętrza dostaną się płyny lub przedmioty lub jeśli zostanie ono uszkodzone w jakikolwiek inny sposób, należy je natychmiast wyłączyć i odłączyć od zasilania. Naprawy urządzenia mogą wykonywać...
- Page 140 NIEBEZPIECZEŃSTWO: 1. Niebezpieczeństwo uduszenia/zadławienia! Plastikowe torby i małe części muszą być przechowywane poza zasięgiem osób (w tym dzieci) o ograniczonych zdolno- ściach fizycznych, sensorycznych lub umysłowych. 2. Niebezpieczeństwo spowodowane przez spadające urządzenie! Proszę upewnić się, że urządzenie jest bezpiecznie zamontowane i nie może spaść. Używaj wy- łącznie odpowiednich stojaków lub uchwytów (szczególnie w przypadku instalacji stałych).
- Page 141 5. Należy unikać wstrząsów lub uderzeń w urządzenie. 6. Należy zwrócić uwagę na stopień ochrony IP, a także warunki otoczenia, takie jak temperatura i wilgotność, zgodnie ze specyfikacją. 7. Urządzenia mogą być stale rozwijane. W przypadku rozbieżności pomiędzy informacja- mi zawartymi w instrukcji obsługi a informacjami na etykiecie urządzenia, dotyczący- mi warunków pracy, wydajności lub innych właściwości urządzenia, pierwszeństwo mają...
- Page 142 TRANSMISJA SYGNAŁU RADIOWEGO (NA PRZYKŁAD, W-DMX LUB RADIOWE SYSTEMY AUDIO): ® Jakość i wydajność transmisji sygnału bezprzewodowego zasadniczo zależy od warunków otoczenia. Na zasięg i stabilność sygnału mogą wpływać np. następujące czynniki: Ekranowanie (np. mur, konstrukcje metalowe, woda) Duże natężenie ruchu radiowego (np. silne bezprzewodowe sieci LAN) Zakłócenia Promieniowanie elektromagnetyczne (np.
- Page 143 UWAGA: POTENCJALNE USZKODZENIE PRZEZ ZEWNĘTRZNE ŹRÓDŁA ŚWIATŁA! Promieniowanie słoneczne, promieniowanie laserowe i wiązki światła z innych reflek- torów mogą uszkodzić obudowę i elementy wewnętrzne, takie jak filtry, gobo i koła kolorów, silniki, kable, paski itp. oraz źródła światła! Proszę nie wystawiać urządzenia, a zwłaszcza otworu obiektywu, na bezpośrednie działanie promieni słonecznych, promieniowania laserowego i wiązek światła z innych reflektorów podczas rozpakowywania, instalacji, długotrwałego nieużywania i eksploatacji! Gdy urządzenie nie jest używane, należy zawsze kierować...
-
Page 144: Uwagi Dotyczące Przenośnych Urządzeń Do Zastosowań Zewnętrznych
Sprawdzić kompletność i nienaruszony stan przesyłki, a jeśli dostawa jest niekompletna lub uszkodzona natychmiast powiadomić sprzedawcę. Zawartość opakowania produktu obejmuje: X 1 × Ruchoma głowica ORON H2 X 1 × Kabel sieciowy X 2 × Uchwyt omega X Informacje dotyczące bezpieczeństwa i zgodności (instrukcja obsługi do pobrania za pomocą... - Page 145 5-pinowe złącza DMX. w zestawie 2× uchwyt montażowy omega. Napięcie robocze: 100 - 240 V AC. Reflektor obsługuje standard zdalnego zarządzania urządzeniami (RDM). Zdalne zarządzanie urządzeniami pozwala użytkownikowi monitorować stan i konfigurację urządzeń RDM za pomocą kontrolera obsługującego RDM, takiego jak opcjonalnie dostępny Cameo UNICON (numer artykułu CLIREMOTE).
-
Page 146: Przyłącza, Elementy Obsługi I Wskaźniki
POWER OUT Gniazdo wyjściowe IP65 z gumową zaślepką. Umożliwia zasilanie innych reflektorów CAMEO. Upewnić się, że całkowity pobór prądu przez wszystkie podłączone urządzenia nie przekracza wartości podanej na urządzeniu w amperach (A) (gdy urządzenie nie jest używane, należy zawsze zamykać... - Page 147 ELEMENT WYRÓWNUJĄCY CIŚNIENIE Element wyrównujący ciśnienie zapobiegający kondensacji wewnątrz obudowy. Aby zapewnić prawidłowe działanie, element musi być chroniony przed zabrudzeniami. ANTENA Antena do bezprzewodowego sterowania DMX znajduje się wewnątrz podstawy urządzenia. UWAGA: Aby zapewnić ochronę przed strumieniami wody zgodnie ze stopniem ochrony IP65, specjalne gniazda wejściowe i wyjściowe DMX muszą...
- Page 148 UWAGA: • Przed przejściem do nawigowania w menu urządzenia należy upewnić się, że panel sterowa- nia jest suchy i czysty, aby nie wpływać negatywnie na jego funkcjonalność. • Wilgoć na panelu sterowania może prowadzić do nieprawidłowego działania reflektora, np. w warunkach zewnętrznych.
-
Page 149: Obsługa
Po prawidłowym podłączeniu reflektora do źródła zasilania, na wyświetlaczu pojawią się komu- nikaty "Aktualizacja oprogramowania ... proszę czekać", wersja oprogramowania, "Witamy w Cameo" i "..RESET" podczas uruchamiania i resetowania silnika. Po zakończeniu tego procesu reflektor jest gotowy do pracy i uruchamiany jest wcześniej aktywowany tryb pracy. - Page 150 Główny wyświetlacz jest aktywowany automatycznie, jeśli w ciągu około 30 sekund nie zostanie wprowadzona żadna informacja. WYŚWIETLACZ GŁÓWNY W różnych trybach pracy główny wyświetlacz pokazuje różne informacje, które są istotne dla danego trybu pracy. Tryby pracy DMX i W-DMX Tryby pracy Art-Net i sACN ®...
- Page 151 WIRELESS DMX Aby sparować bezprzewodowy odbiornik DMX z bezprzewodowym nadajnikiem kompatybilnym z DMX, należy wykonać komendę resetowania w punkcie menu "WDMX" w sekcji "Receiver" (proszę wybrać "Unlink" i potwierdzić). Odbiornik jest teraz gotowy do parowania i oczekuje na żądanie parowania z nadajnika. Rozpocząć parowanie, wybierając "Link" w menu nadajnika i potwierdzając;...
- Page 152 DMX Mode i ponownie potwierdzić. Korzystając z i , wybierz żądany tryb pracy DMX i na- ciśnij ENTER aby potwierdzić. Tabele DMX z przypisaniami kanałów można znaleźć w sekcji DMX CONTROL niniejszej instrukcji obsługi. USTAWIENIA SIECIOWE (Network) Zaczynając od ekranu głównego, proszę nacisnąć MENU, aby uzyskać dostęp do menu główne- go.
- Page 153 Ustawianie maski podsieci: Ustaw pierwszy blok, potwierdź, ustaw drugi blok, potwierdź. Przekazywanie sygnału sterującego do wyjścia XLR Signal Sterowanie przez XLR z przerwaniem sygnału sieciowego Routing Brak połączenia między sygnałem sieci a złączami XLR Network sACN Sterowanie przez Art-Net Sterowanie przez sACN Ustawianie obszaru sACN universe Ustawianie adresu IP: Ustaw pierwszy blok, potwierdź, ustaw drugi blok, potwierdź.
- Page 154 Tryb Stand alone Sygnał sterujący jest przesyłany przez wyjście DMX OUT Sygnał sterujący nie jest przekazywany Wybór i aktywacja żądanej sceny Wybór i aktywacja żądanej pętli Proszę ustawić każdą scenę indywidualnie. Sce- ny są aktywowane poprzez ich wybranie. Wybór kroku 1-8 Ustawienie czasu kroku Ustawienie czasu zanikania Wybór sceny 1-8...
- Page 155 Informacje o pozycjach podmenu dostępnych w menu ustawień i odpowiadających im opcjach ustawień można znaleźć w poniższej tabeli (do wyboru za pomocą przycisków i, potwierdź za pomocą ENTER, zmień wartość lub stan za pomocą przycisków i , potwierdź za pomocą ENTER).
- Page 156 Bluetooth włączony Bluetooth wyłączony Żądanie kodu PIN włączone (ustawienie fabryczne 081569) Żądanie kodu PIN Usta- wyłączone wienia Przekazywanie sygnału sterującego na bezprze- XLR (DMX OUT) wodowe Sterowanie poprzez XLR (DMX IN) z przerwaniem sygnału bezprzewodo- wego Brak połączenia między sygnałem bezprzewodowego DMX a złączami Obrót wyświetlacza o 180°...
- Page 157 Intensywność światła może być precyzyjnie regulowana przy niższych i wyższych wartościach DMX i szeroko regulowana przy średnich wartościach Usta- wienia Wybrać częstotliwość LED PWM ściemnia- Reflektor natychmiast reaguje na zmiany wartości DMX Reflektor zachowuje się podobnie do reflektora halogenowego ze stopnio- wymi zmianami jasności Odwrócony kierunek obrotu Kierunek obrotu nie jest odwrócony...
- Page 158 Koło gobo zawsze obraca się zgodnie z ruchem wskazówek zegara Koło gobo obraca się na najkrótszą odległość Tarcza kolorów prze- skakuje bezpośrednio z Ustawie- powrotem do żądanego nia gobo filtra kolorów po osią- i koła gnięciu odpowiedniej kolorów wartości Ciągły obrót tarczy kolorów Zaciemnienie w przypadku zmian wartości w kołach barw i gobo...
- Page 159 Zapisuje wszystkie bieżące ustawienia jako ustawie- nia użytkownika A Zapisuje wszystkie bieżące ustawienia jako ustawie- nia użytkownika B Zapisuje wszystkie bieżące ustawienia jako ustawie- nia użytkownika C MENU SERWISOWE (Service) Zaczynając od ekranu głównego, proszę nacisnąć MENU, aby uzyskać dostęp do menu głównego. Korzystając z ...
- Page 160 Aktywacja wszystkich silników indywidualnie z Test wartościami od 000 do 255 Nie resetuj czasu pracy serwisowej Resetowanie serwisowego czasu pracy Wyłącznie do celów serwisowych INFORMACJE O SYSTEMIE (System info) Zaczynając od ekranu głównego, proszę nacisnąć MENU, aby uzyskać dostęp do menu głównego. Korzystając z ...
-
Page 161: Konfiguracja I Instalacja
Wyświetla temperaturę odpowiedniego komponentu Ustawienie jednostki temperatury (pro- szę nacisnąć ENTER, aby zmienić) Wyświetlanie prędkości odpowiedniego wentylatora Całkowity czas pracy Czas użytkowania Czas pracy lampy Czas pracy od ostatniego serwisowego zresetowania czasu pracy Adres MAC Unikalny identyfikator RDM Wyświetlanie obecnych wartości DMX Wyświetlanie błędów w przypadku awarii Wyświetlanie tabel trybów DMX KONFIGURACJA I INSTALACJA... - Page 162 POZYCJA UŻYTKOWANIA...
-
Page 163: Pielęgnacja, Konserwacja I Naprawa
PIELĘGNACJA, KONSERWACJA I NAPRAWA Aby zapewnić długotrwałe i prawidłowe działanie urządzenia, należy je regularnie czyścić i w razie potrzeby serwisować. Potrzeba przeprowadzania konserwacji zależy od intensywności użytkowa- nia i środowiska, w którym urządzenie jest używane. Zalecamy kontrolę wzrokową przed każdym uruchomieniem. -
Page 164: Wymiary
WYMIARY(mm) -
Page 165: Dane Techniczne
DANE TECHNICZNE Nr art.: CLORONH2 GŁOWICA RUCHOMA IP65 OPARTA O LASER Typ produktu: FOSFOROWY Typ: Głowica ruchoma Źródło QTY: Źródło światła Silnik oparty o laser fosforowy 260 W >12,000 h (Żywotność zdefiniowana jako czas Minimalna żywotność źródła światła (L70): do 70%/L70) Temperatura barwowa (źródło światła): 8000 K Temperatura barwowa (na wyjściu):... - Page 166 Odwracanie wyświetlacza, włączanie/wyłącza- nie podświetlenia wyświetlacza, błąd sygnału, odwracanie obrotu, odwracanie pochylenia, sprzężenie zwrotne, przesuwanie w czerni, test, reset, domyślne ustawienia użytkownika, Ustawienia urządzenia: funkcje zaciemnienia, przewijanie/przeciąganie kółka koloru/gobo, automatyczna blokada, pręd- kość obrotu/pochylenia, domyślne ustawienia lampy, tryby wentylatora, ochrona przeciwsło- neczna, tryb uśpienia 650 Hz, 1530 Hz, 3600 Hz, 12 kHz, PWM:...
-
Page 167: Wyjaśnienie Klasy Ochrony Ip
Wymiary (szer. x wys. x dł.): Zobacz rysunek Waga: 32 kg Kabel zasilający 1 m z Seetronic IP65 wtyczka Pozostałe funkcje: i 2 wsporniki montażowe Omega (CLOMEGA- BRACKET5) w zestawie Akcesoria (opcjonalne): Wkład SIP z pianki EPP WYJAŚNIENIE KLASY OCHRONY IP 1. -
Page 168: Minimalna Odległość Od Normalnie Łatwopalnych Materiałów
MINIMALNA ODLEGŁOŚĆ OD NORMALNIE ŁATWOPALNYCH MATERIAŁÓW Ten symbol z odległością podaną w metrach (m) wskazuje minimalną odległość urządzenia od normalnie łatwopalnych materiałów. Wartość obowiązująca dla tego urządzenia znajduje się w danych technicznych niniejszej instrukcji! UTYLIZACJA OPAKOWANIE: 1. Opakowanie można poddać recyklingowi przy użyciu zwykłych metod utylizacji. 2. - Page 169 RoHS (2011/65/EU) RED (2014/53/EU) Deklaracja zgodności EC Deklaracje zgodności dla produktów podlegających dyrektywie LVD, EMC, RoHS można zamówić pd adresem info@adamhall.com Deklaracje zgodności dla produktów podlegających RED można pobrać ze strony www.adamhall. com/compliance/ Zastrzega się możliwość wystąpienia błędów w druku i pomyłek, a także zmian tech- nicznych i innych!
-
Page 170: Italiano
Questo dispositivo è stato sviluppato e prodotto secondo i più alti standard di qualità, per garantire molti anni di funzionamento senza problemi. Leggere attentamente questo Manuale di istruzioni per iniziare rapidamente a utilizzare al meglio il prodotto Cameo Light. Ulteriori informazioni su Cameo Light sono disponibili sul nostro sito web CAMEOLIGHT.COM INFORMAZIONI SU QUESTO MANUALE DI ISTRUZIONI •... - Page 171 Questo simbolo identifica pericoli che possono causare scosse elettriche. Questo simbolo identifica aree o situazioni pericolose. Questo simbolo indica pericoli causati da superfici calde. Questo simbolo indica che non si deve guardare o fissare la sorgente luminosa. Questo simbolo indica che sorgenti luminose intense classificate come gruppo di rischio 3 pos- sono causare danni alla pelle o agli occhi.
-
Page 172: Istruzioni Di Sicurezza
ZONA DI PERICOLO Per i dispositivi del gruppo di rischio 3, la zona di pericolo si riferisce all’area in cui la radiazione ottica costituisce un rischio significativo per la salute. Quest’area è contrassegnata dal simbolo di avvertimento nell’immagine seguente. Radiazione ottica Rischio di gravi lesioni oculari o di cecità... - Page 173 PERICOLO 1. Non aprire il dispositivo e non effettuare modifiche. 2. Se il dispositivo non funziona più correttamente, se liquidi o oggetti sono penetrati al suo interno o se è stato danneggiato in qualsiasi altro modo, spegnerlo imme- diatamente e staccarlo dall’alimentazione di rete. Il dispositivo può essere riparato unicamente da tecnici autorizzati alla riparazione.
- Page 174 AVVERTENZA 1. Usare il dispositivo solo per lo scopo per cui è previsto. 2. Utilizzare il dispositivo solo con gli accessori raccomandati e previsti dal produttore. 3. Durante l’installazione, osservare le norme di sicurezza vigenti nel proprio Paese. 4. Dopo aver collegato l’unità, controllare tutti i percorsi dei cavi per evitare danni o incidenti, ad esempio per il rischio di inciampare.
- Page 175 CAUTELA! NOTE IMPORTANTI SUI PRODOTTI DI ILLUMINAZIONE 1. Questo è un dispositivo della classe di rischio 3. Rischio di gravi danni alla pelle e agli occhi! Non guardare mai direttamente la sorgente luminosa o il fascio di luce, nemmeno per breve tempo. Non guardare direttamente nella lampada con strumenti ottici, come lenti d’ingrandimento o binocoli.
- Page 176 AVVERTENZA: i dispositivi con trasmissione del segnale wireless non sono adatti all’utilizzo in zone sensibili dove il funzionamento via radio può causare effetti poten- zialmente dannosi. Queste zone includono: • Ospedali, centri sanitari o altre strutture sanitarie che forniscono trattamenti ai pazienti con personale e attrezzature qualificate.
- Page 177 ZONE DI OSCURAMENTO Il DMX può essere utilizzato per configurare delle zone (area di visione del pubblico, area palcoscenico ecc.) in cui l’oscuramento si attiva automaticamente non appena il fascio di luce raggiunge quella zona con il giro orizzontale (PAN) e verticale (TILT). È possibile attivare solo una delle tre zone di oscuramento disponibili alla volta.
-
Page 178: Note Sui Dispositivi Portatili Per Esterni
Il faro è conforme allo standard RDM (Remote Device Management, gestione remota dei dispositivi). La funzione RDM consente di monitorare lo stato e la configurazione dei dispositivi RDM median- te un controller compatibile con RDM, per esempio il Cameo UNICON, disponibile come optional (codice articolo CLIREMOTE). -
Page 179: Connessioni, Elementi Di Comando E Di Visualizzazione
Presa di uscita di rete IP65 con coperchio ermetico in gomma. Consente di alimentare altri fari CAMEO. Assicurarsi che il consumo totale di corrente di tutti i dispositivi collegati non superi il valore specificato in ampere (A) riportato sul dispositivo (chiudere sempre con il coperchio in gomma quando non si usa). -
Page 180: Display Lcd
ELEMENTO DI EQUALIZZAZIONE DELLA PRESSIONE L’elemento di equalizzazione della pressione impedisce la formazione di condensa nell’alloggia- mento. Per garantirne il corretto funzionamento, questo componente deve essere protetto dallo sporco. ANTENNA L’antenna per il comando DMX wireless si trova alla base del dispositivo. ATTENZIONE: per proteggerle dagli spruzzi d’acqua in conformità... - Page 181 NOTA BENE • Prima di passare al menu del dispositivo, verificare che il pannello di controllo sia asciutto e pulito per non comprometterne il funzionamento. • La presenza di umidità sul pannello di controllo può pregiudicare il funzionamento del faro, per esempio in esterni.
-
Page 182: Funzionamento
“Software Update ... please wait”, la ver- sione del software e i messaggi “Welcome to Cameo” e “... RESET”. Al termine della procedura, il faro è pronto per essere usato e si avvia la modalità operativa attivata in precedenza. - Page 183 Modalità operativa Stand Alone Modalità operativa Slave Temperatura Bluetooth attivato Temperatura Bluetooth disattivato dell’illuminante dell’illuminante Stato W-DMX Stato W-DMX Modalità operativa Messaggio Messaggio d’errore d’errore Scena o loop e uscita del segnale Nota sul display principale nelle modalità operative con comando esterno: non appena il segnale di comando si interrompe, i caratteri al centro del display iniziano a lampeggiare e smettono non appena è...
- Page 184 MENU DI CONTROLLO (Control) Il menu “Control” si utilizza per selezionare le varie modalità operative e impostare le relative opzioni nei sottomenu corrispondenti. IMPOSTAZIONE DELL’INDIRIZZO DMX INIZIALE (DMX Address) Iniziando dal display principale, premere MENU per accedere al menu principale. Utilizzando e , selezionare il menu Control e premere ENTER.
- Page 185 Le informazioni sulle voci di sottomenu del menu “Network” e le corrispondenti opzioni di impo- stazione sono riportate nella tabella seguente (selezionare con e , confermare con ENTER, modificare il valore o lo stato con e , confermare con ENTER). Rete Art-Net Controllo tramite Art-Net Controllo tramite sACN...
- Page 186 MENU STAND-ALONE (Stand Alone) Nelle modalità operative stand-alone “Play Scene” e “Play Loop”, il segnale di comando della modalità operativa corrispondente può essere reinviato alle unità slave tramite XLR (Master/Alone -> Master). Se non si vuole reinviare il segnale di comando, disattivare l’uscita (Master/Alone -> Alone).
- Page 187 MODO SLAVE (Slave) Iniziando dal display principale, premere MENU per accedere al menu principale. Utilizzando e , selezionare la voce di menu Control e confermare con ENTER. Selezionare ora la voce di menu Slave e confermare di nuovo. Attivare l’uscita del segnale di comando nell’unità master (Control ->...
- Page 188 Accoppiamento con dispositivi wire- less compatibili e pronti per l’accop- piamento Impostazione della chiave di connes- sione Standard del ricevitore (disponibile = CRMX solo con Standard del ricevitore modalità = CRMX2 operativa RX) CRMX Selezione dell’universo Universe CRMX da A a H Codice RGB per la vi- Colour sualizzazione dei colori...
- Page 189 I controlli si bloccano dopo circa 60 secondi senza input (LOCKED). Per sbloccare: premere contemporanea- Imposta- mente i tasti freccia UP e DOWN per zioni del circa 5 secondi. display Funzione di blocco automatico disat- tivata L’intensità della luce aumenta in modo lineare con il valore DMX L’intensità...
- Page 190 Oscuramento durante il movimento Imposta- della testa zioni dei Nessun oscuramento durante il movi- movi- mento della testa menti Movimenti del motore rallentati per un della funzionamento più silenzioso testa Funzione disattivata La ruota gobo gira sempre in senso orario La ruota gobo gira sulla distanza più...
- Page 191 Controllo automatico della ventola Ventola disattivata a luminosità molto ridotta Impo- Bassa velocità costante della ventola a luminosità stazione ridotta, se necessario della Velocità media costante della ventola a luminosità ventola ridotta, se necessario Alta velocità costante della ventola L’ultimo comando viene mantenuto Stato di Viene attivata l’ultima modalità...
- Page 192 Ripristino dei valori utente C (per salvare i valori dell’utente: Settings -> Store Default) Reset dei motori pan/tilt Resetta i motori nella testa del dispositivo Reset di tutti i motori Sequenza pre-programmata per testare tutti i componenti Sequenza pre-programmata per testare tutti i componenti sotto il carico massimo Attiva tutti i motori individualmente con valori da 000 a 255...
-
Page 193: Installazione E Montaggio
Informazioni sulla fonte dei dati Informazioni sullo stato Visualizzazione della temperatura del componente corrispondente Impostazione dell’unità di temperatura (premere ENTER per cambiare) Visualizzazione del numero di giri della ventola in questio- Tempo di funzionamento totale Tempo di utilizzo Tempo di funzionamento della lam- pada Tempo di funzionamento dall’ultimo ripristino del tempo di servizio... - Page 194 POSIZIONE DI UTILIZZO...
-
Page 195: Cura, Manutenzione E Riparazione
CURA, MANUTENZIONE E RIPARAZIONE Per garantire il funzionamento corretto nel lungo termine del dispositivo, è necessario effettuar- ne la pulizia e, se necessario, la manutenzione regolarmente. I requisiti di cura e manutenzione richiesti dipendono dall’intensità e dall’ambiente di utilizzo. Raccomandiamo un’ispezione visiva prima di ogni utilizzo. -
Page 196: Dimensioni
DIMENSIONI (mm) -
Page 197: Dati Tecnici
DATI TECNICI Cod. articolo: CLORONH2 Tipo di prodotto: TESTA MOBILE FOSFORO-LASER IP65 Tipo: Testa mobile N. di sorgenti luminose: Tipo di sorgente luminosa: Motore fosforo-laser, 260 W Durata minima della sorgente luminosa >12.000 h (L70): (durata definita come tempo fino al 70%/L70) Temperatura di colore (sorgente luminosa): 8.000 K Temperatura di colore (uscita):... - Page 198 Ribaltamento display, Attivazione/disattivazione della retroilluminazione del display, Errore del segnale, Inversione orizzontale, Inversione verti- cale, Feedback, Funzione “move in black”, Test, Impostazioni dispositivo: Reset, Impostazioni utente predefinite, Funzioni di oscuramento, Scroll/snap, Ruota colori/gobo, Blocco automatico, Velocità orizzontale/vertica- le, Impostazione predefinita lampada, Modalità ventola, Protezione solare, Modalità...
-
Page 199: Spiegazione Della Classe Di Protezione Ip
Peso: 32 kg Cavo di alimentazione da 1 m con spina Altre caratteristiche: Seetronic IP65 e 2 staffe di montaggio Omega (CLOMEGABRACKET5) in dotazione Accessori (opzionali): Inserto SIP in schiuma EPP SPIEGAZIONE DELLA CLASSE DI PROTEZIONE IP 1. La classificazione IP si riferisce solo alla protezione da oggetti solidi e dall’acqua. Non descrive la resistenza generale alle intemperie, come raggi UV e temperatura. -
Page 200: Distanza Minima Da Materiali Normalmente Infiammabili
DISTANZA MINIMA DA MATERIALI NORMALMENTE INFIAMMABILI Questo simbolo con l’indicazione della distanza in metri (m) mostra la distanza minima del dispositivo da materiali normalmente infiammabili. Il valore applicabile a questo dispositivo è riportato nei dati tecnici del presente manuale. SMALTIMENTO IMBALLAGGIO 1. - Page 201 Dichiarazione di conformità CE Le dichiarazioni di conformità per i prodotti soggetti alle direttive LVD, CEE e RoHS possono essere richieste a info@adamhall.com Le dichiarazioni di conformità per i prodotti soggetti alla direttiva RED possono essere scaricate dalla pagina www.adamhall.com/compliance/ Soggetto a refusi ed errori, nonché...
-
Page 203: Dmx Control / Dmx Steuerung / Pilotage Dmx / Control Dmx / Sterowanie Dmx / Controllo Dmx
DMX CONTROL / DMX STEUERUNG / PILOTAGE DMX / CONTROL DMX / STEROWANIE DMX / CONTROLLO DMX 24CH 27CH 33CH Sub- Function Values Group group 000 - 255 0% to 100% Pan fine 000 - 255 Move- ment Tilt 000 - 255 0% to 100% Tilt Tilt fine... - Page 204 Magenta 000 - 255 0% to 100% Magenta 000 - 255 fine Sub- Yellow 000 - 255 tractive 0% to 100% Colour Yellow 000 - 255 Mixing fine 000 - 255 0% to 100% CTO fine 000 - 255 000 - 000 Open 001 - 008 Open ->...
- Page 205 126 - 126 Lime 127 - 134 Lime -> Deep Blue 135 - 135 Deep Blue Deep Blue -> 136 - 143 CTO 2600K 144 - 144 CTO 2600K 145 - 152 CTO 2600K -> Amber 153 - 153 Amber 154 - 161 Amber ->...
- Page 206 095 - 095 Gobo 9 096 - 104 Gobo 9 -> Gobo 10 105 - 105 Gobo 10 106 - 114 Gobo 10 -> Gobo 11 115 - 115 Gobo 11 116 - 124 Gobo 11 -> Gobo 12 125 - 125 Gobo 12 126 - 134 Gobo 12 ->...
- Page 207 000 - 128 Gobo Position 0° ... 540° Gobo Rotation fast Gobo 129 - 191 to slow Wheel 1 Gobo 192 - 192 Gobo Rotation Stop Gobo Position Gobo Rotation slow to Wheel 193 - 255 fast (backwards) (rotating Gobo Gobos) Wheel 1 Gobo...
- Page 208 091 - 095 Gobo 15 -> Gobo 16 096 - 096 Gobo 16 097 - 101 Gobo 16 -> Gobo 17 102 - 102 Gobo 17 103 - 107 Gobo 17 -> Gobo 18 108 - 108 Gobo 18 109 - 113 Gobo 18 -> Gobo 19 114 - 114 Gobo 19 115 - 119 Gobo 19 ->...
- Page 209 Gobo 17 Shake 180 - 182 (slow to fast) Gobo 18 Shake 183 - 185 (slow to fast) Gobo 19 Shake 186 - 188 Gobo (slow to fast) Gobo Wheel 189 - 192 Open Gobo Wheel 2 (static Gobo Wheel rotation Gobos) 193 - 223 fast to slow...
- Page 210 Effect 2 Effect Slot Rotation slow Effect 193 - 255 Rotation to fast (backwards) Wheel 2 Animation Animation Wheel In 000 - 255 Wheel 0 - 100% Animation Wheel 000 - 128 Position 0° to 540° Animation Wheel Beam 129 - 191 Animation Animation Rotation fast to slow...
- Page 211 Blackout while P/T 006 - 007 moving On Blackout while P/T 008 - 009 moving Off Blackout Blackout while Wheels 010 - 011 moving On Blackout while Wheels 012 - 013 moving Off 014 - 015 Sun Protection On Sun Pro- tection 016 - 017 Sun Protection Off 018 - 019 Sleep Mode On...
- Page 212 120 - 121 PWM 1 (650 Hz) 122 - 123 PWM 2 (1530 Hz) 124 - 125 PWM 3 (3600 Hz) PWM Fre- quency 126 - 127 PWM 4 (12000 Hz) 128 - 129 PWM 5 (18900 Hz) 130 - 131 PWM 6 (25000 Hz) 132 - 139 No function 140 - 141 Display Always On Display...
- Page 213 EN: (1*) After the adjustments have been made, set the value to 000 to avoid disturbance by endless function call. DE: (1*) Nachdem die Einstellungen vorgenommen wurden, stellen Sie den Wert auf 000 ein, um Störungen durch endlosen Funktionsaufruf zu vermeiden. FR: (1*) Une fois les ajustements effectués, réglez la valeur sur 000 pour éviter les perturba- tions par appel de fonction sans fin.
- Page 216 CAMEOLIGHT.COM Adam Hall GmbH Adam-Hall-Str. 1 | 61267 Neu-Anspach | Germany Phone: +49 6081 9419-0 | adamhall.com Adam Hall Ltd. | The Seedbed Business Centre | SS3 9QY Essex | United Kingdom REV: 01...
Need help?
Do you have a question about the ORON H2 and is the answer not in the manual?
Questions and answers