Advertisement
Quick Links
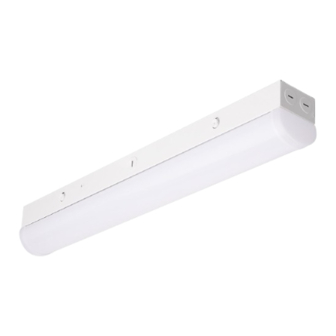
LED STRIP LIGHTS/
EMERGENCY BATTERY BACKUP
Models: 65-1700, 65-1701, 65-1702, 65-1703
INSTALLATION AND SAFETY INSTRUCTIONS
IMPORTANT: Read before installing fixture. Retain for future reference.
WARNING:
Risk of Fire or Electric Shock
• To reduce the risk of fire, electrical shock or injury to persons; read
and follow all warnings and installation instructions before installing.
• All installation should be performed by a qualified electrician.
• To avoid electric shock, ensure power is turned off before installation.
• All wiring must be installed in accordance with all Electrical Codes.
• To prevent product malfunction and/or electrical shock, this product
must be properly grounded.
• Suitable for wet locations.
• Suitable for non-insulated surface and frame. DO NOT cover fixture
with insulation liner or similar material.
• DO NOT install fixture on unstable or easily breakable surface.
• DO NOT exert force on the surface of the fixture.
Item #
Description
65-1700
2' LINEAR STRIP WHITE FINISH 100-277V
65-1701
4' LINEAR STRIP WHITE FINISH 100-277V
65-1702
8' LINEAR STRIP WHITE FINISH 100-277V
65-1703
8' LINEAR STRIP WHITE FINISH 120-347V
65/706
2' & 4' LOW BAY SUSPENSION KIT
65/707
8' LOW BAY SUSPENSION KIT
65/708
ADD ON EM FOR LOW BAYS
CCT INSTRUCTIONS
STEP 1: Press the Spring buttons and remove fixture cover.
INSTALLATION – Surface Mount
STEP 1: Install appropriate anchors into the ceiling or wall.
4' LF = 36 1/4"
8' LF = 83 3/8"
STEP 3: Secure fixture backplate on to the wall or ceiling
using appropriate hardware.
© Copyright 2023 Satco Products, Inc. 5/23 v1.0
Finish/Details
WHITE
59" SUSPENSION LENGTH
59" SUSPENSION LENGTH
8W/1440LM/90 Min. Run Time
STEP 2: Position desired CCT to 3500K, 4000K or 5000K
as needed. After selecting CCT, secure cover.
STEP 2: Turn OFF the power and connect wires by using
wire nuts. See wiring diagram below.
STEP 4: Press the cover upward and lock it with fixture
springs. Installation of fixture is compete.
1
65-1700, 2' (0.61m) W
65-1701, 4' (1.2m) W
65-1702, 8' (2.4m) W
65-1703, 8' (2.4m) W
Volts
Temperature
100~277V
-20°C to 60°
120~347V
–
–
–
–
–
–
Wiring Diagram
LINE
BLACK
NEUTRAL
WHITE
GROUND
GREEN
CCT
Watts
30W
3500K
40W
4000K
50W
5000K
82W
–
–
–
–
–
–
Fixture
PURPLE
DIM +
GREY
DIM –
Satco Products, Inc.
Brentwood, NY 11717
Advertisement

Subscribe to Our Youtube Channel
Summary of Contents for Satco Nuvo 65-1700
- Page 1 STEP 3: Secure fixture backplate on to the wall or ceiling STEP 4: Press the cover upward and lock it with fixture using appropriate hardware. springs. Installation of fixture is compete. Satco Products, Inc. © Copyright 2023 Satco Products, Inc. 5/23 v1.0 Brentwood, NY 11717...
- Page 2 INSTALLATION – Optional EM Driver and Motion Sensor STEP 1: Press the Spring buttons and STEP 2: Use a flat screwdriver to STEP 3: Align the Emergency power remove fixture cover/diffuser. remove knockouts on the bottom of supply with the studs on the bottom fixture housing.
- Page 3 Wiring Diagram for Optional EM Driver and Sensor NOTE: In order to avoid interference between the microwave sensors during operation, the installation distance between the lamps should not be less than one meter.
- Page 4 LUCES DE TIRA LED / RESERVA DE LA ESPAÑOL BATERÍA DE EMERGENCIA INSTRUCCIONES DE INSTALACIÓN Y SEGURIDAD Modelos: 65-1700, 65-1701, 65-1702, 65-1703 ADVERTENCIA: Riesgo de incendio y descarga eléctrica • Para disminuir el riesgo de incendio, descarga eléctrica o lesiones, lea todas las advertencias y siga todas las instrucciones antes de instalar el producto.


Need help?
Do you have a question about the Nuvo 65-1700 and is the answer not in the manual?
Questions and answers