Advertisement
Quick Links
Advertisement

Related Manuals for Hem Max Bench


Summary of Contents for Hem Max Bench
- Page 1 Max Bench Assembly Instruction...
- Page 2 The Max furniture family embodies its name in every way. Created by one of contemporary design’s finest talents, Max Lamb. Please note: You will need 4 people to assemble the Max Bench. Do not attempt to assemble the bench upside down. Read the full assembly instructions before starting.
- Page 3 Parts 2 × Spanner 8 × M18 washer 16 × M18 nut 4 × Felt glider 4 × Metal rod 4 × Leg 1 × Bench Centre 2 × Bench end...
- Page 4 Step 1 Please arrange the parts of the table before you start assembly. Match the numbers on the legs to the sides of the table centre and table ends. Please see the overview illustration below.
- Page 5 Step 2 If desired, add the felt gliders to the bottom of the legs. Step 3 Note: 2 people are needed to hold the bench centre. Please hold up the bench centre from each short side.
- Page 6 Step 4 While two people are holding the bench centre, a third person matches the side of the first leg with the number 1a to the number 1a in the slot of the bench centre. Gently slide the first leg into the slot of the bench centre.
- Page 7 Step 6 While the bench centre is being held by two people, the third person inserts the four metal rods into the holes in the bench center. Step 7 Next, match the first bench end with the bench centre. Just like in step 4, the number on the bench end must match with the number on the leg.
- Page 8 Step 8 Next, while two people still hold the bench centre, two other people slide the bench end towards the metal rods and the bench legs. Try to keep the metal rods from falling out of the other side of the bench center.
- Page 9 Step 10 Like in step 7, match the second table end with the bench centre. The number on the bench end must match with the number on the leg. Step 11 Next, while two people still hold the bench centre, two other people slide the bench end towards the metal rods and the legs.
- Page 10 Step 12 Thread a washers and one 1 nut on to the 4 metal rods from under the bench. Thread the washer first and later the nut. Thread them on by hand. Do not tighten them. Step 13 Now, tighten the nuts simultaneously on the opposite sides using the the two supplied spanners.
- Page 11 Step 14 Repeat step 13 on all other slots this 3 times. Please ensure that the bench ends are aligned with the bench centre.
- Page 12 Step 15 After, thread the second nut on to each end of the 4 metal rods. Tighten them lightly by hand. Step 16 Next, tighten the nuts on opposite sides simultaneously (one rod at a time), using the two supplied spanners.
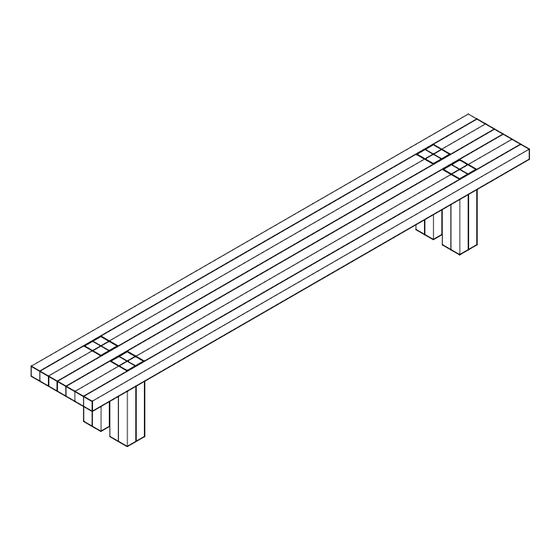
- Page 13 Step 17 Your Max Bench is now ready assembled.
-
Page 14: Care Guide
The Max Table and Bench are made to last. With proper care they will age grace fully and a beautiful patina will develop over time. Hem works only with the highest grades of solid, natural timber and it’s important to note that natural timber varies in grain and color depending on the variation in the original trees. - Page 15 ingenious construction to be highlighted as the piece ages. As with all natural materials, it’s best to let the product live, breath, and ease into its new home. In relation to the expected wood movement, you might find the three top pieces not being perfectly aligned over time and the edges may move slightly up or down in relation to the centerpiece.
- Page 16 Should you have any problems assembling your product, contact us at info@hem.com. We’re always happy to help! We have carefully selected the materials used in this product, and ask you to treat it responsibly too. Please recycle all packaging according to your local disposal rules.
Need help?
Do you have a question about the Max Bench and is the answer not in the manual?
Questions and answers