Advertisement
Quick Links
Advertisement

Related Manuals for Hem Palo 20012


Summary of Contents for Hem Palo 20012
- Page 1 Palo Sofa Assembly Instruction...
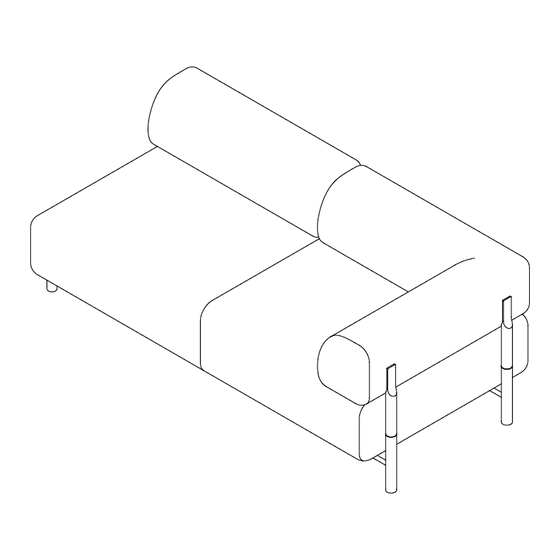
- Page 2 Palo Sofa Palo is whatever you want it to be; a chaise, an ottoman, a sofa. This is furniture that evolves and grows with you. Elegant wood and metal legs are a hallmark of the architectural Palo family; as well as providing detail, they are the secret to a modular system that allows cushions and armrests to be moved and repositioned across the whole series.
- Page 3 Parts Steel leg small & sofa connector Leg cap Beech leg Steel leg (Palo Corner Sofa only) Corner armrest Straight armrest Small base Big base...
- Page 4 Module overview 100 cm / 39.4 in 1 x Small base 4 x Steel leg 4 x Leg cap Palo Ottoman L: 100 cm / 39.4 in x W: 95 cm / 37.4 in 195 cm / 76.8 in 1 x Straight armrest 1 x Big base 6 x Steel leg 4 x Beech leg...
- Page 5 100 cm / 39.4 in 1 x Straight armrest 1 x Small base 6 x Steel leg 4 x Beech leg 2 x Leg cap Palo Single-seater L: 100 cm / 39.4 in x W: 97 cm / 38.1 in 195 cm / 76.8 in 2 x Straight armrest 1 x Big base...
- Page 6 Step 1 We are building the Palo 2-seater Sofa Chaise Right. Turn the base of the sofa around and lay it on a clean, even surface. Step 2 Insert the steel legs while the sofa is upside down. Lock all steel legs into the holes of the sockets provided.
- Page 7 Step 3 Turn the sofa base around and make sure everything feels stable. We recommend two people for this process.
- Page 8 Step 4 Depending on which Palo configuration you have purchased, seal the hole with a leg cap (please see the module overview for reference). Next, place all the beech legs into the upper holes of the steel legs. Make sure you position them straight at the top of the steel leg and push them down without creating...
- Page 9 Step 5 Each armrest needs to be supported by the beech legs which you have put in place at step 4. Please see the module overview for reference.
- Page 10 Want to change your configuration, add extra parts or in need of replacement parts? Send us an email at info@hem.com with all details and we’ll be happy to provide you with a quote and place a manual order for you!
- Page 11 Additional assembly Palo Corner Sofa Left/ Right Step 7 Insert the black parts of the sofa connectors on one sofa base by pressing it into the hole at the bottom. Then, insert the other parts of the sofa connectors on the other sofa base.
- Page 12 Should you have any problems assembling your product, contact us at info@hem.com. We’re always happy to help! We have carefully selected the materials used in this product, and ask you to treat it responsibly too. Please recycle all packaging according to your local disposal rules.
Need help?
Do you have a question about the Palo 20012 and is the answer not in the manual?
Questions and answers