Subscribe to Our Youtube Channel
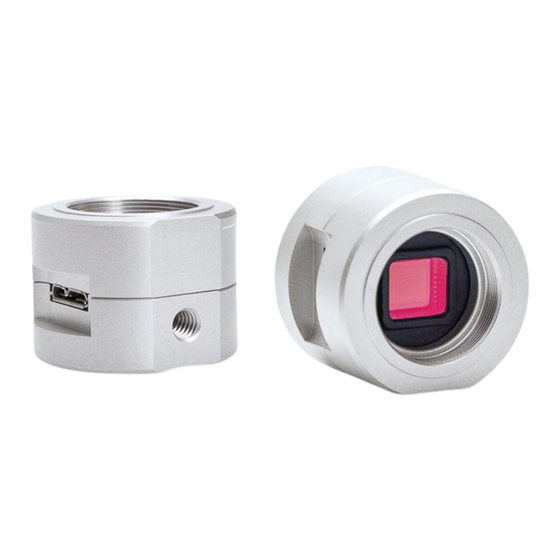
Summary of Contents for Basler pulse
- Page 1 Basler pulse QUICK INSTALLATION GUIDE FOR USB 3.0 CAMERAS Document Number: AW001350 Version: 01 Language: 000 (English) Release Date: 8 July 2015...
- Page 2 Basler customers using or selling these products for use in such applications do so at their own risk and agree to fully indemnify Basler for any damages resulting from such improper use or sale. Warranty note Do not open the housing of the camera.
- Page 3 Contacting Basler Support Worldwide Europe, Middle East, Africa Basler AG An der Strusbek 60–62 22926 Ahrensburg Germany Tel. +49 4102 463 515 Fax +49 4102 463 599 support.europe@baslerweb.com The Americas Basler, Inc. 855 Springdale Drive, Suite 203 Exton, PA 19341 Tel.
-
Page 4: Table Of Contents
Software Installation ........... . 3 2.1.1 Installing the Basler pylon Camera Software Suite ..... . 3 2.1.2 Installing the Host Controller Driver . -
Page 5: Introduction
Windows 7 (64 bit) Windows 8.x (32 bit) Windows 8.x (64 bit) That a USB 3.0 port is installed in your PC and your pulse camera will be connected to it. All Basler pulse USB 3.0 cameras are USB 2.0 backward compatible. -
Page 6: General Preparations
A suitable lens. 1.2 USB 3.0 Host Controller Recommendations Basler recommends the following host controller chipsets as they work well with Basler USB 3.0 cameras: Renesas USB 3.0 host controller chipsets The Renesas chipsets are for example used on ASUS PCIE USB3 host adapters. -
Page 7: Installation Procedures
Otherwise, the Basler pylon software can’t be installed. To install the Basler pylon Camera Software Suite: 1. If you have old Basler pylon software installed on your system, make sure to uninstall the software. For more information about uninstalling Basler pylon software, see the Installation and Setup Guide for Cameras Used with Basler pylon for Windows (AW000611). - Page 8 Only select those features of the pylon software you want to install. The example shown below assumes that you install the 64-bit version of the Basler pylon software, that you will only use USB 3.0 cameras, and that your applications and software development only use C++.
-
Page 9: Installing The Host Controller Driver
’ To install a driver for host controllers using Renesas USB 3.0 chipsets: 1. Click Start > All Programs > Basler > pylon 4 Camera Software Suite > Tools & Drivers > USB 3.0 Host Controller Drivers. The USB 3.0 Host Controller folder opens showing the xHCI driver setup packages and a Readme.txt file. -
Page 10: Hardware Installation
Quick Installation Guide for Basler pulse Cameras AW00135001000 2.2 Hardware Installation 2.2.1 Precautions DANGER Electric Shock Hazard Non-approved power supplies may cause electric shock. Serious injury or death may occur. You must use a camera power supply which meets the Safety Extra Low ... - Page 11 C-mount lens before mounting it on the camera. Otherwise, the lens may reach too far into the camera and damage the IR cut filter (color cameras) or the sensor (mono cameras). For more information, see the Basler pulse User’s Manual for USB 3.0 Cameras ...
-
Page 12: Installing The Camera
Connect the other end of the USB 3.0 cable to a USB 3.0 port on your PC. USB 3.0 ports are either marked with a SuperSpeed logo or have a blue insert. The camera will power up. Windows will find the suitable camera driver in the Basler pylon Camera Software Suite. -
Page 13: Using The Usb Configurator
AW00135001000 Quick Installation Guide for Basler pulse Cameras 3 Using the USB Configurator The USB Configurator allows you to obtain information about the architecture of the device tree to which your camera is connected and about the devices, including your camera. - Page 14 The USB Configurator provides a convenient way of preparing a report about the current USB device tree and its devices. If you need assistance you can send the report to Basler technical service. There, the report will greatly help to assess your current installation and give you detailed advice.
- Page 15 Fig. 3: Support Information Window Displaying a Report 2. You can inspect the report, communicate it or save it: If you want to send it to Basler technical support, click the Copy to Clipboard button and include the report in an e-mail to Basler technical support.
-
Page 16: Acquiring Your First Images
1. Put an object within the camera’s field of view and make sure that the object is well illuminated. 2. Start the pylon Viewer by clicking the pylon Viewer icon on your desktop. The pylon Viewer will open as shown below and you should see an entry in the Devices pane for your pulse camera. - Page 17 AW00135001000 Quick Installation Guide for Basler pulse Cameras Fig. 5: pylon Viewer Displaying an Image 5. In the menu bar, click View, Zoom to Fit to make the image fit into the image display area. 6. Focus the lens until the image is properly focused.
-
Page 18: Next Steps
Quick Installation Guide for Basler pulse Cameras AW00135001000 5 Next Steps Information about how to configure your camera, and how to optimize your image quality, can be found in the online help of the pylon Viewer. To access the online help of the pylon Viewer: 1. - Page 19 AW00135001000 Quick Installation Guide for Basler pulse Cameras See also the Basler pulse USB 3.0 User’s Manual (AW001345) for details about camera operation and features. the Programmer’s Guide and Reference (C++, C, and .NET) documentation included in the ...
-
Page 20: Revision History
Quick Installation Guide for Basler pulse Cameras AW00135001000 Revision History Doc. ID Number Date Changes AW00135001000 08 Jul 2015 Initial release of this document. Basler pulse...


Need help?
Do you have a question about the pulse and is the answer not in the manual?
Questions and answers