
Related Manuals for Basler GigE VISION CAMERAS


Summary of Contents for Basler GigE VISION CAMERAS
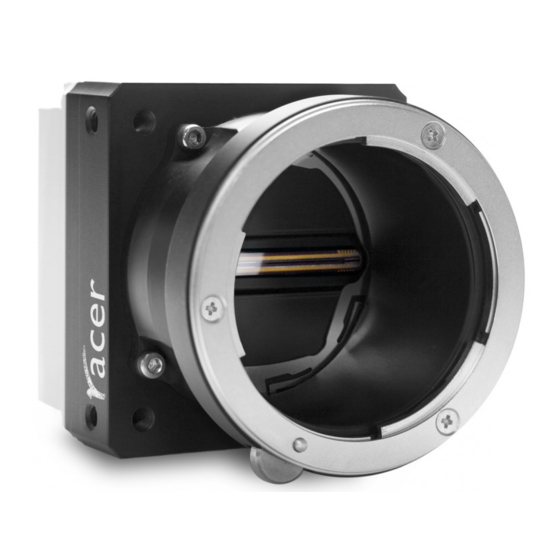
- Page 1 Basler racer USER’S MANUAL FOR GigE VISION CAMERAS Document Number: AW001183 Version: 03 Language: 000 (English) Release Date: 13 September 2013 Note that the 6k, 8k, and 12k cameras are still in their prototype stage...
- Page 2 For customers in the U.S.A. This equipment has been tested and found to comply with the limits for a Class A digital device, pursuant to Part 15 of the FCC Rules. These limits are designed to provide reasonable protection against harmful interference when the equipment is operated in a commercial environment. This equipment generates, uses, and can radiate radio frequency energy and, if not installed and used in accordance with the instruction manual, may cause harmful interference to radio communications.
- Page 3 Contacting Basler Support Worldwide Europe: Basler AG An der Strusbek 60 - 62 22926 Ahrensburg Germany Tel.: +49 4102 463 515 Fax.: +49 4102 463 599 support.europe@baslerweb.com Americas: Basler, Inc. 855 Springdale Drive, Suite 203 Exton, PA 19341 U.S.A. Tel.: +1 610 280 0171 Fax.: +1 610 280 7608 support.usa@baslerweb.com Asia:...
-
Page 5: Table Of Contents
AW00118303000 Table of Contents Table of Contents 1 Specifications, Requirements, and Precautions ......1 Models ............. . 1 General Specifications . - Page 6 Table of Contents AW00118303000 Connector Pin Assignments ..........51 7.2.1 Pin Assignments for the 6-pin Connector .
- Page 7 AW00118303000 Table of Contents 8.2.3.3 Setting the Frame Start Trigger Parameters ....85 8.2.3.4 Frame Timeout ........86 8.2.4 Line Start Triggering.
- Page 8 Table of Contents AW00118303000 10.3.1 Setting the Image AOI ......... 169 10.3.2 Automatic Image AOI X Centering.
-
Page 9: Specifications, Requirements, And Precautions
AW00118303000 Specifications, Requirements, and Precautions 1 Specifications, Requirements, and Precautions This chapter lists the camera models covered by the manual. It provides the general specifications for those models and the basic requirements for using them. This chapter also includes specific precautions that you should keep in mind when using the cameras. -
Page 10: General Specifications
Specifications, Requirements, and Precautions AW00118303000 General Specifications Specification raL2048-48gm raL4096-24gm Sensor Size 2048 pixels 4096 pixels (Maximum Resolution) Sensor Type Awaiba DR-2k-7 Awaiba DR-4k-7 Monochrome Linear CMOS Monochrome Linear CMOS Pixel Size 7 µm x 7 µm Max Line Rate 51 kHz 26 kHz Min Line Rate... - Page 11 AW00118303000 Specifications, Requirements, and Precautions Specification raL2048-48gm raL4096-24gm Weight ~ 240 g (typical) without lens adapter ~ 270 g (typical) with C-mount lens adapter and connectors ~ 330 g (typical) with F-mount lens adapter and connectors ~ 260 g (typical) with M42-mount lens adapter and connectors Conformity CE, RoHS, FCC, UL (in preparation), GenICam, GigE Vision, IP30 Table 1: General Specifications - 2k and 4k Mono Cameras...
- Page 12 Specifications, Requirements, and Precautions AW00118303000 Specification raL6144-16gm raL8192-12gm Sensor Size 6144 pixels 8192 pixels (Maximum Resolution) Sensor Type Awaiba DR-6k-7 Awaiba DR-8k-3.5 Monochrome Linear CMOS Monochrome Linear CMOS Pixel Size 7 µm x 7 µm 3.5 µm x 3.5 µm Max Line Rate 17 kHz 12 kHz...
- Page 13 AW00118303000 Specifications, Requirements, and Precautions Specification raL12288-8gm Sensor Size 12288 pixels (Maximum Resolution) Sensor Type Awaiba DR-12k-3.5 Monochrome Linear CMOS Pixel Size 3.5 µm x 3.5 µm Max Line Rate 8 kHz Min Line Rate No minimum when an external line trigger signal is used 100 Hz when an external line trigger signal is not used Mono/Color Mono...
-
Page 14: Spectral Response
Specifications, Requirements, and Precautions AW00118303000 Spectral Response The following graph shows the quantum efficiency curve for monochrome cameras. The quantum efficiency curve excludes lens characteristics and light source characteristics. 1000 1100 Wave Length (nm) Fig. 1: Quantum Efficiency of the Monochrome Sensor in 12 Bit Depth Mode (Based on Sensor Vendor Information) Basler racer GigE... -
Page 15: Mechanical Specifications
AW00118303000 Specifications, Requirements, and Precautions Mechanical Specifications 1.4.1 Camera Dimensions and Mounting Points The cameras are manufactured with high precision. Planar, parallel, and angular sides guarantee precise mounting with high repeatability. The camera housings conform to the IP30 protection class provided the camera front is covered by the protective plastic seal that is shipped with the camera. - Page 16 Specifications, Requirements, and Precautions AW00118303000 (8 x M4; 6.3 deep) 42.42 36.12 35.39 17.69 Photosensitive Surface of the Sensor. 2 x M2; 5 deep 8 x M4; 6.3 deep 3.97 1 x M2.5; 5.3 deep 14.3 ø 4 x M2.5; 3.3 deep (36.79) 4 x M4;...
-
Page 17: Sensor Line Location
AW00118303000 Specifications, Requirements, and Precautions 1.4.2 Sensor Line Location The location of the sensor line in the mono cameras is shown in Fig. 3. The sensor lines of different camera models vary in length, depending on maximum resolution and pixel size. As an example, a sensor line of maximum length, as applies to 6k and 12k cameras, is shown in Fig. -
Page 18: Lens Adapter Dimensions
Specifications, Requirements, and Precautions AW00118303000 1.4.3 Lens Adapter Dimensions 50.83 42.42 36.12 ø 17.526 Photosensitive Surface of the ø Sensor 51.2 Not to Scale 8.41 Fig. 4: C-mount Adapter on a racer GigE Camera; Dimensions in mm Basler racer GigE... - Page 19 AW00118303000 Specifications, Requirements, and Precautions 79.82 42.42 36.12 46.5 Photosensitive Surface of the Sensor 37.4 Not to Scale Fig. 5: F-Mount Adapter on a racer GigE Camera; Dimensions in mm 49.42 42.42 36.12 ø Photosensitive Surface of the M42 x 1.0 or Sensor M42 x 0.75 Not to Scale...
-
Page 20: Selecting The Optimum Lens Adapter
Specifications, Requirements, and Precautions AW00118303000 1.4.4 Selecting the Optimum Lens Adapter The camera’s scope of delivery does not include a lens mount adapter. It is needed to attach a lens to a camera. You must order a lens adapter separately as an accessory. The optimum choice of a lens mount adapter depends on the lens and on the resolution that will be used. -
Page 21: Software Licensing Information
AW00118303000 Specifications, Requirements, and Precautions Software Licensing Information 1.5.1 LWIP TCP/IP Licensing The software in the camera includes the LWIP TCP/IP implementation. The copyright information for this implementation is as follows: Copyright (c) 2001, 2002 Swedish Institute of Computer Science. All rights reserved. Redistribution and use in source and binary forms, with or without modification, are permitted provided that the following conditions are met: 1. -
Page 22: Lz4 Licensing
Specifications, Requirements, and Precautions AW00118303000 1.5.2 LZ4 Licensing The software in the camera includes the LZ4 implementation. The copyright information for this implementation is as follows: LZ4 - Fast LZ compression algorithm Copyright (C) 2011-2013, Yann Collet. BSD 2-Clause License (www.opensource.org/licenses/bsd-license.php) Redistribution and use in source and binary forms, with or without modification, are permitted provided that the following conditions are met: 1. -
Page 23: Avoiding Emi And Esd Problems
AW00118303000 Specifications, Requirements, and Precautions Avoiding EMI and ESD Problems The cameras are frequently installed in industrial environments. These environments often include devices that generate electromagnetic interference (EMI) and they are prone to electrostatic discharge (ESD). Excessive EMI and ESD can cause problems with your camera such as false triggering or can cause the camera to suddenly stop capturing images. -
Page 24: Environmental Requirements
Specifications, Requirements, and Precautions AW00118303000 Environmental Requirements 1.7.1 Temperature and Humidity Housing temperature during operation: 0 °C ... +50 °C (+32 °F ... +122 °F) Humidity during operation: 20 % ... 80 %, relative, non-condensing Storage temperature: -20 °C ... +80 °C (-4 °F ... +176 °F) Storage humidity: 20 % ... -
Page 25: Precautions
AW00118303000 Specifications, Requirements, and Precautions Precautions NOTICE Avoid dust on the sensor. The camera is shipped with a protective plastic seal on the camera front. To avoid collecting dust on the camera’s sensor, make sure that you always put the protective seal in place when there is no lens mounted on the camera. - Page 26 Specifications, Requirements, and Precautions AW00118303000 NOTICE Inappropriate code may cause unexpected camera behavior. 1. The code snippets provided in this manual are included as sample code only. Inappropriate code may cause your camera to function differently than expected and may compromise your application.
- Page 27 AW00118303000 Specifications, Requirements, and Precautions To clean the surface of the camera housing, use a soft, dry cloth. To remove severe stains, use a soft cloth dampened with a small quantity of neutral detergent, then wipe dry. Do not use solvents or thinners to clean the housing; they can damage the surface finish. Read the manual Read the manual carefully before using the camera! Basler racer GigE...
- Page 28 Specifications, Requirements, and Precautions AW00118303000 Basler racer GigE...
-
Page 29: Software And Hardware Installation
AW00118303000 Software and Hardware Installation 2 Software and Hardware Installation The information you will need to install and operate the camera is included in the Installation and Setup Guide for Cameras Used With the Basler pylon Camera Software Suite (AW000611xx000). You can download the Installation and Setup Guide for Cameras Used With the Basler pylon Camera Software Suite from the Basler website: www.baslerweb.com... - Page 30 Software and Hardware Installation AW00118303000 Basler racer GigE...
-
Page 31: Tools For Changing Camera Parameters
AW00118303000 Tools for Changing Camera Parameters 3 Tools for Changing Camera Parameters This chapter explains the options available for changing the camera’s parameters. The available options let you change parameters either by using stand-alone tools that access the camera via a GUI or by accessing the camera from within your software application. -
Page 32: The Pylon Sdk
Tools for Changing Camera Parameters AW00118303000 3.3 The pylon SDK The pylon SDK is part of the Basler pylon Camera Software Suite. The pylon SDK includes the pylon API, a set of sample programs, and documentation: You can access all of the camera’s parameters and control the camera’s full functionality from ... -
Page 33: Basler Network Drivers And Parameters
AW00118303000 Basler Network Drivers and Parameters 4 Basler Network Drivers and Parameters This section describes the Basler network drivers available for your camera and provides detailed information about the parameters associated with the drivers. Two network drivers are available for the network adapter used with your GigE cameras: The Basler filter driver is a basic GigE Vision network driver that is compatible with all ... -
Page 34: The Basler Filter Driver
Basler Network Drivers and Parameters AW00118303000 4.1 The Basler Filter Driver The Basler filter driver is a basic driver GigE Vision network driver. It is designed to be compatible with most network adapter cards. The functionality of the filter driver is relatively simple. For each frame, the driver checks the order of the incoming packets. -
Page 35: The Basler Performance Driver
AW00118303000 Basler Network Drivers and Parameters 4.2 The Basler Performance Driver The Basler performance driver is a hardware specific GigE Vision network driver compatible with network adapters that use specific Intel chipsets. The main advantage of the performance driver is that it significantly lowers the CPU load needed to service the network traffic between the PC and the camera(s). - Page 36 Basler Network Drivers and Parameters AW00118303000 General Parameters Enable Resend - Enables the packet resend mechanisms. If the Enable Resend parameter is set to false, the resend mechanisms are disabled. The performance driver will not check for missing packets and will not send resend requests to the camera.
- Page 37 AW00118303000 Basler Network Drivers and Parameters Resend Request Threshold - This parameter determines the location of the resend request threshold within the receive window as shown in Fig. 7. The parameter value is in per cent of the width of the receive window. In Fig. 7 the resend request threshold is set at 33.33% of the width of the receive window.
- Page 38 Basler Network Drivers and Parameters AW00118303000 Timeout Resend Mechanism Parameters The timeout resend mechanism is illustrated in Fig. 8 where the following assumptions are made: The frame includes 3000 packets. Packet 1002 is missing within the stream of packets and has not been recovered. ...
- Page 39 AW00118303000 Basler Network Drivers and Parameters Maximum Number Resend Requests - The Maximum Number Resend Requests parameter sets the maximum number of resend requests the performance driver will send to the camera for each missing packet. Resend Timeout - The Resend Timeout parameter defines how long (in milliseconds) the performance driver will wait after detecting that a packet is missing before sending a resend request to the camera.
- Page 40 Basler Network Drivers and Parameters AW00118303000 Threshold and Timeout Resend Mechanisms Combined Fig. 9 illustrates the combined action of the threshold and the timeout resend mechanisms where the following assumptions are made: All parameters set to default. The frame includes 3000 packets. ...
- Page 41 AW00118303000 Basler Network Drivers and Parameters (10) End of the frame. (11) Missing packets at the end of the frame (2999 and 3000). (12) Interval defined by the Packet Timeout parameter. You can set the performance driver parameter values from within your application software by using the Basler pylon API.
- Page 42 Basler Network Drivers and Parameters AW00118303000 Adapter Properties When the Basler Performance driver is installed, it adds a set of "advanced" properties to the network adapter. These properties include: Max Packet Latency - A value in microseconds that defines how long the adapter will wait after it receives a packet before it generates a packet received interrupt.
-
Page 43: Transport Layer Parameters
AW00118303000 Basler Network Drivers and Parameters 4.3 Transport Layer Parameters The transport layer parameters are part of the camera’s basic GigE implementation. These parameters do not normally require adjustment. Read Timeout - If a register read request is sent to the camera via the transport layer, this parameter designates the time out (in milliseconds) within which a response must be received. - Page 44 Basler Network Drivers and Parameters AW00118303000 Basler racer GigE...
-
Page 45: Network Related Camera Parameters And Managing Bandwidth
AW00118303000 Network Related Camera Parameters and Managing Bandwidth 5 Network Related Camera Parameters and Managing Bandwidth This section describes the camera parameters that are related to the camera’s performance on the network. It also describes how to use the parameters to manage the available network bandwidth when you are using multiple cameras. - Page 46 Network Related Camera Parameters and Managing Bandwidth AW00118303000 The packet size parameter should always be set to the maximum size that your network adapter and network switches (if used) can handle. Inter-packet Delay (read/write) Sets the delay in ticks between the packets sent by the camera. Applies to the selected stream channel.
-
Page 47: Managing Bandwidth When Multiple Cameras Share A Single Network Path
AW00118303000 Network Related Camera Parameters and Managing Bandwidth 5.2 Managing Bandwidth When Multiple Cameras Share a Single Network Path If you are using a single camera on a GigE network, the problem of managing bandwidth is simple. The network can easily handle the bandwidth needs of a single camera and no intervention is required. -
Page 48: A Procedure For Managing Bandwidth
Network Related Camera Parameters and Managing Bandwidth AW00118303000 transmission rate will be. After you have adjusted the Inter-packet Delay parameter on each camera, you can check the sum of the Bandwidth Assigned parameter values and see if the sum is now less than 125 MByte/s. - Page 49 AW00118303000 Network Related Camera Parameters and Managing Bandwidth Step 2 - Set the Packet Size parameter on each camera as large as possible. Using the largest possible packet size has two advantages, it increases the efficiency of network transmissions between the camera and the PC and it reduces the time required by the PC to process incoming packets.
- Page 50 Network Related Camera Parameters and Managing Bandwidth AW00118303000 Step 3 - Set the Bandwidth Reserve parameter for each camera. The Bandwidth Reserve parameter setting for a camera determines how much of the bandwidth assigned to that camera will be reserved for lost packet resends and for asynchronous traffic such as commands sent to the camera.
- Page 51 AW00118303000 Network Related Camera Parameters and Managing Bandwidth Step 5 - Calculate “data bandwidth assigned” to each camera. For each camera, there is a parameter called Bandwidth Assigned. This read only parameter indicates the total bandwidth that has been assigned to the camera. The Bandwidth Assigned parameter includes both the bandwidth that can be used for frame data transmission plus the bandwidth that is reserved for packet resends and camera control signals.
- Page 52 Network Related Camera Parameters and Managing Bandwidth AW00118303000 Step 7 - Check that the total bandwidth assigned is less than the network capacity. 1. For each camera, determine the current value of the Bandwidth Assigned parameter. The value is in Byte/s. (Make sure that you determine the value of the Bandwidth Assigned param- eter after you have made any adjustments described in the earlier steps.) 2.
-
Page 53: Camera Functional Description
AW00118303000 Camera Functional Description 6 Camera Functional Description This chapter provides an overview of the camera’s functionality from a system perspective. The overview will aid your understanding when you read the more detailed information included in the later chapters of the user’s manual. Each camera employs a single line CMOS sensor chip designed for monochrome imaging. - Page 54 Camera Functional Description AW00118303000 Type B Digitized Pixel Data (Even-numbered Pixels); 2 x 12 Bit CMOS Sensor Digital Processing ADCs Type A Analog Processing CMOS Sensor Pixels Pixels Analog Processing Analog Processing ADCs ADCs Digital Processing Digital Processing Digitized Pixel Data (Odd-numbered Pixels); Digitized Pixel Data;...
- Page 55 AW00118303000 Camera Functional Description ExASTrig, ExFSTrig, ExLSTrig Frame Buffer ExpActive, FrameTrigWait, LineTrigWait Pixel Pixel Data Data Ethernet Ethernet Sensor FPGA Controller Network Frame Frame Data Data Control Data Control Control Micro- Controller Control Data Fig. 12: Camera Block Diagram Basler racer GigE...
- Page 56 Camera Functional Description AW00118303000 Basler racer GigE...
-
Page 57: Physical Interface
AW00118303000 Physical Interface 7 Physical Interface This chapter provides detailed information, such as pinouts and voltage requirements, for the physical interface on the camera. This information will be especially useful during your initial design-in process. General Description of the Connections The camera is interfaced to external circuity via connectors located on the back of the housing: A 6-pin receptacle used to provide power to the camera. -
Page 58: Pin Numbering
Physical Interface AW00118303000 7.1.1 Pin Numbering Pin numbering for the camera’s 6-pin and 12-pin receptacles is as shown in Fig. 14. Pin numbering for the 8-pin RJ-45 jack adheres to the Ethernet standard. Fig. 14: Pin Numbering for the 6-pin and 12-pin Receptacles Basler racer GigE... -
Page 59: Connector Pin Assignments
AW00118303000 Physical Interface Connector Pin Assignments 7.2.1 Pin Assignments for the 6-pin Connector The 6 pin connector is used to supply power to the camera. The pin assignments for the connector are shown in Table 5. Designation +12 VDC (- 10 %) to +24 VDC (+ 5 %), < 1 % ripple, Camera Power * +12 VDC (- 10 %) to +24 VDC (+ 5 %), <... -
Page 60: Pin Assignments For The 12-Pin Connector
Physical Interface AW00118303000 7.2.2 Pin Assignments for the 12-pin Connector The 12-pin connector is used to access the three physical input lines and two physical output lines on the camera. The pin assignments for the connector are shown in Table 6. Designation I/O Input 1 - I/O Input 1+... -
Page 61: Connector Types
AW00118303000 Physical Interface Connector Types 7.3.1 6-pin Connector The 6-pin connector on the camera is a Hirose micro receptacle (part number HR10A-7R-6PB) or the equivalent. The recommended mating connector is the Hirose micro plug (part number HR10A-7P-6S) or the equivalent. 7.3.2 12-pin Connector The 12-pin connector on the camera is a Hirose micro receptacle (part number HR10A-10R-12P) -
Page 62: Cabling Requirements
Physical Interface AW00118303000 Cabling Requirements 7.4.1 Power Cable A single power cable is used to supply power to the camera. DC ground and the camera housing (along with the shield contacts of all connectors) are connected within the camera (see Fig. 15). The end of the power cable that connects to the camera’s 6-pin connector must be terminated with a Hirose micro plug (part number HR10A-7P-6S) or the equivalent. -
Page 63: I/O Cable
AW00118303000 Physical Interface 7.4.2 I/O Cable The end of the I/O cable that connects to the camera’s 12-pin connector must be terminated with a Hirose micro plug (part number HR10A-10P-12S) or the equivalent. The cable must be wired as shown in Fig. 16. The maximum length of the I/O cable is 10 meters, however, we strongly recommend keeping I/O cables as short as possible. -
Page 64: Camera Power
Physical Interface AW00118303000 Camera Power Camera power must be supplied to the 6-pin connector on the camera via a cable from your power supply. The nominal operating voltage of the camera is +12 VDC (± 10 %).The required operating voltage is +12 VDC (- 10 %) to +24 VDC (+ 5 %), effective on the camera‘s connector. Ripple must be less than one percent. -
Page 65: Input And Output Lines
AW00118303000 Physical Interface Input and Output Lines 7.6.1 Input Lines The camera is equipped with three physical input lines designated as Input Line 1, Input Line 2, and Input Line 3. The input lines are accessed via the 12-pin connector on the back of the camera. The inputs are designed to accept RS-422 differential signals, but they can also be used with RS-644 low voltage differential signals or low voltage TTL signals. - Page 66 Physical Interface AW00118303000 The RS-422 standard allows devices to be used with a bus structure to form an interface circuit. So, for example, input line 1 on several different cameras can be connected via an RS-422 bus as shown in Fig. 18. Fig.
- Page 67 AW00118303000 Physical Interface Using the Inputs with RS-644 LVDS The inputs on the camera can accept RS-644 low voltage differential signals (LVDS). If you are supplying an RS-644 LVDS signal to an input on the camera, the 120 ohm termination resistor on that input must be enabled.
- Page 68 Physical Interface AW00118303000 Using the Inputs with LVTTL A camera input line can accept a Low Voltage TTL signal when the signal is input into the camera as shown in Fig. 19. The following voltage requirements apply to the camera’s I/O input (pin 2 of the 12-pin connector): Voltage Significance +0 to + 5.0 VDC...
-
Page 69: Input Line Debouncers
AW00118303000 Physical Interface Enabling and Disabling the Termination Resistor You can select an input line and enable or disable the termination resistor on the line from within your application software by using the pylon API. The following code snippet illustrates using the API to set the parameter values: Camera.LineSelector.SetValue( LineSelector_Line1 );... -
Page 70: Input Line Inverters
Physical Interface AW00118303000 7.6.1.3 Input Line Inverters You can set each individual input line to invert or not to invert the incoming electrical signal. To set the invert function on an input line: Use the Line Selector to select an input line. ... - Page 71 AW00118303000 Physical Interface Default Input Line Selections By default: Input Line 1 is selected as the source signal for the camera’s Line Start Trigger function. Input Line 1 is also selected as the source signal for shaft encoder module Phase A input. ...
-
Page 72: Output Lines
Physical Interface AW00118303000 7.6.2 Output Lines The camera is equipped with two physical output lines designated as Output Line 1 and Output Line 2. The output lines are accessed via the 12-pin connector on the back of the camera. The outputs are designed to transmit RS-422 differential signals, but they can also be used with RS-644 low voltage differential signalling or low voltage TTL signalling. - Page 73 AW00118303000 Physical Interface Using the Outputs with RS-644 LVDS You cannot directly use the RS-422 signal from a camera output line as an input to an RS-644 low voltage differential signal (LVDS) receiver. However, if a resistor network is placed on the camera’s output as shown in Fig.
-
Page 74: Input Related Signals As Output Signals
Physical Interface AW00118303000 Using the Outputs with LVTTL You can use a camera output line as an input to a low voltage TTL receiver, but only if the camera’s output signal is used as shown in Fig. 22. In this situation, a low will be indicated by a camera output voltage near zero, and a high will be indicated by a camera output voltage of approximately 3.3 VDC. -
Page 75: Minimum Output Pulse Width
AW00118303000 Physical Interface 7.6.2.3 Minimum Output Pulse Width You can use the minimum output pulse width feature to ensure that even very narrow camera output signals, e.g. signals originating from a shaft encoder, will reliably be detected by other devices. The MinOutPulseWidthAbs parameter sets output signals for the selected output line to a minimum width. -
Page 76: Selecting The Source Signal For An Output Line
Physical Interface AW00118303000 7.6.2.5 Selecting the Source Signal for an Output Line To make a physical output line useful, you must select a source signal for the output line. The camera has the following standard output signals available that can be selected as the source signal for an output line: the Exposure Active signal ... - Page 77 AW00118303000 Physical Interface Camera.LineSelector.SetValue( LineSelector_Out2 ); Camera.LineSource.SetValue( LineSource_LineTriggerWait );OOOKKK // Select the shaft encoder module out signal for output line 1 Camera.LineSelector.SetValue( LineSelector_Out1 ); Camera.LineSource.SetValue( LineSource_ShaftEncoderModuleOut ); // Select the frequency converter signal for output line 2 Camera.LineSelector.SetValue( LineSelector_Out2 ); Camera.LineSource.SetValue( LineSource_FrequencyConverter );...
-
Page 78: Setting The State Of User Settable Output Lines
Physical Interface AW00118303000 7.6.2.6 Setting the State of User Settable Output Lines As mentioned in the previous section, you can select "user output" as the signal source for an output line. For an output line that has "user output" as the signal source, you can use camera parameters to set the state of the line. -
Page 79: Checking The State Of The I/O Lines
AW00118303000 Physical Interface Sets user output 2 state Sets user output 1 state Not used Fig. 23: User Output Value All Parameter Bits To set the state of multiple user output lines: Use the User Output Value All parameter to set the state of multiple user outputs. ... -
Page 80: Checking The Line Logic
Physical Interface AW00118303000 the state of the associated line is currently low. If a bit is 1, it indicates that the state of the associated line is currently high. Indicates input line 3 state Indicates output line 2 state Indicates input line 2 state Indicates output line 1 state Indicates input line 1 state Fig. -
Page 81: I/O Line Response Times
AW00118303000 Physical Interface // Select the I/O line and read the line logic type Camera.LineSelector.SetValue( LineSelector_Line1 ); LineLogicEnums lineLogicLine1 = Camera.LineLogic.GetValue( ); You can also use the Basler pylon Viewer application to easily set the parameters. For more information about the pylon API and the pylon Viewer, see Section 3.1 on page 7.6.5 I/O Line Response Times... - Page 82 Physical Interface AW00118303000 Basler racer GigE...
-
Page 83: Acquisition Control
AW00118303000 Acquisition Control 8 Acquisition Control This section provides detailed information about controlling the acquisition of image information. You will find details about triggering frame and line acquisition, about setting the exposure time for acquired lines, about setting the camera’s line acquisition rate, and about how the camera’s maximum allowed line acquisition rate can vary depending on the current camera settings. - Page 84 Acquisition Control AW00118303000 The Height parameter determines the number of lines that will be included in each frame. For example, assume that the Height parameter is set to 100 and that the camera has just started to acquire lines. In this case, the camera will accumulate acquired line data in an internal buffer until 100 lines have been accumulated.
- Page 85 AW00118303000 Acquisition Control The Width and Height parameters cannot be changed while the camera is in the process of acquiring frames. If the camera receives commands to change the Width or Height parameter values while it is in the process of acquiring frames: If the camera is set for single frame mode, the parameters will not change ...
-
Page 86: Controlling Acquisition
Acquisition Control AW00118303000 Controlling Acquisition Five major elements are involved in controlling the acquisition of images: Acquisition start and acquisition stop commands The acquisition mode parameter Acquisition start triggering Frame start triggering Line start triggering 8.2.1 Acquisition Start and Stop Commands and the Acquisition Mode... - Page 87 AW00118303000 Acquisition Control Setting the Acquisition Mode and Issuing Start/Stop Commands You can set the Acquisition Mode parameter value and you can issue Acquisition Start or Acquisition Stop commands from within your application software by using the pylon API. The code snippet below illustrates using the API to set the Acquisition Mode parameter value and to issue an Acquisition Start command.
-
Page 88: Acquisition Start Triggering
Acquisition Control AW00118303000 8.2.2 Acquisition Start Triggering The acquisition start trigger is used in conjunction with the frame start trigger to control the acquisition of frames. In essence, the acquisition start trigger is used as an enabler for the frame start trigger. -
Page 89: Acquisition Frame Count
AW00118303000 Acquisition Control Software - When the acquisition start trigger source is set to software, the user applies an acquisition start trigger to the camera by issuing an acquisition start TriggerSoftware command to the camera from the host PC. Line 1, line 2 or line 3 - When the acquisition start trigger source is set to line 1, line 2 or line 3, ... -
Page 90: Setting The Acquisition Start Trigger Mode And
Acquisition Control AW00118303000 8.2.2.4 Setting The Acquisition Start Trigger Mode and Related Parameters You can set the Trigger Mode and Trigger Source parameter values for the acquisition start trigger and the Acquisition Frame Count parameter value from within your application software by using the pylon API. -
Page 91: Frame Start Triggering
AW00118303000 Acquisition Control 8.2.3 Frame Start Triggering The frame start trigger is used in conjunction with the line start trigger to control the acquisition of the lines that will be included in each frame. In essence, the frame start trigger is an enabler for the line start trigger, i.e., the camera will only react to line start triggers when the frame start trigger is valid. - Page 92 Acquisition Control AW00118303000 and will remain valid until enough lines have been acquired to constitute a complete frame. The frame start trigger will then become invalid. Line 1 - When the frame start trigger source is set to line 1, the user triggers frame start by ...
-
Page 93: Setting The Frame Start Trigger Parameters
AW00118303000 Acquisition Control To see graphical representations of frame start triggering, refer to the use case diagrams in Section 8.3 on page 121. 8.2.3.3 Setting the Frame Start Trigger Parameters You can set the Trigger Mode, Trigger Source, and Trigger Activation parameter values for the frame start trigger from within your application software by using the pylon API. -
Page 94: Frame Timeout
Acquisition Control AW00118303000 8.2.3.4 Frame Timeout The Frame Timeout allows setting a maximum time (in microseconds) that may elapse for each frame acquisition, i.e. the maximum time for the acquisition of the lines for a frame. When the frame timeout is enabled and a time is set a partial frame will be transmitted if the set time has elapsed before all lines specified for the frame are acquired. -
Page 95: Line Start Triggering
AW00118303000 Acquisition Control 8.2.4 Line Start Triggering The line start trigger is used to start a line acquisition. Keep in mind that the camera will only react to a line start trigger when the frame start trigger is valid. If the frame start trigger is invalid, line start triggers will be ignored. -
Page 96: Line Start Trigger Mode = On
Acquisition Control AW00118303000 8.2.4.2 Line Start Trigger Mode = On When the Line Start Trigger Mode parameter is set to on, you must select a source signal for the line start trigger. The Line Start Trigger Source parameter specifies the source signal. The available selections for the Line Start Trigger Source parameter are: Software - When the line start trigger source is set to software, the user triggers line start by ... - Page 97 AW00118303000 Acquisition Control Exposure Time Control with Line Start Trigger Mode On When the Line Start Trigger Mode parameter is set to on, there are three modes available to control the exposure time for each acquired line: trigger width control, timed control, and control off. You can set the camera’s Exposure Mode parameter to select one of the exposure time control modes.
- Page 98 Acquisition Control AW00118303000 Timed Exposure Control Mode When the timed exposure control mode is selected, the exposure time for each line acquisition is determined by the value of the camera’s Exposure Time parameters. If the camera is set for rising edge triggering, the exposure time starts when the source signal for the line start trigger rises.
-
Page 99: Setting The Line Start Trigger Parameters
AW00118303000 Acquisition Control There is also a second component to the start and end delays. This second component is the debouncer setting for the input line. The debouncer setting for the input line must be added to the base start and end delays shown in Table 8 to determine the total start delay and end delay. For example, assume that you are using an raL2048-48gm camera and that you have set the line start trigger mode to on. -
Page 100: Exposure Time
Acquisition Control AW00118303000 Camera.ExposureMode.SetValue( ExposureMode_Timed ); Camera.ExposureTimeAbs.SetValue( 60.0 ); For detailed information about using the pylon API, refer to the Basler pylon Programmer’s Guide and API Reference. You can also use the Basler pylon Viewer application to easily set the parameters. For more information about the pylon Viewer, see Section 3.1 on page 8.2.5... -
Page 101: Exposure Time Parameters
AW00118303000 Acquisition Control maximum exposure time. Keep in mind, however, that using a very long exposure time can lead to significant degradation of the image quality. raL2048- raL4096- raL6144- raL8192- raL12288- 48gm 24gm 16 gm 12 gm 8 gm 2.0 µs 2.0 µs 2.0 µs 2.0 µs... - Page 102 Acquisition Control AW00118303000 You can set the Exposure Time Raw parameter value from within your application software by using the pylon API. The following code snippet illustrates using the API to set the parameter values: Camera.ExposureMode.SetValue( ExposureMode_Timed ); Camera.ExposureTimeRaw.SetValue( 2 ); For detailed information about using the pylon API, refer to the Basler pylon Programmer’s Guide and API Reference.
-
Page 103: Use Case Descriptions And Diagrams
AW00118303000 Acquisition Control 8.2.6 Use Case Descriptions and Diagrams The following pages contain a series of use case descriptions and diagrams. The descriptions and diagrams are designed to illustrate how acquisition start triggering, frame start triggering and line start triggering will work with common combinations of parameter settings. These use cases do not represent every possible combination of the parameters associated with acquisition start, frame start, and line start triggering. - Page 104 Acquisition Control AW00118303000 Settings: Acquisition Mode = Single Frame Acquisition Start Trigger Mode = Off Frame Start Trigger Mode = Off Lines Per Frame (Height) = 3 Line Start Trigger Mode = Off = trigger signal internally generated by the camera; trigger wait signal is not available = line exposure and readout;...
- Page 105 AW00118303000 Acquisition Control Use Case 2 - Acquisition Start, Frame Start, and Line Start Triggering Off (Free Run), Continuous Frame Mode Use case two is illustrated on page This use case is equivalent to the preceding use case one, except for the fact that the acquisition mode is set to Continuous Frame.
- Page 106 Acquisition Control AW00118303000 Settings: Acquisition Mode = Continuous Frame Acquisition Start Trigger Mode = Off Frame Start Trigger Mode = Off Lines Per Frame (Height) = 3 Line Start Trigger Mode = Off = trigger signal internally generated by the camera; trigger wait signal is not available = line exposure and readout;...
- Page 107 AW00118303000 Acquisition Control Use Case 3 - Acquisition Start and Line Start Triggering Off (Free Run), Frame Start Triggering On Use case three is illustrated on page 100. In this use case, the Acquisition Start Trigger Mode and the Line Start Trigger Mode parameters are set to off.
- Page 108 Acquisition Control AW00118303000 Settings: Acquisition Mode = Continuous Frame Acquisition Start Trigger Mode = Off Frame Start Trigger Mode = On Frame Start Trigger Source = Line 2 Frame Start Trigger Activation = Rising Edge Lines Per Frame (Height) = 3 Line Start Trigger Mode = Off = trigger signal internally generated by the camera;...
- Page 109 AW00118303000 Acquisition Control Use Case 4 - Acquisition Start Triggering Off (Free Run), Frame Start and Line Start Triggering On Use case four is illustrated on page 102. In this use case, the Acquisition Start Trigger Mode parameter is set to off. The camera will internally manage acquisition start trigger signals without any need for triggering by the user ("free run").
- Page 110 Acquisition Control AW00118303000 Settings: Acquisition Mode = Continuous Frame Acquisition Start Trigger Mode = Off Frame Start Trigger Mode = On Frame Start Trigger Source = Line 2 Frame Start Trigger Activation = Rising Edge Lines Per Frame (Height) = 3 Line Start Trigger Mode = On Line Start Trigger Source = Line 3 Line Start Trigger Activation = Rising Edge...
- Page 111 AW00118303000 Acquisition Control Use Case 5 - Acquisition Start Triggering Off (Free Run), Frame Start and Line Start Triggering On, Frame Start Trigger Level High, Partial Closing Frame False Use case five is illustrated on page 104. In this use case, the Acquisition Start Trigger Mode parameter is set to off. The camera will internally manage acquisition start trigger signals without any need for triggering by the user ("free run").
- Page 112 Acquisition Control AW00118303000 Settings: Acquisition Mode = Continuous Frame Acquisition Start Trigger Mode = Off Frame Start Trigger Mode = On Frame Start Trigger Source = Line 2 Frame Start Trigger Activation = Level High Partial Closing Frame = False Lines Per Frame (Height) = 3 Line Start Trigger Mode = On Line Start Trigger Source = Line 3...
- Page 113 AW00118303000 Acquisition Control Use Case 6 - Acquisition Start Triggering Off (Free Run), Frame Start and Line Start Triggering On, Frame Start Trigger Level High, Partial Closing Frame True Use case six is illustrated on page 106. This use case is equivalent to the preceding use case five, except for the fact that Partial Closing Frame is set to True.
- Page 114 Acquisition Control AW00118303000 Settings: Acquisition Mode = Continuous Frame Acquisition Start Trigger Mode = Off Frame Start Trigger Mode = On Frame Start Trigger Source = Line 2 Frame Start Trigger Activation = Level High Partial Closing Frame = True Lines Per Frame (Height) = 3 Line Start Trigger Mode = On Line Start Trigger Source = Line 3...
- Page 115 AW00118303000 Acquisition Control Use Case 7 - Acquisition Start and Frame Start Triggering Off (Free Run), Line Start Triggering On Use case seven is illustrated on page 108. This use case is equivalent to use case two, except for the fact that the Line Start Trigger Mode parameter is set to on.
- Page 116 Acquisition Control AW00118303000 Settings: Acquisition Mode = Continuous Frame Acquisition Start Trigger Mode = Off Frame Start Trigger Mode = Off Lines Per Frame (Height) = 3 Line Start Trigger Mode = On Line Start Trigger Source = Line 3 Line Start Trigger Activation = Rising Edge = trigger signal internally generated by the camera;...
- Page 117 AW00118303000 Acquisition Control Use Case 8 - Acquisition Start Triggering On, Frame Start and Line Start Triggering Off (Free Run) Use case eight is illustrated on page 110. In this use case, the Acquisition Start Trigger Mode parameter is set to on, requiring that an acquisition start trigger signal is applied to the camera.
- Page 118 Acquisition Control AW00118303000 Settings: Acquisition Mode = Continuous Frame Acquisition Start Trigger Mode = On Acquisition Start Trigger Source = 1 Acquisition Start Trigger Activation = Rising Edge Acquisition Frame Count = 2 Frame Start Trigger Mode = Off Lines Per Frame (Height) = 3 Line Start Trigger Mode = Off = trigger signal internally generated by the camera;...
- Page 119 AW00118303000 Acquisition Control Use Case 9 - Acquisition Start and Line Start Triggering On, Frame Start Triggering Off (Free Run) Use case nine is illustrated on page 112. In this use case, the Acquisition Start Trigger Mode and the Line Start Trigger Mode parameters are set to on, requiring that an acquisition start and a line start trigger signal are applied to the camera.
- Page 120 Acquisition Control AW00118303000 Settings: Acquisition Mode = Continuous Frame Acquisition Start Trigger Mode = On Acquisition Start Trigger Source = 1 Acquisition Start Trigger Activation = Rising Edge Acquisition Frame Count = 2 Frame Start Trigger Mode = Off Lines Per Frame (Height) = 3 Line Start Trigger Mode = On Line Start Trigger Source = Line 3 Line Start Trigger Activation = Rising Edge...
-
Page 121: Overlapping Exposure With Sensor Readout
AW00118303000 Acquisition Control 8.2.7 Overlapping Exposure with Sensor Readout The line acquisition process on the camera includes two distinct parts. The first part is the exposure of the pixels in the imaging sensor. Once exposure is complete, the second part of the process – readout of the pixel values from the sensor –... -
Page 122: Guidelines For Overlapped Operation
Acquisition Control AW00118303000 Determining whether your camera is operating with overlapped or non-overlapped exposure and readout is not a matter of issuing a command or switching a setting on or off. Rather the way that you operate the camera will determine whether the exposures and readouts are overlapped or not. If we define the “line period”... - Page 123 AW00118303000 Acquisition Control The exposure overhead (see Fig. 39 on page 115) is part of every exposure process. For simplicity, it is omitted from the other figures illustrating exposure and readout (see, for example, Fig. 40 on page 116). The duration of the exposure overhead is expressed by constant C (see also Section 8.5 on page...
- Page 124 Acquisition Control AW00118303000 Earliest possible moment for "legally" starting readout N+1 Illegal ExLSTrig Signal Line Acquisition N Exposure Readout Line Acquisition N+1 Readout Exposure Time Fig. 40: Exposure N+1 Illegally Ends Before Readout of the Preceding Line Acquisition N Has Ended; Applies to Trigger Width Exposure Mode Only When the line start trigger has illegally gone low to end the exposure for line acquisition N+1 before readout for acquisition N has ended (in trigger width exposure mode;...
- Page 125 AW00118303000 Acquisition Control Regular Line Acquisition Avoiding Overtriggering As mentioned above, you can avoid overtriggering by applying an acquisition-related trigger only when the camera is waiting for it. You can achieve this goal by making use of acquisition monitoring tools, i.e. monitoring the camera’s acquisition status and ...
- Page 126 Acquisition Control AW00118303000 Line Acquisition While Obeying Timing Limits When strictly obeying the following timing limits you can avoid overtriggering in "overlapped mode" and "non-overlapped mode" without having to monitor the camera’s acquisition status (see also Fig. 42 and Fig. 43 below). You must ensure that the following four conditions are fulfilled at the same time: ...
- Page 127 AW00118303000 Acquisition Control ExLSTrig Signal Period (= Line Acquisition Period = 1/Line Rate) ExLSTrig Signal E: Exposure F: Exposure Overhead or Determined by the Exposure Time Exposure Overhead & Parameter or Register Setting (at Least Partial) Readout Fig. 42: Relation of the ExLSTrig Signal Period and Periods E and F for Regular Line Acquisition in Timed Exposure Mode ExLSTrig Signal Period (= 1/Line Rate) ExLSTrig...
- Page 128 Acquisition Control AW00118303000 Example Assume that you are using an raL2048-48gm camera at full resolution (2048 pixels), assume that you want to use the minimum allowed line acquisition period and the default value for C Also assume that the other relevant settings are in accord with operation at the minimum allowed line acquisition period.
-
Page 129: Acquisition Monitoring Tools
AW00118303000 Acquisition Control 8.3 Acquisition Monitoring Tools The camera includes the acquisition status feature and generates four output signals that you can use to monitor the progress of line and frame acquisition by the camera: the exposure active signal, the acquisition trigger wait signal, the frame trigger wait signal, and the line trigger wait signal. These signals are designed to be used when you are triggering acquisition start, frame start or line start via a hardware trigger signal. -
Page 130: Exposure Active Signal
Acquisition Control AW00118303000 8.3.1 Exposure Active Signal The camera’s Exposure Active output signal will go high when the exposure time for each line acquisition begins and goes low when the exposure time ends. An example of the Exposure Active signal’s behavior on a camera using a rising edge external line start trigger signal (ExLSTrig) and the timed exposure mode is shown in Fig. -
Page 131: Acquisition Status Indicator
AW00118303000 Acquisition Control 8.3.2 Acquisition Status Indicator If a camera receives a software acquisition start trigger signal when it is not in a "waiting for acquisition start trigger" acquisition status, it will simply ignore the trigger signal and will generate an acquisition start overtrigger event. -
Page 132: Trigger Wait Signals
Acquisition Control AW00118303000 // Check the line start trigger acquisition status // Set the acquisition status selector Camera.AcquisitionStatusSelector.SetValue ( AcquisitionStatusSelector_LineTriggerWait ); // Read the acquisition status bool IsWaitingForLineTrigger = Camera.AcquisitionStatus.GetValue(); You can also use the Basler pylon Viewer application to easily set the parameters. For more information about the pylon API and the pylon Viewer, see Section 3 on page 8.3.3... -
Page 133: Acquisition Trigger Wait Signal
AW00118303000 Acquisition Control 8.3.3.1 Acquisition Trigger Wait Signal As you are acquiring frames, the camera automatically monitors the acquisition start trigger status and supplies a signal that indicates the current status. The Acquisition Trigger Wait signal will go high whenever the camera enters a "waiting for acquisition start trigger"... - Page 134 Acquisition Control AW00118303000 Acq. Trigger Wait Signal ExASTrig Signal Line Acquisition Exp. Readout Line Acquisition Frame M Exp. Readout Line Acquisition Exp. Readout Line Acquisition Exp. Readout Line Acquisition Frame M+1 Exp. Readout Line Acquisition Exp. Readout Time = Camera is in a "waiting for acquisition start trigger"...
-
Page 135: Frame Trigger Wait Signal
AW00118303000 Acquisition Control Selecting the Acquisition Trigger Wait Signal as the Source Signal for the Output Line The acquisition trigger wait signal can be selected to act as the source signal for e.g. camera output line 1. Selecting a source signal for the output line is a two step process: Use the Line Selector to select output line 1. - Page 136 Acquisition Control AW00118303000 Frame Trigger Wait Signal ExFSTrig Signal Line Acqn. N Readout Exp. Line Acqn. N+1 Exp . Readout Line Acqn. N+2 Exp . Readout Line Acqn. N+3 Exp . Readout Line Acqn. N+4 Exp . Readout Line Acqn. N+5 Readout Exp .
-
Page 137: Line Trigger Wait Signal
AW00118303000 Acquisition Control Selecting the Frame Trigger Wait Signal as the Source Signal for the Output Line The frame trigger wait signal can be selected to act as the source signal for e.g. camera output line 1. Selecting a source signal for the output line is a two step process: Use the Line Selector to select output line 1. - Page 138 Acquisition Control AW00118303000 Fig. 46 and Fig. 48 illustrate the Frame Trigger Wait signal with exposure and readout overlapped. The figures assume raising edge triggering and that the trigger mode for the acquisition start trigger and for the frame start trigger is set to off, so the camera is internally generating acquisition and frame start trigger signals.
- Page 139 AW00118303000 Acquisition Control Using the Line Trigger Wait Signal with the Trigger Width Exposure Mode When the camera is set for the trigger width exposure mode, the rise of the Line Trigger Wait signal is based on the Exposure Overlap Time Max Abs parameter setting and on when readout of the current line will end.
- Page 140 Acquisition Control AW00118303000 Setting the Exposure Overlap Time Max Abs Parameter You can use the Basler pylon API to set the Exposure Overlap Time Max Abs parameter value from within your application software. The following code snippet illustrates using the API to set the parameter value: // Set the Exposure Overlap Time Max to 4 µs Camera.ExposureOverlapTimeMaxAbs.SetValue( 4);...
-
Page 141: Frame Transmission Time
AW00118303000 Acquisition Control 8.4 Frame Transmission Time As mentioned in earlier sections of this chapter, each time that a complete frame has been accumulated in the camera’s frame memory, the frame will be transmitted from the camera to your host PC via the camera’s Ethernet network connection. The image data in the frame will be packetized and transmitted in compliance with the mechanisms described in the GigE Vision standard. -
Page 142: Maximum Allowed Line Acquisition Rate
Acquisition Control AW00118303000 Maximum Allowed Line Acquisition Rate In general, the maximum allowed line acquisition rate can be limited by three factors: The amount of time it takes to read an acquired line out of the imaging sensor and into the ... - Page 143 AW00118303000 Acquisition Control Max Lines/s (nominal; based on sensor readout) raL2048- raL4096- raL6144- raL8192- raL12288- 48gm 24gm 16 gm 12 gm 8 gm 80000 80000 80000 80000 80000 Factor 2: Factor 2 is the exposure time. You can use the formula below to calculate the maximum line rate based on the exposure time for each acquired line: Max Lines/s --------------------------------------------------------------------...
- Page 144 Acquisition Control AW00118303000 Once you have determined which factor is most restrictive on the line rate, you can try to make that factor less restrictive if possible: If you find that the sensor readout time is most restrictive factor, you cannot make any ...
-
Page 145: Removing The Parameter Limits For The Exposureoverhead Parameter
AW00118303000 Acquisition Control Factor 2, the exposure time, is the most restrictive factor. In this case, the exposure time setting is limiting the maximum allowed line rate to 5117 lines per second. If you wanted to operate the camera at a higher line rate, you would need to lower the exposure time. Because the exposure time is the most restrictive factor, you could also remove the limit from the Exposure Overhead parameter to increase the line rate. - Page 146 Acquisition Control AW00118303000 Removing the Parameter Limits To remove the limits for the ExposureOverhead parameter: 1. Use the Parameter Selector to select the ExposureOverhead parameter. 2. Set the value of the Remove Limits parameter. You can set the Parameter Selector and the value of the Remove Limits parameter from within your application software by using the Basler pylon API.
-
Page 147: The Shaft Encoder Module
AW00118303000 Acquisition Control The Shaft Encoder Module The camera is equipped with a shaft encoder software module. The module can accept input from a two channel shaft encoder (Phase A and Phase B). The module outputs a signal that can be used, for example, as a source signal for the line start trigger function or the frame start trigger function in the camera. - Page 148 Acquisition Control AW00118303000 Note that if this interpretation of direction is not as you desire, you could change it by moving the Phase A output from the shaft encoder to input line 2 and the Phase B output to input line 1. Shaft Encoder Module Parameters There are several parameters and commands associated with the shaft encoder module.
- Page 149 AW00118303000 Acquisition Control Setting the Shaft Encoder Module Parameters To use the shaft encoder software module effectively, you should do the following: Select a signal source for the Phase A and Phase B inputs on the module. (By default, input line 1 is selected as the signal source for the Phase A input and input line 2 is selected as the signal source for the Phase B input.) Make sure that the output from the encoder module is selected as the signal source for a ...
- Page 150 Acquisition Control AW00118303000 int64_t encodercounterSize = Camera.ShaftEncoderModuleCounter.GetValue(); // Reset the shaft encoder module counter and the shaft encoder module re- verse counter Camera.ShaftEncoderModuleCounterReset.Execute( ); Camera.ShaftEncoderModuleReverseCounterReset.Execute( ); For detailed information about using the pylon API, refer to the Basler pylon Programmer’s Guide and API Reference.
- Page 151 AW00118303000 Acquisition Control Case 1 This is the simplest case, i.e., the Shaft Encoder Reverse Counter Max is set to zero. In this situation, the reverse counter never increments or decrements and it will have no effect on the operation of the encoder software module. When the Shaft Encoder Reverse Counter Max is set to zero: If the Shaft Encoder Module Mode is set to Forward Only, the software module will output a ...
- Page 152 Acquisition Control AW00118303000 Case 2 In this case, assume that: A shaft encoder is attached to a conveyor belt that normally moves continuously in the forward direction past a camera. The conveyor occasionally "jitters" and when it jitters, it moves in reverse for 4 or 5 ticks. ...
- Page 153 AW00118303000 Acquisition Control Case 3 In this case, assume that: We are working with a small conveyor that moves back and forth in front of a camera. A shaft encoder is attached to the conveyor. The conveyor moves in the forward direction past the camera through its complete range of ...
- Page 154 Acquisition Control AW00118303000 Camera The conveyor reaches the end of its forward travel and it stops. Stop Camera The conveyor begins moving in reverse and the shaft encoder starts generating reverse ticks. The reverse counter will increment by 1 for each reverse tick.
- Page 155 AW00118303000 Acquisition Control Camera The conveyor reaches the end of its reverse travel and it stops. Stop Camera The conveyor begins moving forward and the shaft encoder starts generating forward ticks. The reverse counter is at 10 and will now begin decrementing by 1 for each forward tick.
-
Page 156: Frequency Converter
Acquisition Control AW00118303000 8.7 Frequency Converter The camera is equipped with a frequency converter module that allows triggering the camera at a frequency that differs from the frequency of the input signals received. The module can accept input signals from one of the three input lines or signals (ticks) from the shaft encoder module. - Page 157 AW00118303000 Acquisition Control If for example a post-divider of 2 is selected only every other signal received from the multiplier module is passed out from the divider module and, accordingly, the frequency is halved. If a post-divider of 1 is selected every signal received from the multiplier module is passed out un- changed from the divider module.
- Page 158 Acquisition Control AW00118303000 Basler racer GigE...
-
Page 159: Pixel Data Formats
AW00118303000 Pixel Data Formats 9 Pixel Data Formats By selecting a pixel data format, you determine the format (layout) of the image data transmitted by the camera. This section provides detailed information about the available pixel data formats. 9.1 Setting the Pixel Data Format The setting for the camera’s Pixel Format parameter determines the format of the pixel data that will be output from the camera. -
Page 160: Pixel Data Formats
Pixel Data Formats AW00118303000 Pixel Data Formats 9.2.1 Mono 8 Format When a monochrome camera is set for the Mono 8 pixel data format, it outputs 8 bits of brightness data per pixel. The table below describes how the pixel data for a received frame will be ordered in the image buffer in your PC when the camera is set for Mono 8 output. -
Page 161: Mono 12 Format
AW00118303000 Pixel Data Formats 9.2.2 Mono 12 Format When a monochrome camera is set for the Mono 12 pixel data format, it outputs 16 bits of brightness data per pixel with 12 bits effective. The 12 bits of effective pixel data fill from the least significant bit. - Page 162 Pixel Data Formats AW00118303000 When the camera is set for Mono 12, the pixel data output is 16 bit data of the “unsigned short (little endian)” type. The available range of data values and the corresponding indicated signal levels are as shown in the table below.
-
Page 163: Mono 12 Packed Format
AW00118303000 Pixel Data Formats 9.2.3 Mono 12 Packed Format When a monochrome camera is set for the Mono 12 Packed pixel data format, it outputs 12 bits of brightness data per pixel. Every three bytes transmitted by the camera contain data for two pixels. The table below describes how the pixel data for a received frame will be ordered in the image buffer in your PC when the camera is set for Mono 12 Packed output. - Page 164 Pixel Data Formats AW00118303000 When a monochrome camera is set for Mono 12 Packed, the pixel data output is 12 bit data of the “unsigned” type. The available range of data values and the corresponding indicated signal levels are as shown in the table below. This Data Value Indicates This Signal Level (Hexadecimal)
-
Page 165: Yuv 4:2:2 Packed Format
AW00118303000 Pixel Data Formats 9.2.4 YUV 4:2:2 Packed Format When a monochrome camera is set for the YUV 4:2:2 Packed pixel data format, the camera transmits Y, U, and V values in a fashion that mimics the output from a color camera set for YUV 4:2:2 Packed. - Page 166 Pixel Data Formats AW00118303000 7 ... 0 7 ... 0 7 ... 0 When the camera is set for YUV 4:2:2 Packed output, the pixel data output for the Y component is 8 bit data of the “unsigned char” type. The range of data values for the Y component and the corresponding indicated signal levels are shown below.
-
Page 167: Yuv 4:2:2 (Yuyv Packed) Format
AW00118303000 Pixel Data Formats 9.2.5 YUV 4:2:2 (YUYV Packed) Format When a monochrome camera is set for the YUV 4:2:2 (YUYV) Packed pixel data format, the camera transmits Y, U, and V values in a fashion that mimics the output from a color camera set for YUV 4:2:2 (YUYV) Packed. - Page 168 Pixel Data Formats AW00118303000 7 ... 0 7 ... 0 7 ... 0 7 ... 0 7 ... 0 7 ... 0 7 ... 0 7 ... 0 When the camera is set for YUV 4:2:2 (YUYV) output, the pixel data output for the Y component is 8 bit data of the “unsigned char”...
-
Page 169: Pixel Transmission Sequence
AW00118303000 Pixel Data Formats 9.3 Pixel Transmission Sequence For each acquired frame, pixel data is transmitted from the camera in the following sequence: ...., Row .., Row ..Where: is the upper left corner of the frame. - Page 170 Pixel Data Formats AW00118303000 Basler racer GigE...
-
Page 171: Standard Features
AW00118303000 Standard Features 10 Standard Features This chapter provides detailed information about the standard features available on each camera. It also includes an explanation of their operation and the parameters associated with each feature. 10.1 Gain and Black Level 10.1.1 Gain The camera’s gain is adjustable. -
Page 172: Analog Gain
Standard Features AW00118303000 10.1.1.1 Analog Gain The camera’s analog gain is determined by the Gain parameter with the gain selector set to Analog All. All pixels in the sensor are affected by this setting. The allowed parameter values are 1 and 4. A parameter value of 1 corresponds to 0 dB and gain will not be modified. - Page 173 AW00118303000 Standard Features 256 corresponds to 0 dB and gain will not be modified and a parameter value of 2047 corresponds to 18.058 dB and an amplification factor of approximately 7.996. You can use the formula below to calculate the dB of gain that will result from the Gain Raw parameter values: ...
-
Page 174: Using Both Analog Gain And Digital Gain
Standard Features AW00118303000 10.1.1.3 Using Both Analog Gain and Digital Gain You can use analog gain and digital gain at the same time. In this case, the amplification factors will multiply. For example, if you set analog gain to an amplification factor of 4 and use an amplification factor of 1.2 for digital gain, the total amplification factor will be 4.8. - Page 175 AW00118303000 Standard Features For detailed information about using the pylon API, refer to the Basler pylon Programmer’s Guide and API Reference. You can also use the Basler pylon Viewer application to easily set the parameters. For more information about the pylon Viewer, see Section 3.1 on page Basler racer GigE...
-
Page 176: Remove Parameter Limits
Standard Features AW00118303000 10.2 Remove Parameter Limits For each camera feature, the allowed range of any associated parameter values is normally limited. The factory limits are designed to ensure optimum camera operation and, in particular, good image quality. For special camera uses, however, it may be helpful to set parameter values outside of the factory limits. -
Page 177: Image Area Of Interest
AW00118303000 Standard Features 10.3 Image Area of Interest The image area of interest (image AOI) feature (AOI for short) lets you specify a portion of the sensor line. During operation, only the pixel information from the specified portion of the line is transmitted out of the camera. -
Page 178: Automatic Image Aoi X Centering
Standard Features AW00118303000 10.3.2 Automatic Image AOI X Centering The Image AOI feature includes Center X capabilities. When Center X is enabled, the camera will automatically center the image AOI on the sensor. Setting Automatic X Centering You can set the Center X parameter value from within your application software by using the Basler pylon API. -
Page 179: Event Reporting
AW00118303000 Standard Features 10.4 Event Reporting Event reporting is available on the camera. With event reporting, the camera can generate an "event" and after some intermediate steps transmit a related event message to the PC whenever a specific situation has occurred. The camera can generate and transmit events for the following types of situations: Overtriggering of the acquisition start trigger has occurred ... - Page 180 Standard Features AW00118303000 During the time that the camera is waiting for an acknowledgement, no new event messages can be transmitted. 4. Event reporting involves some further software-related steps and settings to be made. For more information, see the "Camera Events" code sample included with the pylon software development kit.
- Page 181 AW00118303000 Standard Features Setting Your System for Event Reporting Event reporting must be enabled in the camera and some additional software-related settings must be made. This is described in the "Camera Events" code sample included with the pylon software development kit. Event reporting must be specifically set up for each type of event using the parameter name of the event and of the supplementary information.
-
Page 182: Luminance Lookup Table
Standard Features AW00118303000 10.5 Luminance Lookup Table The type of electronics used on the camera allow the camera’s sensor to acquire pixel values at a 12 bit depth. Normally, when a camera is set for a 12 bit pixel data format, the camera uses the actual 12 bit pixel values reported by the sensor. - Page 183 AW00118303000 Standard Features 4095 3072 Substitute 12 Bit Value 2048 1024 1024 2048 3072 4095 Actual 12 Bit Sensor Value Fig. 53: Lookup Table with Values Mapped in a Linear Fashion 4095 3072 Substitute 12 Bit Value 2048 1024 1024 2048 3072 4095...
- Page 184 Standard Features AW00118303000 Changing the Values in the Luminance Lookup Table and Enabling the Table You can change the values in the luminance lookup table (LUT) and enable the use of the lookup table by doing the following: 1. Use the LUT Selector to select a lookup table. (Currently there is only one lookup table avail- able, i.e., the "luminance"...
-
Page 185: Binning
AW00118303000 Standard Features 10.6 Binning Binning increases the camera’s response to light by summing the charges from adjacent pixels into one pixel. With horizontal binning, the charges of 2, 3, or a maximum of 4 adjacent pixels are summed and are reported out of the camera as a single pixel. -
Page 186: Gamma Correction
Standard Features AW00118303000 10.7 Gamma Correction The gamma correction feature lets you modify the brightness of the pixel values output by the camera’s sensor to account for a non-linearity in the human perception of brightness. To accomplish the correction, a gamma correction factor () is applied to the brightness value (Y) of each pixel according to the following formula: ... -
Page 187: Shading Correction
AW00118303000 Standard Features 10.8 Shading Correction Two types of shading correction are available on the camera, offset shading correction and gain shading correction. You can set the camera to only perform offset shading correction, to only perform gain shading correction, or to perform both types of shading correction. 10.8.1 Offset Shading Correction When a line scan camera with a digital sensor captures a line in complete darkness, all of the pixel... -
Page 188: Default Shading Set File And User Shading Set File
Standard Features AW00118303000 10.8.3 Default Shading Set File and User Shading Set File For each type of shading correction, two types of shading set files are available in the camera’s nonvolatile memory: The first type of shading set file is called the "defaultshading" file. One "defaultshading" file is ... - Page 189 AW00118303000 Standard Features Creating a "Usershading" File for Offset Shading Correction Creating a "usershading" file for offset shading correction will overwrite any "usershading" file for offset shading correction that is already in the camera’s memory. If you want to preserve the previous "usershading" file save it to your PC before creating the new "usershading"...
- Page 190 Standard Features AW00118303000 Creating a "Usershading" File for Gain Shading Correction Creating a "usershading" file for gain shading correction will overwrite any "usershading" file for gain shading correction that is already in the camera’s memory. If you want to preserve the previous "usershading" file save it to your PC before creating the new "usershading"...
-
Page 191: Working With Shading Sets
AW00118303000 Standard Features After 128 line acquisitions are completed the camera creates the "usershading" file automatically. The "usershading" file is stored in the camera’s non-volatile memory and is not lost if the camera power is switched off. Any time you make a change to the optics or lighting or if you change the camera’s gain settings or exposure mode, you must create a new "usershading"... -
Page 192: Trigger Delay
Standard Features AW00118303000 10.9 Trigger Delay The trigger delay feature lets you specify a delay that will be applied between the receipt of a hardware acquisition start trigger or frame start trigger and it becoming effective. The trigger delay may be specified as a time interval in the range from 0 to 1000000 µs (equivalent to 1 s) or as a number of consecutive line start triggers where the maximum number depends on the camera model. -
Page 193: Error Codes
AW00118303000 Standard Features 10.10 Error Codes The camera can detect several user correctable errors. If one of these errors is present, the camera will set an error code and will flash both the yellow and green LEDs in the LED indicator.: Code Condition Meaning... - Page 194 Standard Features AW00118303000 Reading and Clearing the Error Codes Using Basler Pylon You can use the pylon API to read the value of the Last Error parameter and to execute a Clear Last Error command from within your application software. The following code snippets illustrate using the API to read the parameter value and execute the command: // Read the value of the last error code in the memory LastErrorEnums lasterror = Camera.LastError.GetValue();...
-
Page 195: Test Images
AW00118303000 Standard Features 10.11Test Images All cameras include the ability to generate test images. Test images are used to check the camera’s basic functionality and its ability to transmit an image to the host PC. Test images can be used for service purposes and for failure diagnostics. -
Page 196: Test Images In Detail
Standard Features AW00118303000 10.11.1Test Images in Detail Test Image 1 - Fixed Diagonal Gray Gradient (8 bit) The 8 bit fixed diagonal gray gradient test image is best suited for use when the camera is set for monochrome 8 bit output. The test image consists of fixed diagonal gray gradients ranging from 0 to 255. - Page 197 AW00118303000 Standard Features Test Image 3 - Moving Diagonal Gray Gradient (12 bit) The 12 bit moving diagonal gray gradient test image is similar to test image 2, but it is a 12 bit pattern. The image moves by one pixel from right to left whenever a new frame acquisition is initiated.
-
Page 198: Device Information Parameters
Standard Features AW00118303000 10.12 Device Information Parameters Each camera includes a set of "device information" parameters. These parameters provide some basic information about the camera. The device information parameters include: Device Vendor Name (read only) - indicates the name of the camera’s vendor. This string will ... - Page 199 AW00118303000 Standard Features Pylon::String_t firmwareVersion = Camera.DeviceFirmwareVersion.GetValue(); // Read the Device ID parameter Pylon::String_t deviceID = Camera.DeviceID.GetValue(); // Write and read the Device User ID Camera.DeviceUserID = "custom name"; Pylon::String_t deviceUserID = Camera.DeviceUserID.GetValue(); // Read the Sensor Width parameter int64_t sensorWidth = Camera.SensorWidth.GetValue(); // Read the Sensor Height parameter int64_t sensorHeight = Camera.SensorHeight.GetValue();...
-
Page 200: User Defined Values
Standard Features AW00118303000 10.13 User Defined Values The camera can store two "user defined values". These two values are 32 bit signed integer values that you can set and read as desired. They simply serve as convenient storage locations for the camera user and have no impact on the operation of the camera. -
Page 201: Configuration Sets
AW00118303000 Standard Features 10.14 Configuration Sets A configuration set is a group of values that contains all of the parameter settings needed to control the camera. There are three basic types of configuration sets: the active configuration set, the default configuration set, and user configuration sets. Active Configuration Set The active configuration set contains the camera’s current parameter settings and thus determines the camera’s... -
Page 202: Saving Configuration Sets
Standard Features AW00118303000 Default Startup Set You can select the default configuration set or one of the user configuration sets stored in the camera’s non-volatile memory to be the "default startup set." The configuration set that you designate as the default startup set will be loaded into the active set whenever the camera starts up at power on or after a reset. -
Page 203: Loading A Saved Set Or The Default Set Into The Active Set
AW00118303000 Standard Features 10.14.2 Loading a Saved Set or the Default Set into the Active Set If you have saved a configuration set into the camera’s non-volatile memory, you can load the saved set from the camera’s non-volatile memory into the camera’s active set. When you do this, the loaded set overwrites the parameters in the active set. - Page 204 Standard Features AW00118303000 Basler racer GigE...
-
Page 205: Chunk Features
AW00118303000 Chunk Features 11 Chunk Features This section provides detailed information about the chunk features available on each camera. 11.1 What are Chunk Features? In most cases, enabling a camera feature will simply change the behavior of the camera. The Test Image feature is a good example of this type of camera feature. -
Page 206: Making The "Chunk Mode" Active And Enabling The Extended Data Stamp
Chunk Features AW00118303000 11.2 Making the "Chunk Mode" Active and Enabling the Extended Data Stamp Before you can use any of the camera’s "chunk" features, the "chunk mode" must be made active. Making the chunk mode active does two things: It automatically enables the Extended Frame Data chunk feature. - Page 207 AW00118303000 Chunk Features The following code snippet illustrates using the pylon API to run the parser and retrieve the extended image data: // retrieve data from the extended frame data chunk IChunkParser &ChunkParser = *Camera.CreateChunkParser(); GrabResult Result; StreamGrabber.RetrieveResult( Result ); ChunkParser.AttachBuffer( (unsigned char*) Result.Buffer(), Result.GetPayloadSize() );...
-
Page 208: Frame Counter
Chunk Features AW00118303000 11.3 Frame Counter The Frame Counter feature numbers frames sequentially as they are acquired. When the feature is enabled, a chunk is added to each completed frame containing the value of the counter. The frame counter is a 32 bit value. The counter starts at 0 and wraps back to 0 after it reaches its maximum. - Page 209 AW00118303000 Chunk Features Result.GetPayloadSize() ); int64_t frameCounter = Camera.ChunkFramecounter.GetValue(); For detailed information about using the pylon API, refer to the Basler pylon Programmer’s Guide and API Reference. You can also use the Basler pylon Viewer application to easily set the parameters. For more information about the pylon Viewer, see Section 3.1 on page Frame Counter Reset...
- Page 210 Chunk Features AW00118303000 For detailed information about using the pylon API, refer to the Basler pylon Programmer’s Guide and API Reference. You can also use the Basler pylon Viewer application to easily set the parameters. Basler racer GigE...
-
Page 211: Time Stamp
AW00118303000 Chunk Features 11.4 Time Stamp The Time Stamp feature adds a chunk to each acquired frame. The chunk contains a time stamp that was generated when the frame start trigger for the frame became valid. Note that when the camera is set for continuous acquisition mode with the frame start trigger set to off, the user is not required to apply frame start trigger signals to the camera. - Page 212 Chunk Features AW00118303000 Result.GetPayloadSize() ); int64_t timeStamp = Camera.ChunkTimestamp.GetValue(); For detailed information about using the pylon API, refer to the Basler pylon Programmer’s Guide and API Reference. You can also use the Basler pylon Viewer application to easily set the parameters. For more information about the pylon Viewer, see Section 3.1 on page Basler racer GigE...
-
Page 213: Trigger Counters
AW00118303000 Chunk Features 11.5 Trigger Counters The camera has the following "trigger counters" available that can help you determine if you are triggering the camera correctly: the Line Trigger Ignored Counter the Frame Trigger Ignored Counter the Line Trigger End To End Counter ... - Page 214 Chunk Features AW00118303000 Line Trigger End To End Counter The Line Trigger End to End Counter counts the number of line triggers received by the camera from the end of the previous frame acquisition to the end of the current frame acquisition. If you subtract the number of lines actually included in the current frame from the number of lines shown by this counter, it will tell you the number of line triggers that were received but not acted on during the frame end to frame end period.
- Page 215 AW00118303000 Chunk Features // enable the trigger counter chunks Camera.ChunkSelector.SetValue( ChunkSelector_LineTriggerIgnoredCounter ); Camera.ChunkEnable.SetValue( true ); Camera.ChunkSelector.SetValue( ChunkSelector_FrameTriggerIgnoredCounter ); Camera.ChunkEnable.SetValue( true ); Camera.ChunkSelector.SetValue( ChunkSelector_LineTriggerEndToEndCounter ); Camera.ChunkEnable.SetValue( true ); Camera.ChunkSelector.SetValue( ChunkSelector_FrameTriggerCounter ); Camera.ChunkEnable.SetValue( true ); Camera.ChunkSelector.SetValue( ChunkSelector_FramesPerTriggerCounter ); Camera.ChunkEnable.SetValue( true ); To retrieve data from a chunk appended a frame that has been received by your PC, you must first run the frame and its appended chunks through the chunk parser included in the pylon API.
-
Page 216: Encoder Counter
Chunk Features AW00118303000 11.6 Encoder Counter The encoder counter chunk indicates the value of the Shaft Encoder Module Counter parameter at the time of the occurrence of a frame trigger. When the encoder counter chunk is enabled, a chunk is added to each frame containing the value of the Shaft Encoder Module Counter parameter. The encoder counter chunk is a 16 bit value. - Page 217 AW00118303000 Chunk Features For detailed information about using the pylon API, refer to the Basler pylon Programmer’s Guide and API Reference. You can also use the Basler pylon Viewer application to easily set the parameters. Basler racer GigE...
-
Page 218: Input Line Status At Line Trigger
Chunk Features AW00118303000 11.7 Input Line Status At Line Trigger The Input Status At Line Trigger feature samples the status of all of the camera’s input lines each time a line acquisition is triggered. It collects the input line status data for each acquired line in a chunk and adds the chunk to the frame that includes the acquired line. - Page 219 AW00118303000 Chunk Features To retrieve data from a chunk appended to an image that has been received by your PC, you must first run the image and its appended chunks through the chunk parser included in the pylon API. Once the chunk parser has been used, you can retrieve the input line status at line trigger information that was extant when acquisition of line i was triggered by doing the following: Read the value of the Chunk Input Status At Line Trigger parameter.
-
Page 220: Crc Checksum
Chunk Features AW00118303000 11.8 CRC Checksum The CRC (Cyclic Redundancy Check) Checksum feature adds a chunk to each acquired frame containing a CRC checksum calculated using the X-modem method. As shown in Fig. 60 on page 212, the checksum is calculated using all of the image data in the frame and all of the appended chunks except for the checksum itself. - Page 221 AW00118303000 Chunk Features Camera.ChunkSelector.SetValue( ChunkSelector_PayloadCRC16 ); Camera.ChunkEnable.SetValue( true ); // Check the CRC checksum of an acquired frame IChunkParser &ChunkParser = *Camera.CreateChunkParser(); GrabResult Result; StreamGrabber.RetrieveResult( Result ); ChunkParser.AttachBuffer( (unsigned char*) Result.Buffer(), Result.GetPayloadSize() ); if ( ChunkParser.HasCRC() && ! ChunkParser.CheckCRC() ) cerr <<...
- Page 222 Chunk Features AW00118303000 Basler racer GigE...
-
Page 223: Troubleshooting And Support
AW00118303000 Troubleshooting and Support 12 Troubleshooting and Support This chapter explains camera reset and outlines the resources available to you if you need help working with your camera. 12.1 Camera Reset Some situations may require a camera reset. It is executed using the DeviceReset command parameter via the pylon API and is therefore also referred to as a "software reset". -
Page 224: Tech Support Resources
Troubleshooting and Support AW00118303000 12.2 Tech Support Resources If you need advice about your camera or if you need assistance troubleshooting a problem with your camera, you can contact the Basler technical support team for your area. Basler technical support contact information is located in the front pages of this manual. - Page 225 AW00118303000 Troubleshooting and Support The camera’s product ID: The camera’s serial number: Network adapter that you use with the camera: Describe the problem in as much detail as possible: (If you need more space, use an extra sheet of paper.) If known, what’s the cause of the problem? When did the problem occur?
- Page 226 Troubleshooting and Support AW00118303000 Did your application ever run without problems? Parameter set It is very important for Basler technical support to get a copy of the exact camera parameters that you were using when the problem occurred. To make note of the parameters, use Basler’s pylon Viewer. If you cannot access the camera, please try to state the following parameter settings: Frame Size: Pixel Format:...
-
Page 227: Revision History
AW00118303000 Revision History Revision History Doc. ID Number Date Changes AW00118301000 20 Jun 2012 Preliminary release of this document. Applies to prototype cameras only. AW00118302000 9 Apr 2013 Initial release for series cameras. AW00118303000 13 Sep 2013 Updated the contact information for Asia. Updated some max. - Page 228 Revision History AW00118303000 Basler racer GigE...
-
Page 229: Index
AW00118303000 Index Index chunk frame trigger ignored counter acquisition frame count parameter ...81 parameter ..........207 acquisition start overtrigger event ..171 chunk frames per trigger counter acquisition start trigger .......78, 80 parameter ..........207 acquisition status indicator .....123 chunk height parameter......198 acquisition status parameter ....123 chunk input status at line trigger acquisition trigger wait signal ....125 parameter ..........211... - Page 230 Index AW00118303000 dimensions ........2, 4, 5, 7 frame retention parameter ....... 26 drivers, network........25 frame size ..........76 DSNU frame start overtrigger event ....171 see offset shading correction frame start trigger....... 78, 83 dust ............17 frame start trigger activation parameter ...84 falling edge ........
- Page 231 AW00118303000 Index electrical characteristics .....57 max number resend request parameter ...31 inverter ..........62 max width parameter......190 termination resistor.......58, 61 maximum exposure time ......92 input status at line trigger chunk.....210 maximum line rate ........134 installation minimum exposure time ......92 hardware ..........21 minimum line rate .......2, 4, 5 software..........21 minimum output pulse width....66, 67...
- Page 232 Index AW00118303000 pin assignments .........51, 52 pin numbering ..........50 saving parameter sets....193, 194 pixel data formats........151 sensor mono 12 ...........153 architecture ........46 mono 12 packed ......155 pixel size ........2, 4, 5 mono 8 ..........152 resolution ........2, 4, 5 YUV 422 (YUYV) packed....159 size ........
- Page 233 AW00118303000 Index torque maximum..........12 transition threshold ........60 trigger acquisition start ........78 frame start ........78, 83 line start........78, 87 trigger counters ........205 trigger delay..........184 trigger width exposure time control mode ..........89, 131 use case description..........95 diagram ..........95 user defined values ........192 user output value parameter ....70 user settable output lines ....68, 70 user shading set file .......180...
- Page 234 Index AW00118303000 Basler racer GigE...
Need help?
Do you have a question about the GigE VISION CAMERAS and is the answer not in the manual?
Questions and answers