Table of Contents
Advertisement
Quick Links
Advertisement
Table of Contents

Related Manuals for Axis S9002 Mk II


Summary of Contents for Axis S9002 Mk II
- Page 1 AXIS Camera Station S9002 Mk II Desktop Terminal User manual...
-
Page 2: Table Of Contents
Configure AXIS Camera Station ........ -
Page 3: About Your Device
4K streams. The terminal is preloaded with AXIS Camera Station client and all necessary software and is preconfigured to minimize installation time. With its slim form factor, AXIS S9002 Mk ll complements Axis rack servers to create a high-end surveillance workstation. -
Page 4: Get Started
Create a standard user account. See 4. Update AXIS Camera Station to the latest version. If your system is online: open the AXIS Recorder Toolbox app and click Update AXIS Camera Station. If your system is offline: go to axis.com and download the latest version. -
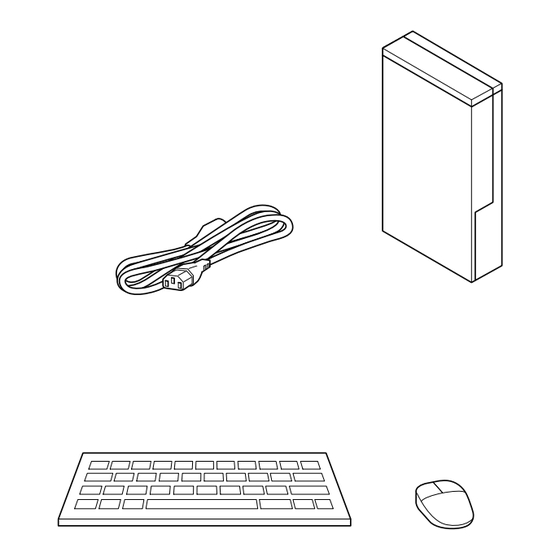
Page 5: Install Your Device
AXIS Camera Station S9002 Mk II Desktop Terminal Install your device Install your device... - Page 6 AXIS Camera Station S9002 Mk II Desktop Terminal Install your device...
- Page 7 AXIS Camera Station S9002 Mk II Desktop Terminal Install your device...
- Page 8 AXIS Camera Station S9002 Mk II Desktop Terminal Install your device...
- Page 9 AXIS Camera Station S9002 Mk II Desktop Terminal Install your device...
-
Page 10: Configure Your Device
Log in to the server Using the AXIS Camera Station client, you can connect to multiple servers or a single server installed on the local computer or somewhere else on the network. You can connect to AXIS Camera Station servers in different ways: Last used servers - Connect to the servers used in the previous session. -
Page 11: Configure Axis Camera Station
When trying to connect to a server for the first time, the client checks the server certificate ID. To ensure that you’re connecting to the correct server, manually verify the certificate ID with the one displayed in AXIS Camera Station Service Control. - Page 12 Start the video management system Double-click the AXIS Camera Station client icon to start the client. When you start the client for the first time, it attempts to log in to the AXIS Camera Station server installed on the same computer as the client.
-
Page 13: Network Configuration
See Signed video and the camera’s user manual for more information. Network configuration Configure proxy or firewall settings before using AXIS Camera Station if the AXIS Camera Station client, AXIS Camera Station server, and the connected network devices are on different networks. Client proxy settings... -
Page 14: Server Port Configuration
When a NAT, firewall, or similar separates the client and the server, configure the NAT or firewall to ensure that the HTTP port, TCP port, and streaming port specified in AXIS Camera Station Service Control can pass through the firewall or NAT. Contact the network administrator for instructions on configuring the NAT or firewall. -
Page 15: Manage Windows® User Accounts
AXIS Camera Station S9002 Mk II Desktop Terminal Manage Windows® user accounts Manage Windows® user accounts Create a user account To help keep your personal data and information more secure, we recommend that you add a password for each local account. -
Page 16: Change A User Account's Password
AXIS Camera Station S9002 Mk II Desktop Terminal Manage Windows® user accounts 1. Go to Settings > Accounts > Other people. 2. Go to the account you want to remove and click Remove. Change a user account's password 1. Log in with an administrator account. -
Page 17: Manage Axis Camera Station User Accounts
Manage AXIS Camera Station user accounts Manage AXIS Camera Station user accounts Configure user permissions Go to Configuration > Security > User permissions to view the users and groups that exists in AXIS Camera Station S9002 Mk II Desktop Terminal. Note Administrators of the computer that runs AXIS Camera Station S9002 Mk II Desktop Terminal server are automatically given administrator privileges to AXIS Camera Station S9002 Mk II Desktop Terminal. -
Page 18: User Or Group Privileges
Operator - Select cameras, views, and I/O ports to get access to live and recorded. An operator has full access to all functionality of AXIS Camera Station S9002 Mk II Desktop Terminal except system configuration. Viewer - Access to live video of selected cameras, I/O ports, and views. A viewer doesn’t have access to recorded video or system configuration. - Page 19 The following access privileges are available for users or groups with the Operator or Viewer role. You can select multiple views and set the access privileges. Access Allow access to the views in AXIS Camera Station S9002 Mk II Desktop Terminal. Edit Allow to edit the views in AXIS Camera Station S9002 Mk II Desktop Terminal.
- Page 20 AXIS Camera Station S9002 Mk II Desktop Terminal Manage AXIS Camera Station user accounts Configuration of system health monitoring Allow configuration of the system health monitoring system. Access to system health monitoring Allow access to the system health monitoring system.
-
Page 21: Manage Your Device
AXIS Camera Station S9002 Mk II Desktop Terminal Manage your device Manage your device Update Windows® Windows® periodically checks for updates. When an update is available, your device automatically downloads the update but you've to install it manually. Note Recording will be interrupted during a scheduled system restart. - Page 22 AXIS Camera Station S9002 Mk II Desktop Terminal Manage your device 7.2 Click OK.
-
Page 23: Troubleshooting
4. After the ISO to USB tool is complete, take the USB drive and plug it into your device. 5. Start your device and before the AXIS splash screen appears press F12. We recommend that you tap the F12 key repeatedly as the device boots fast. -
Page 24: Product Overview
AXIS Camera Station S9002 Mk II Desktop Terminal Product overview Product overview Front and rear sides Audio line out PS2 keyboard port Serial port PS2 mouse port USB 3.1 USB 2.0... -
Page 25: Specifications
AXIS Camera Station S9002 Mk II Desktop Terminal Product overview Ethernet (RJ45) 1 GbE Mini DisplayPort™ Power connector 10 System power LED 11 On/off button 12 Drive activity LED 13 Universal audio jack 14 USB 2.0 15 USB 2.0 16 USB 3.1 17 USB 3.1 Type-C... - Page 26 AXIS Camera Station S9002 Mk II Desktop Terminal Product overview Link indicator is green and activity indicator is blinking green The NIC is connected to a valid network at its maximum port speed and data is being sent or received.
- Page 27 AXIS Camera Station S9002 Mk II Desktop Terminal Product overview Power indicators Description Green A valid power source is connected to the PSU and the PSU is operational. Blinking amber Indicates a problem with the PSU. Not illuminated Power is not connected.
-
Page 28: Need More Help
Need more help? Need more help? Useful links • AXIS Camera Station user manual • Configure Axis Secure Remote Access • What to include in an Antivirus allowlist for AXIS Camera Station Contact support If you need more help, go to axis.com/support. - Page 29 User manual Ver. M6.2 AXIS Camera Station S9002 Mk II Desktop Terminal Date: October 2024 © Axis Communications AB, 2018 - 2024 Part no. T10130277...
Need help?
Do you have a question about the S9002 Mk II and is the answer not in the manual?
Questions and answers