Table of Contents
Advertisement
Quick Links
Advertisement
Table of Contents
Troubleshooting

Related Manuals for Blackmagicdesign DaVinci Resolve Micro Color Panel


Summary of Contents for Blackmagicdesign DaVinci Resolve Micro Color Panel
- Page 1 September 2024 Operation Manual DaVinci Resolve Micro Color Panel...
- Page 2 We hope you use your DaVinci Resolve Micro Color Panel to create some of the world’s most dynamic film and television productions! We are keen to see what creative work you produce and to get your feedback on new features you would like to see us add to your micro color panel.
-
Page 3: Table Of Contents
DaVinci Resolve Micro Color Panel 4 Setting up the DaVinci Resolve Micro Color Panel 4 Connecting the DaVinci Resolve Micro Color Panel via USB-C 4 Charging the DaVinci Resolve Micro Color Panel 5 Updating the DaVinci Resolve Micro Color Panel Firmware 5... -
Page 4: Davinci Resolve Micro Color Panel
Micro Color Panel on your Windows or Mac computer. Simply connect the DaVinci Resolve Micro Color Panel to your computer’s USB type C port, using a USB-C cable. No additional configuration is required. The Micro Color Panel will show up automatically in DaVinci Resolve, along with the DaVinci Control Panels Setup applications, ready for use. -
Page 5: Charging The Davinci Resolve Micro Color Panel
Charging the DaVinci Resolve Micro Color Panel Connecting the DaVinci Resolve Micro Color Panel via USB-C to your Mac, PC, or iPad will also charge the unit’s internal battery, allowing it to be used wirelessly via Bluetooth. You can check the current battery level of the Micro Color Panel by going to the Control Panels section of the System Preferences. -
Page 6: Connecting The Davinci Resolve Micro Color Panel Via Bluetooth
Connecting the DaVinci Resolve Micro Color Panel via Bluetooth You can also connect the DaVinci Resolve Micro Color Panel wirelessly via Bluetooth for more flexible installation options. To Connect the Micro Color Panel to MacOS via Bluetooth Ensure that your Micro Color Panel’s battery is ready by first connecting it via USB-C, as described above, and allowing it to charge. - Page 7 Once the Micro Color Panel is connected in the Bluetooth & devices window, open DaVinci Resolve. The LEDs on the keys will illuminate to confirm that the Micro Color Panel is connected properly. Setting up the DaVinci Resolve Micro Color Panel...
-
Page 8: Troubleshooting The Micro Color Panel Via Bluetooth
Micro Color Panel is connected properly. Troubleshooting the Micro Color Panel via Bluetooth If you are having difficulty using the DaVinci Resolve Micro Color Panel via Bluetooth, try the following troubleshooting tips: ‚ Make sure you are using DaVinci Resolve 19 or higher. The Micro Color Panel is not compatible with any DaVinci Resolve version lower than 19. -
Page 9: Reset The Micro Color Panel Firmware
Then press another key. Trackball Modes You can set up the DaVinci Resolve Micro Color Panel’s physical rings and trackballs to mirror the on-screen Primaries Wheels and Log controls. This lets you select an intuitive tactile interface for each mode. -
Page 10: Log Trackball Mode
When any of the Offset, Viewer, Wipe Still, and Cursor keys are lit, some or all of the trackballs and rings will change their state to control different functions. Those functions are described below under their respective key descriptions. Primary Trackball Mode controls Y LIFT Y GAMMA Y GAIN... -
Page 11: Offset Trackball Mode
Offset Trackball Mode You can also select the Offset button whether in Primary or Log modes. The Offset button will illuminate green to remind you that this mode is active. This is a toggle operation, and when selected, the left-hand side ring surrounding the trackball controls the color temperature of the image, the center trackball ring controls the color tint, and the right-hand side trackball controls the image offset balance and master exposure with the ring. -
Page 12: Control Description
BYPASS DISABLE USER LOOP Shift Down: Sizing Palette Trackball Controls When the Sizing Palette is active, and the Shift Down key is pressed and held, the following functions can be controlled by the trackballs: Gain Trackball: Adjusts image input sizing position pan/tilt. Gain Ring: Adjusts image input sizing zoom. -
Page 13: Control Knobs
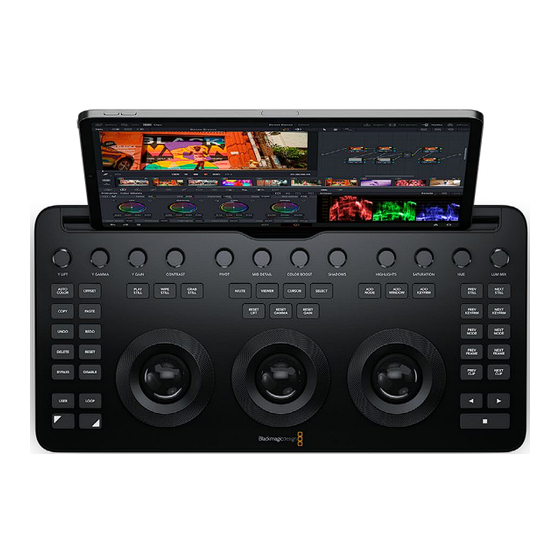
CLIP USER LOOP DaVinci Resolve Micro Color Panel Control Knobs From left to right: Y Lift: This knob is for adjusting the contrast of the image in the darker areas. The midtone, and to a lesser amount the brighter areas of an image, will also change. -
Page 14: Control Buttons
Saturation: Increases or decreases overall image saturation. At higher values, colors appear more intense, while at lower values, color intensity diminishes until, at 0, all color is gone, leaving you with a grayscale image. Hue Rotation: Rotates all hues of the image around the full perimeter of the color wheel. The default setting of 50 shows the original distribution of hues. - Page 15 Grab Still: At any time when you are grading, selecting the Grab Still key automatically grabs a full resolution frame from the Timeline and attaches the node graph metadata for later display and use. H/Lite (Highlight): Toggles the highlight view on or off. This key will illuminate green to let you know this mode is active.
- Page 16 Offset: Toggles the right trackball to offset mode, the left ring to color temperature, and the middle ring to tint. This key illuminates green to show you that this mode is turned on. Shift Up: Toggles Log mode. Copy: Copies the clip grade to the buffer. Shift Up: Copies the node grade to the buffer.
- Page 17 Right Control buttons Y LIFT Y GAMMA Y GAIN CONTRAST PIVOT MID DETAIL COLOR BOOST SHADOWS HIGHLIGHTS SATURATION LUM MIX AUTO PLAY WIPE GRAB PREV NEXT OFFSET H/LITE VIEWER CURSOR SELECT COLOR STILL STILL STILL NODE WINDOW KEYFRM STILL STILL RESET RESET RESET...
-
Page 18: Control Table
Stop: This stops the playback. Press stop again to start up playback again. Shift Down: Stop the tracker. Control Table Below is a simplified reference table that shows the results of the various key combinations of the DaVinci Resolve Micro Color Panel. Buttons Tap Key Shift Up Shift Down... - Page 19 Y LIFT Y GAMMA Y GAIN CONTRAST PIVOT MID DETAIL COLOR BOOST Y LIFT Y GAMMA Y GAIN CONTRAST PIVOT MID DETAIL COLOR BO AUTO PLAY WIPE GRAB OFFSET H/LITE VIEWER CURSOR SELECT COLOR STILL STILL STILL AUTO PLAY WIPE GRAB OFFSET H/LITE...
- Page 20 Buttons Tap Key Shift Up Shift Down Y GAMMA Y GAIN CONTRAST PIVOT MID DETAIL COLOR BOOST SHADOWS PLAY STILL Toggles (selected) wipe Toggle Toggle Gallery display with currently selected split-screen display PLAY WIPE GRAB still and clip OFFSET H/LITE VIEWER CURSOR SELECT...
- Page 21 Buttons Tap Key Shift Up Shift Down OOST SHADOWS HIGHLIGHTS SATURATION LUM MIX ADD NODE Adds serial node after Adds parallel node Adds layer node currently selected node PREV NEXT SELECT NODE WINDOW KEYFRM STILL STILL HADOWS HIGHLIGHTS SATURATION LUM MIX RESET PREV NEXT...
- Page 22 SATURATION LUM MIX PREV NEXT KEYFRM STILL STILL LUM MIX PREV NEXT KEYFRM KEYFRM SATURATION LUM MIX PREV NEXT STILL STILL Buttons Tap Key Shift Up Shift Down PREV NEXT NODE NODE PREV NEXT PREV FRAME Moves playhead — Go to first frame KEYFRM STILL STILL...
-
Page 23: Regulatory Notices
Regulatory Notices Disposal of Waste of Electrical and Electronic Equipment Within the European Union. The symbol on the product indicates that this equipment must not be disposed of with other waste materials. In order to dispose of your waste equipment, it must be handed over to a designated collection point for recycling. - Page 24 Hereby, Blackmagic Design declares that the product (DaVinci Resolve Speed Editor) is using wideband transmission systems in 2.4 GHz ISM band is in compliance with directive 2014/53/EU. The full text of the EU declaration of conformity is available from compliance@blackmagicdesign.com Regulatory Notices...
-
Page 25: Safety Information
Safety Information Weight Warning The Fairlight Studio Console has considerable weight even when empty. For example, a 3 Bay console weighs up to 110 kg empty, and 157 kg fully assembled. You should always move a Fairlight console with at least 4 people using safe lifting procedures, such as keeping the back straight, bending the knees and lifting with careful, controlled movements. -
Page 26: Warranty
Warranty 12 Months Limited Warranty Blackmagic Design warrants that DaVinci Resolve color grading control panels, editing keyboards and audio consoles will be free from defects in materials and workmanship for a period of 12 months from the date of purchase. If a product proves to be defective during this warranty period, Blackmagic Design, at its option, either will repair the defective product without charge for parts and labor, or will provide a replacement in exchange for the defective product.
Need help?
Do you have a question about the DaVinci Resolve Micro Color Panel and is the answer not in the manual?
Questions and answers