Table of Contents
Advertisement
Available languages
Available languages
Quick Links
Advertisement
Table of Contents

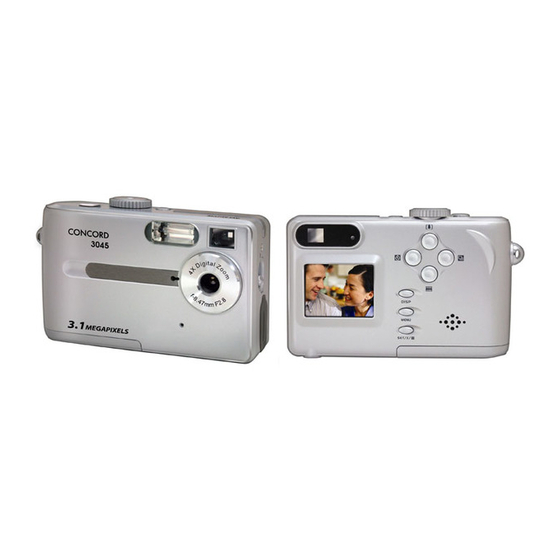
Related Manuals for CONCORD 3045


Summary of Contents for CONCORD 3045
- Page 2 ENGLISH 3045 CONCORD FRANÇAIS Quick Start Guide DEUTSCH ESPAÑOL ITALIANO NEDERLANDS PORTUGUÊS...
- Page 3 QUICK START GUIDE This Quick Start Guide provides a quick reference for operating your new digital camera. For more detailed instructions on how to use all of your camera’s features, please refer to the User’s Guide in the CD-ROM supplied with the package. Before using the camera, make sure to read all the safety instructions and precautions outlined in the User’s Guide.
-
Page 4: Turning The Camera On
LOADING THE BATTERIES AND THE SD MEMORY CARD fig.1.1 fig.1.2 fig.1.3 1. Slide open the battery cover. 2. Insert 4x AAA batteries and the SD memory card (sold separately) 3. Slide the battery cover back into the closed position. TURNING THE CAMERA ON Press the Power button to turn the camera on. -
Page 5: Setting The Camera's Operational Mode
You may change the date style as follows: 1. In the SETTING menu, press the Up or Down button to highlight the DATE STYLE item. 2. Press the SET button to enter its submenu. 3. Press the UP and Down buttons to highlight the desired date format: yyyy/mm/dd, mm/dd/yyyy or dd/mm/yyyy. -
Page 6: Close-Up Shooting
SETTING THE FLASH Pressing the FLASH button cycles through the flash modes. The flash can be used in Auto and Manual photo modes, but not in Video mode. The flash mode icons appear in the LCD. The following list describes each flash mode: Auto Flash the camera detects ambient lighting conditions, and the flash fires if it detects insufficient light. -
Page 7: Taking Pictures With Self-Timer
Note: • The LCD will be blank when the images are taken in the Continuous Shot Mode. • The camera will take 5 pictures in a row when the Shutter Button is pressed. • Flash will be deactivated in the Continuous Shot Mode. TAKING PICTURES WITH SELF-TIMER 1. -
Page 8: Zooming The Displayed Image
NOTES: 1. An audio clip is represented by the image to the right. 2. Only the image information can be turned off or on by pressing the DISP button. 3. When an audio or video clip is selected, it plays automatically. To control video and audio clip playback, press the right button to pause playback;... -
Page 9: Software Installation (Windows)
SOFTWARE INSTALLATION (WINDOWS) 1. Insert the CD-ROM included in your camera’s packaging into your computer’s CD-ROM drive. 2. The installation screen will pop up automatically. • If the installation screen does not appear automatically, double click on My Computer on the Desktop or in the Start Menu,and locate the CD-ROM Drive, then double click on the CD-ROM Drive icon for installation. - Page 10 Concord, Concord Eye-Q and the Concord Eye-Q logo are registered trademarks or trademarks of Concord Camera Corp., in the United States and/or other countries. Microsoft and Windows are either registered trademarks or trademarks of Microsoft Corporation in the United States and/or other countries.
-
Page 11: Guide De Demarrage Rapide
GUIDE DE DEMARRAGE RAPIDE Le présent Guide de référence rapide explique brièvement le fonctionnement de votre nouvel appareil photo numérique. Pour en savoir plus sur l’utilisation des fonctions de votre appareil photo, reportez-vous au Manuel de l’utilisateur figurant sur le CD-Rom fourni avec le coffret. -
Page 12: Mise Sous Tension De L'appareil
CHARGEMENT DES PILES ET DE LA CARTE MEMOIRE SD fig.1.1 fig.1.2 fig.1.3 1. Faire glisser le couvercle des piles. 2. Insérez 4 piles AAA et la carte mémoire SD (vendues séparément). 3. Glisser le couvercle des piles dans sa position fermée. MISE SOUS TENSION DE L’APPAREIL Appuyez sur le bouton de mise en marche pour allumer l’appareil photo. - Page 13 Vous pouvez modifier le style de date comme suit : 1. Dans le menu REGLAGE, appuyez sur le bouton haut ou bas pour mettre en surbrillance STYLE DE DATE. 2. Appuyez sur le bouton SET pour accéder au sous-menu correspondant. 3.
-
Page 14: Réglage Du Flash
RÉGLAGE DU FLASH Appuyer sur le bouton FLASH pour sélectionner le mode du flash. Le flash peut être utilisé dans les modes de photographies Automatique et Manuel mais pas en mode Vidéo . Les icônes de mode flash apparaissent sur l’écran LCD. La liste suivante décrit chaque mode flash. -
Page 15: Prise De Vues Avec Le Retardateur
REMARQUE: • Lors des prises de vues dans ce mode, l’écran est vide. • L’appareil prend 5 photos d’affilée une fois que le déclencheur a été enfoncé. • En mode Prise continue, le flash est désactivé. PRISE DE VUES AVEC LE RETARDATEUR 1. - Page 16 REMARQUE: 1. Les séquences audio sont représentées par l’illustration sur la droite. 2. En appuyant sur le bouton DISP, vous pouvez activer ou désactiver uniquement les données vidéo. 3. Quand un clip audio ou vidéo est sélectionné, il est joué automatiquement. Pour contrôler la visualisation d’un clip audio ou vidéo, appuyer sur le bouton de droite pour marquer une pause;...
- Page 17 INSTALLATION DE LOGICIELS (WINDOWS) 1. Introduisez le CD-ROM inclus dans le coffret de votre appareil photo dans le lecteur de CD-ROM de votre ordinateur. 2. Le programme d’installation démarre automatiquement. • Si l’écran d’installation ne s’affiche pas automatiquement, double-cliquez sur Poste de travail sur le bureau ou dans le menu Démarrer, puis sur l’icône du lecteur de CD-Rom pour lancer l’installation.
- Page 18 Concord, Concord Eye-Q et le logo Concord Eye-Q sont des marques de commerce déposées ou non aux États-Unis et/ou dans d’autres pays et appartenant à Concord Camera Corp. Microsoft et Windows sont des marques de commerce déposées ou non aux États-Unis et/ou dans d’autres pays et appartenant à...
- Page 19 KURZANLEITUNG Diese Kurzanleitung gibt Ihnen die wichtigsten Hinweise zum Betrieb Ihrer neuen Digitalkamera. Genauere Anweisungen zur Nutzung aller Kamerafunktionen finden Sie im Benutzerhandbuch auf der mitgelieferten CD-ROM. Lesen Sie vor Verwendung der Kamera alle im Benutzerhandbuch enthaltenen Sicherheitsanweisungen und -hinweise sorgfältig durch.
-
Page 20: Einschalten Der Kamera
EINLEGEN DER BATTERIEN UND DER SPEICHERKARTE fig.1.1 fig.1.2 fig.1.3 1. Öffnen Sie die Batteriefachabdeckung. 2. Legen Sie 4 Batterien der Größe AAA und die SD-Speicherkarte ein (nicht im Lieferumfang enthalten) 3. Schließen Sie die Batteriefachabdeckung. EINSCHALTEN DER KAMERA Drücken Sie die Power-Taste, um die Kamera einzuschalten. Die Betriebsanzeige-LED leuchtet grün auf. LCD Strom Netztaste Anzeigelampe... - Page 21 Das Datumsformat kann folgendermaßen geändert werden: 1. Drücken Sie im EINSTELLUNGS-Menü die Pfeiltaste nach unten oder nach oben, um das Symbol für das DATUMSFORMAT auszuwählen. 2. Drücken Sie die SET-Taste, um das Untermenü aufzurufen. 3. Drücken Sie die Pfeiltasten nach unten und nach oben, um das gewünschte Datumsformat auszuwählen.
- Page 22 EINSTELLUNG DES BLITZ Betätigen Sie die FLASH (Blitz) Taste, um Sie durch die Einstellungen durch den Blitz-Modus zu führen. Der Blitz kann im Auto und im manuellen Modus . verwendet werden, jedoch nicht im Video- Modus . Das Blitzsymbol erscheint im LCD-Display. Im nachfolgenden finden Sie eine Beschreibung der einzelnen Blitz-Modi.
-
Page 23: Fotografieren Mit Selbstauslöser
Hinweis: • Das LCD wird während der Aufnahme der Serienbilder nichts anzeigen. • Nach Drücken des Auslösers nimmt die Kamera 5 Bilder in Folge auf. • Im Serienbildmodus ist der Blitz ausgeschaltet. FOTOGRAFIEREN MIT SELBSTAUSLÖSER 1. Stellen Sie den Moduswähler auf Auto oder manuellen Modus 2. - Page 24 ANMERKUNGEN: 1. Audioclips werden durch das rechts stehende Bild dargestellt. 2. Durch Drücken der DISP-Taste kann lediglich die Bildinformation aus-oder eingeschaltet werden. 3. Sobald Sie ein Video- oder Audioclip auswählen, wird dieses automatisch abgespielt. Steuerung der Wiedergabe von Video- oder Audio-Clips, drücken Sie die Taste nach rechts, wird die Wiedergabe angehalten;...
- Page 25 SOFTWAREINSTALLATION (WINDOWS) 1. Legen Sie die CD-ROM die sich im Lieferumfang befindet in das CD-ROM Laufwerks des Computers ein. 2. Das Installationsprogramm startet automatisch. • Wenn der Installationsbildschirm nicht automatisch geöffnet wird, doppelklicken Sie auf Arbeitsplatz auf dem Desktop Ihres PC oder im Start- Menü.
- Page 26 die Kamera und installiert sie auf dem PC. Die dabei angezeigten Meldungen sind je nach Betriebssystem verschieden. Weitere Informationen hierzu finden Sie im digitalen Benutzerhandbuch auf der mitgelieferten CD- ROM. Unter Windows 98/98SE kann möglicherweise die Aufforderung zum Einlegen der Windows 98- oder 98SE-CD- ROM erfolgen.
-
Page 27: Guía De Inicio Rápido
GUÍA DE INICIO RÁPIDO Esta Guía de inicio rápido ofrece una referencia rápida para utilizar su nueva cámara digital. Para obtener instrucciones más detalladas sobre cómo usar todas las funciones de la cámara, consulte la Guía del usuario que puede encontrar en el CD-ROM incluido con el paquete. Antes de usar la cámara, asegúrese de leer todas las instrucciones y precauciones de seguridad que se describen en la Guía del usuario. -
Page 28: Encendido De La Cámara
COLOCACIÓN DE LAS PILAS Y DE LA TARJETA DE MEMORIA SD fig.1.1 fig.1.2 fig.1.3 1. Abra el depósito de las baterías. 2. Inserte 4 pilas AAA y la tarjeta de memoria SD. (se venden por separado) 3. Deslice la cubierta de las baterías hasta la posición de cerrado. ENCENDIDO DE LA CÁMARA Presione el botón de encendido para encender la cámara. - Page 29 PUEDE CAMBIAR EL ESTILO DE FECHA DE LA SIGUIENTE MANERA: 1. En el menú SETTING (Configuración), presione los botones Arriba o Abajo para seleccionar DATE STYLE (Estilo de fecha). 2. Presione el botón SET para ingresar a su submenú. 3. Presione los botones Arriba y Abajo para seleccionar el formato de fecha deseado: aaaa/mm/dd, mm/dd/aaaa o dd/mm/aaaa.
- Page 30 CÓMO CONFIGURAR EL FLASH Presione el botón del FLASH para pasar por los modos de flash. El flash se puede utilizar en los modos Manual y Auto , pero no en el modo Vídeo Los íconos del modo de flash aparecen en la LCD. La siguiente lista describe los modos de flash.
- Page 31 Note: • La pantalla LCD parpadea cuando las imágenes se toman con el modo Disparo continuo. • La cámara tomará cinco fotografías seguidas cuando se presione el botón del obturador. • El flash se desactiva en el modo Disparo continuo. TOMA DE FOTOS CON EL CRONÓMETRO AUTOMÁTICO 1.
- Page 32 NOTAS: 1. La imagen de la derecha representa un clip de audio 2. Sólo puede desactivar o activar la información de la imagen presionando el botón DISP (pantalla). 3. Cuando se selecciona un clip de audio o vídeo, se reproduce automáticamente. Para controlar la reproducción del clip de audio y vídeo, presione el botón derecho para pausar la reproducción;...
- Page 33 INSTALACIÓN DE SOFTWARE (WINDOWS) 1. Inserte en el ordenador el CD incluido con la cámara. 2. El programa de instalación se inicia automáticamente. • Si la pantalla de instalación no aparece de manera automática, haga doble clic en el icono “Mi PC” en el Escritorio o en el menú Inicio, y localice la unidad de CD-ROM, luego haga doble clic en el icono de la unidad de CD- ROM para la instalación.
- Page 34 Concord, Concord Eye-Q y el logo Concord Eye-Q son marcas registradas o marcas comerciales de Concord Camera Corp., en los Estados Unidos y/o otros países. Microsoft y Windows son marcas registradas o marcas comerciales de Microsoft Corporation en los Estados Unidos y/o otros países.
- Page 35 GUIDA INTRODUTTIVAQUICK La presente Guida rapida fornisce un riassunto delle informazioni necessarie per l'uso della fotocamera. Per informazioni più dettagliate sull'applicazione delle varie funzioni della fotocamera, si consiglia di consultare il manuale dell'utente sul CD-ROM incluso nella confezione. Prima di utilizzare la fotocamera, leggete attentamente le istruzioni per la sicurezza che troverete nel manuale dell'utente.
-
Page 36: Accensione Della Fotocamera
INSERIMENTO DELLE BATTERIE E DELLA SCHEDA MEMORIA SD fig.1.1 fig.1.2 fig.1.3 Aprire il coperchio del vano batterie. Inserire 4 batterie AAA e la scheda memoria SD (non incl. nella confezione). Richiudere il coperchio. ACCENSIONE DELLA FOTOCAMERA Premere il pulsante di accensione per accendere la fotocamera. La spia verde di accensione si attiverà. Indicatore LED di Tasto accensione... -
Page 37: Impostazione Della Modalità Operativa Della Fotocamera
È possiblile cambiare il tipo di data eseguendo i seguenti passaggi: 1. Nel menu IMPOSTAZIONI, premere il pulsante di selezione verso l’alto o il basso per evidenziare la voce TIPO DATA (DATE STYLE). 2. Premere il pulsante di impostazione SET per accedere al relativo sottomenu. 3. -
Page 38: Impostazione Del Flash
IMPOSTAZIONE DEL FLASH Premendo il tasto FLASH è possibile cambiare le modalità del flash. Il flash può essere utilizzato nelle modalità Automatica e Manuale , ma non nella modalità Video Le icone relative alla modalità del flash sono visualizzate nello schermo LCD. Auto Flash: la fotocamera rileva le condizioni di illuminazione ambientale, e il flash si attiva se l’illuminazione non è... -
Page 39: Registrazione Di Filmati
Nota: • Nel corso dell’acquisizione in modalità scatto continuo, lo schermo LCD non visualizzerà nulla. • Tenendo premuto il pulsante di scatto vengono acquisite 5 immagini di fila. • Flash disattivato in modalità Scatto continuo. ACQUISIZIONE DI IMMAGINI CON AUTOSCATTO 1. - Page 40 NOTA: 1. L’audio clip è rappresentato dall’immagine a destra. 2. Premendo il pulsante DISP è possibile attivare o disattivare solo l’informazione dell’immagine. 3. Per riprodurre un file audio o un video è sufficiente selezionarli. Per controllare la riproduzione di un video o di un file audio, premere il tasto destro per la pausa, mentre premendo il tasto sinistro si interrompe la riproduzione.
-
Page 41: Installazione Software (Windows)
INSTALLAZIONE SOFTWARE (WINDOWS) 1. Inserire il CD-ROM incluso nella confezione della fotocamera nell’unità CD-ROM del computer. 2. Il programma d’installazione dovrebbe avviarsi automaticamente. • Se il programma d’installazione non si avvia automaticamente, fare doppio clic su Risorse del computer del Desktop o nello Start Menu e individuare l’unità... - Page 42 “Continuare” e seguire le istruzioni che appaiono sullo schermo fino a completare l’installazione. Concord, Concord Eye-Q e il logo Concord Eye-Q sono marchi registrati o marchi di Concord Camera Corp. negli Stati Uniti e/o negli altri paesi. Microsoft e Windows sono marchi registrati o marchi di Microsoft Corporation negli Stati Uniti e/o in altri paesi. Mac e Macintosh sono marchi registrati o marchi di Apple Computer, Inc.
- Page 43 KURZANLEITUNG In deze Korte handleiding vindt u de basisbeginselen voor het gebruik van uw digitale camera. Raadpleeg voor nadere gebruiksaanwijzingen met betrekking tot de camerafuncties de Gebruikershandleiding op de meegeleverde CD-ROM. Lees vóór gebruik alle veiligheidsvoorschriften en voorzorgsmaatregelen uit de Gebruikershandleiding aandachtig door. DE GEBRUIKERSHANDLEIDING OP DE CD-ROM RAADPLEGEN 1.
-
Page 44: De Datum En Tijd Instellen
DE BATTERIJEN EN SD-GEHEUGENKAART LADEN fig.1.1 fig.1.2 fig.1.3 1. Schuif de batterijklep open. 2. Plaats 4 AAA batterijen en de SD-geheugenkaart (niet meegeleverd) 3. Schuif de batterijklep weer naar de gesloten stand. ZET DE CAMERA AAN Druk op de Aan/Uit knop om de camera aan te zetten. Het Aan-lampje gaat groen branden. Aan/Uit knop Aan-lampje DE DATUM EN TIJD INSTELLEN... - Page 45 U kunt het datumformaat als volgt wijzigen: 1. Druk in het INSTELLINGEN menu op Omhoog of Omlaag om de optieDATUMFORMAAT te markeren. 2. Druk op SET om het desbetreffende submenu te openen. 3. Druk op Omhoog of Omlaag om het gewenste datumformaat te markeren.jjjj/ mm/dd, mm/dd/jjjj of dd/mm/jjjj.
-
Page 46: De Flitser Instellen
DE FLITSER INSTELLEN Door de FLITSER knop in te drukken doorloopt u de flitserinstellingen. De flitser kan in Automatisch en Handmatig fotograferen gebruikt worden, maar niet in de filmstand. Het pictogram voor de flitserinstelling verschijnt op het LCDscherm. De volgende lijst beschrijft elke flitserinstelling. Automatische flitser: de camera meet de verlichtingsomstandigheden, en de flitser gaat bij onvoldoende licht af. - Page 47 Opmerking: • Het LCD-scherm is leeg wanneer in de Continustand gefotografeerd wordt. • De camera neemt 5 foto’s op een rij wanneer de sluiterknop ingedrukt wordt. • In de stand Continu-opname wordt de flitser uitgeschakeld. FOTO’S NEMEN MET DE ZELFONTSPANNER 1.
- Page 48 OPMERKINGEN: 1. Een geluidsopname wordt door het pictogram hier rechts afgebeeld. 2. Alleen de beeldinformatie kan uit- of ingeschakeld worden met behulp van de DISP knop. 3. Wanneer u een film- of geluidsopname kiest, wordt deze automatisch afgespeeld. Om de weergave van film- en geluidsopnamen te bedienen: druk op Naar rechts om de weergave tijdelijk te onderbreken;...
- Page 49 SSOFTWARE INSTALLEREN (WINDOWS) 1. Plaats de meegeleverde CD-Rom in het CD-Rom station van uw computer. 2. Het installatieprogramma start automatisch. • Als het installatiescherm niet automatisch verschijnt, dubbelklik op “Deze computer” op het bureaublad of in het Startmenu en zoek het CD-ROM station.
- Page 50 Concord, Concord Eye-Q en het Concord Eye-Q logo zijn geregistreerde handelsmerken of handelsmerken van Concord Camera Corp., in de Verenigde Staten en/of andere landen. Microsoft en Windows zijn geregistreerde handelsmerken of handelsmerken van Microsoft Corporation in de Verenigde Staten en/of andere landen.
- Page 51 GUIA DE INICIALIZAÇÃO RÁPIDA Este Guia de inicialização rápida fornece uma referência para você operar sua nova câmera digital. Para obter instruções mais detalhadas sobre como utilizar todos os recursos de sua câmera, consulte o Guia do usuário no CD-ROM fornecido no pacote. Antes de usar a câmera, leia todas as instruções de segurança e precauções do Guia do usuário.
-
Page 52: Ligando E Desligando A Câmera
CARREGANDO AS BATERIAS E O CARTÃO DE MEMÓRIA SD fig.1.1 fig.1.2 fig.1.3 1. Abra deslizando a tampa do compartimento das pilhas. 2. Coloque 4 pilhas AAA e o cartão de memória SD (vendido separadamente). 3. Feche deslizando a tampa do compartimento de pilhas. LIGANDO E DESLIGANDO A CÂMERA Para ligar a câmera, pressione o botão liga/desliga (Power). - Page 53 Você pode alterar o estilo da data da seguinte forma: 1. No menu de CONFIGURAÇÕES, pressione o botão para cima ou para baixo para realçar o item ESTILO DE DATA. 2. Pressione o botão SET para entrar no submenu. 3. Pressione os botões para cima e para baixo para realçar o formato desejado de data: aaaa/mm/dd, mm/dd/aaaa ou dd/mm/aaaa.
- Page 54 CONFIGURANDO O FLASH Ao pressionar o botão FLASH, é possível passar pelos modos de flash. O flash pode ser utilizado nos modos de fotografia automática e manual , mas não no modo de vídeo . O ícone do modo de flash aparece na LCD. A lista a seguir descreve cada modo de flash.
- Page 55 Observação: • A LCD permanecerá em branco quando as imagens forem feitas no modo de foto contínua. • A câmera tira 5 fotos em série quando o botão do obturador é pressionado. • O flash será desativado no modo de foto contínua. FOTOGRAFANDO COM O TIMER AUTOMÁTICO 1.
- Page 56 OBSERVAÇÕES: • Um clipe de áudio é representado por uma imagem à direita. • Somente as informações sobre imagens podem ser desligadas quando se pressiona o botão DISP. • Um clipe de áudio ou vídeo é reproduzido automaticamente quando selecionado. Para controlar a reprodução de um clipe de áudio ou vídeo, pressione o botão direito para pausar e o esquerdo para interromper a reprodução.
- Page 57 INSTALAÇÕES DE SOFTWARE (WINDOWS) 1. Insira o CD-ROM incluso na embalagem da câmera à unidade de CD-ROM do computador. 2. O programa de instalação inicia automaticamente. • Se a tela de instalação não aparecer automaticamente, clique duas vezes em Meu Computador na Área de Trabalho ou no menu Iniciar, localize a unidade de CD-ROM e clique duas vezes no ícone da unidade de CD-ROM para começar a instalação.
- Page 58 “Continuar mesmo assim” para continuar e siga as instruções da tela para completar a instalação. Concord, Concord Eye-Q e a Concord Eye-Q logo são marcas registradas da Concord Camera Corp., nos Estados Unidos e/ou outros países. Microsoft e Windows são marcas registradas da Microsoft Corporation nos Estados Unidos e/ou outros países. Todas as outras marcas são...
- Page 59 Visit Concord on the Internet www.concord-camera.com Version 1.0 Concord 3045 Quick Start Guide 516100-00 Copyright 2004 Concord Camera Corp.
Need help?
Do you have a question about the 3045 and is the answer not in the manual?
Questions and answers