
Related Manuals for Universal Audio Apollo X4


Summary of Contents for Universal Audio Apollo X4
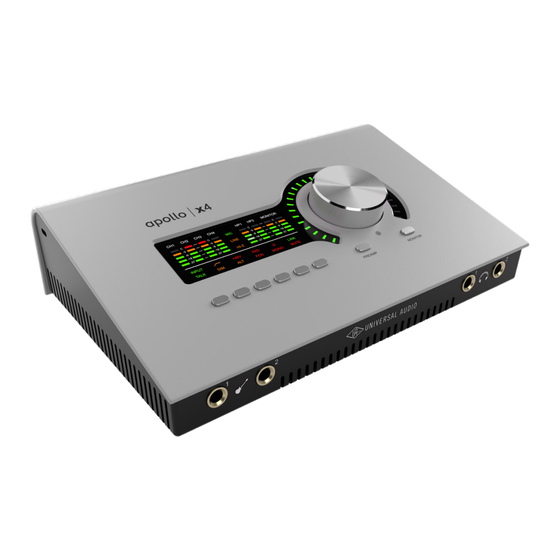
- Page 1 Thunderbolt 3 Audio Interface with QUAD Core Realtime UAD Processing Apollo x4 Gen 2 Hardware Manual Manual Version 240930 www.uaudio.com...
-
Page 2: A Letter From Bill Putnam Jr
— and our goal is to make your investment pay off. Universal Audio interfaces like the Apollo X Gen 2 Series exemplify a commitment to craftsmanship that we’ve forged over the past 60 years — from our original founding in the 1950s by my father, Bill Putnam Sr., to our current mission to combine the best of both... -
Page 3: Table Of Contents
A Letter from Bill Putnam Jr.......................2 Introduction ..............................4 Record hits with the world’s most powerful desktop audio interface..........4 Apollo x4 Gen 2 Features ............................6 Operational Overview ..............................9 About Apollo Documentation ..........................11 Additional Resources ...............................12 Quick Start ..............................13... -
Page 4: Introduction
Unison™ mic preamps, and realtime UAD processing — letting you record through plug-ins from Neve, API, Manley, Auto-Tune, and hundreds more — Apollo x4 levels up your studio with legendary UA sound, built to inspire your next collaboration. - Page 5 Mix with Authentic Analog Sounds Out of the box, Apollo x4 gives you the tools used in the world’s biggest recording studios. Along with included LA-2A compressors, Pultec EQs, and amps from Marshall and Ampeg — you can tap into the entire library of over 200 UAD plug-ins to unlock proven hit-making sounds.
-
Page 6: Apollo X4 Gen 2 Features
• Compatible with LUNA, Logic Pro, Pro Tools, Cubase, Ableton Live, and more • Expandable with Thunderbolt Apollo interfaces and Dante via Apollo x16D • Free industry-leading technical support from knowledgeable audio engineers Apollo x4 Gen 2 Hardware Manual Introduction... -
Page 7: All Features
• Same features and functionality as other UAD-2 devices when used with DAW • Can be combined with other UAD-2 devices for increased mixing DSP • Complete UAD plug-ins library available at the UA online store Apollo x4 Gen 2 Hardware Manual Introduction... - Page 8 Console Recall plug-in • Saves Apollo x4 configurations inside DAW sessions for easy recall • Facilitates control of Apollo x4 monitoring features from within the DAW • VST, AAX 64, and Audio Units plug-in formats UAD Meter & Control Panel application •...
-
Page 9: Operational Overview
Operational Overview Audio Interface First and foremost, Apollo x4 Gen 2 is a premium 12 x 18 Thunderbolt 3 audio interface with elite-class 24-bit/192 kHz audio conversion. Apollo x4 connects to the outputs and inputs of other audio gear, and performs analog-to-digital (A/D) and digital-to-analog (D/A) audio conversions on the gear’s signals. -
Page 10: Standalone Use
UAD Powered Plug-Ins in a DAW Apollo x4 and UAD plug-ins can also be used with a DAW without the use of UAD Console. UAD plug-ins loaded within the DAW operate like other (non-UAD) plug-ins, except the processing occurs on the Apollo x4 DSP instead of the host computer’s processor. In this scenario, UAD plug-ins are subject to the latencies incurred by I/O buffering. -
Page 11: About Apollo Documentation
The features and functionality of all individual UAD-2 Powered Plug-Ins is detailed in the UAD Plug-Ins Manual. Refer to that document to learn about the operation, controls, and user interface of each UAD-2 plug-in that is developed by Universal Audio. Direct Developer Plug-In Manuals UAD Powered Plug-Ins includes plug-in titles created by our Direct Developer partners. -
Page 12: Accessing Documentation
Tip: Use the back button in the PDF reader application to return to the previous page after clicking a hyperlink. Additional Resources For additional resources, or if you need to contact Universal Audio for assistance, see the Technical Support page. -
Page 13: Quick Start
• As with any sound system, the following steps are recommended to avoid audio spikes in your speakers and headphones: 1. Power on the speakers last, after all other devices (including Apollo x4) are powered on. 2. Power off the speakers first, before all other devices (including Apollo x4) are powered off. -
Page 14: Connection Notes
Connection Notes Thunderbolt 3 • Apollo x4 must be connected via a Thunderbolt 3 cable (not included) to a computer that has an available Thunderbolt 3 port.* • Apollo x4 cannot be bus powered via Thunderbolt 3. The included external power supply must be used. -
Page 15: Hardware Setup
3. Connect the included power supply to an AC outlet (Apollo x4 cannot be bus powered). 4. Connect the locking power supply barrel to the rear panel of Apollo x4. Align the two tabs on the power cable's connector to the notches on the input, then rotate the barrel clockwise to prevent accidental disconnection. -
Page 16: Software Setup
For complete details about how to operate UAD Console, see the online manual. UA Support Videos Informational videos are available to help you get started with Apollo at help.uaudio.com. Apollo x4 Gen 2 Hardware Manual Quick Start... -
Page 17: Connect To Input Sources And Monitor System
Connect to Input Sources and Monitor System One typical Apollo x4 audio setup is illustrated below. For complete details about all of Apollo x4's connectors and controls, see Controls & Connectors. Tip: In the example below, the mics are connected to channels 3 and 4, so that the mics and the instruments (which are connected to channels 1 and 2) can be used at the same time. -
Page 18: Setting Hardware I/O Levels
LINK button (6-f) when an input is selected (1). • Line outputs 1 – 4 are accessed and controlled via software only (UAD Console or DAW). • See About Apollo Documentation to learn more. Apollo x4 Gen 2 Hardware Manual Quick Start... -
Page 19: Controls & Connectors
The input channel preamplifiers are independently controlled when in Preamp mode. Preamp Controls Apollo x4 has one set of preamp input channel controls. The input channel controls adjust all preamp functions for the currently selected input channel only. Apollo x4 Gen 2 Hardware Manual... - Page 20 Available options are dim when inactive, bright when enabled, and unlit when unavailable. Note: Not all preamp options are available with all input types. For specific details, see the Top Panel Controls section later in this chapter. Apollo x4 Gen 2 Hardware Manual Controls & Connectors...
-
Page 21: Monitor Mode
Stereo Outputs Apollo x4 has three stereo outputs that can be controlled with the top panel hardware: Monitor, Headphone 1 (HP1), and Headphone 2 (HP2). The volume of these stereo outputs are controlled when in Monitor mode. -
Page 22: Top Panel
The LEDs surrounding the Level knob indicate the relative level of the selected function (either input channel preamp gain or monitor/headphone volume). Note: The Volume Level Indicator LEDs are RED when MONITOR (5) is selected and MUTE (8-l) is enabled. Apollo x4 Gen 2 Hardware Manual Controls & Connectors... - Page 23 “C” (clip) LED at the top of the Output Meters illuminates. *Exception: If a HP output is currently selected on Apollo x4 and the HP Source within the CUE OUTPUTS window in UAD Console is set to the same HP output, these output meters indicate the level being sent to the headphone bus via UAD Console’s headphone sends and/or the DAW.
-
Page 24: Monitor Button
In Preamp mode, the Option Buttons can also be used to control Unison-enabled UAD preamp, guitar/bass amp, and pedal plug-in parameters. See the UAD Console Manual for complete Unison details. Options Display (7) and Option Buttons (8) Apollo x4 Gen 2 Hardware Manual Controls & Connectors... - Page 25 Links the controls of adjacent input channels (1+2 or 3+4) to create a stereo input pair. When channels are linked, preamp control adjustments are applied to both channels. Note: Only the same type of inputs can be linked (Mic+Mic or Line+Line). The Hi-Z inputs cannot be linked. Apollo x4 Gen 2 Hardware Manual Controls & Connectors...
- Page 26 Console software is set to a non-zero value. (j) FCN (Function) This switch can be assigned to control one of three monitoring functions. FCN is only available when Apollo x4 is combined with other Thunderbolt-equipped Apollo models in a multi-unit cascading configuration. (k) MONO Sums the left and right signals of the stereo monitor mix into a monophonic signal.
-
Page 27: Front Panel
The anti-theft security slot on the side panel connects to any standard Kensington lock. Rear Panel Refer to the illustration below for numbered control descriptions in this section. Note: All rear panel ¼” jacks can accept unbalanced TS (tip-sleeve) or balanced TRS (tip-ring-sleeve) plugs. Apollo x4 Gen 2 Hardware Manual Controls & Connectors... - Page 28 These ¼” phone outputs are accessed via software (UAD Console or DAW). Line outputs 3 – 6 are typically used to send audio to other equipment. The Line Outputs are DC coupled. Apollo x4 Gen 2 Hardware Manual Controls & Connectors...
- Page 29 1. Align Tabs 12VDC (19) Power Switch This rocker switch applies power to Apollo x4. Switch to OFF when not in use. Caution: Before powering Apollo x4, lower the volume of the monitor speakers and remove headphones from your ears.
- Page 30 (20) Thunderbolt 3 Port Connect the Thunderbolt 3 cable (not included) from the host computer here. A Thunderbolt 3 connection to the computer is required to use all Apollo x4 features and UAD Powered Plug-Ins. Note: With Mac computers only, Apollo x4 can be connected to Thunderbolt 1 and Thunderbolt 2 ports by using the Apple Thunderbolt 3 to Thunderbolt 2 Adapter in conjunction with a Thunderbolt 2 cable.
-
Page 31: Specifications
+10 dB to +65 dB Pad Attenuation (switchable per mic input) 20 dB (variable via Unison plug-ins) Phantom Power (switchable per mic input) +48V Connector Type XLR female, pin 2 positive (combo XLR/TRS) Apollo x4 Gen 2 Hardware Manual Specifications... - Page 32 600 Ω load (1 kHz @ 14.8 dBu, -1 dBFS) 15.8 dBu Maximum Output Power 300 Ω load 68 mW RMS 600 Ω load 38 mW RMS Connector Type ¼" female TRS stereo Apollo x4 Gen 2 Hardware Manual Specifications...
- Page 33 5.86 lbs (2.66 kg) Weight (bare unit) 3.2 lbs (1.47 kg) Package Contents Apollo x4 Gen 2 Audio Interface External Power Supply AC Power Cable (IEC C7, non-polarized) Region specific (USA, EU, UK, ANZ, or Japan) Getting Started URL Card...
-
Page 34: Hardware Block Diagram
Hardware Block Diagram Apollo x4 Gen 2 Hardware Manual Specifications... -
Page 35: Troubleshooting
Troubleshooting If Apollo x4 isn’t behaving as expected, some common troubleshooting items to confirm are below. If you are still experiencing issues after performing these checks, contact Technical Support. SYMPTOM ITEMS TO CHECK • Confirm power supply connector is fully inserted, then twist barrel to lock Unit won’t power on... -
Page 36: Notices
It is considered improper use when the product is used for any application not named in the corresponding instruction manual. Universal Audio does not accept liability for damage arising from improper use or misuse of this product and its attachments/ accessories. Before putting the product into operation, please observe the respective country-specific regulations. -
Page 37: Manufacturer's Declarations
EU Declaration of Conformity • RoHS-Directive (2015/863/EU) • Low Voltage Directive (2014/35/EU) • EMC Directive (2014/30/EU) • REACH Directive (EC1907/2006) Apollo x4 Gen 2 Hardware Manual Notices... - Page 38 • Consult the dealer or an experienced radio/TV technician for help. Any modifications to the unit, unless expressly approved by Universal Audio, could void the User’s authority to operate the equipment. Apollo x4 Gen 2 Hardware Manual...
- Page 39 • BS EN 55035:2017 + A11:2020 “Electromagnetic compatibility of multimedia equipment – Immunity requirements. • QCVN 118:2018/BTTTT “National technical regulation on Electromagnetic compatibility of multimedia equipment - Emission requirements” (Class B) • KS C 9832, KS C 9835 (Class B) Apollo x4 Gen 2 Hardware Manual Notices...
-
Page 40: Product Label
• Equipment Name: Apollo x4 Gen 2 • Model Name: Apollo x4 Gen 2 • Registration Number: R-R-UAO-APOLLOX4G2 • Manufacturer/Country of Origin: Universal Audio, Inc. / Malaysia, China, Vietnam • Date of Registration: 2024-08-20 Product Label Apollo x4 Gen 2 Hardware Manual... -
Page 41: End User License Agreement
Universal Audio, Inc. shall not be liable for errors contained herein or direct, indirect, special, incidental, or consequential damages in connection with the furnishing, performance, or use of this material. -
Page 42: Technical Support
The Universal Audio YouTube Channel at youtube.com includes helpful support videos for setting up and using UA products. UA YouTube Channel Universal Audio Community Forums The unofficial UA discussion forums are a valuable resource for all Universal Audio product users. This website is independently owned and operated. www.uadforum.com Customer Care To contact UA support staff for technical or repair assistance, please visit: help.uaudio.com... - Page 43 www.uaudio.com...
Need help?
Do you have a question about the Apollo X4 and is the answer not in the manual?
Questions and answers