Table of Contents
Advertisement
Advertisement
Table of Contents

Subscribe to Our Youtube Channel
Related Manuals for Daewoo KOR-61151


Summary of Contents for Daewoo KOR-61151
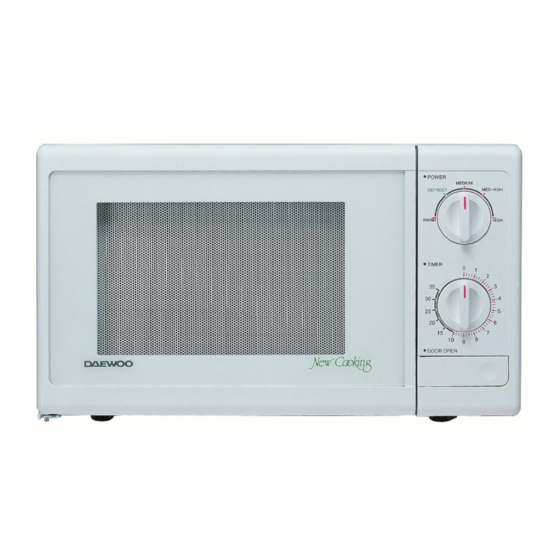
- Page 1 Service Manual Microwave Oven KOR-61155 KOR-61151 DAEWOO ELECTRONICS CO., LTD.
-
Page 2: Table Of Contents
SPECIFICATIONS FEATURE DIAGRAM INSTALLATION OPERATION MEASUREMENT OF THE MICROWAVE OUTPUT POWER MICROWAVE RADIATION TEST KOR-6115 WIRING DIAGRAM KOR-61151 WIRING DIAGRAM CIRCUIT DESCRIPTION PRECAUTIONS FOR DISASSEMBLY AND REPAIR DISASSEMBLY AND ASSEMBLY INTERLOCK MECHANISM TROUBLE SHOOTING GUIDE COMPONENT TEST PROCEDURE EXPLODED VIEW AND PARTS LIST... -
Page 3: Proper Use And Service Precautions
No grease, soil or spatter should be allowed to build up on these surfaces or inside the oven. DO NOT ATTEMPT TO OPERATE THIS APPLIANCE WITH THE DOOR OPEN. The microwave Oven has concealed switches to make sure the power is turned off when the door is opened. Do not attempt to defeat them. -
Page 4: Specifications
SPECIFICATIONS ITEM POWER SUPPLY POWER CONSUMPTION MICROWAVE OUTPUT POWER FREQUENCY OUTPUT DIMENSIONS (W X H X D) CAVITY DIMENSIONS (W X H X D) NET WEIGHT TIMER POWER SELECTIONS CAVITY VOLUME * Specifications are subject to change without notice. SPECIFICATION 120V~60Hz, SINGLE PHASE WITH EARTHING 920 W 600 W (IEC 705) (FULL MICROWAVE POWER) -
Page 5: Feature Diagram
FEATURES DIAGRAM ¤ Safety Interlock System ¤Ł Door Viewing Screen - Allows viewing of food. The screen is designed so that light can pass through, but not the microwave. ¤Ø Door Hook - When the door is closed, it will automatically shut. If the door is opened while the oven is operating, the magnetron will immediately stop operating. -
Page 6: Installation
Power supply • Check your local power source. This microwave oven requires a current of approximately 15 amperes, 120 Volts, 60Hz grounded outlet. • Power supply cord is about 1.0 meters long. 1. A short power-supply cord is poovided to reduce the risks resulting from becoming entangled in or tripping over a longer cord. -
Page 7: Operation
Timer past 2 minutes and then return to the correct timer setting. 2. Various clicking noises may be heard when turning the V.P.C. knob. This is normal and does not affect the operation of your microwave oven. ON/OFF time (sec) 30/0 23.2/6.8 16.5/13.5... -
Page 8: Measurement Of The Microwave Output Power
PROCEDURE 1. Microwave power output measurement is made with the microwave oven supplied at rated voltage and operated at its maximum microwave power setting with a load of 1,000¡ 5cc of potable water. 2. The water is contained in a cylindrical borosilicate glass vessel having a maximum material thickness of 3 mm and an outside diameter of approximately 190 mm. -
Page 9: Microwave Radiation Test
MICROWAVE RADIATION TEST WARNING • Make sure to check the microwave leakage before and after repair of adjustment. • Always, start measuring of an unknown field to assure safety for operating personnel from microwave energy. • Do not place your hands into any suspected microwave radiation field unless the safe density level is known. •... -
Page 10: Kor-6115 Wiring Diagram
KOR-6115 WIRING DIAGRAM... -
Page 11: Kor-61151 Wiring Diagram
KOR-61151 WIRING DIAGRAM... -
Page 12: Circuit Description
CIRCUIT DESCRIPTION 1. When the food is placed in the oven cavity and door is closed. • The contact of the interlock monitor switch open. • The contacts of the primary interlock switch and secondary interlock switch close. 15A Fuse Timer motor 2. -
Page 13: High Voltage Transformer
HIGH VOLTAGE TRANSFORMER 3. When the door is opened during cooking. • Primary interlock switch and secondary interlock switch open to cut off the primary voltage to the high voltage transformer to stop microwave oscillation. • Fan motor, timer motor and turntable motor stop rotating. •... -
Page 14: Precautions For Disassembly And Repair
ƒ¡Cautions to be observed when trouble shooting. Unlike many other appliances, the microwave oven is a high-voltage, high-current equipment. It is completely safety during normal operation. However, carelessness in servicing the oven can result in an electric shock or possible danger from a short circuit. -
Page 15: Disassembly And Assembly
DISASSEMBLY AND ASSEMBLY 1. To remove cabinet Remove three screws on cabinet back. 2. To remove door assembly (1) Remove two screws ¤ which secure the stopper hinge top. (2) Remove the door assembly ¤Ø from top plate of cavity. (3) Remove the above for reassembly. -
Page 16: Method To Reduce The Gap Between The Door Seal And The Oven Front Surface
(1) Remove the gasket door ¤ from door plate ¤Œ. (2) Remove the barrier screen inner ¤ºfrom door plate ¤Œ. (3) Remove the door frame ¤Łfrom door plate ¤Œ. (4) Remove the stopper hinge top ¤Øfrom door plate ¤Œ. (5) Remove the spring ¤ and the hook ¤ . (6) Remove the barrier screen outer ¤... - Page 17 5. To remove control panel parts (1) Remove the screw which secure the control panel, push up two snap fits and draw forward the control panel assembly. Control Panel (2) Remove the door open lever ¤ from the control panel. (3) Remove two screws ¤Łwhich secure the timer assembly ¤Ø.
-
Page 18: To Remove High Voltage Capacitor
6. To remove high voltage capacitor (1) Remove a screw ¤ which secure the grounding ring ring terminal of the H.V. diode ¤Łand the capacitor holder ¤Ø. (2) Remove the H.V. diode ¤Łfrom the capacitor ¤Ø. (4) Reverse the above steps for reassembly. High voltage circuit wiring Magnetron H.V. - Page 19 CAUTION : Never install the magnetron without the metallic gasket plate which is packed with each magnetron to prevent microwave leakage. Whenever repair work is carried out on magnetron, check the microwave leakage. It shall not exceed 4mW/cm Magnetron Antenna Metallic Gasket Plate...
-
Page 20: Interlock Mechanism
INTERLOCK MECHANISM The door lock mechanism is a device which has been specially designed to completely eliminate microwave radiation when the door is opened during operation, and thus to perfectly prevent the danger resulting from the leakage of microwave. (1) Primary interlock switch When the door is closed, the hook locks the oven door. -
Page 21: Adjustment Steps
(2) Secondary interlock switch and interlock monitor switch When the door is closed, the hook pushes the push lever downward, the push lever presses the button of the interlock monitor switch to bring it under “OFF”, condition and presses the button of the secondary interlock switch to bring it under “ON”, condition. -
Page 22: Trouble Shooting Guide
TROUBLE SHOOTING GUIDE TROUBLE DOOR SHUT, TIMER SET BUT NO COOKING TAKES PLACE. Does the fan motor work when you shut the door and turn the timer? Does 15A fuse blow? continuity Replace fuse. Both continuity Disconnect one side of the lead wire connected from transformer to the high voltage capacitor, and operate oven. - Page 23 Does the fan motor when you shut the door and turn the time? Does the oven lamp light? Does the turntable turn? No microwave oscillation. Check continuity continuity of filament of magnetron. Poor continuity Check the isolation of filament winding of high voltage transformer.
-
Page 24: Component Test Procedure
COMPONENT TEST PROCEDURE 1. High voltage is present at the high voltage terminal of the voltage transformer during any cooking cycle. 2. It is neither necessary nor advisable to attempt measurement of the high voltage. 3. Before touching any oven components or wiring, always unplug the oven from its power source and discharge the capacitor (see page 13). -
Page 25: Interlock Switches
6. Interlock switches • You can test continuity of safety interlocks and monitor switch by using switch tester or ohmmeter. • The switch operation is checked by zero/unlimited. the meter should indicate zero resistance. • The sequence of check is interlock monitor switch; primary and secondary interlock switched check. 1) In case of interlock monitor switch check POWER SUPPLY... -
Page 26: Exploded View And Parts List
EXPLODED VIEW AND PARTS LIST 1. Door Assembly PART NAME BARRIER-SCREEN *O FRAME DOOR STOPPER HINGE *T DOOR WELD AS BARRIER-SCREEN *I GASKET DOOR HOOK SPRING HOOK A05 A06 PARTS CODE Q’TY 3517003000 3512202500 3515201000 3511705500 3517002800 3512300200 3513100700 3515101300... -
Page 27: Control Panel Ass'y
2. Control Panel Ass’y PART NAME KNOB VPC CONTROL PANEL COUPLER VPC KNOB SCREW TAPPINGT2S PAN 4X12 PW KNOB COUPLER TIMER TIMER SCREW TAPPING T2S PAN 4X12 PW LEVER DOOR OPEN SPRING DOOR BUTTON BUTTON DOOR OPEN PARTS CODE Q’TY 3513402600 3512202000 3517400500... - Page 28 KOR-6115 Parts List REE NO. PART CODE 3511706010 DOOR AS 3516713100 CONTROL-PANEL AS 3510801300 CABINET 7S312X40A1 SCREW SPECIAL 3516104800 CAVITY AS 7S341W40B1 SCREW SPECIAL 7S341W40B1 SCREW SPECIAL 4413A90012 CLAMP POWER CORD 7S422X4081 SEREW SPECIAL 35113NBND5 CORD POWER AS 3518002200 MAGNETRON 7S312X40A1 SCREW SPECIAL 7S312X40A1...
- Page 29 KOR-61151 Parts List REE NO. PART CODE 3511706010 DOOR AS 3516713100 CONTROL-PANEL AS 3510801300 CABINET 7S312X40A1 SCREW SPECIAL 3516104820 CAVITY AS 7S341W40B1 SCREW SPECIAL 7S341W40B1 SCREW SPECIAL 4413A90012 CLAMP POWER CORD 7S422X4081 SEREW SPECIAL 35113YAR95 CORD POWER AS 3518902400 THERMOSTAT...
- Page 30 DAEWOO ELECTRONICS CO., LTD. 686, AHYEON-DONG, MAPO-GU, SEOUL, KOREA C.P.O. BOX 8003 SEOUL, KOREA TELEX: DWELEC K28177-8 CABLE: “DAEWOOELEC” FAX: 02) 364-5588/5305 TEL: 02) 360-7114/7315~7 PRINTED DATE: MAR., 1996...
Need help?
Do you have a question about the KOR-61151 and is the answer not in the manual?
Questions and answers