
Subscribe to Our Youtube Channel
Related Manuals for SPEX SamplePrep Geno/Grinder 2010


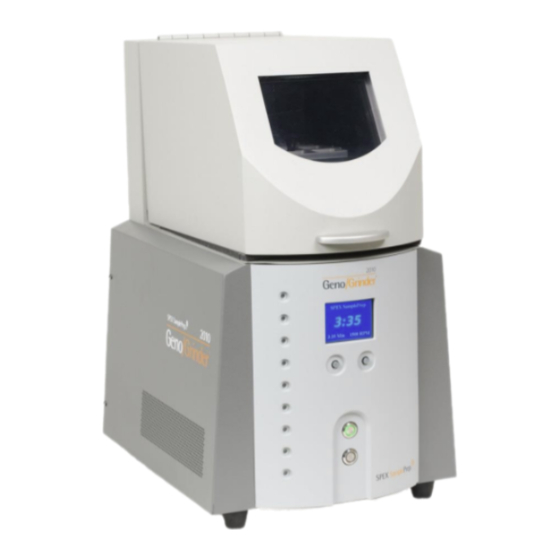
Summary of Contents for SPEX SamplePrep Geno/Grinder 2010
- Page 1 65 Liberty St., Metuchen, NJ 08840 1-855-GET-SPEX (1-438-7739) Ext. 465 www.spexsampleprep.com 2010 Geno/Grinder® Patented OPERATING MANUAL For 2010-115 and 2010-230 Geno/Grinders, this manual is Part No. 87036...
- Page 2 1976 Copyright Act or in writing from the publisher. Requests for permission should be addressed in writing to SPEX SamplePrep LLC, 65 Liberty Street, Metuchen, NJ 08840.
-
Page 3: Table Of Contents
2010 Geno/Grinder TABLE OF CONTENTS SECTION DESCRIPTION PAGE Introduction ........................4 Specifications ........................6 Unpacking ........................... 7 Setting Up ........................... 8 Electrical Hookup ........................ 8 Cabinet Set-Up ........................8 Installing the Adjustable Clamp Assembly ................. 8 Controls ..........................11 Timer ..........................11 Rate Control ........................ -
Page 4: Introduction
2010 Geno/Grinder 1.0 INTRODUCTION The Geno/Grinder® is designed to effectively disrupt cellular materials by oscillating two or more deep-well titer plates vertically. This motion allows the unit to be used to prepare sample tissue for extractions of nucleic acid, protein, and other constituents by shaking the tissue, steel balls and a buffering agent together in each well of the titer plate. - Page 5 2010 Geno/Grinder 1.0 INTRODUCTION (Cont’d) In addition, the use of the Geno/Grinder is quick, easy, and multiple samples can be run simultaneously. A holder for 50 mL centrifuge tubes is available in a 16 tube configuration; the holder for 15 mL tubes accommodates 24. Thus, throughput is significantly increased over current methods, which involve shaking the tubes by hand for 2 minutes.
-
Page 6: Specifications
2010 Geno/Grinder 2.0 SPECIFICATIONS Type of Grinder: Reciprocating, impact grinder Grinding Mechanism: Grinding balls of stainless steel. Silica or zirconia beads. Dimensions 25.25 in. (64.1 cm) high (43 in., 109 cm with top cover open) x 15.00 in. (35.6 cm) wide x 20.49 in. (52.0 cm) deep including handle, 19.33 in. -
Page 7: Unpacking
2010 Geno/Grinder 3.0 UNPACKING Carefully inspect the exterior of the packing box. Any visible damage should immediately be reported to the carrier. Remove all packing documents from the exterior of the box and file in your records. Remove the top of the shipping box, the foam packaging material, and the Geno/Grinder accessories (power cord, titer plates, etc.). -
Page 8: Setting Up
2010 Geno/Grinder 4.0 SETTING UP 4.1 Electrical Hookup The power (off/on) switch, fuse tray, and power cord receptacle are located on the rear of the Geno/Grinder cabinet, toward its bottom. The detachable power cord should be plugged firmly into its inlet, then into an electrical outlet. Make sure that the electrical outlet is easily accessible in case it becomes necessary to unplug the unit. - Page 9 2010 Geno/Grinder 4.3.1 Installing the 2189 Adjustable Clamp Assembly To install the clamp, first locate the 3/16”Allen wrench and the two bolts and lock washers supplied with the Geno/Grinder. Open the Geno/Grinder top cover and place the clamp base on top of the shaft. Using the lock washers and bolts, secure the clamp base to the shaft with the Allen wrench (Figure 3).
- Page 10 2010 Geno/Grinder 4.3.2 Installing the 2194 or 2199 Clamp Assembly To install the clamp, first locate the 3/16”Allen wrench and the three bolts and lock washers supplied with the Geno/Grinder. Open the Geno/Grinder top cover and place the clamp base on top of the shaft. Using the three lock washers and bolts, secure the clamp base to the shaft with the Allen wrench, as shown in Figure 4.
-
Page 11: Controls
The control panel is located on the front of the 2010 Geno/Grinder (Figure 5). Upon start- up, the SPEX SamplePrep and 2010 Geno/Grinder logos will appear on the display screen. The run time setting will be displayed on the lower left and the operating rate will be shown on the lower right. -
Page 12: Rate Control
2010 Geno/Grinder 5.2 Rate Control The rate of operation is shown as strokes/min. in the lower right-hand corner of the display screen. One stroke is a complete up-and-down movement of the clamp. The Rate Control Knob is located below the display screen on the right, and is adjusted in the same manner as the Timer Control Knob. -
Page 13: Loading The Clamp
2010 Geno/Grinder 6.0 LOADING THE CLAMP 6.1 Loading the Adjustable Clamp (2189) The clamp is the most critical component of the Geno/Grinder, as it must be carefully adjusted to hold the titer plates (or vials, centrifuge tubes, etc.) firmly in place. The up-and- down motion of the clamp is extremely vigorous. - Page 14 2010 Geno/Grinder 6.1.1 Vials in Holders or Cryo-Blocks (Cont’d) Place vials in holders or Slide lid onto the screw with cryo-blocks in clamp base guide on upright at rear Figure 6 – Loading the Clamp Figure 7 – Attaching the Clamp Lid B) Turn handle to tighten and check that button has popped out...
- Page 15 2010 Geno/Grinder 6.1.2 Titer Plates Titer plates are made by many companies and are sealed in various ways. The Geno/Grinder is designed for use with the vast majority of currently available titer plates. Plates can be sealed using a variety of formats. For PCR and DNA/RNA work a heat sealer is suggested, so as to minimize the possibility of contamination between wells.
- Page 16 2010 Geno/Grinder 6.1.2 Titer Plates (Cont’d) Single-sided nesting tray Double-sided nesting tray Figure 9 – Nesting Plate in Clamp Base Figure 10 – Stacking Titer Plates Figure 11 – Closed Clamp with 4 Titer Plates Page 16 of 28 SPEX® SamplePrep LLC July 2014...
- Page 17 2010 Geno/Grinder 6.1.3 Releasing the Clamp 1. When the Geno/Grinder comes to a complete stop, open the cover. 2. Turn the clamp lid handle counter-clockwise until it rotates freely (Figure 12). 3. Press the button and hold while sliding the lid up the screw shaft. 4.
-
Page 18: Loading The Standard Or Large Capacity Clamp (2194 And 2199)
2010 Geno/Grinder 6.2 Loading the Standard or Large Capacity Clamp (2194 and 2199) Each of the two clamp lids has a curved strike plate at either end; the strike plate engages the bar at the top of the matching snap-down latch. For a titer plate seal to perform its job while the Geno/Grinder is running, the fit of the clamp must be very snug. - Page 19 2010 Geno/Grinder 6.2.2 Vials in Holders or Cryo-Blocks (Cont’d) 4. Refer to Figure 13 when stacking titer plates in the 2199 large capacity clamp. Safety Catch locks when clamp is loaded. Press to release lock after run is complete. Figure 13 - Stacking Titer Plates in the 2199 Large Clamp 6.2.3 Releasing the Clamp 1.
-
Page 20: Operation
2010 Geno/Grinder 7.0 OPERATION Before operating the Geno/Grinder, make sure it is plugged in and switched on. The power cord inlet is located on the rear of the cabinet, next to the off/on switch and the fuse tray. The off/on switch is a standard rocker switch with symbols 0 (for OFF) and I (for ON). The following steps outline a standard operating cycle: 1. -
Page 21: Operating The Top Cover
In addition, the Geno/Grinder should only be used with accessories provided by or recommended by SPEX SamplePrep and must be used in the intended manner. Use of accessories not recommended by SPEX SamplePrep may negatively affect the safety protection provided by the unit. -
Page 22: Error Messages
Sample contamination and/or equipment damage can result. If service is required, please call SPEX SamplePrep Customer Service at 1-855-438-7739, Ext. 465 for assistance with any questions you may have. NOTE: Disconnect the electrical cord of the Geno/Grinder before beginning any cleaning or maintenance of the unit. -
Page 23: Changing The Fuses
2010 Geno/Grinder 9.1 Changing the Fuses If the Geno/Grinder will not operate when the start button is pressed, it is possible that one or both of the fuses may have blown. To access the fuses, first remove the power cord from the back of the Geno/Grinder. -
Page 24: Accessories
Acid Washed Grinding Beads are treated to remove fine particles and contaminants. They are suitable for most basic applications. SPEX SamplePrep offers all three grades in sizes ranging from 100 to 1000 µm. - Page 25 2010 Geno/Grinder 10.0 ACCESSORIES FOR THE 2010 GENO/GRINDER (Cont’d) Titer Plates and Cap-Mats While most titer plates can be used in the Geno/Grinder, these sturdy titer plates have been tested extensively with various samples, and resist perforation by steel grinding balls even at high clamp speeds.
- Page 26 2010 Geno/Grinder 10.0 ACCESSORIES FOR THE 2010 GENO/GRINDER (Cont’d) 2253-PC-12 Polycarbonate 50 mL Centrifuge Tube, Package of 12 50 mL polycarbonate round-bottomed centrifuge tube with screw-on polyethylene cap. Can be used with 2664 Cryo-Block. For use with 2199 Large Capacity Clamp Assembly. 2254-PE-12 LDPE 50 mL Centrifuge Tube, Package of 12 50 mL LDPE round-bottomed centrifuge tube with screw-on polyethylene cap.
-
Page 27: Warranty
Repairs, replacements, or parts are guaranteed for 30 days or for the remaining original warranty period (whichever is greater) for the item that was repaired or replaced. Items not produced by SPEX SamplePrep LLC carry the manufacturer’s warranty only. -
Page 28: Contact Us
Tel: +44 (0) 208 204 6656 Fax: +44 (0) 208 204 6654 Website: www.spexcertiprep.co.uk Outside the United States and Europe, contact the SPEX SamplePrep representative from whom you purchased your equipment. A list of our current representatives is on our website, www.spexsampleprep.com.
Need help?
Do you have a question about the Geno/Grinder 2010 and is the answer not in the manual?
Questions and answers