
Related Manuals for SPEX SamplePrep 6875 Freezer/Mill Series


Summary of Contents for SPEX SamplePrep 6875 Freezer/Mill Series
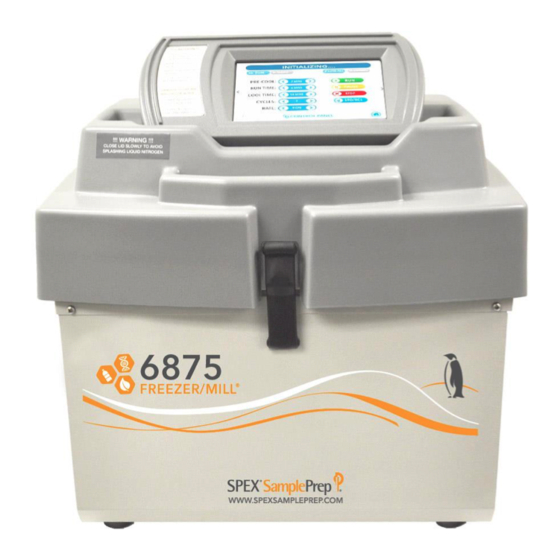
- Page 1 65 Liberty Street, Metuchen, NJ, 08840 1-855-GET-SPEX (438-7739) or 732-623-0465 www.spexsampleprep.com ® 6875 FREEZER/MILL OPERATING MANUAL For 6875-115 and 6875-230 Freezer/Mills this manual is part number 87051...
- Page 2 6875 Freezer/Mill Copyright 2015 by SPEX® SamplePrep LLC All rights reserved. No part of the work may be reproduced or transmitted in any form or by any means, electronic or mechanical; including photocopying and recording, except as may be expressly permitted by the 1976 Copyright Act or in writing from the publisher. Requests for permission should be addressed in writing to SPEX®...
-
Page 3: Table Of Contents
6875 Freezer/Mill TABLE OF CONTENTS SECTION DESCRIPTION PAGE Introduction ........................5 Specifications ........................6 Unpacking ........................... 7 Setting Up ..........................8 Electrical Connection ......................9 Power Switch and Controller ....................9 Lid, Coil Assembly, and LN Sensor ..................10 Grinding Vial Sizes, Adapters, and Vial Openers………………………………………………………….11 Touchscreen Display ...................... - Page 4 6875 Freezer/Mill 11.0 Trouble-Shooting Guide ....................38 12.0 Quick Protocols ......................... 39 13.0 Warranty ........................... 41 13.1 Product Specifications ...................... 41 13.2 To Arrange a Return Shipment ..................41 14.0 Contact Us ......................... 42 Page 4 of 42 SPEX® SamplePrep LLC DEC 2015...
-
Page 5: Introduction
6875 Freezer/Mill 1.0 INTRODUCTION SPEX SamplePrep Freezer/Mills are laboratory mills that cool unconventional materials to cryogenic temperatures and pulverize them to a powder form without thermal degradation. Our proven technology uses a dual electromagnetic, grinding chamber that rapidly drives a steel impactor back and forth against the two end plugs of the sample vial. -
Page 6: Specifications
6875 Freezer/Mill 2.0 6875 FREEZER/MILL SPECIFICATIONS Type of Mill: Cryogenic impact mill Controller: Touchscreen Data Transfer: USB Port (back of controller) Grinding Mechanism: Steel impactor driven by dual electromagnets Coolant: Liquid nitrogen (LN) Dimensions: 20½ in. (52 cm) x 21½ in. (55 cm) x 18 in. (46 cm) Weight: (empty, without vial or coolant) approx. -
Page 7: Unpacking
6875 Freezer/Mill 3.0 UNPACKING Inspect the exterior of the packing box and report any visible damage to the carrier. Remove all packing documents from the exterior of the box, and save them for your records. Open the top of the shipping box. Remove the packing material and accessories, and gently remove the 6875 Freezer/Mill. -
Page 8: Setting Up
6875 Freezer/Mill 3.0 UNPACKING (Cont’d) TOUCHSCREEN CONTROLLER [USB PORT BACK OF CONTROLLER] Figure 2 – 6875 Freezer/Mill, Rear View 4.0 SETTING UP The 6875 Freezer/Mill weighs 44 pounds (20 Kg) empty. The lid opens from the front and the lid latch is in the center. -
Page 9: Electrical Connection
Figure 3. If it is necessary to send the unit back to SPEX SamplePrep for service, be sure to return the controller to its horizontal position before packing the unit for shipping. -
Page 10: Lid, Coil Assembly, And Ln Sensor
6875 Freezer/Mill 4.2 Power Switch and Controller (Cont’d) Grasp controller from the rear and gently pull forward to USB Port adjust viewing angle (back of controller) Figure 3 - Adjusting the Viewing Angle of the Controller 4.3 Lid, Coil Assembly, and LN Sensor The lid of the 6875 Freezer/Mill supports the coil (dual electromagnet assembly) and coil housing. -
Page 11: Grinding Vial Sizes, Adapters, And Vial Openers
When the power is switched ON at the back of the mill, “Please wait” appears during start-up as the software loads. Then the SPEX SamplePrep logo is displayed, with a web address and a brief animated representation of the Freezer/Mill. After the animation has finished, the screen will switch to the HOME screen, as shown in Figure 4. -
Page 12: Control Panel
6875 Freezer/Mill 5.1 Logo Screen (Cont’d) The Home Screen Icon can be found on the following screens (e.g. Control Panel, Resources, Saved Protocols) positioned to the bottom right of the screen. Touching the Home Icon allows the users to return to Home Screen. Figure 4 –... - Page 13 6875 Freezer/Mill 5.2 Control Panel (Cont’d) Figure 5 – Control Panel The following sequence of events will occur from the current settings in Figure 5 1. Precool - the coil is inactive while the vial cools in liquid nitrogen for 1 minute. Samples must be precooled before grinding (5 to 10 minutes is recommended).
- Page 14 6875 Freezer/Mill 5.2.1 Starting a Programmed Run To run the program displayed on the CONTROL PANEL screen, touch button. The Freezer/Mill can be started, stopped, or paused in the middle of a grinding program from the button selections to the right of the screen. Open the lid and place the loaded sample vial in Coil Vial Opening, then SLOWLY close the lid to keep the liquid nitrogen from splashing or spilling out the tub.
- Page 15 6875 Freezer/Mill 5.2 Control Panel (Cont’d) Figure 7 – Lid Open Screen During the PRECOOL stage the TIME REMAINING line counts down the time for that stage in 1-second increments. To pause the program, touch the button. To continue the program touch the RESUME button.
- Page 16 6875 Freezer/Mill 5.2 Control Panel (Cont’d) As shown in Figure 8, the RUN TIME line indicates the 2 minute grinding period has been completed for the 1 grinding Cycle out of 4 grinding Cycles. Between any two grinding periods is the COOL DOWN stage.
-
Page 17: Changing Settings
6875 Freezer/Mill 5.2.3 Stopping or Pausing a Run To stop a program, touch the button on the CONTROL PANEL screen and the program will end. If the button is touched after the program has stopped then the entire program will start over. To pause during a grinding program, touch the button. -
Page 18: Saved Protocols
6875 Freezer/Mill 5.4 Saved Protocols The SAVED PROTOCOLS screen is shown in Figure 11. In this example, three saved protocols have been stored and named (e.g. Hair, Bone, Soft Tissue). Up to 20 Protocols can be stored. Only 10 protocols at one-time are visible on the Saved Protocols screen. To access or make visible additional protocols, or vacant protocol spaces (e.g. - Page 19 6875 Freezer/Mill 5.4 Saved Protocols (Cont’d) The Up/Down yellow arrow key on KEYBOARD allows the user to shift back and forth from upper case to lower case (the default is upper case). Touch Down arrow to switch to lower case. Or touch Up arrow to revert to upper case.
-
Page 20: Operation
6875 Freezer/Mill 5.4 Saved Protocols (Cont’d) Figure 13 – Clear Protocol Screen 5.4.3 Edit Saved Protocols To edit a saved protocol, touch the protocol to highlight the name (BLUE). Then touch the EDIT button. From the Edit Protocol screen change parameters and/or name, then touch the DONE button. -
Page 21: Loading Samples Into Freezer/Mill Vials
6875 Freezer/Mill 6.1 Adding Liquid Nitrogen Coolant (Cont’d) Unlatch the lid and the gas cylinders will push it open. To unlock the latch, press down on the lid and pull the top of the latch forward and down. Disengage the bottom of the latch and the lid can be opened. - Page 22 6875 Freezer/Mill 6.2 Loading Samples into Freezer/Mill Vials (Cont’d) Your own pprocedure for specific materials should be determined by trials; in practice almost no two materials grind alike. In practice, the optimum parameters (sample weight and size, precooling time, grinding times and number of cycles, impactor rate, etc.) are customized to match particular samples.
-
Page 23: Loading A Vial Into The Freezer/Mill
6875 Freezer/Mill 6.2.3 Loading a Sample into a Vial at Room Temperature Most Freezer/Mill samples do not have to be kept cold all the time, and can be loaded at room temperature. To load a vial, first assemble it halfway by pushing an end-plug into a center cylinder. -
Page 24: Removing A Vial From The Freezer/Mill
6875 Freezer/Mill 6.3 Loading a Vial into the Freezer/Mill (Cont’d) wall. This allows additional vials to precool during the grinding process. Thus, when the next vial is to be run, the precool step can be skipped. Remove the basket from the LN with caution. Do not immerse a hand into the LN, even when wearing a protective glove. - Page 25 6875 Freezer/Mill 6.5 Opening, Emptying, and Cleaning Freezer/Mill Vials (Cont’d) to warm up gradually, wrapped in several layers of cloth or paper towels. Once the vial is warm, the stuck end plug can be drawn out by hand or with a pair of pliers. When using pliers to extract an end plug, rotate the end plug and pull gently, as if unscrewing a bottle-cap.
-
Page 26: Checking The Liquid Nitrogen Level
LN level is low. The 6820 Auto-Fill System must be installed and calibrated at our factory. A 6875 Freezer/Mill that was not ordered with an Auto-Fill System must be returned to SPEX SamplePrep LLC if installation is desired. Page 26 of 42 SPEX®... -
Page 27: 6820 Auto-Fill System
6820 Auto-Fill System. Four-foot and six-foot transfer hoses of standard design (part numbers 6906 and 6907) can be purchased from SPEX SamplePrep, or custom transfer hoses can be designed and supplied by the user. The LN inlet is a male ½ inch JIC fitting placed low on the right side of the Freezer/Mill, so the outlet of the hose requires a female CGA295 fitting. -
Page 28: Liquid Nitrogen Connection
6875 Freezer/Mill 7.2 Liquid Nitrogen Connection Install the safety valve on the outlet of the tank or LN line, with the gooseneck tilted up and the valve outlet down (see Figure 14). Then attach the LN transfer hose to the safety valve, and the other end to the inlet on the Freezer/Mill. -
Page 29: Resources
6875 Freezer/Mill 8.0 RESOURCES The Resources screen button is located on the Home screen (Figure 4). To access the Resources screen touch the Resources button. On the Resources screen, as seen in Figure 14, are additional buttons to recall the run history, technical support, accessories (e.g. vials, holders, etc.), and training information (e.g. -
Page 30: Accessories (Electronic Version)
6875 Freezer/Mill 8.1 Run History (Cont’d) Figure 16 – Run History Screen 8.2 Accessories [Electronic Version] – (Available for purchase at additional cost) To enter the Accessories Screen touch the Accessories button. In the Accessories Screen items are grouped into separate categories (e.g. Grinding Vials, Vial Racks, Extractors), as shown in Figure 17. -
Page 31: Training
6875 Freezer/Mill 8.2 Accessories [Electronic Version] (Cont’d) Figure 18 – Extractor Accessories 8.3 Training To access the Training screen touch the Training button on the Resources screen. In the Training screen the operating manual, instructions and how-to-use videos are listed. To open any of the categories listed on the screen touch the button name, as displayed in Figure 19. -
Page 32: System Settings
6875 Freezer/Mill 8.4 System Settings To access the Settings screen touch the Gear Icon. The System can be upgraded, the time display changed from 12-hour to 24-hour, and Time and Date can be entered or changed, as shown in Figure 20. Touch window to change settings then touch the SET button to lock in the figure. A pop-up window opens confirming, Time or Date resets. -
Page 33: Accessories For The 6875 Freezer/Mill
(Available for purchase at additional cost) A partial list of available accessories is shown here. For a complete listing, please visit our website (www.spexsampleprep.com) or contact us for a copy of the SPEX SamplePrep Handbook of Sample Preparation and Handling. - Page 34 6875 Freezer/Mill 9.0 ACCESSORIES FOR THE 6875D FREEZER/MILL (Cont’d) 6781S Small Stainless Steel Vial Set Small Stainless Steel Set contains everything necessary to make one complete Grinding Vial. O-rings on End Plugs seal Vial during grinding. Includes 6751P Stainless Steel Impactor, Stainless Steel End Plugs, Stainless Steel Center Cylinder, and pack of 10 Silicone O-rings 6781O.
- Page 35 6875 Freezer/Mill 9.0 ACCESSORIES FOR THE 6875D FREEZER/MILL (Cont’d) 6870S Small Grinding Vial Accessory Package Small Grinding Vial Accessory Package contains everything necessary to run Small Grinding Vials in the 6875 Freezer/Mill. Includes one 6754 Small Extractor/Vial Opener, one 6755 Vial Rack for Small Grinding Vials, and one 6806 Multi-Vial Adapter.
- Page 36 4 ft. (1.2 m) long flexible stainless steel hose suitable for transferring liquid nitrogen directly into all SPEX SamplePrep Freezer/Mills®. Fitted with a 3/8 in. (9.5 mm) NPT male fitting on one end and a CGA295 female fitting on the other end.
-
Page 37: Maintenance
To maintain the exterior of the unit, first disconnect the Freezer/Mill from its electrical source. Then lightly spray with a mild window cleaner or similar product and wipe unit down. If the 6875 Freezer/Mill requires service, please call SPEX SamplePrep Customer Service for assistance. 10.1 Changing the Fuses If the Freezer/Mill will not operate when the start button is pressed, it is possible that one or both of the fuses may have blown. -
Page 38: Trouble-Shooting Guide
Power switch not turned on. Press power switch to ON position. Blown fuse. Replace fuses. Blows fuses repeatedly. Electrical short. Contact SPEX SamplePrep and return for repair. Screen displays Safety interlock switch not Close the lid and latch. “LID UP”. -
Page 39: Quick Protocols
6875 Freezer/Mill 12.0 QUICK PROTOCOLS Sample Sample (g) Sample size Freezer/Mill Vial Accessory Grinding Protocol 5mm - 8mm 6775 6751 6756 Extractor Precool 10 min 6781S Grinding 3 cycles Cycles (1 min each Bone cycle) Cool Time 1 min Rate 12 cps 1 whole (as-is) - Page 40 6875 Freezer/Mill 12.0 QUICK PROTOCOLS (Cont’d) Sample Sample (g) Sample size Freezer/Mill Vial Accessory Grinding Protocol pellets 6875, 6875D 6801 6808 Extractor Precool 15 min *15min 3mm - 5mm 6881 6807 Holder Polyethylene *6775 6751 6756 Extractor Grinding 6 cycles *4 cycles [containers- High Cycles...
-
Page 41: Warranty
30 days or for the remaining original warranty period (whichever is greater) for the item that was repaired or replaced. Items not produced by SPEX SamplePrep LLC carry the manufacturer’s warranty only. 6875 Freezer/Mill wear parts include the coil. -
Page 42: Contact Us
Fax: +44 (0) 208 204 6654 Website: www.spexeurope.com E-mail: spexeurope@spex.com Outside the United States and Europe, contact the SPEX SamplePrep representative from whom you purchased your equipment. A list of our current representatives is on our website, www.spexsampleprep.com. Page 42 of 42 SPEX® SamplePrep LLC...
Need help?
Do you have a question about the 6875 Freezer/Mill Series and is the answer not in the manual?
Questions and answers