Table of Contents
Advertisement
Quick Links
Advertisement
Table of Contents

Related Manuals for Life Fitness F1


Summary of Contents for Life Fitness F1
- Page 1 LIFE FITNESS TREADMILL OWNER’S MANUAL 10.31.18 8860701 REV AB...
-
Page 2: Corporate Headquarters
Telephone: +55 (11) 3095 5200 option 2 Email:sales@lifefitnessjapan.com kundendienst@lifefitness.com Service Email: Sales/Marketing Email: Hong Kong suportebr@lifefitness.com vertrieb@lifefitness.com Life Fitness Asia Pacific LTD Sales/Marketing Email: 32/F, Global Trade Square Spain vendasbr@lifefitness.com 21 Wong Chuk Hang Road Life Fitness IBERIA Latin America and Caribbean* Hong Kong C/Frederic Mompou 5,1º1ª... -
Page 3: Table Of Contents
13. Warranty Information © 2018 Life Fitness, A division of Brunswick Corporation. All Rights Reserved. Life Fitness and LF Connect® are registered trademarks of Brunswick Corporation. Fitlinxx is a trademark of Fitlinxx, Inc. Polar is a registered trademark of Polar Electro, Inc. iPod® and iPhone® are registered trademarks... - Page 4 Before using this product, it is essential to read this ENTIRE operation manual and ALL installation instructions. This will help in setting up the equipment quickly and in instructing others on how to use it correctly and safely. Class HB (Home): Domestic use. NOTE: This equipment generates, uses and can radiate radio frequency energy, and if not installed and used in ac- cordance with the user manual, may cause harmful interference to radio communications.
- Page 5 FTR Life Fitness Treadmill Thank you for purchasing a Life Fitness treadmill. Before using this product please read this user manual in its entirety to ensure that you have the knowledge to safely and properly operate all of the features on your treadmill. We hope...
-
Page 6: Important Safety Instructions
To disconnect, turn power OFF at the ON/OFF switch, then remove plug from electrical outlet. • Never operate a Life Fitness product if it has a damaged power cord or electrical plug, or if it has been dropped, damaged, or even partially immersed in water. Contact Life Fitness Customer Services. - Page 7 Do not use this product outdoors, near swimming pools, or in areas of high humidity. • Never operate a Life Fitness product with the air openings blocked. Keep air openings free of lint, hair or any ob- structing material. •...
-
Page 8: Consignes De Sécurité Importantes
électrique. • Ne faites jamais fonctionner un appareil Life Fitness dont le cordon d’alimentation ou la fiche serait abîmé(e), qui aurait fait une chute ou qui aurait été endommagé ou partiellement plongé dans l’eau. Contactez le service après- vente de Life Fitness. -
Page 9: Immobilization Method
N’utilisez pas ce produit à l’extérieur, près d’une piscine ou dans des endroits très humides. • Ne faites jamais fonctionner de produit Life Fitness dont les bouches d’aération sont bloquées. Maintenez-lesexemptes de peluches, de cheveux ou de toute obstruction. •... -
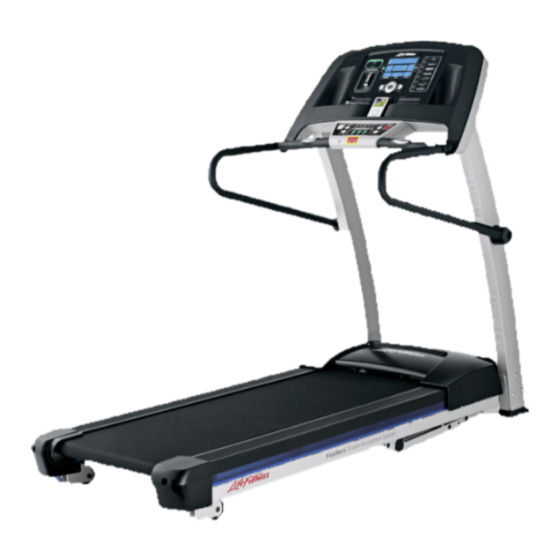
Page 10: Life Fitness Treadmill Overview
LIFE FITNESS TREADMILL OVERVIEW... -
Page 11: Assembly
ASSEMBLY For safety, and to save time and effort, read this Owner’s Manual completely before installing your Life Fitness Tread- mill. Place the treadmill near where it will be used before beginning the unpacking procedure. 3.1 Unpacking These unpacking instructions assume you have already done the following: •... -
Page 12: Installing Uprights
3.3 Installing Uprights Locate the LEFT UPRIGHT (1). The upright is marked “L”. Position the LEFT UPRIGHT near inside of the left bracket. a) Connect the two electrical connectors at the bottom of the upright. b) Set the upright in position while feeding the cable into the upright. c) Install all hardware and finger tighten at this time. -
Page 13: Installing The Console Assembly
Installing the Console Assembly A second person, who is holding the console assembly in place, is recommended. WARNING: Do not tip the treadmill over on its side. The base frame can swing around unexpectedly if this procedure is not followed. Unbuckle the strap on the top of the treadmill. -
Page 14: Installing The Handrails
Installing the Handrails Attach the RIGHT HANDRAIL (7). The handrails are marked “R” or “L”. a) Slide the handrail into the tube at the console. b) Install two M8 X 15MM BLACK SCREWS (8) with two FLAT WASHERS (13) on the top of the handrail. Finger tighten the screws. -
Page 15: Setup
Electrical Power Requirements Most Life Fitness Treadmills are intended for use on a normal 120 volt circuit in the United States and Canada. Below is a table that provides the current rating for this product based on supply voltage. Make sure that the treadmill model supports the proper line voltage for the installation location before plugging into the outlet. - Page 16 Folding and Unfolding the Treadmill The treadmill’s deck can be folded up when not in use. To do so, make sure that the incline is set to 0%, then simply grab the deck and lift it until it locks into place. To lower the deck again, push the running surface in with one hand and pull the release handle to slowly lower it to the ground.
-
Page 17: Console And Activity Zone Overview
Console and Activity Zone Overview A. Accessory Trays and Water Bottle Holders are located on either side of the display console. B. Energy Saver On / Off: The Energy Saver mode is used to minimize the power being pulled from the wall when the treadmill is not in use. - Page 18 Activity Zone K. iPod Controls: Use these keys to play/pause, skip back, skip forward, decrease volume, and increase volume. 1. You must plug your headphones into the treadmill’s headphone jack (L) for the volume controls on the treadmill to function. 2.
-
Page 19: Console Displays
Console Displays The console display was designed to reduce toggling between workout information. The design of each button on the treadmill’s console was designed to give the user tactile feedback. Each piece of workout feedback, including incline, time, speed, heart rate, calories and distance has its own dedicated window. 1. - Page 20 The console calculates target heart rate by taking the maximum heart rate (220 minus the user’s age) and multiplying it by an intensity level. Life Fitness intensity levels are 65% for weight loss and fat burning and 80% for improving cardiovascular endurance. The display will toggle between the 65% and 80% intensity levels.
- Page 21 7. Incline Display There are two types of levels used on Life Fitness treadmills. Users can adjust the current time segment and incline percentage during random, hill, heart rate, or virtual trainer workouts. The first difficulty level corresponds to a range of actual incline percentages.
-
Page 22: Workout Overviews
Workout Overviews Six workouts are pre-programmed for the Life Fitness Treadmill. Each workout has a different goal. Read the workout descriptions carefully so that you can develop a workout routine that focuses on reaching your specific goals. Note: The LF Connect USB port gives you the ability to download and customize over 40 workouts. You can get recom- mended workout programs based on your individual goals. - Page 23 HILL WORKOUT (Experienced – Fit) Access: This workout can be started by pressing the HILL workout key. Description: The Life Fitness patented hill workout is an interval training workout. Intervals are periods of intense aerobic exercise. The workout profile window displays the levels of the intervals, which together have the appearance of hills and valleys.
- Page 24 CARDIO WORKOUT * (Experienced – Fit) *Chest strap must be worn to execute the workout. Access: This workout can be started by pressing the CARDIO workout key. Description: The user must wear a chest strap for this workout to function properly. This program uses incline adjustments to increase and decrease heart rate.
- Page 25 20 - 21 <20 Life Fitness developed this rating scale based on VO 2 max percentile distributions referenced in American College of Sports Medicine’s “Guidelines for Exercise Testing and Prescription” (7th Ed. 2006), which were obtained from the data collected by the Cooper Institute Aerobics Center Longitudinal Study, 1970 - 2002.
-
Page 26: Lfconnect- Workout Tracking
• Strength Tracking – – Scan the QR code of any Life Fitness equipment or use our easy input manual strength track- ing. Select and track your sets, reps and weight. Take detailed notes and attach them to your workouts for even better tracking. -
Page 27: Getting Started
Getting Started LFconnect app can be obtained from: • App Store: https://itunes.apple.com/us/app/lfconnect-workout-tracking/id610127644?mt=8 • Google Play: https://play.google.com/store/apps/details?id=com.lf.lfvtandroid • China’s Android store: Xiaomi, Baidu and APK.91.COM How to Start Using the App 1. Install LFconnect app for Android and iOS from the above source 2. - Page 28 Important notes: Gym equipment has the freedom to define the number of intervals and the length of each interval. Home equipment (including F1 Smart Treadmill) must define interval workout with 24 intervals with the same duration. 7. Save Creating a non-interval work preset. See Figure 2 (Figure 2 Creating and editing interval workouts.
-
Page 29: How To Use The Workout Preset On F1 Smart Treadmill
Eject the USB drive from your computer 10. The below steps to be executed on your F1 Smart Treadmill: 11. Plug in the USB drive into the Virtual Trainer USB port (see page 14) 12. Select the USB button in the Workout Selection area (see Page 14) 13. -
Page 30: Workout Results
Figure 8 Workout Results How to Save Workourt Results from F1 Smart Treadmill to USB You must either have a USB inserted into the treadmill port or you must insert the USB stick within 5 minutes of the workout ending and “Workout Summary” displayed on the console The console will direct you to press the “USB”... -
Page 31: How To Import Workout Results From Usb Without Using Airdrop
The workout results in those files are saved to LFconnect cloud Open LFconnect app, Menu > Results. Your workout results from F1 Smart Treadmill can be viewed in the chart or list view How to Import workout results from USB without AirDrop... - Page 32 Click “OK” to Save Upload Workout Results to LFconnect Do your workout on supported Life Fitness equipment and save your workout result to the USB drive 2. Plug the USB drive to your computer 3. Wait until the USB drive is backed up and synced to Google Drive automatically.
- Page 33 Open button on the top bar. d. You will be move back to Menu > Results. Your workout results from F1 Smart Treadmill can be viewed in the chart or list view...
-
Page 35: Heart Rate Zone Training® Exercise
If this does not work you may need to slow the machine to get an accurate reading. Life Fitness recommends for safety and accurate heart rate readings that the user stand on the side rails when attempting to monitor heart rate with contact electrodes. -
Page 36: Settings Menu
• Set the date and time plus the time zone for workout tracking on the Life Fitness Virtual Trainer web site. Date and time are your local time. Time Zone is based on your location compared to Greenwich Mean Time. - Page 37 7. Brightness • Changes the intensity of the display backlight LED’s. • Brightness Range is 1 - 10. 8. Contrast • Changes the contrast of the display. • Contrast Range is 1 - 99. 9. Wireless Heart Rate • Turns ON or OFF the telemetry heart rate receiver. •...
-
Page 38: Service And Technical Data
Be sure to grasp the sensors firmly and keep hands still. If heart rate seems substantially higher or lower than expected, remove hands from sensors until heart rate disappears. Life Fitness recommends that the user stand on the side rails when attempting to monitor heart rate with contact sensors. - Page 39 This real time clock is only needed if you on the console. use the Life Fitness ”Virtual Trainer” website. You do not need to replace the Note: Applies to Track Console only. battery if you do not use the website. Contact Customer Service for guid-...
-
Page 40: How To Adjust And Tension The Striding Belt
The Belt Tensioning Bolts The Life Fitness treadmill has access holes in the rear roller guards, which allow access to the tensioning bolts. These tensioning bolts make it possible to adjust tracking and centering of the striding belt (A) without removing the guards. -
Page 41: Preventive Maintenance Tips
3. Using the Silicon lubricant approved by Life Fitness, apply one half of the bottle to the surface of the deck be- tween the belt and the deck. -
Page 42: Life Fitness Approved Cleaners
Gym Wipes are large, durable pre-moistened wipes to use on the equipment before and after workouts. Use Gym Wipes on the equipment for at least 2 minutes for general disinfection purposes. Contact Life Fitness Customer Sup- port Services to order these cleaners. Call 1-800-351-3737 or email: customersupport@lifefitness.com. -
Page 43: Specifications
Specifications Designed use: Home Maximum user weight: 300 pounds / 136 kilograms Speed range: 0.5 - 10.0 mph in 0.1 increments Elevation range: 0%-12% (in 0.5% increments) Motor: 2.5 HP continuous duty DC Rollers: Front: 2.6” (67mm) precision crowned Back: 2.0” (50mm) precision crowned Belt: 55”... -
Page 44: Warranty
If the Product or any warranted part must be returned to a TIES OF ANY KIND EITHER EXPRESSED OR IMPLIED, INCLUD- service facility for repairs, Life Fitness will pay all shipping and ING BUT NOT LIMITED TO THE IMPLIED WARRANTIES OF MER-...
Need help?
Do you have a question about the F1 and is the answer not in the manual?
Questions and answers