Advertisement
Available languages
Available languages
Quick Links
H
Short Instruction Manual
Bench-Top Water Activity Indicator
1
GENERAL DESCRIPTION
Congratulations on your purchase of the HygroLab water activity indica-
tor. Please read these short instructions carefully before installing the
device. The detailed instruction manual can be found on the internet at:
www.rotronic.com or by scanning the QR code.
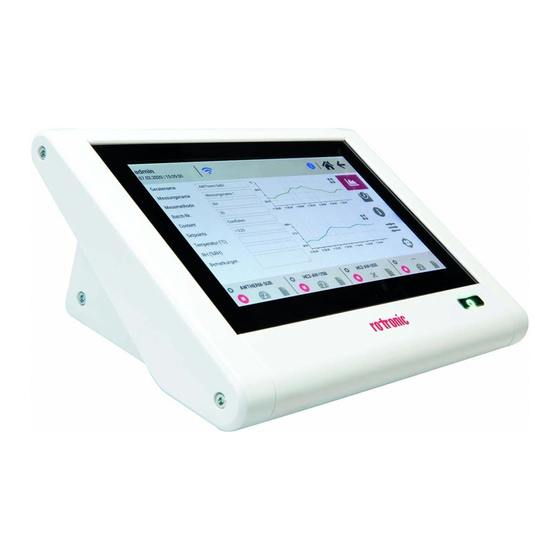
The HygroLab is a multifunction bench-top indicator that can read
simultaneously up to 4 HygroClip2-Advanced digital humidity-temperature probes. The HygroLab
is primarily designed for measuring the water activity (Aw) of foods, pharmaceuticals and cosmet-
ics. The HygroLab can also be used in other laboratory applications that require measuring humid-
ity and temperature.
NOTE: Make sure that the HygroLab has the newest software. For more information read the
instruction below.
2
DIMENSIONS
214,40 mm
3
POWER SUPPLY
The HygroLab requires the power AC adapter model PA 1024 – 120IB200.
INPUT: 100 – 240VAC 50 – 60Hz 0.6A
OUTPUT: 12VDC 2.0A 24W Max
NOTE: The power supply serves as a separator to disconnect the device from the electric
power and this must always be easily accessible.
4
PROBE INPUTS
The HygroLab has 4 probe inputs designed for use with either HC2-AW or all standard Hygro-
Clip2-Advanced probes.
5
BACK PANEL
4
2
3
HygroLab back panel showing:
1. Four (HC2) probe inputs
2. Two USB 2.0, two USB 3.0
3. Ethernet ports
4. Power supply
English
L
YGRO
AB
146,07 mm
1
6
KEYPAD
ON/OFF key
The ON/OFF key is used as follows:
• To turn the instrument on: press the ON/OFF key
• To turn the instrument off: press the ON/OFF key
7
FIRST USE
After starting the HygroLab for the first time the system requires the user name and the password
for the Administrator. By setting the password for the first time the system needs a confirmation
of the password.
8
SKIPPING
In some cases, login is not wanted or necessary. The HygroLab gives that possibility to skip the
login procedure. The system gives a guest account with right limits for safe usage of the HygroLab.
If desired, it's also possible to define the rights for the guest account in the role management.
9
DISPLAY
The LCD touch display can be used as an input device for the whole system. The backlight of the
display can be set in the device settings.
10
PERIPHERALS
If desired the HygroLab can be operated with a Mouse and Keyboard. Just plug the USB of the
Mouse and the Keyboard into the USB of the HygroLab.
11
UPPER MENU
The upper menu is changing while using the HygroLab. These symbols are shown in the main menu.
admin
User name / Date / time
01.01.2020 / 12:04:20
Shows the name of the current user, the actual time and date
Info button
Shows the current Hardware- and
the Firmware-Version
These symbols are shown in the submenu on the left upper corner.
Home button
Going back to the "main menu"
12
MAIN MENU
The main menu has the three main function of the HygroLab.
Measurement
Showing all information of the connected sensors. Temperature, relative humidity
(rH%) and the water activity (aw)
214,40 mm
Documents
All Data are saved as PDF sheet in the Documents. All docs include time stamp.
Settings
All Settings for the system. Like changing the language, units, date and time or
setting the Network.
13
LOWER MENU
The lower menu is responsible for the controlling of the connected probes of the HygroLab. After the
measurement is finished the probe input glows green or in case of an error it glows red.
Start / Stop / Add
Starting the measurement of the chosen probe.After starting the
chosen probe can be separately stopped. By starting a new
measurement again, the old measurement would be deleted.
Measurement Data
After starting the measurement, the current data (temp., rH% and aw) and a
graphical diagram, measurement protocol, etc. can be seen.
Measurement Docs
Saved Documents / Protocols of all measurements of the probe. Also failed
measurement are saved, no measurements would be lost.
Start: Starting the measurement separately with the connected probe.
Stop: Stopping the current measuring separately, which is running.
Add: Adding a new measurement.
NOTE: By adding a new measuring the old measuring are deleted only in the current mea-
surement data, the report of the old measurement is always saved as a document in the
measurement documents.
Logout
Logout the current user or change
to another user
Back button
Going one page back
Advertisement

Related Manuals for Rotronic HYGROLAB


Summary of Contents for Rotronic HYGROLAB
- Page 1 Please read these short instructions carefully before installing the device. The detailed instruction manual can be found on the internet at: If desired the HygroLab can be operated with a Mouse and Keyboard. Just plug the USB of the www.rotronic.com or by scanning the QR code.
- Page 2 The HygroLab is capable of remote control with any device with internet access (Computer, Smart- • Define the stability of the water activity per minute Our recommendation phone, Tablet, etc.). Only scan the QR-Code or type in the IP address of the HygroLab into the search Stab.AW: 0.0001 [/min] window of the browser.
- Page 3 Gerät installieren. Die detaillierte Bedienungsanleitung finden Sie im Internet unter www.rotronic.com oder durch Einscannen des QR-Codes. Sofern gewünscht, kann der HygroLab mit Maus und Tastatur bedient werden. Dazu die Maus und die Tastatur einfach mit dem USB-Anschluss des HygroLab verbinden.
- Page 4 . Wählen Sie anschliessend im Untermenü Messungen die gewünschte Messmethode . TRENDANZEIGE Während der Messung zeigt der HygroLab mit Pfeilen die Trends für Temperatur, Feuchte und Was- HINWEIS: Die Messmethode kann nur geändert werden, wenn der Fühler nicht in Betrieb ist.
- Page 5 Vous trouverez un mode d’emploi détaillé sur notre site Internet: www.rotronic.com ou en scannant le code QR. Si nécessaire, l'HygroLab peut être utilisé avec une souris et un clavier. Reliez simplement pour cela la souris et le clavier par le raccordement USB de l’HygroLab.
- Page 6 La modification de la date et de l’heure est effectuée de la même manière que celle des unités, Matériau du boîtier ABS, aluminium, acier spécial c’est à dire avec le sous-menu « Paramètres locaux ». Si l'HygroLab n'est pas connecté à l'Internet, Poids 1,02 kg (2,25 lbs) entrez ici les modifications de la date et de l'heure ;...
-
Page 7: Primo Utilizzo
SALTO DEL LOGIN In alcuni casi, il login non è richiesto o non è necessario. HygroLab dà la possibilità di saltare la procedura di login. Il sistema assegna un account ospite limitato per un utilizzo sicuro di HygroLab. - Page 8 Il valore tende a scendere Valore stabile Per la maggior parte dei prodotti, per questa fase occorrono dai 30 ai 60 minuti. HygroLab rileva Avvia tutte le misure disponibili / Ferma tutte le misure in corso automaticamente le condizioni di equilibrio (umidità e temperatura) e termina la misura. HygroLab HygroLab può...
Need help?
Do you have a question about the HYGROLAB and is the answer not in the manual?
Questions and answers