Table of Contents
Advertisement
Quick Links
OWNER'S MANUAL
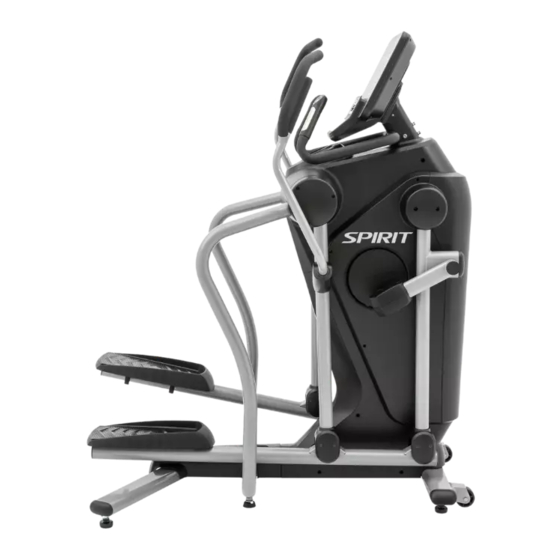
Elliptical Trainer
CES880
CAUTION:
Weight on this product should not exceed 181 kgs/ 400 lbs
CES880_880043_OM_20240130
WARNING
Exercise can present a health
risk. Consult a physician before
beginning any exercise program
with this equipment.
If you feel faint or dizzy,
immediately discontinue use of
this equipment. Serious bodily
injury can occur if this
equipment is not assembled
and used correctly. Serious
bodily injury can also occur if all
instructions are not followed.
Keep children and pets away
from equipment when in use.
Always make sure all bolts and
nuts are tightened prior to each
use. Follow all safety
instructions in this manual.
SUSPENSION
ELLIPTICAL
Product May Vary Slightly From Picture.
Online Support
If you require assistance or are
experiencing issues with your
Spirit Machine, please contact
customer care for additional help.
1-800-258-8511
questions@spiritfitness.com
Warranty Registration
Scan to quickly and easily
register your new Spirit
Fitness machine.
Advertisement
Table of Contents

Subscribe to Our Youtube Channel
Related Manuals for Spirit CES880


Summary of Contents for Spirit CES880
- Page 1 If you require assistance or are immediately discontinue use of experiencing issues with your this equipment. Serious bodily Spirit Machine, please contact injury can occur if this equipment is not assembled customer care for additional help. and used correctly. Serious...
-
Page 3: Table Of Contents
Setting Up Your Unit ............27 Quick Start ................. 29 Technology and Features About Your Machine ............30 Console Screen - Overview ..........31 Using the Spirit+ App ............32 Features ................33 Heart Rate Monitoring Heart Rate Chest Strap ..........35 Chest Strap Warning ............36... -
Page 4: Product Registration
WARRANTY REGISTRATION the Spirit Fitness family! Thank you for your purchase of this quality unit from Spirit Fitness. Your new unit was manufactured by one of the leading fitness manufacturers in the world and is backed by one of the most comprehensive warranties available. -
Page 5: Product Labels
PRODUCT LABELS SERIAL NUMBER STICKER SERIAL NUMBER This sticker will be found on the rear stabilizer. Please record the number below the barcode for the purpose of registering your Elliptical’s warranty. 1234 5678 9876 (870) 935-1107 PROPOSITION 65 WARNING This sticker will be found on the rear stabilizer. The State of California requires us to inform you that this unit was manufactured using chemicals that could cause harm with improper use. -
Page 6: Safety Instructions
SAFETY INSTRUCTIONS To reduce risk of injury to persons: Please ensure that you review and adhere to the user Read all instructions before using this appliance. weight restrictions of your new machine. Failure to do so may result in serious injury or damage to your WARNING - To reduce the risk of injury to persons: This exercise equipment is not intended for use by persons with reduced machine. -
Page 7: Parts Included
NOTICE: The length of all bolts and screws except those with flat heads is Access Key measured from below the head to the end of the bolt or screw. Flat head bolts and screws are measured from the top of the head to the end of the Console Upper Handlebar bolt or screw. - Page 8 “A SSEMBLY ARTS” PARTS INCLUDED Unpack the box in a clear area. Follow the List of Assembly Parts & its part number below to check and make sure all assembly parts are present and in good condition. Do not dispose of the packing material until the assembly process is completed.
-
Page 9: Parts Of Your Suspension Elliptical
Elliptical Trainer PARTS OF YOUR ELLIPTICAL WARNING A. LCD Screen Exercise can present a health B. Adjustable Fan risk. Consult a physician before C. Hand Pulse Grips beginning any exercise program D. Upper Handlebar with this equipment. E. Direct Access Key F. -
Page 10: Pre-Assembly
PRE-ASSEMBLY 1. Place all parts from the box in a cleared area and position them on the floor in front of you. 2. Remove all packing materials from your area and place them back into the box. Do not dispose of the packing materials until assembly is completed. -
Page 11: Assembly
“A SSEMBLY NSTRUCTIONS” ASSEMBLY - STEP ONE Place all parts from the box in a cleared area and position them on the floor in front of you. Remove all packing materials from your area and place them back into the box. Do not dispose of the packing materials until assembly is completed. Read each step carefully before beginning. - Page 12 reviewing below steps: This step could require two people. b. Be sure to tighten the Levelers (28) a. Loosen the Leveler (28) to securely until screw lines are eliminated as make the Adjustment Plate ASSEMBLY - STEP TWO & THREE become less tight.
- Page 13 “A a. There is a “L” & “R” decal on the Inner Handrail SSEMBLY NSTRUCTIONS” Cover (50, 51). – b. Slide the Right Inner Handrail Cover (51) onto TEP 4 Middle Pivoting Arm the Stationary Handrail (49). Cover (59, 60) Assembly ASSEMBLY - STEP FOUR &...
- Page 14 ASSEMBLY - STEP FIVE - CONTINUED “A SSEMBLY NSTRUCTIONS” f. Refer left, 4pcs Nylon Nuts (M10xp1.5)(115) and 2pcs Socket Bolts (M10xp1.5x20mm)(128) have preassembled on the Base Frame (77). g. Remove the above bolts (128) and nuts (115). h. Refer left, slide the Right Stationary Handrail (49) into the Main Frame (1).
- Page 15 k. Then gently push the upper side of the Handrail (49) into the ASSEMBLY - STEP FIVE - CONTINUED Main Frame (1). l. Slightly attach 2pcs thin Nylon Nuts (M10xp1.5)(116) and 2pcs Socket Bolts (M10xp1.5x60mm)(129). NOTE: Please do not tighten at this moment. m.
- Page 16 ASSEMBLY - STEP SIX – TEP 6 Stationary Handrail (48, 49) Tighten Process a. Follow Step a. and b. to use the left tools to fully tighten Step a. smoothly. NOTE: Be sure to fully tighten step a location first. b.
- Page 17 ASSEMBLY - STEP SEVEN – TEP 7 Basic Leveler (52) Assembly Detailed Lever- drawing 1 Stationary Handrail Adjustment Plate Leveler (52) Detailed Lever- drawing 2 Stationary Handrail Adjustment Plate Screw line Leveler (52) LEVELING NOTE: After placing the LEVELING NOTE: After placing the item in the item in the intended location, check intended location, check the stability of the item.
- Page 18 ASSEMBLY - STEP EIGHT – TEP 8 Inner & Outer Handrail Cover (51, 45) Assembly a. Slide the to slide the Right Inner Handrail Cover (51) up to the Right Stationary Handrail (49) and fully tighten 2pcs Screws, Philips Pan Head (M6xp1.0x15mm)(124).
- Page 19 ASSEMBLY - STEP NINE – TEP 9 Front Swing Arm Cover (61) Assembly a. Refer left, 4pcs Screws, Phillips Pan Head (M5xp0.8x15mm)(122) have preassembled on the Front Swing Arm (62, 63). b. Remove the above screws (122). c. Attach the Front Swing Arm Cover (61) to the Main Frame (1) and fully tighten with 2pcs Screws, Philips Pan Head (M5xp0.8x15mm)(122).
- Page 20 ASSEMBLY - STEP TEN – TEP 10 Base Cover (90), Pedal Arm (74, 75), Swing Arm Cover (65) Assembly a. Refer above, 2pcs Screws, Philips Pan Head (M5×p0.8×30mm)(123) have preassembled on the Base Frame (77).
- Page 21 ASSEMBLY - STEP TEN - CONTINUED a. Refer above, 2pcs Screws, Philips Pan Head (M5×p0.8×30mm)(123) have preassembled on the Base Frame (77). b. Remove the above Screws (123). c. Attach the Base Cover (76) onto the Base Frame (77) and fully tighten 2pcs Screws (123).
- Page 22 ASSEMBLY - STEP TEN - CONTINUED g. Refer to left, 16pcs Screws, Phillips Pan Head (M5xp0.8x15mm)(122) have preassembled on the Front & Back Swing Arm (63, 67). h. Remove the above Bolts (122). i. Attach 4pcs Bottom Swing Arm Covers (65) to the Swing Arm (63, 67) and fully tighten with 8pcs Screws (122)
- Page 23 ASSEMBLY - STEP ELEVEN – TEP 11 Pedal (69) & Non-Slip Pad (68) Assembly a. Refer left, 8pcs Bolts, Socket Head (M8×p1.25×15mm)(127) and 8pcs Washers (8×19×2.0t)(102) have preassembled on the Pedal Arm (74, 75). b. Remove the above Bolts (127) and Washers (102).
- Page 24 ASSEMBLY - STEP TWELVE – TEP 12 Fixed Handlebar (78) Assembly a. Gently insert the Connection Wire (89) to the left side into the Fixed Handlebar (78). b. Attach the Fixed Handlebar (78) to the Main Frame (1) and slightly attach all 4pcs Bolts,...
- Page 25 ASSEMBLY - STEP TWELVE - CONTINUED b. Attach the Fixed Handlebar (78) to the Main Frame (1) and slightly attach all 4pcs Bolts, Socket Head (M8×p1.25×15mm)(127), 4pcs Lock Washers (M8)(99) and 4pcs Washers (8×16×2.0t)(101). c. Then fully tighten above Bolts (127), Lock Washers (99) and Washers (101).
- Page 26 ASSEMBLY - STEP THIRTEEN & FOURTEEN – TEP 13 Console (86) Assembly a. Connect the Console Wire to the Connection Wire (89). NOTE: Be careful not to pinch the wires. b. Connect the Console Wire to the Pulse Sensor Wire (90). NOTE: Be careful not to pinch the wires.
- Page 27 ASSEMBLY - STEP FIFTEEN – TEP 15 Upper Handrail (53, 54), Upper Handrail Cover (55, 56) Assembly a. Refer above, 4pcs Screws, Philips Pan Head (M5xp0.8x15mm)(122) have preassembled on the Back Swing Arm (67). b. Remove the above Bolts (122).
- Page 28 ASSEMBLY - STEP FIFTEEN - CONTINUED c. There is a “R” & “L” decal on the Upper Handrail (53, 54). d. Attach the Right Upper Handrail (54) to the Right Back Swing Arm (67) and fully tighten with 6pcs Bolts, Hex Head Flange (M8xp1.25x15mm)(133).
-
Page 29: Setting Up Your Unit
SETTING UP YOUR SUSPENSION ELLIPTICAL Plugging in and Powering On C-Safe Feature Spirit Fitness commercial elliptical trainers have a built-in Your console is equipped with a C-SAFE feature. The Power generator for power and do not need to be plugged into an (POWER) port can be used for powering a remote controlled AC outlet. - Page 30 “O SETTING UP AND MOVING YOUR ELLIPTICAL PERATIONAL NSTRUCTIONS” Hold the Base Frame (77) up with two hands and tow the Place the item in the area where it will be used. The maximum OW TO TOW THE ITEM SAFELY item to the desired place carefully.
-
Page 31: Quick Start
QUICK START 1. This is the quickest way to start a workout. After the console powers up you just press the Start button to begin. This will initiate the Quick Start mode. In Quick Start the Time will count up from zero, all workout data will start to accrue and the workload may be adjusted manually by pressing the Level Up and Down buttons. -
Page 32: About Your Machine
Downloading the Spirit+ app will help unlock more features - such as tracking workouts and sharing data via Google Fit and Apple Fitness. Simply search for “Spirit+” in the app Be sure to follow Spirit Fitness on your favorite social... -
Page 33: Console Screen - Overview
CONSOLE SCREEN - OVERVIEW Scan Button for LED Windows Dot Matrix Message LED Data Display Win- Center dows Scan Button for Dot Matrix Up, Down, Program Controls Charger Start, Stop, Level Controls... -
Page 34: Using The Spirit+ App
2. Open the App on your device (phone or tablet) and make sure Bluetooth® is enabled on your device (phone or tablet). 3. In the App click the Bluetooth® icon to search for your Spirit + equipment. 4. Under the Bluetooth® scan result list, select the machine for connect. -
Page 35: Features
FEATURES Basic Information The Program button is used to preview each program. When you first turn the console on, you may press program key to preview The Dot Matrix Message Center, or Profile Window, will what the program profile looks like. If you decide that you want to try a program, press the Enter key to select the program and enter display the workout Profile. - Page 36 FEATURES - CONTINUED Charge Portable Devices with USB port Charge your personal device during your workout using the fitness equipment’s on-console USB port. To charge your mobile electronics make sure the fitness equipment power is Step 1: Connect your USB charging cable (not included) to the USB Power Port and to your device.
-
Page 37: Heart Rate Chest Strap
HEART RATE CHEST STRAP* (NOT INCLUDED) 1. Attach the transmitter to the elastic strap using the Note: The transmitter is automatically activated when it detects interlocking key. activity from the user’s heart. Additionally, it automatically 2. Adjust the strap as tightly as possible as long as the strap deactivates when it does not receive any activity. -
Page 38: Chest Strap Warning
If you have problems try wearing the transmitter upside down. Normally the transmitter will be oriented so the Spirit Fitness logo is right side up. 6. The antenna that picks up your heart rate is very sensitive. -
Page 39: Heart Rate Exertion
HEART RATE EXERTION The old motto, “no pain, no gain”, is a myth that has been The two most popular reasons for, or goals, of exercise are cardiovascular overpowered by the benefits of exercising comfortably. A great deal fitness (training for the heart and lungs) and weight control. The black of this success has been promoted by the use of heart rate monitors. - Page 40 HEART RATE - PERCEIVED EXERTION Heart rate is important but listening to your body also has a lot of advantages. There are more variables involved in how Rating Perception of Effort hard you should workout than just heart rate. Your stress level, physical health, emotional health, temperature, humid- ity, the time of day, the last time you ate and what you ate all contribute to the intensity at which you should workout.
-
Page 41: Programs Intro
PROGRAMS INTRO Programming the Console Each of the programs can be customized with your personal information and changed to suit your needs. Some of the information asked for is necessary to ensure the readouts are correct. You will be asked for your Age and Weight. Entering your Age is necessary during the Heart Rate programs to ensure the correct settings are in the program for your Age. - Page 42 PROGRAMS - TO SELECT AND START A PROGRAM Manual The Manual program works as the name implies, manually. This means that you control the workload yourself and not the computer. To start the Manual program follow the instructions below. 1. Using the Program button choose Manual then press the Enter button. 2.
- Page 43 PROGRAMS - TO SELECT AND START A PROGRAM Preset 1. Using the Program button select your desired program then press the Enter button. 2. The Dot Matrix Message Center will ask you to enter your Age. You may adjust the age setting, using the Up and Down buttons, then press the Enter button to accept the new number and proceed on to the next screen.
-
Page 44: Programs - Preset
PROGRAMS - PRESET The elliptical trainer has five different programs that have been designed for a variety of workouts. These five programs have factory preset work level profiles for achieving different goals. Hill Hill This program follows a triangle or pyramid type of gradual progression from approximately 10% of maximum effort (the level that you chose before starting this program) up to a maximum effort which lasts for 10% of the total workout time,... - Page 45 resistance level (default or user input level). It has slight fluctuations up and down to allow your heart rate to elevate, and PROGRAMS then recover repeatedly, before beginning a quick cool down. This will build up your heart muscle and increase blood flow and Interval lung capacity.
- Page 46 PROGRAMS HIIT Program time will be blinking. You may use the up and down keys to adjust Fat Burn the Sprint time from 20 to 60 seconds then press Enter. The time for the Rest period will blink and you can adjust the time using The HIIT, or High Intensity Interval Training, program takes the up and down keys and press Enter.
- Page 47 PROGRAMS Constant Power Program A Watts program is a controllable constant power whose Level 8. During the Constant Power program you will be able to scroll adjusts when the speed is changed. through the data in the LED Data Display Window by pressing the adjacent Up/Down Scan buttons.
- Page 48 The VO2 program is based on the YMCA protocol and is a sub-maximal test that uses pre-determined, fixed work levels that are based on your heart rate readings as the test progresses. The test will take anywhere PROGRAMS between 6 to 15 minutes to complete, depending on your level of fitness. The test ends when your heart rate reaches 85% of maximum at any time during the test or your heart rate is between 110 bpm and 85% at the end of two consecutive stages.
- Page 49 PROGRAMS Workload chart for female or de-conditioned male FITNESS TEST PROGRAMMING...
- Page 50 PROGRAMS Fitness Test Programming 1. Using the Program button choose Fitness Test and press During the test: Enter. • The console must be receiving a steady heart rate for the test to 2. The Dot Matrix Message Center will display Gender. Use begin.
- Page 51 PROGRAMS Fitness Test Programming What your score means: VO2max Chart for males and very fit females VO2max Chart for females and de-conditioned males...
- Page 52 PROGRAMS Fitness Test Programming VO2max Chart for females and de-conditioned males...
-
Page 53: Custom Program
PROGRAMS Custom Program You can build your own custom program by following the 6. Next is Time. You may adjust the time and press Enter to instructions below. continue. 1. Using the Program button, select Custom and then then 7. Now you are asked to adjust the Max Resistance Level of the press the Enter button to begin programming. - Page 54 PROGRAMS Heart Rate Program Operation To start the HRC program follow the instructions below. 7. If you want to increase or decrease the resistance at any time during the program, press the Level Up/Down key. This will 1. Using the Program button, choose the HR program (65% allow you to change your target heart rate at any time during or 80%), then press the Enter key.
-
Page 55: Maintenance & Care
MAINTENANCE & CARE Post-Workout Machine Care Sanitizing Your Spirit Fitness Equipment 1. Store your machine according to the instructions when • Unupholstered high-contact surfaces (hard plastics) can be not in use. sanitized using a 75% isopropyl alcohol solution and a clean, dry 2. -
Page 56: Exploded View Diagram
EXPLODED VIEW DIAGRAM... - Page 57 EXPLODED VIEW DIAGRAM...
-
Page 58: Warranty
Effective January 30, 2024- CES880 Suspension Elliptical LIMITED WARRANTY Spirit Fitness warrants all its Suspension Elliptical parts for a period of time listed below from the date of retail sale, as determined by sale receipt, or in the absence of a sales receipt eighteen (18) months from the original factory shipping date. Spirit Fitness’ responsi- bilities include providing new or remanufactured parts, at Spirit Fitness’... - Page 59 9. Warranties outside of the United States may vary. Please contact your local dealer for details. Product features or specifications as described or illustrated are subject to change without notice. All warranties are made by Spirit Fitness, Inc. This warranty...
- Page 60 4. Spirit Fitness’ obligation under this warranty is limited to repairing or replacing, at Spirit Fitness’ option, the product through one of our authorized service centers. All repairs must be preauthorized by Spirit Fitness. If the product is shipped to a service center freight charges to and from the service center will be the customer’s responsibility.
- Page 64 3000 Nestle Road Jonesboro, AR 72401 | Phone: 800-258-8511 | Fax: 870-935-7611 www.spiritfitness.com ©2024 All Rights Reserved. CES880 Owner’s Manual...
Need help?
Do you have a question about the CES880 and is the answer not in the manual?
Questions and answers