
Related Manuals for Netgate 4200


Summary of Contents for Netgate 4200
- Page 1 Security Gateway Manual Netgate-4200 © Copyright 2024 Rubicon Communications LLC Oct 01, 2024...
- Page 2 CONTENTS 1 Out of the Box 2 How-To Guides 3 References...
- Page 3 Security Gateway Manual Netgate-4200 This Quick Start Guide covers the first time connection procedures for the Netgate® 4200 Desktop Firewall Appliance and will provide the information needed to keep the appliance up and running. © Copyright 2024 Rubicon Communications LLC...
-
Page 4: Getting Started
OUT OF THE BOX 1.1 Getting Started The basic firewall configuration begins with connecting the Netgate® appliance to the Internet. The Netgate appliance should be unplugged at this time. Connect one end of an Ethernet cable to the WAN port (shown in the... -
Page 5: Initial Configuration
Allow 4 or 5 minutes to boot up completely. Warning: If the ISP Customer Premise Equipment (CPE) on WAN (e.g. Fiber or Cable Router) has a default IP Address of 192.168.1.1, disconnect the Ethernet cable from the 1 port on the Netgate 4200 Security Gateway before proceeding. - Page 6 Security Gateway Manual Netgate-4200 Fig. 2: Example certificate warning message © Copyright 2024 Rubicon Communications LLC...
-
Page 7: The Setup Wizard
1. Click Next to start the Setup Wizard. Fig. 3: Setup Wizard starting page 2. Click Next after reading the information on Netgate Global Support. 3. Use the following items as a guide to configure the options on the General Information page: Hostname Any desired hostname name can be entered to identify the firewall. - Page 8 Security Gateway Manual Netgate-4200 DNS Servers For purposes of this setup guide, use the Google public DNS servers (8.8.8.8 and 8.8.4.4). Note: The firewall defaults to acting as a resolver and clients will not utilize these forwarding DNS servers. However, these servers give the firewall itself a way to ensure it has working DNS if resolving the default way does not work properly.
- Page 9 Plus dashboard, click Finish. Note: This step of the wizard also contains several useful links to Netgate resources and methods of obtaining assistance with the product. Be sure to read through the items on this page before finishing the wizard.
- Page 10 Plus software is highly configurable, all of which can be done through the dashboard. This orientation will help to navigate and further configure the firewall. Section 1 Important system information such as the model, Serial Number, and Netgate Device ID for this Netgate firewall. Section 2 ®...
- Page 11 Security Gateway Manual Netgate-4200 Fig. 7: Copyright and Trademark Notices © Copyright 2024 Rubicon Communications LLC...
-
Page 12: Backup And Restore
Click Download configuration as XML and save a copy of the firewall configuration to the computer connected to the Netgate firewall. This backup (or any backup) can be restored from the same screen by choosing the backed up file under Restore Configuration. - Page 13 Security Gateway Manual Netgate-4200 Fig. 9: Re-run the Setup Wizard Fig. 10: Backup & Restore © Copyright 2024 Rubicon Communications LLC...
-
Page 14: Connecting To The Console
1.4 Input and Output Ports 1.4.1 Rear Side The rear side of the Netgate 4200 contains several items of interest for connecting to and managing the device. The items below are marked with circled numbers on figure Rear view of the Netgate 4200 Firewall Appliance: ©... - Page 15 Security Gateway Manual Netgate-4200 Fig. 12: Rear view of the Netgate 4200 Firewall Appliance Item Description Power Connector ACPI Power Button (Protruding) - Graceful shutdown, hard power off (Hold 10s), power on Reset Button (Recessed) - Used when performing the Factory Reset Procedure.
-
Page 16: Front Side
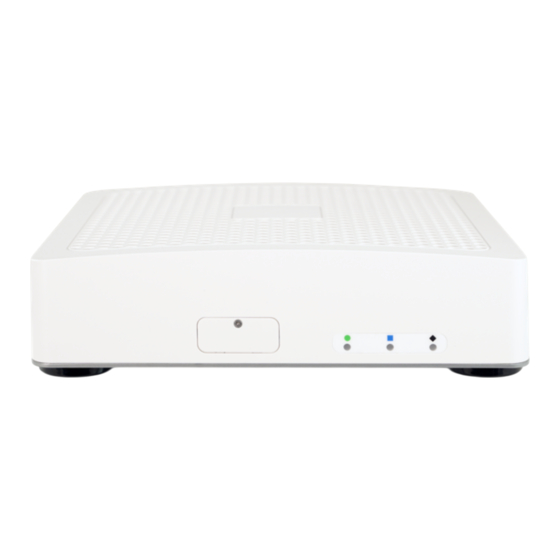
1.4.2 Front Side The front of the device has as well as an access panel for future expansion uses. Status LEDs Fig. 13: Front view of the Netgate 4200 Firewall Appliance © Copyright 2024 Rubicon Communications LLC... -
Page 17: Right Side
1.4.4 Status LEDs The Netgate 4200 has two sets of status LEDs: One on the front of the device and one on the rear. The status LEDs on the front are horizontal while the LEDs on the rear are arranged vertically. Though the placement is different, both sets are labeled consistently. -
Page 18: Safety And Legal
Security Gateway Manual Netgate-4200 Fig. 15: Status LEDs on the front (left) and rear (right) of the Netgate 4200 Firewall Appliance 1.5 Safety and Legal 1.5.1 Safety Notices 1. Read, follow, and keep these instructions. 2. Heed all warnings. 3. Only use attachments/accessories specified by the manufacturer. -
Page 19: Fcc Compliance
(UPS) or a combination of those devices. Failure to take such precautions could result in premature failure, and/or damage to your Netgate appliance, which is not covered under the product warranty. Such an event may also present the risk of electric shock, fire, or explosion. -
Page 20: Rohs/Weee Compliance Statement
Security Gateway Manual Netgate-4200 1.5.6 CE Marking CE marking on this product represents the product is in compliance with all directives that are applicable to it. 1.5.7 RoHS/WEEE Compliance Statement English European Directive 2002/96/EC requires that the equipment bearing this symbol on the product and/or its packaging must not be disposed of with unsorted municipal waste. - Page 21 1.5.8 Declaration of Conformity Česky[Czech] NETGATE tímto prohla uje, e tento NETGATE device, je ve shod se základními po adavky a dal ími p íslu n mi ustanoveními sm rnice 1999/5/ES. Dansk [Danish] Undertegnede NETGATE erklærer herved, at følgende udstyr NETGATE device, overholder de væsentlige krav og...
- Page 22 Alulírott, NETGATE nyilatkozom, hogy a NETGATE device, megfelel a vonatkozó alapvetõ követelményeknek és az 1999/5/EC irányelv egyéb elõírásainak. Íslenska [Icelandic] Hér me l sir NETGATE yfir ví a NETGATE device, er í samræmi vi grunnkröfur og a rar kröfur, sem ger ar eru í tilskipun 1999/5/EC. Italiano [Italian] Con la presente NETGATE dichiara che questo NETGATE device, è...
- Page 23 NETGATE erklærer herved at utstyret NETGATE device, er i samsvar med de grunnleggende krav og øvrige relevante krav i direktiv 1999/5/EF. Slovensky [Slovak] NETGATE t mto vyhlasuje, e NETGATE device, sp a základné po iadavky a v etky príslu né ustanovenia Smernice 1999/5/ES. Svenska [Swedish] Härmed intygar NETGATE att denna NETGATE device, står I överensstämmelse med de väsentliga egenskapskrav...
-
Page 24: Applicable Law
Security Gateway Manual Netgate-4200 Rubicon Communications LLC Attn.: Legal Dept. 4616 West Howard Lane, Suite 900 Austin, Texas 78728 legal@netgate.com The arbitration will be conducted by the American Arbitration Association (AAA) under its rules. The AAA’s rules are available at www.adr.org. Payment of all filing, administration and arbitrator fees will be governed by the AAA’s rules. -
Page 25: Limited Warranty
Security Gateway Manual Netgate-4200 1.5.13 Limited Warranty DISCLAIMER OF WARRANTIES AND LIMITATION OF LIABILITY THE PRODUCTS/SERVICES AND ALL INFORMATION, CONTENT, MATERIALS, PRODUCTS (INCLUD- ING SOFTWARE) AND OTHER SERVICES INCLUDED ON OR OTHERWISE MADE AVAILABLE TO YOU THROUGH THE PRODUCTS/SERVICES ARE PROVIDED BY US ON AN “AS IS” AND “AS AVAILABLE” BA- SIS, UNLESS OTHERWISE SPECIFIED IN WRITING. -
Page 26: How-To Guides
HOW-TO GUIDES 2.1 Netgate 4200 Wall Mount The Netgate 4200 has an optional Wall Mount Kit available. This page provides an overview for attaching the system to the wall. The Netgate 4200 Wall Mount Kit contains all of the components necessary to mount the 4200. - Page 27 Security Gateway Manual Netgate-4200 The Netgate 4200 Wall Mount can be used in an inboard fashion, or an outboard fashion. Fig. 2: The Netgate 4200 Inboard Wall Mount Orientation 2.1.1 Inboard Wall Mount Instructions Click on the button below to download the Wall Mount Template.
- Page 28 Security Gateway Manual Netgate-4200 Fig. 3: The Netgate 4200 Outboard Wall Mount Orientation © Copyright 2024 Rubicon Communications LLC...
- Page 29 Security Gateway Manual Netgate-4200 Note: The 100% Scale setting varies by PDF reader, printer manufacturer, and model. Follow the pictured instructions on the PDF to complete the wall mount installation. 2.1.2 Outboard Wall Mount Instructions Click on the button below to download the Wall Mount Template.
- Page 30 Security Gateway Manual Netgate-4200 Fig. 4: Using the Wall Mount Bracket to Mark the Screw Locations © Copyright 2024 Rubicon Communications LLC...
-
Page 31: Mounting The Power Supply
Security Gateway Manual Netgate-4200 2.1.3 Mounting the Power Supply The mounting bracket for the power supply uses two zip-ties to hold the power supply to the mounting bracket. There is no PDF for the Power Supply Bracket. Use the holes directly to mark the wall for mounting. - Page 32 Security Gateway Manual Netgate-4200 2.2.1 USB Serial Console Device This device uses a Silicon Labs CP210x USB-to-UART Bridge which provides access to the console. This device is exposed via the USB Micro-B (5-pin) port on the appliance. Install the Driver If needed, install an appropriate Silicon Labs CP210x USB to UART Bridge driver on the workstation used to connect with the device.
- Page 33 Security Gateway Manual Netgate-4200 Locate the Console Port Device The appropriate console port device that the workstation assigned as the serial port must be located before attempting to connect to the console. Note: Even if the serial port was assigned in the BIOS, the workstation OS may remap it to a different COM Port.
- Page 34 Security Gateway Manual Netgate-4200 Note: If the device does not appear in /dev/, see the note above in the driver section about manually loading the Linux driver and then try again. FreeBSD The device associated with the system console is likely to show up as /dev/cuaU0. Look for messages about the device attaching in the system log files or by running dmesg.
- Page 35 Security Gateway Manual Netgate-4200 Fig. 5: An example of using PuTTY in Windows © Copyright 2024 Rubicon Communications LLC...
- Page 36 Security Gateway Manual Netgate-4200 PuTTY in Linux • Open PuTTY from a terminal by typing sudo putty Note: The sudo command will prompt for the local workstation password of the current account. • Set the Connection type to Serial • Set Serial line to /dev/ttyUSB0 •...
-
Page 37: Terminal Settings
Security Gateway Manual Netgate-4200 If portions of the text are unreadable but appear to be properly formatted, the most likely culprit is a character encoding mismatch in the terminal. Adding the -U parameter to the screen command line arguments forces it to use UTF-8 for character encoding: sudo screen -U <console-port>... -
Page 38: What's Next
Some devices expose multiple ports, so using the incorrect port may lead to no output or unexpected output. Hardware Failure There could be a hardware failure preventing the serial console from working. Contact Netgate TAC for assis- tance. © Copyright 2024 Rubicon Communications LLC... - Page 39 Security Gateway Manual Netgate-4200 No Serial Output If there is no output at all, check the following items: USB Cable Not Plugged In For USB consoles, the USB cable may not be fully engaged on both ends. Gently, but firmly, ensure the cable has a good connection on both sides.
-
Page 40: Connecting To The Rj45 Console Port
Security Gateway Manual Netgate-4200 Garbled Serial Output If the serial output appears to be garbled, missing characters, binary, or random characters check the following items: Flow Control In some cases flow control can interfere with serial communication, causing dropped characters or other issues. - Page 41 Security Gateway Manual Netgate-4200 2.3.1 Launch a Terminal Program Use a terminal program to connect to the system console port. Some choices of terminal programs: Windows For Windows the best practice is to run or SecureCRT. An example of how to configure PuTTY is PuTTY in Windows below.
- Page 42 Security Gateway Manual Netgate-4200 Fig. 7: An example of using PuTTY in Windows © Copyright 2024 Rubicon Communications LLC...
- Page 43 Security Gateway Manual Netgate-4200 Fig. 8: An example of using PuTTY in Linux GNU screen In many cases screen may be invoked simply by using the proper command line, where <console-port> is the console port that was located above. sudo screen <console-port>...
- Page 44 Security Gateway Manual Netgate-4200 Terminal Settings The settings to use within the terminal program are: Speed 115200 baud, the speed of the BIOS Data bits Parity None Stop bits Flow Control Off or XON/OFF. Warning: Hardware flow control (RTS/CTS) must be disabled.
- Page 45 Some devices expose multiple ports, so using the incorrect port may lead to no output or unexpected output. Hardware Failure There could be a hardware failure preventing the serial console from working. Contact Netgate TAC for assis- tance. No Serial Output...
- Page 46 Security Gateway Manual Netgate-4200 Wrong Terminal Settings Ensure the terminal program is configured for the correct speed. The default BIOS speed is 115200, and many other modern operating systems use that speed as well. Some older operating systems or custom configurations may use slower speeds such as 9600 or 38400.
- Page 47 Plus software on a Netgate 4200 device. ® Note: pfSense Plus is preinstalled on Netgate appliances. It is optimally tuned for Netgate hardware and contains features that cannot be found elsewhere, such as ZFS Boot Environments, OpenVPN DCO, Built-in IPFIX Export, and AWS VPC Wizard.
-
Page 48: Connect To The Console
NVMe storage (nda0). 2.4.6 Install pfSense Plus Software The installer will automatically launch and present several options. On Netgate appliances, choosing Enter for the default options will complete the installation process in most cases. - Page 49 Security Gateway Manual Netgate-4200 Caution: If this device contains multiple disks, such as when adding an SSD to an existing system which pre- viously used MMC, additional steps may be necessary to ensure the device boots from and uses the correct disk.
-
Page 50: Interface Configuration
Security Gateway Manual Netgate-4200 2.5.1 Requirements • This guide assumes the underlying interface is already present (e.g. physical port, VLAN, etc). • The WAN configuration type and settings must be known before starting. For example, this might be an IP address, subnet mask, and gateway value for static addresses or credentials for PPPoE. - Page 51 Security Gateway Manual Netgate-4200 Gateway IPv4 The IPv4 address of the gateway inside the same subnet. Description Optional text describing the purpose of the gateway. – Click – Ensure the new gateway is selected as the IPv4 Upstream Gateway • Check Block private networks This will block private network traffic on the interface, though if the firewall rules for this WAN are not permis- sive, this may be unnecessary.
-
Page 52: Firewall Rules
Security Gateway Manual Netgate-4200 Manual Outbound NAT If the mode is set to Manual, create a new rule or set of rules to cover the new WAN. If there are existing rules in the Mappings table, they can be copied and adjusted to use the new WAN. Otherwise, create them manually: •... -
Page 53: Gateway Groups
Security Gateway Manual Netgate-4200 2.5.6 Gateway Groups Gateway Groups do not control traffic directly, but can be used in other places, such as firewall rules and service bindings, to influence how those areas use gateways. For most scenarios it helps to create three gateway groups to start with: PreferWAN, PreferWAN2, and LoadBalance: •... - Page 54 Security Gateway Manual Netgate-4200 • Navigate to System > Routing, Gateways tab • Set Default gateway IPv4 to PreferWAN • Click Save • Click Apply Changes Note: This is important for failover from the firewall itself so it always has outbound access. While this also enables basic failover for client traffic, it’s better to use policy routing rules to control client traffic behavior.
- Page 55 Security Gateway Manual Netgate-4200 • Click Save Note: If the DNS Resolver has specific outgoing interfaces selected in its configuration, select the new WAN there well as well. 2.5.8 Setup Policy Routing Policy routing involves setting a gateway on firewall rules which direct matching traffic out specific WANs or failover groups.
-
Page 56: Dynamic Dns
Security Gateway Manual Netgate-4200 2.5.9 Dynamic DNS Dynamic DNS provides several benefits for multiple WANs, particularly with VPNs. If the firewall does not already have one or more Dynamic DNS hostnames configured, consider signing up with a provider and creating one or more. - Page 57 Security Gateway Manual Netgate-4200 – Automatic or Hybrid Outbound NAT – Manual Outbound NAT • Firewall Rules – Open – Isolated • Other Services 2.6.1 Requirements • This guide assumes the underlying interface is already present (e.g. physical port, VLAN, etc).
-
Page 58: Dhcp Server
Security Gateway Manual Netgate-4200 • Uncheck Block private networks This interface is a private network, this option would prevent it from functioning. • Uncheck Block bogon networks The rules on this interface should only allow traffic from the subnet on the interface, making this option unnec- essary. - Page 59 Security Gateway Manual Netgate-4200 Automatic or Hybrid Outbound NAT If the mode is set to Automatic or Hybrid, then this likely does not need further configuration. Ensure the new LAN subnet is listed as a Source in the Automatic Rules at the bottom of the page. If so, skip ahead to the next section to configure Firewall Rules.
- Page 60 Security Gateway Manual Netgate-4200 Open On an open LAN, hosts in that LAN are free to contact any other host through the firewall. This might be a host on the Internet, across a VPN, or on another local LAN. In this case a simple “allow all” style rule for the interface will suffice.
- Page 61 Security Gateway Manual Netgate-4200 Create a Private Networks Alias Create an alias using all RFC 1918 networks (listed in the example below) or at least an alias containing the local/private networks on this firewall, such as VPNs. Using all RFC 1918 networks is a safer practice.
- Page 62 Security Gateway Manual Netgate-4200 If clients are configured to query DNS servers other than this firewall, create rules using those as the destination instead. Destination Port Range Select the DNS (53) entry or choose Other and manually enter 53 To allow DNS over TLS, create a separate rule using the DNS over TLS entry or manually enter port 853.
- Page 63 Security Gateway Manual Netgate-4200 Reject Other Firewall-bound Traffic Add rule to reject any other traffic to the firewall to ensure users on this interface cannot connect to management services such as the GUI, SSH, and so on. • Click to add a new rule at the bottom of the list.
-
Page 64: Apply Changes
Security Gateway Manual Netgate-4200 Allow Other Traffic Add rule to allow traffic from this interface network to any other destination, which enables clients on this interface to reach the Internet and/or other remote public networks. • Click to add a new rule at the bottom of the list. -
Page 65: Other Services
2.7 Factory Reset Procedure This procedure performs a factory reset using the hardware reset button on the Netgate 4200. This button is located on the rear side of the unit toward the left end, between the power and console connectors and under the power button. -
Page 66: Changing The Boot Order
2.8 Changing the Boot Order The Netgate 4200 ships with a factory default boot order which may not be optimal for all users. This document describes methods for changing the boot order on the 4200 which can reduce the boot time. - Page 67 Security Gateway Manual Netgate-4200 Fig. 11: The Netgate 4200 BIOS Boot Option Priorities Fig. 12: The Netgate 4200 BIOS Boot Device Selection © Copyright 2024 Rubicon Communications LLC...
- Page 68 • Press the Enter key to open the device choice menu. • Select the Disabled option using the up/down arrow keys. Fig. 13: The Netgate 4200 BIOS Boot Device Disabled • Press the Enter key to select the option. • Repeat these steps for all other PXE entries.
- Page 69 Security Gateway Manual Netgate-4200 Fig. 14: The Netgate 4200 BIOS Boot Options with PXE Entries Disabled Save and Exit the BIOS Configuration Press the F4 key to save and exit or navigate to Save & Exit and choose Save Changes and Exit.
- Page 70 Security Gateway Manual Netgate-4200 Fig. 15: The Netgate 4200 BIOS Boot Override Selection 2.8.2 Using The efibootmgr utility can alter the EFI boot order while pfSense software is running. This allows administrators to make changes to the boot order remotely without causing any downtime. Making the changes is more complicated than using the BIOS method, however.
- Page 71 Security Gateway Manual Netgate-4200 Note: The example output above is from a factory default setup, which will be similar to most devices in the field unless they have been reinstalled. The output includes several items, including a list of the current boot device and boot order.
- Page 72 Security Gateway Manual Netgate-4200 Give pfSense Software Priority Alternately, to keep the other entries but move pfSense software to the top, first look at the current Boot Order: BootOrder : 0009, 0000, 000C, 000D, 000E, 000F, 0010, 0011, 0012, 0013, 0014, 000A...
-
Page 73: Updating The Bios
This document describes a simple method for updating the BIOS using a USB mass storage device. When this is necessary, Netgate will provide a means for owners of Netgate 4200 hardware to download the BIOS files directly. -
Page 74: Update The Bios
Security Gateway Manual Netgate-4200 Fig. 17: The Netgate 4200 BIOS Firmware Update Tab 2.9.3 Update the BIOS Starting from the Firmware Update tab in the BIOS, take the following steps to update the BIOS. Choose items from the menu by using the arrow keys to select an entry and then pressing the Enter key to confirm the selection. - Page 75 Security Gateway Manual Netgate-4200 Fig. 18: The Netgate 4200 BIOS Firmware Update Tab Fig. 19: Select a Storage Device © Copyright 2024 Rubicon Communications LLC...
- Page 76 Security Gateway Manual Netgate-4200 Fig. 20: Select a BIOS Update File Fig. 21: Firmware Update tab with a BIOS Update Image File Selected © Copyright 2024 Rubicon Communications LLC...
- Page 77 Security Gateway Manual Netgate-4200 Fig. 22: BIOS Update in Progress Fig. 23: BIOS Update Complete © Copyright 2024 Rubicon Communications LLC...
- Page 78 The exact version number will depend on the file provided by Netgate. 2.10 M.2 NVMe SSD Installation The Netgate® 4200 has built-in onboard eMMC storage. Optionally, a PCIe-based M.2 NVMe drive can be installed as an upgrade or to bypass the onboard eMMC flash memory.
-
Page 79: Warnings And Precautions
SATA devices. The Netgate 4200 has one socket capable of supporting a PCIe-based M.2 NVMe drive: Socket #3 labeled J13. This is the rear socket nearest to the I/O panel. This is an M-Key socket which accepts M.2 B+M-Key or M-Key PCIe NVMe SSDs only. -
Page 80: Installation Procedure
Security Gateway Manual Netgate-4200 2.10.3 Installation Procedure The installation procedure has many steps which are broken down into related groups in the remainder of this document. Follow all steps in the procedure carefully. Take a Backup If the system contains an existing configuration which should be carried over to the SSD, then the first step is to take a backup of that configuration. - Page 81 Installing the SSD requires removing the top of the case to expose the internal components. Before opening the case, the Netgate 4200 must be completely disconnected from everything. This includes power, network cables, USB cables, serial console cables, and any other cable or devices connected to the Netgate 4200.
- Page 82 Security Gateway Manual Netgate-4200 Fig. 26: SIM card slot cover screw location © Copyright 2024 Rubicon Communications LLC...
- Page 83 Security Gateway Manual Netgate-4200 Fig. 27: SIM card slot retention screw location © Copyright 2024 Rubicon Communications LLC...
- Page 84 Security Gateway Manual Netgate-4200 Fig. 28: Foot screw locations © Copyright 2024 Rubicon Communications LLC...
- Page 85 Security Gateway Manual Netgate-4200 Fig. 29: Foot screw and washer removal © Copyright 2024 Rubicon Communications LLC...
- Page 86 Security Gateway Manual Netgate-4200 Fig. 30: Plas-tite chassis screw removal © Copyright 2024 Rubicon Communications LLC...
- Page 87 Security Gateway Manual Netgate-4200 Fig. 31: Lid removal starting at a corner © Copyright 2024 Rubicon Communications LLC...
- Page 88 Security Gateway Manual Netgate-4200 11. Continue gently prying the corner while starting to pull the metal base and I/O panel up and away from the lid. Fig. 32: Separating the lid from the metal base 12. Continue separating the lid from the chassis, gradually work around to the front of the lid where the LEDs and SIM slots are located.
- Page 89 Security Gateway Manual Netgate-4200 Fig. 33: Separating the lid from the LED guides © Copyright 2024 Rubicon Communications LLC...
- Page 90 Which M.2 card sockets support an M.2 PCIe NVMe SSD?, the Netgate 4200 currently supports M.2 B+M-Key or M-Key PCIe NVMe SSDs only in socket #3 labeled J13. This is the rear socket nearest to the I/O panel. Fig. 34: Netgate 4200 top-down internal view with M.2 socket #3 (J13) highlighted 2.
- Page 91 Security Gateway Manual Netgate-4200 Warning: M.2 cards are keyed. Do not force an M.2 card into a slot with mismatched keying. Refer to M.2 Edge Connector Keying for a depiction of the different M.2 key types. Fig. 35: Inserting the SSD into M.2 socket #3 (J13) at an angle 3.
- Page 92 Security Gateway Manual Netgate-4200 Replacing and Fastening the Lid With the M.2 NVMe SSD in place, the next step is to replace the lid and all of the fasteners. Danger: Reminder: • Anti-static protection must be used throughout this procedure.
- Page 93 Security Gateway Manual Netgate-4200 Fig. 38: Replacing the front part of the lid © Copyright 2024 Rubicon Communications LLC...
- Page 94 Security Gateway Manual Netgate-4200 Fig. 39: Replacing the front part of the lid over the LED guides © Copyright 2024 Rubicon Communications LLC...
- Page 95 Security Gateway Manual Netgate-4200 Fig. 40: Check the left edge of the I/O Panel © Copyright 2024 Rubicon Communications LLC...
- Page 96 Security Gateway Manual Netgate-4200 Fig. 41: Check the right edge of the I/O Panel © Copyright 2024 Rubicon Communications LLC...
- Page 97 Security Gateway Manual Netgate-4200 7. Turn the device over carefully and protect the surface to avoid damaging the lid. Tip: An anti-static mat or similar non-marring work surface is ideal for this role. 8. Replace the four (4) long T10 Torx plas-tite threaded case screws in the holes...
-
Page 98: Restore The Configuration
1. Move the device back to its original location. 2. Re-mount the Netgate 4200 device if it should be secured in some way (e.g. wall mount) 3. Plug in all network cables, USB cables and devices, serial console connections, etc. - Page 99 Does the Netgate 4200 support Wi-Fi cards? • What is the purpose of the four small card slots behind the access panel on the front of the Netgate 4200? • Which SIM card slots and M.2 sockets are connected for use with cellular modems? •...
- Page 100 B+M or M-Key NVMe See also: Refer to M.2 Edge Connector Keying for a depiction of the different M.2 key types. Fig. 1: Netgate 4200 top-down internal view with M.2 socket #3 (J13) highlighted © Copyright 2024 Rubicon Communications LLC...
- Page 101 3.1.2 Which M.2 card sizes physically fit the sockets? The M.2 sockets on the Netgate 4200 primarily support 80mm length cards, such as 2280, because 80mm cards can be installed using only a metric machine screw for retention. M.2 NVMe SSDs are commonly available in 2280 size.
- Page 102 3.1.4 Does the Netgate 4200 support M.2 SATA devices? No, the M.2 sockets on the Netgate 4200 do not support SATA devices. The Netgate 4200 only supports NVMe storage. 3.1.5 Which M.2 card sockets support an M.2 PCIe NVMe SSD? The Netgate 4200 currently supports M.2 B+M-Key or M-Key PCIe NVMe SSDs only in socket #3 labeled J13.
- Page 103 Netgate 4200? These are SIM card slots for possible future cellular modem use. Each of the B-Key M.2 sockets on the Netgate 4200 (sockets #1 and #2) are connected to one pair of SIM cards for a possible dual-carrier Wireless WAN solution.
- Page 104 Security Gateway Manual Netgate-4200 Fig. 4: Netgate 4200 SIM card slots and labels © Copyright 2024 Rubicon Communications LLC...
-
Page 105: Additional Resources
Netgate-4200 3.1.11 Does the Netgate 4200 support antennas for Wi-Fi or Cellular modems? The Netgate 4200 is not supplied with antennas but the I/O panel (“rear”) of the device has four single D antenna mounting holes for SMA bulkhead connectors. -
Page 106: Professional Services
Security Gateway Manual Netgate-4200 3.2.2 Resource Library To learn more about how to use Netgate appliances and for other helpful resources, make sure to browse the Netgate Resource Library. https://www.netgate.com/resources 3.2.3 Professional Services Support does not cover more complex tasks such as CARP configuration for redundancy on multiple firewalls or circuits, ®...
Need help?
Do you have a question about the 4200 and is the answer not in the manual?
Questions and answers