
Related Manuals for AGA eR7i


Summary of Contents for AGA eR7i
- Page 1 AGA eR7i User Guide PLEASE READ THESE INSTRUCTIONS LPRT 518049 BEFORE USING THIS APPLIANCE. 07/24 EOPI 518051...
- Page 2 © AGA Rangemaster Limited 2023 AGA is a trading name of AGA Rangemaster Ltd. AGA brand names, words and logos are registered trademarks of the AGA Rangemaster Ltd, Meadow Lane, Long Eaton, Nottingham NG10 2GD...
-
Page 3: Table Of Contents
Overview of your AGA eR7i Button operations A brief description - AGA eR7i Handset advice hotcupboard Communication/handshake (pairing) Equipment supplied with your AGA eR7i 9 The date/time setting screen AGA Utensils and Accessories Auto/events programme screen Getting to know your AGA Information (home) screen... -
Page 5: Warnings
Warnings WARNING: The appliance and its accessible parts become hot during use. Care should be taken to avoid touching heating elements. Children less than 8 years of age should be kept away unless continuously supervised. WARNING: The appliance can be used by children aged from 8 years and above and persons with reduced physical, sensory or mental capabilities or lack of experience and knowledge if they have been... -
Page 6: Introduction
Introduction Your new AGA eR7i gives you everything you love about an AGA heat storage cooker, but with the ability to turn each cooking area on and off, and the added convenience of an induction hob, fan-assisted oven and touchscreen control to select from a range of cooking temperatures. -
Page 7: Overview Of Your Aga Er7I
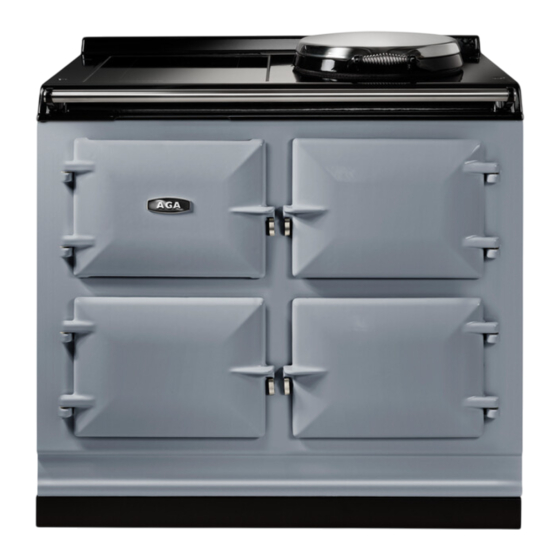
Overview of your AGA eR7i A. Induction unit B. Hotplate - Boil & Simmer C. Control panel D. Cast Roast & Bake heat storage oven & grill E. Fan oven F. Cast simmering heat storage oven... -
Page 8: Induction Hob
Slow cooked toast can be made on the simmering The cast ovens have the same capacity, (able to fit a plate, no need here to use the AGA toaster. (Use of 10kg (22lb) turkey) and the AGA heat-storage cooker... -
Page 9: A Brief Description - Aga Er7I Hotcupboard
A brief description - AGA eR7i hotcupboard Warming Plate Induction Hob Hotcupboard ON/OFF Boiling / Simmering Plate Slow Cooking Oven Top Plate Warming Oven Control Door Cast Roast & Bake Heat Storage Oven & Grill Fan Oven Simmering Oven... -
Page 10: Equipment Supplied With Your Aga Er7I
Equipment supplied with your AGA eR7i Large Size Roasting Tin Half Size Roasting Tin and Grill 1 x Roasting Tin with Grill Rack Rack This is designed to be used on the This is designed to slide onto the This tin can be slid onto the oven oven grid shelves. - Page 11 Control Panel Handset This is situated behind the top left hand door. The Your AGA eR7i cooker also comes with a handset control panel has a capacitive touch screen with LED which can be used to programme the cast ovens only.
- Page 12 1x Floor Grid 2x Cast Oven Grid 2x Fan Oven Grid 1x Baking Sheet Shelves Shelves This grid is used on the This is designed floor of the cast ovens, These are for inserting These are for inserting in specifically for use in the in particular the roasting in each oven to provide the fan oven to provide...
- Page 13 Take thick slices of surfaces, keeping them bread and place in the AGA toaster - if the bread is clear of crumbs and burnt very moist or very fresh, heat the toaster beforehand on debris –...
-
Page 14: Aga Utensils And Accessories
AGA Specialist for details. A demonstration will show bases and stacking lids so that the maximum use of you how to get the best from your new AGA and will oven space is made and an AGA kettle for boiling water. -
Page 15: How To Use Your Aga Er7I
The AGA cooker will emit an odour for a short while, this is simply due to the protective oil we put on the hotplate and ovens burning off. Due to the newness in the first couple of hours, it is advisable to open the kitchen window while this takes place. - Page 16 Hotplate POWER supply ON/OFF Top Cast Oven ON/ POWER ON/OFF Boiling/Simmering hotplate OFF and select button selector and indicator Fan Oven ON/OFF Simmering Oven and select button ON/OFF button Programme mode Manual & Zone selections Oven temperature Auto & Auto- Slumber select indicator select buttons...
-
Page 17: Operating Cast Iron Hotplate
Operating Cast Iron Hotplate Function Symbol Symbol(s) illuminated Turn on the appliance Turn on the cast iron hotplate Select setting once for simmer and twice for boiling Outer ring will blink red until desired temperature is reached when it will go solid Select within 3 seconds of pressing the ‘Hob Power’... -
Page 18: Using The Zones Of The Aga Er7I
62. be done with the AGA eR7i but is not necessary. For instance, if making a pasta dish with sauce on the AGA eR7i, it can all be done on the hotplate. - Page 19 2 Zone Induction Hotplate The induction hobs work independently of the AGA hotplate and ovens. The entire induction hob functions are accessed via the touch pads built into the ceramic surface of the induction hotplate. Hob timer set Hob timer set...
- Page 20 The level of sound will vary depending on the type and style of pan used. Accessories can be viewed at your local AGA specialist or online at www. agacookshop.co.uk. Pan Detection...
-
Page 21: Residual Heat Indicator
Residual Heat Indicator Control Panel The hob surface will get hot when in use, this is due to Always use positive finger contact on the touch pads to heat being conducted from the cooking pan. The hob ensure a good control response. surface will also remain hot for a while after use. -
Page 22: Using The Induction Hob
Using the Induction Hob Step 1. To switch on touch the standby. Step 4. Boost level. Power boost will last for up to 10 mins, before reverting back to setting. Step 2. Touch the induction on. If power level is not Step 5. - Page 23 Pause Step 1. To interrupt the cooking period, touch the Step 2. To recommence cooking, touch the pause pause. and then slide your finger the full length of the power level pads. 1 2 3 4 5 6 7 8 Step 3.
-
Page 24: Warming Function
Warming Function The warming function will keep cooked food warm for a set period of time. Level Temperature 40°C 104°F Melting 70°C 158°F Warming 94° C Simmer Step 1. To switch on touch the standby. Step 4. To select the second warming level, touch and hold the first power level. - Page 25 Auto Cook The Auto Cook feature allows the pan contents to be brought up to a high temperature rapidly, before reverting back to the set power level. Step 3. Touch required power level pad for 5 Step 1. To switch on touch the standby. seconds.
-
Page 26: Timer Function
1. Timer Function The timer functions do not start or stop a cooking process. The hob has two individual timers: Kitchen Timer, for general kitchen timing requirements, for example, timing food cooked in an oven. Minute Minder, for timing the duration of the induction cooking process. - Page 27 Modify Kitchen Timer Step 1. To modify or cancel a previously set time, touch the standby. Step 2. Press the “-” and “+” button together. Step 3. The time can now be modified by using the + or - symbols. To cancel the kitchen time; set the time to 0 or touch the standby.
-
Page 28: Minute Minder
2. Minute Minder Step 1. To switch on touch the standby. Step 4. Press the “-” and “+” button together. 1 2 3 4 5 6 7 8 9 Step 2. Touch the induction on. If power level is not Step 5. - Page 29 Modify Minute Minder Step 1. Press the “-” and “+” button together. Step 2. The time can now be set by using the - or +. The count down will commence after a few seconds. 1 2 3 4 5 6 7 8 9...
- Page 30 3. Temporary Lock Temporary Lock, this feature will lock the controls for the duration of a cooking process to prevent accidental adjustment of the controls. Step 1. Touch the power button. Step 4. Touch the lock to reset power level adjustment (a) or power pad to turn the hob off (b).
-
Page 31: Bridge Function
Bridge Function The bridge function allows both cooking zones/ elements to be switched on at the same time and controlled as one cooking zone only. This is ideal for an induction compatible griddle or fish kettle for example. Step 3. Set the required power level by the left slider Step 1. -
Page 32: Cooking On Your Aga Er7I, Ovens Overview
• You can cook directly on the floor of the roasting with the AGA heat-storage cooker, with the flexibility of oven for short periods of time e.g. pizza, quiche. being able to change the cooking temperature. - Page 33 Grill The grill is suitable for all types of grilling and browning foods. Preheat and grill with oven door closed to retain heat. The grill works best preheated for 2 minutes from R settings or 5 minutes from slumber, but can be used if preheated for 10 minutes from cold.
-
Page 34: The Cast Simmering Heat Storage Oven
This element heats the air and the cast iron within to provide cooking results consistent with the traditional simmering oven of an AGA heat-storage cooker, with the flexibility of being able to turn it to Off when not required. When selected the simmering oven is always at a simmer or Slumber mode ideal for long slow cooking. -
Page 35: The Cast Simmering Heat Storage Oven - User Guidance
Oven venting • Make sure that pork and poultry reach an internal The AGA eR7i ovens are vented through outlets located temperature of at least 75°C. centrally to the rear of the top plate. The venting • Always bring soups, casseroles and liquids to the system is designed to vent the moisture from the oven boil before putting in the simmering oven. -
Page 36: The Fan Oven
This allows for a faster heat up time and the flexibility of a range or cooking temperatures; B1-B4 for baking and R6-R9 for roasting. See “Cooking on your AGA eR7i” page 36 Cooking Tips Place dishes, tins and tray on the shelves and ensure there is space around the trays to allow air circulation. -
Page 37: Cooking On Your Aga Er7I
When a zone has reached temperature a solid red light will indicate it has warmed up. AGA recommends that to fully saturate the castings it is best to leave them for one hour for the optimum cooking results. -
Page 38: Aga Er7I Ovens Settings
AGA eR7i ovens settings The Aga eR7i is designed to give you flexibility when cooking a range of dishes using top cast oven, grill, fan assisted oven and long slow cooking in the simmering oven. When referencing recipes from cookbooks, the eR7i pre-set cook settings are equivalent to the gas mark number. - Page 39 Equivalent Equivalent Pre-set Description cooking Fan Oven Typical Food Type oven Temperature °C Temperature °C settings Moderate Tray bakes, sandwich cakes, small cakes, flapjacks, biscuits, bread and butter pudding, roulade Pastry, pizza, garlic bread, gratin, baked fish, baked chicken, toad in the hole, roasting meat, browning...
-
Page 40: Operating The Aga Er7I Ovens
Operating the AGA eR7i ovens Manual mode (cast and fan ovens only) Auto Manual Slumber Auto Slumber Function Touch Symbol Symbol(s) illuminated Turn on the appliance The selected oven symbol will blink until the desired temperature is reached. Top / Grill... - Page 41 Function Symbol Symbol(s) Illuminated Select setting fan oven Red line will appear under the oven Use button to change symbol. setting. Top / Grill Simmer Turn off single cast oven - select oven and touch again to switch off Turn off fan oven Turn off all zones (ovens and hob)
-
Page 42: Slumber Mode (Cast Ovens Only)
Slumber mode (cast ovens only) In this mode, both cast ovens are active • top cast oven is pre-set to approximately 120°C. • simmering oven is pre-set to approximately 100°C. Function Symbol Symbol(s) illuminated Turn on the appliance The manual symbol will blink and the letter ‘S’... - Page 43 Function Symbol Symbol(s) illuminated The manual symbols stops blinking and Cancel slumber mode the cast ovens are switched off. Touch and hold for 3 seconds Turn off all zones (ovens and hob)
-
Page 44: Auto Mode (Cast Ovens Only)
Auto mode (cast ovens only) This mode setting brings selected cast iron ovens up to full heat from off. The ovens can be selected to operate once or twice each day. Each operation is termed an ‘event’ , the start and finish time is chosen by you unless you use the pre-set time. - Page 45 Function Symbol Symbol(s) illuminated De-select the Simmering oven Touch symbol once. Touch the manual symbol to Cancel AUTO return to manual mode Turn off all zones (ovens and hob)
-
Page 46: Auto Slumber (Cast Ovens Only)
Auto Slumber (cast ovens only) This mode setting brings selected ovens up to full heat from Slumber. The ovens can be selected to operate once or twice each day. Each operation is termed an ‘event’ , the start and finish time is chosen by you unless you use the pre-set time. - Page 47 Function Symbol Symbol(s) illuminated Touch and hold the AUTO symbol for 3 Return to Auto from Auto slumber seconds. The symbol will stop blinking Touch and hold for 3 and return to auto mode. seconds Touch the manual symbol to Cancel AUTO SLUMBER return to manual mode Turn off all zones (ovens and hob)
- Page 48 NOTE: During Auto-Slumber mode the simmering oven is not affected by event periods and can be switched ON or OFF at any time. PLEASE NOTE: • Don’t forget to include time for warm-up. • Don’t forget if you have set the AUTO/Slumber programme and have selected the AUTO/Slumber mode, an oven or ovens must be selected.
-
Page 49: Handset - A Hand Held Control
Button operations Communication or ‘Handshake’ button used initially to synchronise the handset to the AGA eR7i. Clock button Opens and closes the date and time settings screen. Left/Back Button Moves back and highlights the previous setting. -
Page 50: Handset Advice
If the handset is A power cut damaged or lost, a replacement can be obtained from Handset is out of range of the AGA eR7i cooker AGA and re-programmed to suit your appliance. When transferring information from or to the controller... -
Page 51: Communication/Handshake (Pairing)
This process will be required on the original installation of power has been applied to the cooker. The Standby the AGA eR7i. If the handset is replaced for any reason the button on the touch panel must be ‘ON’ . It must then be new handset will need to be synchronised. - Page 52 Step 4 Notes • Use the buttons to choose the language Symbol appears in the top right hand you want the handset text to be in, then press corner of the screen, if the handset is out of confirm the language choice required. range with the cooker or the communication/ handshake process has not been completed.
-
Page 53: The Date/Time Setting Screen
The date/time setting screen Press and hold Clock button until the screen is displayed. In this screen the time, date, month and year can be altered/set. Press the buttons to alter the highlighted time, date, month and year settings. Press the buttons to cycle between the time, date, month and year. - Page 54 Press button at any stage to save the settings and exit the DATE/TIME screen. ‘Message sent OK’ will appear on the screen when the handset is in range of the cooker. ‘Changes stored on handset only’ will appear on the screen, when the controller handset is out of range of the cooker.
-
Page 55: Auto/Events Programme Screen
Auto/events programme screen This screen is opened by pressing the 7-day event button In this screen, the number of events and the start and end time of events can be set. Each day can have a different number of events, and start and end times, or all seven days can be the same. - Page 56 What you can do How you do it The current day is shown on the display, this can Press the buttons to navigate through the be changed to the day that you wish to edit by settings on the screen. When a setting is selected it will pressing the buttons.
-
Page 57: Information (Home) Screen
‘Sleep’ mode. (during AUTO/Slumber event) Symbol indicating the battery life. If there is no communication between the AGA eR7i and the handset because: the cooker is not powered, in standby or the handset is out of range from the cooker. The symbol is displayed. - Page 58 Power cuts under 10 minutes Automatic update of time When the power is restored, the AGA eR7i will resume In the event of power cuts the handset will normal operation as was set prior to the power automatically update the controls within the cooker interruption.
-
Page 59: Batteries
Fig. 1.3 The handset is fitted with four ‘AAA’ batteries, which are packed separately. Your Engineer will insert them when your AGA eR7i cooker is installed. When replacing the batteries, follow these instructions in conjunction with the diagrams. Remove the handset from its backplate, then remove the battery cover plate from the rear of the handset (Fig. -
Page 60: Induction Care
(Fig. 1.8). to ensure longevity of performance, we recommend WARNING: Should a crack appear in the surface, the use of AGA Rangemaster Induction cookware. If disconnect the appliance immediately from the supply you decide to purchase an alternative set of cookware and arrange for its repair. - Page 61 When the power is on each zone will not activate until Fig. 1.6 a pan has been place onto the zone. Then that zone will illuminate, and a power level can be selected, the pan detection will be automatic whenever the pan is placed within or removed from the cooking zone on the hob.
-
Page 62: Aga (Hotcupboard)
AGA (Hotcupboard) Points to remember when Slow Cooking: • Pre-heat the oven for 30 minutes before starting Slow Cooking Oven plus Warming Oven to cook. These ovens are heated by a single element at the • Bring casseroles, soups etc to the boil on the rear of the oven cavity. -
Page 63: Caring & Cleaning
Chromed aluminum Hot soapy water and soft cloth Hotplate lid cover Stainless steel Damp cloth - the AGA e-cloths are excellent AGA Stainless Steel and Chrome Cleaner are recommended to keep the insulated covers clean and shining Hotplate surround and handle... - Page 64 Hotplate/hob Part Finish Recommended Cleaning Method Top plate (hotplate) Cast iron - pan support Damp cloth - mop up spills as soon as they happen. Hotspot Cast iron The hotplate is easy to take care for, and regular maintenance will ensure long-life. Should the hotplate become soiled;...
- Page 65 Ovens and Grill Part Finish Recommended Cleaning Method The cast iron ovens help to keep themselves clean, they merely need to be brushed out occasionally with the wire brush supplied. Remember to always switch the ovens on, to dry them out after cleaning.
- Page 66 The hotplate and cast ovens are made from cast iron, and are very durable, but they will rust if surface moisture is left on them. Specialist cleaners, e-cloths and Splash shields can be obtained from your AGA Specialist or online at www.agacookshop.co.uk.
- Page 67 The enamelled roasting tins supplied with the AGA WILL BE DAMAGED BY EXCESSIVE MOISTURE. eR7i should be cleaned in hot soapy water, soaking DO NOT PUT OVEN DOORS IN A DISHWASHER. if necessary. A nylon scouring pad can also be used.
-
Page 68: Fitting & Removal Of The Cast Heat Storage Oven Shelves
Fitting & removal of the cast heat storage oven shelves When using the oven shelves for the first time follow Fig. 1.13, Fig. 1.14, Fig. 1.15, Fig. 1.16. Fig. 1.13 Fig. 1.14 Removal of the cast heat storage oven shelves Fig. -
Page 69: Servicing & Warranty
• Your AGA does not need to be regularly serviced. Serial number • Fans may need periodic replacement. Make a note of your AGA eR7i Serial Number when it is being installed. The serial number can be found behind • In the event of requiring maintenance, please call the magnetic plinth cover. -
Page 70: Deep Fat Frying
• DO NOT hang clothes on the left hand side of the Deep fat frying AGA hand-rail. The electrical controls are behind the top left hand door, blocking the air vent can cause IMPORTANT excessive control temperatures, and will prevent •... - Page 72 AGA CLOUD, THE FIRST AGA RECIPE APP Download AGA Cloud to view a host of delicious step-by-step recipes tailored to your AGA appliance. Available only in the United Kingdom and Ireland. With AGA Rangemaster’s policy of continuous product improvement, the Company reserves the right to change specifications and make modifications to the appliances described and illustrated at any time.
Need help?
Do you have a question about the eR7i and is the answer not in the manual?
Questions and answers