
Subscribe to Our Youtube Channel
Related Manuals for Joie nutmeg


Summary of Contents for Joie nutmeg
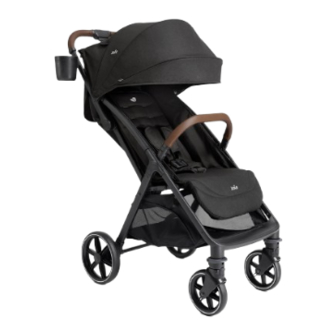
- Page 1 ™ stroller Instruction Manual up to 50 lb maximum (22.7 kg) up to 45 inches (114.3 cm) product guide videos IMPORTANT! Read the instructions in this manual before use of the product.
-
Page 2: Table Of Contents
Contents: Warranty Information Warnings Parts List Opening Stroller Attaching & Detaching Front Wheels Attaching & Detaching Rear Wheels Attaching & Detaching Cupholder Attaching & Detaching Armbar Securing Your Child Adjusting Backrest Adjusting Calf Support Using Front Swivel Lock Using Brake Using Canopy Using Shoulder Harness Cover and Crotch Harness Cover Folding Stroller... -
Page 3: Warranty Information
Please have the proof of purchase, model number and date of manufacture available when you contact us. For warranty information please visit: www.joiebaby.com Contact: Joie Baby USA Consumer Service Contact Info Address: 70 Thousand Oaks Blvd., Morgantown, PA 19543 Email: info.us@joiebaby.com Phone: 1-866-798-7866... -
Page 4: Warnings
Genuine Parts Only: Use only genuine parts and accessories from Joie. Overloading, incorrect folding, and using accessories other • than those approved by Joie, e.g. child seats, bag hooks, rain covers, buggy boards, etc., may damage or make the stroller unsafe. - Page 5 WARNING Failure to follow these warnings and instructions could result in serious injury or death. • Weight & Height Limits: This stroller is only suitable for children up to 50 lb (22.7 kg) and 45 inches (114.3 cm) tall. Exceeding these limits can cause wear and tear, potentially leading to an unstable stroller.
- Page 6 WARNING Failure to follow these warnings and instructions could result in serious injury or death. • Strangulation Hazard: Do not place items with a string around your child’s neck, suspend strings from the stroller, or attach strings to toys. DO NOT let your child play with the stroller. •...
- Page 7 To prevent a hazardous, unstable condition, DO NOT place • more than 1 lb (0.5 kg) in the cupholder. When using the stroller frame with a Joie car seat, refer to • the child usage requirements listed in the car seat instruction manual.
-
Page 8: Parts List
Parts List: Please make sure there are no missing parts. Please contact Joie Customer Service if anything is missing. Stroller Frame Front Wheel Rear Wheel Arm bar Canopy Shoulder Harness Cover Calf Support Swivel Lock Front Wheel Buckle Infant Car Seat Lock... - Page 9 Parts List:...
-
Page 10: Opening Stroller
Opening Stroller: 1 - Take the Stroller Frame Out. 2 - Unfold the Stroller Frame: Locate the secondary lock (A) on the handle. Slide it along the handle. Squeeze the one-hand-fold button (B) while holding the secondary lock in place. Rotate the handle upwards (C) until the stroller is fully open. -
Page 12: Attaching & Detaching Front Wheels
Attaching & Detaching Front Wheels: 1 - Attaching the Front Wheels: Insert the front wheels into the designated slots on the front legs of the stroller frame. A “clicking” sound will confirm that the wheels are properly locked in place. IMPORTANT: Safety Check: Always pull on the wheels after attachment to ensure they are securely fastened. -
Page 14: Attaching & Detaching Rear Wheels
Attaching & Detaching Rear Wheels: 1 - Attaching the Rear Wheels: Insert the rear wheels into the designated slots on the rear legs of the stroller frame. A “clicking” sound will indicate that the wheels are properly locked in place. IMPORTANT: Safety Check: Always pull on the wheels after attachment to ensure they are securely fastened. -
Page 16: Attaching & Detaching Cupholder
Attaching & Detaching Cupholder: To attach, align the cupholder with the designated mount on the stroller frame. Slide the clip on the cupholder downward until it snaps over the mount. A “clicking” sound will indicate that the cupholder is properly locked in place. To detach cupholder, pull upward to slide it off of mount. -
Page 18: Attaching & Detaching Armbar
Attaching & Detaching Armbar: IMPORTANT: The armbar is not a substitute for the harness. Always secure your child with the harness for proper restraint. 1 - Attaching the Armbar: Align the ends of the armbar with the designated armbar mounts on the stroller frame. Push the armbar until it clicks into place. -
Page 20: Securing Your Child
Securing Your Child: IMPORTANT: Always engage the parking brake: This is crucial whenever the stroller is stopped, especially when placing or removing your child. A parked stroller with a disengaged brake can roll away, posing a serious fall hazard. Secure your child with the harness: Never leave your child unbuckled in the stroller. - Page 22 2 - Lock Buckle: Align the lap belt buckle with the shoulder harness buckle (A). Insert the combined buckles together into the center buckle (B). A “clicking” sound will indicate that the buckle is properly locked in place (C). IMPORTANT: Always secure your child with the harness.
- Page 24 IMPORTANT: Harness Check: Always secure your child with the harness. The arm bar is not a restraint and cannot prevent falls. Shoulder Harness Height Adjustment: Locate the shoulder harness anchors (A) on back of seat. Turn the shoulder harness anchor (B) to face forward, aligning it with the front of the stroller.
-
Page 26: Adjusting Backrest
Adjusting Backrest: 1 - Recline Backrest: Locate the backrest adjuster handle. Squeeze the handle while gently pulling the backrest downward to your desired reclining position. 2 - Raise Backrest: To raise the backrest, simply push it upwards until it reaches the desired position. -
Page 28: Adjusting Calf Support
Adjusting Calf Support: 1 - Raising the Support: Lift the 3-position calf support upwards. A “clicking” sound will indicate that it is properly locked in place. 2 - Lowering the Support: Find the adjustment buttons on both sides of the calf support (A) and press both buttons simultaneously. -
Page 30: Using Front Swivel Lock
Using Front Swivel Lock: Push the front swivel locks upwards to fix the wheels in a straight position. This will prevent them from swiveling freely. Push the locks back down to release them. Tip: Using the swivel locks is recommended when traveling on uneven surfaces. -
Page 32: Using Canopy
Using Canopy: 1 - Opening and Closing the Canopy: To open, pull the canopy forward towards the front of the seat. To close, push the canopy back until it reaches the desired position. Ventilation: For airflow, flip up the canopy window cover on top of stroller. For additional airflow, flip up the canopy window cover on back of stroller. -
Page 34: Folding Stroller
Folding Stroller: IMPORTANT: Always close the canopy before folding the stroller. This prevents damage to the canopy fabric. Ensure that the snaps on each side of the calf support are unfastened before folding the stroller. Ensure that the front swivel locks are released before folding the stroller. -
Page 36: Using Accessories
Using Accessories IMPORTANT: Always adjust the backrest to the lowest po- sition and collapse the canopy before attaching the car seat. Never fold the stroller with the car seat attached. Always remove the car seat first. Engaging the Infant Car Seat Lock: Find the infant car seat lock located near the base of the stroller handle. - Page 38 1 - Removing the Car Seat: Locate the release handle (A) on the car seat and squeeze it. While squeezing release handle, lift the infant car seat upwards (B) to detach it from the stroller. WARNING: Fall Hazard: Always check that the infant car seat is securely attached to the stroller by pulling up on the car seat.
-
Page 40: Removing And Reassembling The Stroller Fabric
Removing and Reassembling the Stroller Fabric: Removing the Stroller Fabric: Unbuckle the harness. Slide harness covers off straps, by pulling them down over the waist buckle. Lift off the crotch pad cover for easier access. To remove canopy fabric, slide canopy mounts forward to detach canopy. - Page 42 1 - Removing the Seat Fabric: On the sides of the seat, pull the plastic tabs upwards to detach the fabric from the frame. 2 - Calf Support: Align the webbing tabs with the slot in the plastic on the calf support.
-
Page 44: Using Carry Bag
Using Carry Bag: A carry bag is included only when purchasing Nutmeg as a travel system. Fold the stroller per instructions on page 34. Insert folded stroller straight into carry bag. Armbar will be protruding from top of carry bag. Attach corresponding loops and hooks for closure through the arm bar opening . -
Page 46: Care And Maintenance
Discontinue use if parts are loose or missing. Loose screws: Tighten any loose screws you find. Worn parts: Replace any worn or damaged parts. Use only Joie replacement parts. Torn material or stitching: Repair or replace torn fabric or stitching. - Page 47 Storage: Sun and heat exposure: Avoid excessive sun or heat exposure to prevent fading or warping of parts. Drying after use: If the stroller gets wet, open the canopy and allow it to dry completely before storing. Wheel Maintenance: Squeaking wheels: Apply a light coat of lubricating oil (e.g., silicone spray, anti-rust oil, or sewing machine oil) directly to the axle and wheel assembly to eliminate squeaking.
- Page 48 TIM-001146B...
Need help?
Do you have a question about the nutmeg and is the answer not in the manual?
Questions and answers