Advertisement
Available languages
Available languages
Quick Links
米家螢幕掛燈/米家顯示屏掛燈使用說明書
Mi Computer Monitor Light Bar User Manual
Mi Computer-Bildschirm-Lichtbalken Benutzerhandbuch
Manuel d'utilisation de Mi Computer Monitor Light Bar
Manual de usuario de Mi Computer Monitor Light Bar
Manuale utente Mi Computer Monitor Light Bar
Руководство пользователя световой панели монитора компьютера Mi
Mi Beeldscherm Lichtbalk Gebruikershandleiding
Mi Bilgisayar Monitörü Işık Çubuğu Kullanım Kılavuzu
Mi
คู ่ ม ื อ ผู ้ ใ ช้ Mi ไฟไลท์ บ าร์ ส ำหรั บ หน้ า จอคอมพิ ว เตอร์
Manual do Utilizador da Barra de Luz para o monitor de computador Mi
Mi ディスプレイ掛け式ライト取扱説明書
Mi 컴퓨터 모니터 라이트 사용 설명서
Manuel de l'utilisateur de la barre lumineuse pour écran d'ordinateur Mi
01
10
22
32
42
52
62
72
82
92
102
110
120
129
138
Advertisement

Related Manuals for Xiaomi mi Computer Monitor Light Bar


Summary of Contents for Xiaomi mi Computer Monitor Light Bar
- Page 1 Mi Computer Monitor Light Bar User Manual Mi Computer-Bildschirm-Lichtbalken Benutzerhandbuch Manuel d'utilisation de Mi Computer Monitor Light Bar Manual de usuario de Mi Computer Monitor Light Bar Manuale utente Mi Computer Monitor Light Bar Руководство пользователя световой панели монитора компьютера Mi Mi Beeldscherm Lichtbalk Gebruikershandleiding Mi Bilgisayar Monitörü...
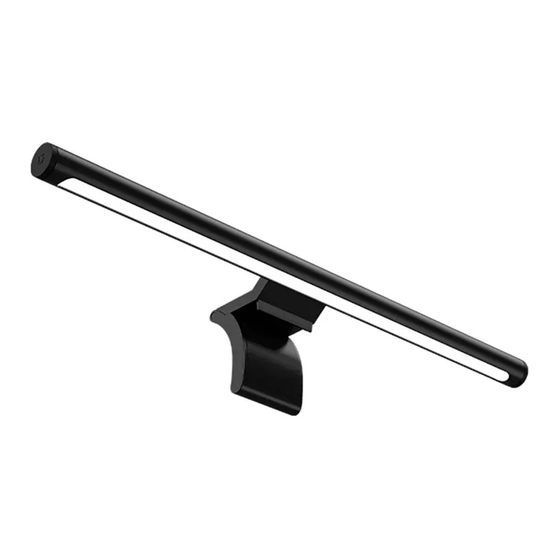
- Page 2 產品介紹 使用產品前請仔細閱讀本說明書,並妥善保管。 發光區域 供電接觸點 燈體 Type-C電源接口 供電接觸點 (背面) 固定條 底座...
- Page 3 旋轉鈕 Type-C電源線 遙控器 4號電池×2 (需自行購買) 提示: 需自行購買2個4號電池配合使用。 說明書中的產品、配件、使用者介面等插圖均為示意圖,僅供參考。由於產品的更新與升級,產品實物與 示意圖可能略有差異,請以實物為準。...
- Page 4 安装 1. 安裝掛燈 發光區域朝下,將燈體供電接觸點吸附連接到底座供電接觸點上。 將底座放到螢幕上方中間位置,使固定條緊扣 螢幕,底座下方抵住螢幕背面。 40° 提示: 0-32mm 本產品適用於厚度≤32mm的顯示器,可適配超寬螢幕、曲面螢幕、iMac等。 厚度<10mm的螢幕可以穩定懸掛使用,但底座下方無法抵住螢幕。 ° 底座重力轉軸可調角度為40 ,請勿用力拉扯。 本產品不可用於筆記本電腦。...
- Page 5 2. 安裝遙控器電池 ⑴ 一手握住遙控器底部邊緣,另一隻手掌壓住底部防滑墊並逆時針旋轉,即可開啟遙控器 後蓋。 ⑵ 根據電池艙所標示的電池正負極安裝好2個4號電池(電池需自行購買)。 ⑶ 將底部邊緣的三角箭頭與防滑墊鎖扣標識區域對齊,後蓋平整入位。 ⑷ 一手握住遙控器底部邊緣,另一隻手掌壓住底部防滑墊並順時針旋轉,即可鎖住後蓋完 成安裝。 打開後蓋 安裝後蓋...
- Page 6 使用 1. 連接電源 將電源線連接到電源接口,然後接通電源。 提示: 本產品可以連接輸出電壓5V、輸出電流大於1A的電源供應器、行動電源或電腦USB接口供電。 請使用原廠電源線,請勿使用USB延長線或分線器,否則可能導致掛燈工作異常。 請勿使用預設不能直接輸出5V電壓的電源供應器供電。 若掛燈出現閃爍或噪音,請及時更換供電裝置。 請勿將燈體或底座供電接觸點連接其他金屬導體,否則可能導致產品損壞或其他危險。 原廠電源線為掛燈專用配件,不支援為其他裝置快充或傳輸資料。...
- Page 7 2. 燈光控制 按一下遙控器旋轉鈕,開關燈光。開燈後,旋轉遙控器旋鈕,調節亮度;長按同時旋轉遙 控器旋鈕,調節色溫;長按遙控器旋鈕2秒,進入燈光的電腦模式(2700K色溫,50%亮度)。 提示:出廠時遙控器與掛燈已配對,可直接使用。若需要與同型號其他非原裝配件配對,請在掛燈接通電源 20秒內,長按遙控器旋鈕,掛燈出現呼吸效果即配對成功。 3. 調節角度 如下圖,旋轉燈體可調節掛燈角度,角度調節範圍為25° 。 25°...
- Page 8 基本規格 產品型號:MJGJD01YL 色溫範圍:2700—6500K 工作溫度:-10℃~40℃ 顯色指數:Ra95 工作濕度:0%—85%RH 光 通 量:270lm 工作壽命:25000小時 額定輸入:5V 功率因數:>0.9 無線連接:2.4GHz 燈體尺寸:φ23×448mm 額定功率:5W(80×0.2W/LED模塊) 遙控器尺寸:φ66.5×34mm...
- Page 9 注意事項 一個遙控器可控制多個掛燈,一個掛燈只能被一個遙控器控制。 清潔產品表面時,需要用柔軟的棉布擦拭,不能用含有腐蝕性的溶劑清洗。 安裝或移動燈具時,請同時拿取燈體和底座,避免跌落造成損壞或傷害。 遙控器安裝電池時請注意正負極“+”“-”。 不可充電電池電量耗盡後,不能自行充電;不同型號電池或新舊電池不能混用。 正常使用一段時間之後,若發現遙控器工作狀態異常,可能是電池電量不足,請更換 新的電池,並將廢舊電池按照當地法規安全處理,避免環境污染。 遙控器更換電池後,請將廢舊電池集中回收,避免環境污染。 產品長期不使用時,或遙控器廢棄不用時,電池必須從其中取出。 電池已漏液時,請從產品中取出電池並按照當地法規安全處理,避免環境污染。 此燈具內的光源應由製造商或其服務代理商或有類似資格的人來更換。 本產品只能在室內使用。 安裝時,請注意確認燈體和底座的供電接觸點正負極相對應。...
- Page 10 NCC警語 取得審驗證明之低功率射頻器材,非經核准,公司、商號或使用者均不得擅自變更頻率、 加大功率或變更原設計之特性及功能。低功率射頻器材之使用不得影響飛航安全及干擾合 法通信;經發現有干擾現象時,應立即停用,並改善至無干擾時方得繼續使用。前述合法 通信,指依電信管理法規定作業之無線電通信。低功率射頻器材須忍受合法通信或工業、 科學及醫療用電波輻射性電機設備之干擾。 CCAB20LP1640T1...
-
Page 11: Product Overview
Product Overview Read this manual carefully before use, and retain it for future reference. Light Area Power Contact Points Light Bar Type-C Power Port Power Contact (on the back) Clamp Points Base... - Page 12 Knob Type-C Charging Cable Remote Control AAA Ba eries × 2 (sold separately) Note: AAA ba eries × 2 are not included and sold separately. Illustrations of product, accessories, and user interface in the user manual are for reference purposes only. Actual product and functions may vary due to product enhancements.
-
Page 13: Installation
Installation 1. Install the light bar With the light area facing downwards, a ach the power contact points on the light bar to those on the base. Place the base on the upper center of the monitor, and make sure the clamp is firmly secured on the monitor and the bo om of the base is against the back of the monitor. - Page 14 2. Install the remote control ba eries Put the remote control with the anti-slip pad facing downwards on your palm, then ⑴ hold to turn the remote control counterclockwise with another hand to open the back cover. Install two AAA ba eries (sold separately). Make sure the positive (+) and negative (-) ⑵...
-
Page 15: How To Use
Do not connect the power contact points on the light bar or base to any other metallic conductor, as it may damage the product or cause other hazards. The original charging cable is designed for Mi Computer Monitor Light Bar only. Any fast charging or data transmission by this charging cable is not supported. - Page 16 2. Control the light Press the knob on the remote control to turn the light on/off. A er turning on the light, rotate the knob on the remote control to adjust the brightness. Press and hold the knob and simultaneously rotating it to adjust the color temperature. Press and hold the knob for two seconds, the light will be the best one for the computer with the color temperature in 2700 K and the brightness to 50%.
-
Page 17: Specifications
Specifications Model: MJGJD01YL Color Temperature: 2700–6500 K Operating Temperature: -10°C to 40°C Color Rendering Index: Ra95 Operating Humidity: 0–85% RH Luminous Flux: 270 lm Service Life: 25,000 hours Rated Input: 5 V Power Factor: > 0.9 Wireless Connectivity: 2.4 GHz Rated Power: 5 W (80 ×... - Page 18 Precautions One remote control can control multiple light bars, but a light bar can only be controlled by one remote control. When cleaning the surface of the light bar, wipe it clean with a so co on cloth. Never use any corrosive solvents. When installing or moving the light bar, please take both of the light bar and base to avoid damage to the product or personal injury caused by falling parts.
- Page 19 The ba eries must be removed from the remote control when the remote control is not used for a long time, or when it is being disposed of. Remove leaking ba eries from the remote control, and dispose of them in accordance with local rules and regulations so as to avoid environmental pollution.
-
Page 20: Eu Declaration Of Conformity
EU Declaration of Conformity Hereby, Qingdao Yeelink Information Technology Co., Ltd. declares that the radio equipment type MJGJD01YL is in compliance with Directive 2014/53/EU. The full text of the EU declaration of conformity is available at the following internet address: h ps://www.mi.com/en/service/support/declaration.html. -
Page 21: Fcc Compliance Statement
FCC Compliance Statement This device complies with Part 15 of the FCC Rules / Industry Canada licence-exempt RSS standard(s). Operation is subject to the following two conditions: (1) this device may not cause harmful interference, and (2) this device must accept any interference received, including interference that may cause undesired operation. - Page 22 —Reorient or relocate the receiving antenna. —Increase the separation between the equipment and receiver. —Connect the equipment into an outlet on a circuit different from that to which the receiver is connected. —Consult the dealer or an experienced radio/TV technician for help. This device can be used in portable mode without restriction.
- Page 23 Produktübersicht Lesen Sie diese Handbuch vor der Verwendung sorgfältig und bewahren Sie es auf, um zukün ig die Informationen nachlesen zu können. Beleuchtungsbereich Stromkontaktstellen Lichtbalken Typ C Stromanschluss Stromkontaktstellen (auf der Rückseite) Klemme Sockel...
- Page 24 Knopf Ladekabel Type-C Fernbedienung AAA-Ba erien × 2 (separat erhältlich) Hinweis: AAA-Ba erien × 2 sind nicht enthalten und separat erhältlich. Abbildungen des Produkts, des Zubehörs und der Benutzeroberfläche in der Benutzerhandbuch dienen nur als Referenz. Die tatsächlichen Produkte und Funktionen können aufgrund von Produktverbesserungen variieren.
- Page 25 Installation 1. Installieren Sie den Lichtbalken Mit der Lichtfläche nach unten gerichtet, befestigen Sie die Stromkontaktpunkte auf dem Lichtbalken mit denen auf dem Sockel. Setzen Sie den Sockel auf die obere Mi e des Bildschirms und vergewissern Sie sich, dass die Klemme fest am Bildschirm befestigt ist und die Unterseite des Sockels an der Rückseite des Bildschirms anliegt.
- Page 26 2. Legen Sie die Ba erien der Fernbedienung ein Halten Sie die Fernbedienung mit der rutschfesten Unterlage nach unten auf Ihrer ⑴ Handfläche und drehen Sie sie dann mit der anderen Hand gegen den Uhrzeigersinn, um die hintere Abdeckung zu öffnen. Setzen Sie zwei AAA-Ba erien ein (separat erhältlich).
- Page 27 Verwendung 1. Schließen Sie das Stromkabel an Schließen Sie das Ladekabel an den Stromanschluss an und verbinden Sie es anschließend mit einem Netzteil. Hinweise: Dieses Produkt kann über ein Netzteil, eine Powerbank oder den USB-Stromanschluss eines Computers mit einer Ausgangsspannung von 5 V und einem Ausgangsstrom von mehr als 1 A betrieben werden. Die Stromversorgungen müssen SELV (Sicherheits-kleinspannung) sein, und die Spitzenspannung darf 5,25 V nicht überschreiten.
- Page 28 2. Steuerung des Lichts Drücken Sie die Taste auf der Fernbedienung, um das Licht ein-/auszuschalten. Nachdem Sie das Licht eingeschaltet haben, drehen Sie den Regler auf der Fernbedienung, um die Helligkeit einzustellen. Halten Sie den Regler gedrückt und drehen Sie ihn gleichzeitig, um die Farbtemperatur einzustellen. Wenn Sie den Knopf zwei Sekunden lang gedrückt halten, ist das Licht mit einer Farbtemperatur von 2.700 K und einer Helligkeit von 50 % am besten für den Computer geeignet.
-
Page 29: Spezifikationen
Spezifikationen Modell: MJGJD01YL Farbtemperatur: 2.700-6.500 K Betriebstemperatur: -10 °C bis 40 °C Farbwiedergabeindex: Ra95 Betriebsfeuchtigkeit: 0-85 % rel. Lu feuchtigkeit Lichtstrom: 270 lm Lebensdauer: 25.000 Stunden Nenneingang: 5 V Leistungsfaktor: > 0,9 WLAN-Verbindung: 2,4 GHz Nennleistung: 5 W (80 x 0,2 W/LED-Modul) Betriebsfrequenz: 2405-2470 MHz Abmessungen des Lichtbalkens: Ø... - Page 30 Wenn Sie den Lichtbalken installieren oder bewegen, nehmen Sie bi e sowohl den Lichtbalken als auch den Sockel mit, um Schäden am Produkt oder Verletzungen durch herabfallende Teile zu vermeiden. Achten Sie beim Einsetzen der Ba erien in die Fernbedienung darauf, dass der Pluspol (+) und der Minuspol (-) korrekt installiert sind.
-
Page 31: Eu-Konformitätserklärung
Die in dieser Leuchte enthaltene Lichtquelle darf nur durch den Hersteller, einen Servicetechniker oder eine gleichermaßen qualifizierte Person ausgetauscht werden. Dieses Produkt ist nur für den Betrieb im Innenbereich gedacht. Unter normalen Einsatzbedingungen muss dieses Gerät einen Abstand von mindestens 20 cm zwischen der Antenne und dem Körper des Benutzers einhalten. Achten Sie bei der Installation des Lichtbalkens auf dem Sockel darauf, dass die Stromkontaktpunkte auf dem Lichtbalken und dem Sockel richtig ausgerichtet sind. - Page 32 getrennten Erfassung für elektrische und elektronische Geräte zugeführt werden muss und nicht über den normalen Haushaltsabfall entsorgt werden darf. Bi e entnehmen Sie Ba erien und Lampen, die nicht vom Gerät umschlossen sind, vor der Abgabe aus dem Gerät und entsorgen diese über die offiziellen Sammelstellen für Ba erien und Lampen. Beim Kauf eines neuen Elektrogerätes können Sie beim Vertreiber ein gleichartiges Altgerät unentgeltlich zurückgeben.
-
Page 33: Présentation Du Produit
Présentation du produit Lisez a entivement ce manuel avant toute utilisation et conservez-le pour pouvoir le consulter ultérieurement. Zone d'éclairage Points de contact électrique Rampe lumineuse Port d'alimentation Points de contact de type-C (à l'arrière) électrique Pince Socle... - Page 34 Poignée Câble de charge de type-C Télécommande Piles AAA x 2 (vendues séparément) Remarque : Les piles AAA x 2 ne sont pas intégrées et vendues séparément. les illustrations du produit, les accessoires et l’interface utilisateur présents dans le manuel d'utilisation sont uniquement fournis à...
- Page 35 Installation 1. Installer la rampe lumineuse Avec la zone d'éclairage orientée vers le bas, relier les points de contact électrique sur la rampe lumineuse à ceux sur le socle. Placer le socle sur le centre supérieur de l'écran, se rassurer que la pince est bien fixé sur le moniteur et que la base du socle est contre l'arrière du moniteur.
- Page 36 2. Installer les piles de la télécommande Me re la télécommande avec le coussinet antidérapant orienté vers le bas sur votre ⑴ paume de main, puis tenir pour tourner la télécommande dans le sens contraire des aiguilles d'une montre avec l'autre main pour ouvrir le couvercle arrière. Installer les deux piles AAA (vendues séparément).
-
Page 37: Connexion À L'alimentation Électrique
Le câble de charge original est conçu uniquement pour le Mi Computer Monitor Light Bar. Toute charge ou transmission de données rapide par ce câble de charge n'est pas pris en charge. - Page 38 2. Contrôle de la lumière Appuyer la poignée sur la télécommande pour allumer/éteindre la lumière. Après avoir allumé la lumière, roter la poignée sur la télécommande pour régler la luminosité. Appuyer et maintenir la poignée tout en le rotant simultanément pour régler la température chromatique.
-
Page 39: Caractéristiques
Caractéristiques Modèle : MJGJD01YL Température de couleur : Température de fonctionnement : 2700-6500 K -10 °C à + 40 °C Indice de rendu des couleurs : Ra95 Humidité de fonctionnement : 0-85 % HR Flux lumineux : 270 lm Durée de vie : 25.000 heures Entrée nominale : 5 V Coefficient de puissance : >... - Page 40 Lors du ne oyage de la surface de la rampe lumineuse, utiliser un tissu en coton doux. Ne jamais utiliser des solvants corrosifs. Lors de l'installation ou du déplacement de la rampe lumineuse, veuillez prendre la rampe lumineuse et le socle, afin d'éviter d'endommager le produit ou de causer des blessures corporelles à...
- Page 41 réglementation locale, afin d'éviter la pollution de l'environnement. La source lumineuse contenue dans ce luminaire ne doit être remplacée que par le fabricant ou son agent de maintenance ou une personne de qualification équivalente. Ce produit est conçu pour une utilisation domestique uniquement. Dans des conditions normales d’utilisation, cet équipement doit être maintenu à...
- Page 42 Réglementation DEEE et informations sur la mise au rebut et le recyclage Tous les produits portant ce symbole deviennent des déchets d’équipements électriques et électroniques (DEEE dans la Directive européenne 2012/19/UE) qui ne doivent pas être mélangés aux déchets ménagers non triés. Vous devez contribuer à la protection de l’environnement et de la santé...
-
Page 43: Descripción Del Producto
Descripción del producto Lea detenidamente este manual antes de usar el producto y consérvelo para futuras consultas. Zona de iluminación Puntos de contacto de corriente Barra de luz Puerto de alimentación Puntos de contacto de tipo C (en la parte posterior) de corriente Abrazadera Base... - Page 44 Perilla Cable de carga tipo C Mando a distancia 2 x Baterías AAA (vendidas por separado) Nota: Las 2 x baterías AAA no están incluidas y se venden por separado. Las ilustraciones del producto, los accesorios y la interfaz de usuario del manual de usuario son solo para fines de referencia.
-
Page 45: Instalación
Instalación 1. Instalar la barra de luz Con la zona de la luz hacia abajo, conecta los puntos de corriente de la barra de luz a los de la base. Coloca la base en la parte superior central del monitor, y asegúrate de que la abrazadera esté firmemente sujeta al monitor y que la parte inferior de la base esté... - Page 46 2. Instale las baterías del mando a distancia Ponga el mando a distancia con la almohadilla antideslizante hacia abajo en la palma ⑴ de la mano, y manténgalo apretado para girar el mando a distancia en sentido contrario a las agujas del reloj con otra mano para abrir la tapa trasera. Instale dos baterías AAA (vendidas por separado).
-
Page 47: Modo De Uso
El cable de carga original está diseñado para Mi Computer Monitor Light Bar solamente. No se admite ninguna carga rápida ni transmisión de datos mediante este cable de carga. - Page 48 2. Control de la luz Presione el botón del mando a distancia para encender o apagar la luz. Después de encender la luz, gire la perilla del mando a distancia para ajustar el brillo. Mantenga presionada la perilla y gírela simultáneamente para ajustar la temperatura del color.
-
Page 49: Especificaciones
Especificaciones Modelo: MJGJD01YL Temperatura del color: Temperatura de funcionamiento: -10 °C a 40 °C 2700-6500 K Humedad de funcionamiento: 0-85% HR Índice de Rendimiento de Color: Vida útil: 25.000 horas Ra95 Factor de potencia: > 0,9 Flujo lumínico: 270 lm Potencia nominal: Entrada nominal: 5 V 5 W (80 ×... - Page 50 Precauciones Un mando a distancia puede controlar varias barras de luz, pero una barra de luz sólo puede ser controlada por un mando a distancia. Al limpiar la superficie de la barra de luz, límpiela con un paño de algodón suave. No utilice nunca disolventes corrosivos.
-
Page 51: Declaración De Conformidad De La Ue
viejas para evitar la contaminación del medio ambiente. Las baterías deben retirarse del mando a distancia cuando no se utilice el mando a distancia durante mucho tiempo o cuando se vaya a desechar. Retire las baterías con pérdidas del mando a distancia y deséchelas de acuerdo con las normas y reglamentos locales para evitar la contaminación del medio ambiente. - Page 52 texto completo de la declaración de conformidad de la UE en esta dirección de Internet: h p://www.mi.com/global/service/support/declaration.html Directiva RAEE de información de eliminación y reciclaje Todos los productos que llevan este símbolo son residuos de aparatos eléctricos y electrónicos (RAEE según la directiva 2012/19/UE) que no deben mezclarse con residuos domésticos sin clasificar.
- Page 53 Panoramica del prodo o Leggere a entamente il presente manuale prima dell'uso del dispositivo e conservarlo per ogni riferimento futuro. Area di luce Punti di conta o dell'alimentazione Barra luminosa Porta di alimentazione Punti di conta o di tipo C (sul retro) dell'alimentazione Morse o...
- Page 54 Manopola Cavo di ricarica di tipo C Telecomando Ba erie AAA × 2 (vendute separatamente) Nota: Le ba erie AAA × 2 non sono incluse e vendute separatamente. le illustrazioni del prodo o, degli accessori e dell'interfaccia utente nel manuale utente sono esclusivamente a scopo di riferimento.
-
Page 55: Installazione
Installazione 1. Installare la barra luminosa Con l'area luminosa rivolta verso il basso, collegare i punti di conta o dell'alimentazione sulla barra luminosa a quelli sulla base. Posizionare la base nella parte centrale superiore del monitor e assicurarsi che il morse o sia saldamente fissato al monitor e che la parte inferiore della base sia contro il retro del monitor. - Page 56 2. Installare le ba erie del telecomando Posizionare il telecomando con il cuscine o antiscivolo rivolto verso il basso sul palmo ⑴ della mano, quindi tenerlo premuto per ruotare il telecomando in senso antiorario con un'altra mano per aprire il coperchio posteriore. Installare due ba erie AAA (vendute separatamente).
- Page 57 Il cavo di ricarica originale è proge ato solo per Mi Computer Monitor Light Bar. Qualsiasi ricarica rapida o trasmissione di dati tramite questo cavo di ricarica non è supportata.
- Page 58 2. Controllare la luce Premere la manopola sul telecomando per accendere/spegnere la luce. Dopo aver acceso la luce, ruotare la manopola del telecomando per regolare la luminosità. Tenere premuta la manopola e contemporaneamente ruotarla per regolare la temperatura del colore. Tenere premuta la manopola per due secondi, la luce sarà la migliore per il computer con la temperatura croma ica a 2700 K e la luminosità...
-
Page 59: Specifiche Tecniche
Specifiche tecniche Modello: MJGJD01YL Temperatura colore: 2700-6500 K Temperatura di esercizio: Da -10°C a 40°C Indice di resa cromatica: Ra95 Umidità di esercizio: 0-85% UR Flusso luminoso: 270 lm Vita utile: 25.000 ore Potenza nominale in ingresso: Fa ore di potenza: > 0,9 Potenza nominale: 5 W (80 ×... - Page 60 Precauzioni Un telecomando può controllare più barre luminose, ma una barra luminosa può essere controllata solo da un telecomando. Quando si pulisce la superficie della barra luminosa, pulirla con un panno di cotone morbido. Non utilizzare mai solventi corrosivi. Quando si installa o si sposta la barra luminosa, prendere sia la barra luminosa che la base per evitare danni al prodo o o lesioni personali causate dalla caduta di parti.
-
Page 61: Dichiarazione Di Conformità Ue
Le ba erie devono essere rimosse dal telecomando quando non viene utilizzato per lungo tempo o quando il telecomando viene eliminato. Rimuovere le ba erie che perdono dal telecomando e smaltirle secondo le norme e i regolamenti locali, in modo da evitare l'inquinamento ambientale. La fonte luminosa contenuta in questa lampada deve essere sostituita solo dal produ ore, da un agente di servizio o da altro personale qualificato. - Page 62 Informazioni sullo smaltimento e sul riciclaggio dei RAEE Tu i i prodo i contrassegnati da questo simbolo sono rifiuti di apparecchiature ele riche ed ele roniche (RAEE in base alla dire iva 2012/19/UE) che non devono essere smaltiti assieme a rifiuti domestici non differenziati. Alcontrario, è necessario proteggere l’ambiente e la salute umana consegnando i rifiuti a un punto di raccolta autorizzato al riciclaggio di rifiuti di apparecchiature ele riche ed ele roniche, predisposto dalla pubblica amministrazione o dalle autorità...
-
Page 63: Описание Изделия
Описание изделия Перед использованием внимательно прочтите это руководство. Сохраните его — оно может понадобиться вам в дальнейшем. Освещенная область Зарядка контактных точек Световая панель Порт электропитания Зарядка контактных с разъёмом Type-C точек Зажим (на тыльной стороне) Подставка электропитания... - Page 64 Ручка Кабель для зарядки с Пульт ДУ Щелочная батарея разъёмом Type-C типа AAА (2 шт.) (продаётся отдельно) Примечание. Щелочная батарея типа ААА (2 шт.) не входит в комплект и продаётся отдельно. Иллюстрации изделия, комплектующих и пользовательского интерфейса в руководстве пользователя представлены...
- Page 65 Установка 1. Установить световую панель Направляя световую панель вниз, соединить точки электропитания световой панели с точками на подставке электропитания. Поместить подставку электропитания в центр верхней части монитора и убедиться в надёжном креплении зажима на мониторе и что нижняя часть подставки электропитания прилегает...
- Page 66 2. Установить батареи в пульт ДУ Поместить пульт дистанционного управления противоскользящей накладкой вниз ⑴ на ладонь. Удерживая его, другой рукой повернуть пульт против часовой стрелки, чтобы открыть заднюю крышку. Установить две щелочные батареи тип AAА (продаются отдельно). Убедитесь, что ⑵ положительный...
- Page 67 Инструкция 1. Подключение к источнику питания Подсоединить кабель для зарядки к порту электропитания и к источнику питания. Примечания: Этот прибор может быть запитан от адаптера, блока питания или USB-порта электропитания компьютера с выходным напряжением 5 В и выходным током более 1 А. Источники питания должны иметь...
- Page 68 2. Управление освещением Для освещения нажмите кнопку вкл./выкл. на пульте ДУ. После включения освещения поверните ручку на пульте ДУ, чтобы отрегулировать яркость. Для настройки цветовой температуры нажмите и одновременно вращайте ручку. Для настройки оптимального освещения с цветовой температурой 2700 К и яркостью...
-
Page 69: Технические Характеристики
Технические характеристики Модель: MJGJD01YL Цветовая температура: 2700–6500 K Рабочая температура: От −10°C до 40°C Показатель цветопередачи: Ra95 Рабочая влажность: Световой поток: 270 лм Относительная влажность 0-85% Номинальный ввод: 5 В 1 А Срок службы: 25 000 часов Беспроводное подключение: 2,4 ГГц Коэффициент... -
Page 70: Меры Предосторожности
Меры предосторожности Один пульт дистанционного управления может управлять несколькими световыми панелями, но световая панель может управляться только с одного пульта ДУ. Для очистки поверхности световой панели протрите ее мягкой хлопчатобумажной тканью. Запрещается использовать агрессивные растворители. При установке или перемещении световой панели следует брать одновременно световую... -
Page 71: Декларация О Соответствии Нормам Ес
нормами и законами вашей страны. После замены утилизируйте использованные батарейки для избегания загрязнения окружающей среды. Необходимо извлекать батарейки из пульта ДУ, если он не будет использоваться на протяжении длительного времени или при его утилизации. Извлеките протекающие батарейки из пульта ДУ и для избегания загрязнения окружающей... - Page 72 Настоящим компанияQingdao Yeelink Information Technology Co., Ltd. заявляет, что тип радиооборудования MJGJD01YLсоответствует требованиям Директивы 2014/53/EU. Полный текст декларации о соответствии нормативным требованиям ЕС доступен по следующему адресу: h p://www.mi.com/global/service/support/declaration.html Информация об утилизации и переработке отходов электрического и электронного оборудования Все изделия, обозначенные символом раздельного сбора отработанного электрического...
- Page 73 Productoverzicht Lees vóór gebruik deze handleiding zorgvuldig door en bewaar deze om later te kunnen raadplegen. verlichtingsgebied Stroomcontactpunten Lichtbalk Type-C voedingspoort Stroomcontactpunten (aan de achterkant) Klem Voet...
- Page 74 Knop Type-C Oplaadkabel Afstandsbediening AAA Ba erijen x 2 (worden apart verkocht) Opmerking: AAA ba erijen x 2 zijn niet inbegrepen en worden apart verkocht. A eeldingen van het product, accessoires en UI in de gebruikershandleiding zijn alleen ter referentie. Het daadwerkelijke product en de functionaliteit kunnen variëren door productverbeteringen.
- Page 75 Installatie 1. Installeren van de lichtbalk Bevestig de stroomcontactpunten op de lichtbalk, met de verlichting naar beneden gericht, op die van de voet. Plaats de voet midden boven op de monitor, en zorg ervoor dat de klem stevig op de monitor is bevestigd en dat de onderkant van de voet tegen de achterkant van de monitor zit.
- Page 76 2. Installeren van de ba erijen van de afstandsbediening Leg de afstandsbediening met het antislipkussen naar beneden op uw handpalm en ⑴ houd deze vast om de afstandsbediening met een andere hand tegen de klok in te draaien om het klepje aan de achterkant open te maken. Plaats twee AAA ba erijen (worden apart verkocht).
- Page 77 Gebruik 1. Aansluiten op de stroomvoorziening Sluit de oplaadkabel aan op de voedingspoort en steek deze vervolgens in een stopcontact. Opmerkingen: Dit product kan worden gevoed door een adapter, powerbank of computer USB-voedingspoort met een uitgangsspanning van 5 V en een uitgangsstroom van meer dan 1 A. De voedingen moeten Safety Extra Low Voltage (SELV) (Veilig Extra Lage Spanning) zijn en de piekspanning mag niet hoger zijn dan 5,25 V.
- Page 78 2. Het licht bedienen Druk op de knop op de afstandsbediening om het licht in/uit te schakelen. Nadat het licht is ingeschakeld, draai aan de knop op de afstandsbediening om de helderheid aan te passen. Houd de knop ingedrukt en draai deze tegelijkertijd om de kleurtemperatuur aan te passen.
- Page 79 Specificaties Model: MJGJD01YL Kleurtemperatuur: 2700-6500 K Bedrijfstemperatuur: -10 °C tot 40 °C Kleurweergave-index: Ra95 Bedrijfsvochtigheid: Lichtstroom: 270 lm 0-85% relatieve luchtvochtigheid Nominale invoer: 5 V Levensduur: 25.000 uur Draadloze connectiviteit: 2,4 GHz Stroomfactor: > 0,9 Bedrijfsfrequentie: 2405-2470 MHz Nominaal vermogen: 5 W (80 × 0,2 W/LED module) Maximaal uitgangsvermogen: Afmetingen lichtbalk: Ø...
- Page 80 Voorzorgsmaatregelen Eén afstandsbediening kan meerdere lichtbalken bedienen, maar een lichtbalk kan maar door één afstandsbediening bediend worden. Voor het reinigen van de lichtbalk, veeg deze schoon met een zachte katoenen doek. Gebruik nooit bijtende oplosmiddelen. Houd bij het installeren of verplaatsen van de lichtbalk zowel de lichtbalk als de voet vast om schade aan het product of persoonlijk letsel te voorkomen door vallende onderdelen.
-
Page 81: Eu-Conformiteitsverklaring
ba erijen om milieuvervuiling te voorkomen. De ba erijen moeten verwijderd worden uit de afstandsbediening als de afstandsbediening langere tijd niet gebruikt wordt, of wanneer deze weggegooid wordt. Verwijder lekkende ba erijen uit de afstandsbediening, en gooi deze weg in overeenstemming met de plaatselijke regels en voorschri en om milieuvervuiling te voorkomen. - Page 82 van de EU-conformiteitsverklaring is beschikbaar op het volgende internetadres: h p://www.mi.com/global/service/support/declaration.html Informatie over recycling en verwijdering van AEEA Alle producten met dit symbool behoren tot afgedankte elektrische en elektronische apparatuur (AEEA zoals in Richtlijn 2012/19/EU) en mogen niet worden vermengd met ongesorteerd huishoudelijk afval.
-
Page 83: Ürüne Genel Bakış
Ürüne Genel Bakış Ürünü kullanmadan önce bu kılavuzu dikkatlice okuyun ve ileride başvurmak üzere saklayın. Aydınlık Alan Güç Temas Noktaları Işık Çubuğu Type-C Güç Bağlantı Güç Temas Noktaları Noktası (arkada) Kelepçe Taban... - Page 84 Tuş Type-C Şarj Kablosu Uzaktan Kumanda 2 x AAA Pil (ayrı satılır) Not: 2 x AAA pil dâhil değildir ve ayrı satılır. Kullanım kılavuzundaki ürün, aksesuar ve kullanıcı arayüzü çizimleri yalnızca referans amaçlı olarak sağlanmıştır. Ürün iyileştirmeleri nedeniyle asıl ürün ve işlevler farklılık gösterebilir.
- Page 85 Kurulum 1. Işık çubuğunu takın Işık kısmı aşağı doğru bakarken, ışık çubuğundaki güç bağlantı noktalarını tabanda bulunan noktalara takın. Tabanı monitörün üst kısmında ortaya yerleştirin ve kelepçenin monitöre sıkıca sabitlendiğinden ve tabanın alt kısmının monitörün arkasına dayandığından emin olun. 40° Notlar: 0-32mm Bu ürün;...
- Page 86 2. Uzaktan kumandanın pillerini yerleştirin Uzaktan kumandayı, kaymaz ped aşağı doğru bakacak şekilde avucunuzun içine koyun, ⑴ ardından arka kapağı açmak için diğer elinizle uzaktan kumandayı bastırarak saat yönünün tersine çevirin. İki adet AAA pili (ayrı olarak satılır) yerleştirin. Pozitif (+) ve negatif (-) kutupların doğru ⑵...
- Page 87 Kullanım 1. Güç kaynağına bağlayın Şarj kablosunu güç portuna bağlayın ve ardından bunu bir güç kaynağına takın. Notlar: Bu ürün; 5 V çıkış voltajına ve 1 A'dan daha yüksek çıkış akımına sahip bir adaptörle, taşınabilir şarj cihazıyla veya bilgisayardaki USB güç bağlantı noktasıyla çalıştırılabilir. Güç kaynakları Çok Düşük Güvenlik Gerilimi (SELV) olmalıdır ve tepe gerilimi 5,25 V değerini geçmemelidir.
- Page 88 2. Işığı kontrol edin Işığı açmak/kapatmak için uzaktan kumanda üzerindeki tuşa basın. Işığı açtıktan sonra, parlaklığı ayarlamak için uzaktan kumanda üzerindeki tuşu çevirin. Renk sıcaklığını ayarlamak için tuşa basılı tutun ve aynı anda tuşu çevirin. Tuşu iki saniyeliğine basılı tutun, ışık renk sıcaklığı 2700K ve parlaklığı %50 olan bilgisayar için en iyi konuma gelecektir.
- Page 89 Belirtimler Model: MJGJD01YL Renk Sıcaklığı: 2700-6500 K Çalışma Sıcaklığı: -10 °C ila 40 °C Renksel Geriverim İndeksi: Ra95 Çalışma Nemi: %0-85 bağıl nem Işık akısı: 270 lm Hizmet Ömrü: 25.000 saat Nominal Giriş: 5 V Güç Faktörü: > 0,9 Kablosuz Bağlantı: 2,4 GHz Nominal Güç: 5 W (80 ×...
- Page 90 Önlemler Bir uzaktan kumanda birden fazla ışık çubuğunu kontrol edebilir; ancak bir ışık çubuğu sadece bir uzaktan kumanda ile kontrol edilebilir. Işık çubuğunun yüzeyini temizlerken, yumuşak pamuklu bir bezle silin. Asla herhangi bir aşındırıcı çözücü kullanmayın. Işık çubuğunu yerleştirirken veya taşırken, ürüne zarar vermekten veya düşen parçalardan kaynaklanan bireysel yaralanmalardan kaçınmak için lütfen hem ışık çubuğunu hem de tabanı...
- Page 91 Uzaktan kumanda uzun süre kullanılmadığında veya atılırken, uzaktan kumandanın içindeki piller çıkarılmalıdır. Sızma yapan pilleri uzaktan kumandadan çıkarın ve çevre kirliliğini önlemek için yerel kurallara ve düzenlemelere uygun bir şekilde atın. Bu lambanın içinde bulunan ışık kaynağı yalnızca imalatçı veya imalatçının yetkili servisi ya da benzer yetkilere sahip birisi tarafından değiştirilir.
- Page 92 WEEE İmha ve Geri Dönüşüm Bilgileri Bu sembolü taşıyan tüm ürünler, elektrikli ve elektronik ekipman atıklarıdır (2012/19/EU sayılı direkti e WEEE olarak belirtilmiştir) ve bunların sınıflandırılmamış evsel atıklarla birlikte atılmaması gerekir. Bunun yerine ekipman atıklarınızı, elektrikli ve elektronik ekipman atıklarının geri dönüşümü için devlet veya yerel makamlar tarafından belirlenmiş...
- Page 94 ) AAA× 2 AAA × 2...
- Page 95 40° 0-32mm iMacs...
- Page 96 ⑴ ) AAA ⑵ ⑶ ⑷...
- Page 97 5.25 (VELS)
- Page 98 2700 25°...
- Page 99 MJGJD01YL : 10- : %85–0 : 25,000 : 0.9 < : 0.2 × 80) (LED Ø23 × 448 : Ø66.5 × 34 : 6500–2700 : Ra95 : 270 : 2.4 : 2470-2405 : 10 :...
- Page 101 , Qingdao Yeelink Information Technology Co, Ltd EU/2014/50 MJGJD01YL h p://www.mi.com/global/service/support/declaration.html...
- Page 102 ) WEEE WEEE) (EU/2012/19...
- Page 103 ภาพรวมผลิ ต ภั ณ ฑ์ อ่ า นคู ่ ม ื อ ฉบั บ นี ้ ใ ห้ ล ะเอี ย ดก่ อ นใช้ ง าน และควรเก็ บ ไว้ ใ ช้ อ ้ า งอิ ง ในอนาคต พ ื ้ น ท ี ่ แ สง จุ...
- Page 104 ปุ ่ ม สายชาร์ จ ประเภท C รี โ มทคอนโทรล ถ่ า น AAA × 2 (แยกจำหน่ า ย) หมายเหตุ : ถ่ า น AAA × 2 ไม่ ร วมอยู ่ ใ นผลิ ต ภั ณ ฑ์ และแยกจำหน่ า ย ภาพของผลิ...
- Page 105 การติ ด ตั ้ ง 1. การติ ด ตั ้ ง ไลท์ บ าร์ จั ด ให้ พ ื ้ น ที ่ แ สงหั น หน้ า ลง ติ ด จุ ด สั ม ผั ส กำลั ง ไฟฟ้ า บนไฟไลท์ บ าร์ ก ั บ จุ ด บนฐาน วางฐานบนตรงกลางด้...
- Page 106 2. การใส่ ถ ่ า นรี โ มทคอนโทรล วางรี โ มทคอนโทรลซึ ่ ง มี แ ผ่ น กั น ลื ่ น ให้ ห ั น หน้ า ลงบนฝ่ า มื อ ของคุ ณ ⑴ จากนั ้ น ใช้ ม ื อ อี ก ข้ า งหนึ ่ ง จั บ และหมุ น รี โ มทคอนโทรลทวนเข็ ม นาฬิ ก าเพื ่ อ เปิ ด ฝาหลั ง ใส่...
- Page 107 วิ ธ ี ก ารใช้ 1. การเชื ่ อ มต่ อ เข้ า กั บ แหล่ ง จ่ า ยไฟ เชื ่ อ มต่ อ สายชาร์ จ เข้ า กั บ พอร์ ต จ่ า ยไฟ จากนั ้ น จึ ง เสี ย บพอร์ ต จ่ า ยไฟเข้ า ไปในแหล่ ง จ่ า ยไฟ หมายเหตุ...
- Page 108 2. การควบคุ ม ไฟ กดปุ ่ ม บนรี โ มทคอนโทรลเพื ่ อ เปิ ด /ปิ ด ไฟ หลั ง จากเปิ ด ไฟแล้ ว ให้ ค ุ ณ หมุ น ปุ ่ ม บนรี โ มทคอนโทรลเพื ่ อ ปรั บ ความสว่ า ง กดปุ ่ ม ค้ า งไว้ แ ละและหมุ น ปุ ่ ม ไปพร้ อ มกั น เพื ่ อ ปรั บ อุ ณ หภู ม ิ ส ี กดปุ...
- Page 109 ข้ อ มู ล จำเพาะ รุ ่ น : MJGJD01YL อุ ณ หภู ม ิ ส ี : 2700–6500 K อุ ณ หภู ม ิ ก ารทำงาน: -10°C ถึ ง 40°C ดั ช นี ค วามถู ก ต้ อ งของสี : Ra95 ความชื...
- Page 110 ข้ อ ควรระวั ง รี โ มทคอนโทรลหนึ ่ ง อั น สามารถควบคุ ม ไฟไลท์ บ าร์ แ บบหลายอั น ได้ แต่ ไ ฟไลท์ บ าร์ อ ั น เดี ย วสามารถควบคุ ม ได้ ด ้ ว ยรี โ มทคอนโทรลเพี ย งอั น เดี ย วเท่ า นั ้ น เมื...
-
Page 111: Visão Geral Do Produto
Visão geral do produto Leia este manual com atenção antes de utilizar o produto e guarde-o para referência futura. Área de luz Pontos de contacto de energia Barra de luz Porta de energia Pontos de contacto Tipo-C (na parte de trás) de energia Braçadeira Base... - Page 112 Puxador Cabo de carregamento Controlo remoto Baterias AAA x 2 de Tipo-C (vendidas separadamente) Nota: Baterias AAA x 2 não estão incluindas e são vendidas separadamente. As ilustrações do produto, os acessórios e a interface de utilizador no manual do utilizador são apenas para referência.
- Page 113 Instalação 1. Instale a barra de luz Com a área da luz direcionada para baixo. Junte os pontos de contacto de energia da barra de luz aos da base. Coloque a base na parte superior do centro do monitor, e certifique-se que a braçadeira está firmemente segura no monitor e que o fundo da base está...
- Page 114 2. Instale as baterias do controlo remoto Coloque o controlo remoto com o tapete antiderrapante virado para baixo, em direção ⑴ à sua palma da mão, depois prima para ligar o controlo remoto em sentido inverso ao movimento dos ponteiros do relógio, com a outra mão para abrir a tampa de trás. Instale duas baterias AAA (vendidas separadamente).
-
Page 115: Como Utilizar
Como utilizar 1. Conectar a uma fonte de alimentação Conecte o cabo de carregamento à porta de energia e depois ligue-o a uma fonte de alimentação. Notas: Este produto pode ser carregado por um adaptador, banco de energia, ou porta de energia conectada ao computador via USB com uma porta de saída com a voltagem de 5 V e uma porta de saída currente maior que 1 A. - Page 116 2. Controlo de luz Pressione a mola no controlo remoto para ligar ou desligar a luz. Depois de ligar a luz, gire a mola no controlo remoto para ajustar a luminosidade. Prima e pressione a mola enquando simultaneamente girar a mesma, para ajustar a cor da temperatura.
- Page 117 Especificações Modelo: MJGJD01YL Temperatura da cor: 2700-6500 K Temperatura operacional: -10 °C a 40 °C Índice de rendição de cor: Ra95 Humidade operacional: 0-85% RH Fluxo luminoso: 270 lm Tempo de vida: 25.000 horas Entrada padrão: 5 V Fator de potência: > 0,9 Ligação sem fios: 2,4 GHz Energia padrão: 5 W (80 ×...
- Page 118 Precauções Um controlo remoto pode controlar múltiplas barras de luz, mas uma barra de luz só pode ser controlada por apenas um controlo remoto. Quando limpar a super cie da barra de luz, limpe-a com um pano suave de algodão. Nunca use quaisquer solventes corrosivos.
-
Page 119: Declaração De Conformidade Da Ue
As baterias devem ser removidas do controlo remoto quando o controlo remoto não for usado durante bastante tempo, ou quando este for descartado. Remova baterias com fugas, do controlo remoto e descarte as baterias de acordo com as regras locais e regulamentos para evitar poluição ambiental. A fonte de luz contida nesta lâmpada deverá... - Page 120 Informações sobre a eliminação e reciclagem de REEE Todos os produtos que apresentem este símbolo são considerados resíduos de equipamentos elétricos e eletrónicos (REEE, conforme a Diretiva 2012/19/UE), não devendo ser misturados com resíduos domésticos indiscriminados. Em vez disso, o utilizador deve proteger a saúde humana e o meio ambiente e entregar o respetivo equipamento num ponto de recolha designado para reciclagem de resíduos de equipamentos elétricos e eletrónicos, indicado pelo governo ou pelas autoridades...
- Page 121 製品紹介 ご使用前にこの説明書をよくお読みください。また、いつでも参照できるよう保管 してください。 発光エリア 電源接続部 ライト本体 Type-C電源ポート 電源接続部 (裏面) 留め具 スタンド...
- Page 122 つまみ USB Type-C電源コード リモコン 単4乾電池×2(別売) 注意: 使用に必要な単4乾電池は別売りです。 説明書記載の製品、付属品、ユーザーインターフェースなどの画像はイメージです。製品の更新や改良 のため、実際の製品とイメージが多少異なる場合があります。その場合実物に準じます。...
- Page 123 設置方法 1.ライト本体を設置する 発光エリアを下に向け、本体の電源接続部とスタンドの 電源部を取り付けます。 スタンドをディスプレイ上方の真ん中に置き、 固定できるように留め具をディスプレイの 裏に当てて調整します。 40° 注意: 0-32mm 本製品は厚さ≦32mmのディスプレイに対応しております。 厚さ<10mmのディスプレイにも使用可能ですが、不安定に なる場合があります。 スタンドの重力軸の調整可能な角度は40°です。過度な力で 引っ張らないでください。 ノートパソコンでの利用は推奨外となります。...
- Page 124 2.リモコンの電池を入れる 一つの手でリモコン下の両端を持ち、もう一つの手で底の滑り止めを押し、左回りで ⑴ 回すと、裏の蓋を開けることができます。 電池収納部のプラス・マイナスマークに合わせて2本の単4乾電池を入れます(別売)。 ⑵ 底にある三角形の矢印と滑り止めマットのロックのマークを一致させて蓋を閉めます。 ⑶ 一つの手でリモコン下の両端を持ち、もう一つの手で底の滑り止めを押し、右回 ⑷ りで回すと、裏の蓋を閉めることができます。これで取り付け完了となります。 蓋を開ける時 蓋を取り付ける時...
- Page 125 使用方法 1. 電源に接続する 電源コードを電源ポートに接続してから電源を入れます。 注意: 本製品は出力電圧が5Vで、出力電流が1Aより大きいACアダプタ、モバイル電源またはパソコンの USBポートに接続できます。電源は安全超低電圧(SELV)にする必要があり、最大電圧は5.25V を超えてはなりません。 本製品付属の電源コードを使ってください。USB延長線またはスプリッターを使わないでください。 掛け式ライトの異常を引き起こす可能性があります。 電源入力に5Vの電圧を直接に出力できない高速充電ACアダプタを使わないでください。 掛け式ライトが点滅したり、ノイズが出たりした場合、ただちに給電デバイスから取り外してください。 ライトかスタンドの電源接続部をそのほかの金属導体に接続しないでください。製品の損害かそ のほかの危険を引き起こす原因になります。 オリジナル電源コードはMi モニター掛け式ライト専用付属品です。そのほかのデバイスによる 高速充電やデータ転送のための利用は推奨外です。...
- Page 126 ⒉ 明るさを調整する リモコンのつまみを短く押すと、ライトが点灯します。 点灯後、リモコンのつまみを回すと、明るさが調整できます;リモコンのつまみを長 押ししながら回すと、色温度が調節できます;リモコンのつまみを2秒以上長押しすると、 デフォルト設定された明るさになります(2700K色温度、50%照明度)。 注意:出荷の段階で、リモコンと掛け式ライトが既にペアリングされているため、そのまま使うこと ができます。 型番が同じだが同梱していない付属品でペアリングする必要がある場合、ライト本体の電源を入れて20秒 以内に、リモコンのつまみを長押しすると、掛け式ライトが点滅し、ペアリングに成功します。 3. 角度を調節する 25° 右記の図のように、ライトを回して掛け式ライトの角度を 調節します。角度の調節可能な範囲は25°です。...
- Page 127 基本パラメータ 製品型番:MJGJD01YL 色温度の範囲:2700—6500K 動作温度:-10℃ ~ 40℃ 発色指数:Ra95 動作湿度:0—85%RH 光束:270lm 動作寿命:25000時間 定格入力:5V パワーファクター:>0.9 無線接続:2.4GHz 定格出力:5W(80×0.2W/LEDモジュール) 動作周波数:2406-2468 MHz ライト寸法:φ23×448mm リモコン寸法:φ66.5×34mm...
- Page 128 注意事項 1つのリモコンで複数のライトに対応できますが、1つのライトは1つのリモコンに より制御されます。 製品の表面を掃除する際、やわらかい布で拭き取ってください。腐食性のある洗剤は 使用しないでください。 ライトを設置または移動する際、ライトとスタンドは同時に持ってください。落下 による怪我や故障の原因となります。 リモコンの電池を入れる際には電池の+と-の向きに注意してください。 充電に対応していない電池を充電しないでください。異なる種類の電池、および新 旧の電池を混在させないでください。 一定期間使用した後にリモコンの動作に異常が出た場合、電池の残量不足である可 能性があるため、電池を交換してください。古い電池は地域の法規則に従って安全 に処理してください。 本製品を長期間使用しない場合や廃棄をする場合は、必ず電池を取り出してください。 電池が液漏れした場合、速やかに本製品から電池を取り出して、地域の法規則に従 って安全に処理してください。...
- Page 129 本製品の電灯は修理業者以外による交換を推奨しておりません。 本製品は室内のみでご使用ください。 通常の条件において本製品を使用する際、アンテナと使用者の身体の間隔は20cm 以上空けるようにしてください。 設置する際、ライトとスタンドの給電部分の陽極・陰極の向きにご注意ください。...
- Page 130 제품 소개 제품 사용 전에 본 설명서를 자세히 읽고 적절하게 보관하세요. 발광 구역 전원 접촉점 등체 Type-C 전원 접구 전원 접촉점 (뒷면) 고정가지 스탠드...
- Page 131 회전버튼 Type-C 전원 케이블 리모컨 7호 배터리×2(따로 구매 필요) 안내: 같이 사용하기를 위해 7호 배터리 2개 구매 필요. 사용 설명서의 제품, 액세서리, 사용자 인터페이스 등의 그림은 참고용입니다. 제품 업데이트 및 업그레이드로 인해 실제 제품 및 회로도가 약간 다를 수 있습니다. 실제 제품을 참조하십시오.
- Page 132 설치 1. 라이트 설치 발광 구역이 위로 향하고 등체 전원 접촉점을 스탠드 전원 접촉점에 부착해서 연결합니다. 스탠드를 스크린 위에 중간 위치에 놓아서 고정가지를 모니터 스크린에 고정시키고 스탠드 밑에 모니터 뒷면에 기대시킵니다. 40° 안내: 0-32mm 본 제품이 두께 ≤32mm의 모니터에 적용하고 갈치스키린, 곡면스크린, iMac등에...
- Page 133 2. 리모컨 배터리 설치 한 손이 리모컨 밑에 계선을 잡고 남은 손이 밑에 논슬립 매트를 누르며 시계 반대 ⑴ 방향으로 회전해서 바로 리모컨 뒷면 뚜껑을 켭니다. 배터리창 음양극에 7호 배터리 2개 설치 완료됩니다.(따로 구매 밀요) ⑵ 밑에 계선의 삼각 화살촉을 논슬립 매트 자물쇠 고리 표시 구역과 맞춰서 뒷면 뚜껑 ⑶...
- Page 134 사용 1. 전원 연결 전원 케이블을 전원 연결 포트에 연결한 뒤 전원을 연결합니다. 안내: 본 제품이 수출이 5V 의 전압에 연결될 수 있고 수출 전류이 1A 보다 큰 어댑터, 이동 전원이나 컴퓨터 USB 접구에 전략 제공할 수 있습니다. 전원 공급 장치는 안전 특별저압 (SELV)이어야 하며 피크...
- Page 135 2. 라이트 제어 짧게 리모컨 회전버튼을 누르면 라이트 켜기/끄기. 라이트를 켠 후 리모컨 회전버튼을 회전하고 광도 조절합니다. 길게 느로기 동시에 리모컨 회전버튼을 누르면 색온도를 조절합니다. 길게 리모컨 회전버튼을 2초 누르면 라이트 컴퓨터 모드(2700K색온도, 50% 광도)에 들어갑니다. 안내: 공장 나올 때 리모컨과 라이트는 연결 완료되었고 직접 사용할 수 있습니다. 동일한 모델 기타 비공장...
- Page 136 기본 사양 제품 모델: MJGJD01YL 색온도 범위: 2700—6500K 작동 온도: -10℃ ~ 40℃ 연색지수: Ra95 작동 습도: 0%—85%RH 광통량: 270lm 작업 수명: 25000시간 정격 입력: 5V 역률인소: >0.9 무선연결: 2.4GHz 정격출력: 5W (80×0.2W/LED 모듈) 작동 주파수: 2405-2470 MHz 등체 크기: φ23×448mm 최대...
- Page 137 주의사항 한 리모컨은 여러 라이트를 제어할 수 있고 한 라이트는 하나의 리모컨한테 제어할 수 있습니다. 제품 표면을 청소할 때는 부식성 솔벤트가 아닌 부드러운 천으로 닦아야 합니다. 라이트가 떨어질 때 손상이나 손해를 피하려는 잔등을 설치나 이동할 때 동시에 등체와 스탠드를 빼버리세요. 리모컨이...
- Page 138 규정에 따라 폐기하십시오. 이 등기구의 광원은 제조자 또는 그 서비스 대리인 또는 유사한 자격을 갖춘 사람으로 교체되어야 합니다. 본 제품은 실내에서만 사용할 수 있습니다. 일반적인 사용 상황에서 본 장비는 안테나와 사용자의 신체 사이에 최소 20cm의 거리를 유지해야 합니다. 설치 시 등체이 스탠드의 전원 제공 포인트 음양극과 맞추는 것을 주의하세요.
-
Page 139: Aperçu Du Produit
Aperçu du produit Lisez a entivement ce manuel avant de l'utiliser et conservez-le pour toute référence ultérieure. Zone lumineuse Points de contact électrique Barre lumineuse Port d'alimentation de Points de contact Type-C (à l'arrière) Élément de fixation électrique Base... - Page 140 Poignée Câble de recharge de Type-C Télécommande Ba eries AAA × 2 (vendues séparément) Remarque : Les ba eries AAA × 2 ne sont pas incluses et sont vendues séparément. Les illustrations du produit, des accessoires et de l'interface utilisateur présents dans le manuel d'utilisateur sont uniquement fournis à...
- Page 141 Installation 1. Installer la barre lumineuse Avec la zone lumineuse orientée vers le bas, fixer les points de contact électrique sur la barre lumineuse sur ceux sur la base. Placer la base sur le milieu supérieur de l'écran et s'assurer que l'élément de fixation est bien fixé sur l'écran et que la partie inférieure de la base est contre l'arrière de l'écran.
- Page 142 2. Installer les ba eries de la télécommande Placer la télécommande avec le tampon antidérapant orienté vers le bas sur votre ⑴ paume de main, puis tenir pour tourner la télécommande dans le sens contraire des aiguilles d'une montre avec l'autre main pour ouvrir le couvercle arrière. Installer deux ba eries AAA (vendues séparément).
- Page 143 Mode d'emploi 1. Connecter à l'alimentation électrique Connecte le câble de recharge au port d'alimentation, puis le brancher à une alimentation électrique. Remarques : Ce produit peut être alimenté par un adaptateur, une réserve d'énergie portative ou un port d'alimentation USB d'un ordinateur ayant une tension de sortie de 5 V et un courant de sortie supérieur à...
- Page 144 2. Contrôler la lumière Appuyer la poignée sur la télécommande pour allumer/éteindre la lumière. Après avoir allumé la lumière, tourner la poignée sur la télécommande pour régler le luminosité. Appuyer et maintenir la poignée tout en la tournant simultanément pour régler la température de couleur.
-
Page 145: Spécifications
Spécifications Modèle : MJGJD01YL Température de couleur : 2700–6500 K Température de fonctionnement : -10 °C à 40 °C Indice de restitution de couleur : Ra95 Humidité de fonctionnement : 0–85 % HR Flux lumineux : 270 lm Durée d'utilisation : 25 000 heures Puissance absorbée nominale: 5 V Facteur de puissance : >... - Page 146 Précautions Une télécommande peut contrôler plusieurs barres lumineuses, mais une barre lumineuse peut uniquement être contrôlée par une télécommande. Lors du ne oyage de la surface de la barre lumineuse, utiliser un tissue en coton doux pour la ne oyer. Ne jamais utiliser des solvants corrosifs. Lors de l'installation ou du retrait de la barre lumineuse, veuillez prendre la barre lumineuse et la base, afin d'éviter d'endommager le produit ou des blessures corporelles du fait des pièces qui tombent.
- Page 147 Après avoir remplacé les ba eries de la télécommande, veuillez recycler les vieilles ba eries pour éviter la pollution environnementale. Les ba eries doivent être enlevées de la télécommande lorsque la télécommande n'est pas utilisée pendant longtemps ou lorsqu'elle est en cours d'élimination. Enlever les ba eries qui coulent de la télécommande et les éliminer conformément aux règles et réglementations locales, afin d'éviter la pollution environnementale.
- Page 148 Le présent appareil est conforme aux CNR d'Industrie Canada applicables aux appareils radio exempts de licence. L'exploitation est autorisée aux deux conditions suivantes : (1) l'appareil ne doit pas produire de brouillage, et (2) l'utilisateur de l'appareil doit accepter tout brouillage radioélectrique subi, même si le brouillage est susceptible d'en comprome re le fonctionnement.
- Page 149 주소: F10-B4, Bldg. B, International Innovation Park, 1# Keyuanweiyi Rd., Laoshan District, Qingdao, 266101, Shandong, China 자세한 내용은 www.mi.com에서 확인해 주십시오. Fabriqué pour : Xiaomi Communications Co., Ltd. Fabriqué par : Qingdao Yeelink Information Technology Co., Ltd. (une entreprise de l'écosystème Mi) Adresse : 10F-B4, Building B, Qingdao International Innovation Park, No.1...
- Page 150 Fabricado para: Xiaomi Communications Co., Ltd. Fabricante: Qingdao Yeelink Information Technology Co., Ltd. (uma empresa Mi Ecosystem) Morada: 10F-B4, Building B, Qingdao International Innovation Park, No.1 Keyuan Weiyi Road, Laoshan District, Qingdao City, Shandong Province, P.R.China Para mais informações, consulte o site www.mi.com 販売元:Xiaomi Communications Co., Ltd.
- Page 151 1#Keyuanweiyi Rd , Laoshan, Qingdao, 266101, Shandong, China : 10F-B4, Bldg.B, International Innovation Park, www.mi.com ผลิ ต เพื ่ อ : Xiaomi Communications Co., Ltd. ผลิ ต โดย: Qingdao Yeelink Information Technology Co., Ltd. (บริ ษ ั ท ในระบบนิ เ วศ Mi) ที...
- Page 152 Keyuan Weiyi Road, Laoshan District, Qingdao City, Shandong Province, P.R.China Ga voor meer informatie naar www.mi.com Şu şirket için üretildi: Xiaomi Communications Co., Ltd. Üretici: Qingdao Yeelink Information Technology Co., Ltd. (Mi Ekosisteminde yer alan şirketlerden biri) Adres: 10F-B4, Building B, Qingdao International Innovation Park, No.1 Keyuan Weiyi Road, Laoshan District, Qingdao City, Shandong Province, P.R.China...
- Page 153 Fabbricato per: Xiaomi Communications Co., Ltd. Fabbricato da: Qingdao Yeelink Information Technology Co., Ltd. (una società Mi Ecosystem) Indirizzo: 10F-B4, Building B, Qingdao International Innovation Park, No.1 Keyuan Weiyi Road, Laoshan District, Qingdao City, Shandong Province, P.R.China Per ulteriori informazioni, visitare il sito www.mi.com Изготовлено...
- Page 154 Fabriqué pour : Xiaomi Communications Co., Ltd. Fabriqué par : Qingdao Yeelink Information Technology Co., Ltd. (une société Mi Ecosystem) Adresse : 10F-B4, Building B, Qingdao International Innovation Park, No.1 Keyuan Weiyi Road, Laoshan District, Qingdao City, Shandong Province, P.R.China Pour plus d’informations, consultez le site www.mi.com...
- Page 155 Manufactured for: Xiaomi Communications Co., Ltd. Manufactured by: Qingdao Yeelink Information Technology Co., Ltd. (a Mi Ecosystem company) Address: 10F-B4, Building B, Qingdao International Innovation Park, No.1 Keyuan Weiyi Road, Laoshan District, Qingdao City, Shandong Province, P.R.China For further information, please go to www.mi.com Hergestellt für: Xiaomi Communications Co., Ltd.
- Page 156 委 託 方:小米通訊技術有限公司 製 造 商:青島易來智能科技股份有限公司 (小米生態鏈企業) 製造商地址:青島市嶗山區科苑緯一路1號青島國際創新園 B座10層B4 製造商電話:+86 400 619 7969 產 地:中國 進 囗 商:台灣小米通訊有限公司 進口商地址:臺北市中正區新生南路1段50號2樓之2 服 務 電 話:02-77255376 本產品售後服務請查詢官網:www.mi.com/tw/service (以下訊息僅供香港市場適用) 服務電話:852-30773620 本產品售後服務請查詢官網:www.mi.com/hk/service...
Need help?
Do you have a question about the mi Computer Monitor Light Bar and is the answer not in the manual?
Questions and answers