Table of Contents
Advertisement
Quick Links
gomerlin.com.au
gomerlin.co.nz
capable
MR855MYQ
Garage Roller Door Opener
Installation and Operating Instructions
Australia
New Zealand
Owners Copy: SAVE THESE INSTRUCTIONS for future reference
This manual contains IMPORTANT SAFETY information
DO NOT PROCEED WITH THE INSTALLATION BEFORE READING THOROUGHLY
Advertisement
Table of Contents

Related Manuals for Chamberlain Merlin SilentDrive Elite MR855MYQ


Summary of Contents for Chamberlain Merlin SilentDrive Elite MR855MYQ
- Page 1 gomerlin.com.au gomerlin.co.nz capable MR855MYQ Garage Roller Door Opener Installation and Operating Instructions Australia New Zealand Owners Copy: SAVE THESE INSTRUCTIONS for future reference This manual contains IMPORTANT SAFETY information DO NOT PROCEED WITH THE INSTALLATION BEFORE READING THOROUGHLY...
-
Page 2: Table Of Contents
SAFETY INSTRUCTIONS WARNING Failure to comply with the following instructions may result in serious injury or property damage. • Read and follow all instructions carefully. • The garage door opener is designed and tested to offer safe service provided it is installed and operated in strict •... -
Page 3: Carton Inventory
INTRODUCTION CARTON INVENTORY TOOLS REQUIRED Quik start guide Ladder Stop collar Adjustable wrench for U-bolts already installed on the door Clamp bracket, plates, washers (2) and nuts (2) 8 mm socket, 10 mm socket and 13 mm extended socket and socket wrench E970M four button remote control (2) 300 mm socket extension (for minimum side-room E148M four button wireless wall mount remote control (1) -
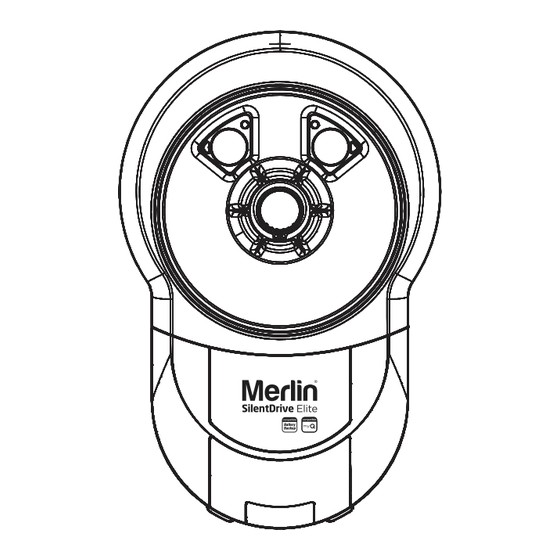
Page 4: Control Panel
INTRODUCTION CONTROL PANEL Terminal Block: used for external accessories (see chart below). NOTE: The terminal block is behind a plastic cover in the back housing. Use a small screwdriver to lever open the plastic cover if access to the terminal block is required. All wires should be secured appropriately. FUNCTION POLARITY COMMENT... -
Page 5: Prepare & Test The Door
INSTALLATION TESTING THE DOOR Complete the following test to ensure your door is well balanced, and not sticking or binding: • Disable all locks and remove any ropes connected to the garage door. • Lift the door to about halfway and then release it. The door should remain spring balanced. -
Page 6: Pinning The Door
INSTALLATION PINNNG THE DOOR Free curtain Ballooning Add fasteners here Note: A ballooning door may delay the safety reversal response and can compromise garage door security. • To remedy any ballooning, insert the supplied self tapping metal screws into where the curtain leaves the roll. Secure these through the curtain into the drum wheel at each end of the roll. - Page 7 INSTALLATION ATTACHING EXTENSION POLES (IF REQUIRED) Extension pole Optional accessory not provided • Insert the extension poles into the drive legs. • Align the holes on the extension poles with the holes on the drive legs. • Using the screws provided, secure the extension poles. •...
-
Page 8: Installation Procedure
INSTALLATION INSTALLATION PROCEDURE Do not allow people to walk under or around the door during the installation process as serious injury can occur. NOTE: The opener can be installed on either side of the door. The following instructions are for RIGHT HAND INSTALLATIONS Rope (as illustrated i.e. -
Page 9: Adjustment & Testing
INSTALLATION SETTING THE LIIMITS FOR RIGHT OR LEFT HAD OPERATION AND FORCE Travel limits set how far your door goes up and down. Your opener must also be configured for right or left hand installation. If not the door will rotate in the reverse direction. Program Buttons: The Control Panel diagram in section 4 identifies the Control Buttons and LED layout Audible Beep: An audible “BEEP”... - Page 10 INSTALLATION TESTING THE SAFETY REVERSE SYSTEM The safety reverse system test is important. The garage door must reverse on contact with a 40 mm obstacle laid flat on the floor. Failure to properly adjust the opener may result in serious personal injury from a closing garage door.
-
Page 11: Timer To Close
PROGRAMMING TIMER TO CLOSE FEATURE (TTC) Auto close is NOT recommended for households with young children.personal injury from a closing garage door. TIMER TO CLOSE feature: (TTC) 10 to 180 seconds. NOTE: The Protector System (IR Beams) MUST be installed before TTC will operate. -
Page 12: Audible Beep
PROGRAMMING AUDIBLE BEEP (OPTIONAL) The SilentDrive Elite (MR855MYQ) has been factory set for an audible “BEEP”. The Audible beep can be turned OFF by using the following method. • Start with the door fully CLOSED. Flash x 2 AUDIBLE • Press and Hold both “S”... -
Page 13: Wireless Programming
PROGRAMMING WIRELESS PROGRAMMING (REMOTE ACCESSORIES) NOTE: The transmitters supplied with your opener are preprogrammed by the factory. Activate the opener only when door is in full view, free of obstruction and properly adjusted. No one should enter or leave the garage while the door is in motion. Do not allow children to operate push buttons or remotes. -
Page 14: Operating Your Opener
OPERATION AND CARE OR YOUR OPENER OPERATION OF YOUR OPENER CARE OF YOUR OPENER Your opener can be activated by any of the following devices: When properly installed, your opener will operate with minimal maintenance. The opener does not require additional •... -
Page 15: Wiring
WIRING SECTION TYPICAL WIRING DIAGRAM SILENTDRIVE ELITE (MR855MYQ) Information for Service Personnel External Receiver 24 vdc white black Wired Wall Button Obstruction Detection Beams REPLACE BATTERIES IN TRANSMITTERS Battery of the transmitters: The batteries in the transmitter have a long life. If the transmission range decreases, the batteries should be replaced. -
Page 16: Troubleshooting
TROUBLESHOOTING TROUBLESHOOOTING The opener will not operate from either the UP/DOWN The door opens but will not close (or reverses while activation button or the transmitters: closing): • Does the opener have electric power? Plug a lamp into the • Is something obstructing the door? Pull the manual release outlet. -
Page 17: Accessories And Spare Parts
827AU E840M M-BBU24V NOTE: Use of any Chamberlain Group accessoriesare approvedtouse with this opener.This includes genuine Merlin accessories. Generic compatible accessories are NOT approved for use with this opener. SPARE PARTS If the supply cord is damaged, it must be... -
Page 18: Diagnostic Chart
If door is not binding or sticking, reset the limits (refer to “Program the Travel Limits and Force” section). Trademark of The Chamberlain Group LLC ® Registered Trademark of The Chamberlain Group LLC © 2022 The Chamberlain Group LLC... -
Page 19: Warranty
WARRANTY DON’T FORGET Warranty Registration To validate your warranty you must complete the registration form online at: gomerlin.com.au/warranty gomerlin.co.nz/warranty Get Connected with Additional purchase of the myQ Connectivity Kit is required to enable myQ functionality. Visit www.gomerlin.com.au or www.gomerlin.co.nz for more details. - Page 20 Customer Service team if you need help in finding a local service out of balance, then it must not be used until serviced by a Chamberlain technician. A service fee for on-site service may apply.
Need help?
Do you have a question about the Merlin SilentDrive Elite MR855MYQ and is the answer not in the manual?
Questions and answers