
Subscribe to Our Youtube Channel
Related Manuals for Dyaco PT 4.0 T


Summary of Contents for Dyaco PT 4.0 T
- Page 1 User manual Please read this entire manual carefully Treadmil before operating your new treadmill and save it for future use. 4.0 T...
- Page 2 Thank you for your recent purchase of the treadmill 4.0 T. Dyaco provides simple, reliable products that offer the most relevant feedback to users to achieve best-in-class outcomes and empower individuals to build confidence in maintaining healthy lifestyles. Your new product has been manufactured by one of the world’s leading fitness product manufacturers.
-
Page 3: Table Of Contents
Contents Important safety instructions Important electrical information Important operation instructions Features Assembly instructions Console operation Using a heart rate transmitter Maintenance... -
Page 4: Important Safety Instructions
Important safety instructions Attention Read all instructions in this manual before using this device. SAVE THESE INSTRUCTIONS - THINK SAFETY! Danger To reduce the risk of electric shock disconnect this device from the electrical outlet prior to cleaning and/or service work. Warning Before beginning exercise on this product, or any exercise program, consult a physician. - Page 5 Do not operate treadmill on deeply padded, plush or shag carpet. Damage to both carpet and treadmill may result. Do not attempt to use this product for any purpose other than for the purpose it is intended. Do not operate where aerosol (spray) products are being used or where oxygen is being administered.
- Page 6 Injuries to health may result from incorrect or excessive training. Remove tether cord after use to prevent unauthorized treadmill operation. Maximum User Weight: 180 kg (396 lbs) The user should mount the treadmill and stand on the step rails before starting the treadmill operation.
- Page 7 السﻼمة ات إرشاد المهمة تنبيه وج ّ ه فكرك اقرأ جميع اﻹرشادات الواردة في هذا الدليل قبل استخدام الجهاز. احتفظ بتلك اﻹرشادات !نحو اﻷمان ﺧﻄر لتقليل ﺧﻄر التعرض للصدمات الكهربائية، ي ُ رجى فصل هذا الجهاز من المقبس الكهربائي قبل .التنظيف...
- Page 8 .أبق ِ اﻷيدي بعي د ً ا عن جميع اﻷجزاء المتحركة • .تجنب مطل ق ً ا إسقاط أو إدخال أي شيء في أي فتحات • .ارجية ﻻ تستخدم الجهاز في المناطق الخ • لفصل الجهاز، أعد كل وحدات التحكم إلى وضع اﻹيقاف، وبعدها أزل القابس من مصدر التيار •...
- Page 9 تجنب مطل ق ً ا تشغيل المنتج إذا كان هناك سلك أو قابس تالف، إذا لم يعمل المنتج بشكل • صحيح، فاتصل بالوكيل. إذا تعرض للسقوط أو التلف أو السقوط في الماء، فاتصل .بالوكيل .أبق ِ السلك بعي د ً ا عن اﻷسطح الساخنة •...
- Page 10 .قم بفك السلك المطول بعد اﻻستخدام لمنع تشغيل جهاز المشي تلقائ ي ًا (،رطل ) كجم :دم الوزن اﻷقصى للمستخ • يجب على المستخدم تثبيت جهاز المشي والوقوف على قضبان المشي قبل بدء تشغيل • ابدأ سرعة الحزام بسرعة منخفضة وقف على الحزام بحرص مع .جهاز...
- Page 11 Wichtige Sicherheitshinweise Achtung Lesen Sie vor dem Gebrauch dieses Geräts alle Anweisungen in diesem Handbuch. BEWAHREN SIE DIESE ANWEISUNGEN AUF - DENKEN SIE AN SICHERHEIT! Gefahr Vor Reinigungs- und / oder Wartungsarbeiten den Stecker aus der Steckdose ziehen, um das Risiko eines elektrischen Schocks zu verringern. Warnung Konsultieren Sie einen Arzt, bevor Sie mit dem Training an diesem Gerät oder einem Trainingsprogramm beginnen.
- Page 12 Das Laufband nicht auf weichen, Plüsch- oder Hochflorteppichen betreiben. Es kann zu Schäden am Teppich und Laufband führen. Versuchen Sie nicht, dieses Produkt für einen anderen als den vorgesehenen Zweck zu verwenden. Nicht dort betreiben, wo Aerosol (Spray) -Produkte verwendet werden oder wo Sauerstoff verabreicht wird.
- Page 13 Wechseln Sie keine Komponenten selbst aus, da dies zu Verletzungen oder zur Zerstörung des Laufbands führen kann. Der unten stehende Schalldruckpegel ist bei einem Betrieb von 8 km/h ohne Last gemessen. Schalldruckpegel (dB) < 70 dB. Die Geräuschemission unter Last ist höher als ohne Last. Falsches oder übermäßiges Training kann zu Gesundheitsschäden führen.
- Page 14 Consignes de Sécurité importantes Attention Lire toutes les instructions de ce manuel avant utilisation. CONSERVEZ PRÉCIEUSEMENT CES INSTRUCTIONS - PENSEZ À VOTRE SÉCURITÉ! Danger Pour réduire le risque d’électrocution, débranchez l’appareil de la prise avant d’effectuer des travaux de nettoyage et/ou d’entretien. Avertissement Avant de commencer à...
- Page 15 Pour débrancher l’appareil, mettez toutes les commandes en position arrêt, puis retirez la fiche de la prise de courant. Ne pas utiliser sous une couverture ou un coussin. Un échauffement excessif peut se produire et provoquer un incendie, un choc électrique ou des blessures corporelles.
- Page 16 Des informations appropriées sur les pièces de rechange susceptibles d’affecter l’ utilisation sans danger. La déclaration suivante : « L’émission de bruit sous charge est plus élevée qu’à vide. » Le cas échéant, la valeur de la pression acoustique pondérée A au niveau de l’oreille de l’instructeur.
- Page 17 Belangrijke veiligheids instructies Let op Lees alle instructies in deze handleiding voordat u dit apparaat gebruikt. BEWAAR DEZE INSTRUCTIES - DENK AAN VEILIGHEID! Gevaar Koppel het apparaat los van het stopcontact voordat u reinigings- en/of servicewerkzaamheden uitvoert om het risico op elektrische schokken te verminderen.
- Page 18 Om het apparaat los te koppelen, draait u alle bedieningselementen naar de uit-stand en haalt u vervolgens de stekker uit het stopcontact. Laat het apparaat niet functioneren onder een deken of kussen. Overmatige verhitting kan brand veroorzaken en elektrische schokken of persoonlijk letsel veroorzaken.
- Page 19 Geschikte informatie over vervangende onderdelen die het veiligegebruik van de loopband. De volgende verklaring: "Geluidsemissie onder belasting is hoger dan zonder belasting." Indien van toepassing, de waarde van het A-gewogen emissiegeluidsdrukniveau op het gehoor. Wijzig zelf geen enkel onderdeel, het kan de loopband beschadigen of vernietigen.
-
Page 20: Important Electrical Information
Important electrical information Warning Never use a RCD - Residual Current Device (U.S ver. = GFCI, a ground fault circuit interrupter) wall outlet with this treadmill. As with any appliance with a large motor, the RCD/GFCI will trip often. Route the power cord away from any moving part of the treadmill including the elevation mechanism and transport wheels. - Page 21 Circuit Breakers: Some circuit breakers are not rated for high inrush currents that can occur when a treadmill is first turned on or even during use. If your treadmill is tripping the circuit breaker (even though it is the proper current rating) but the circuit breaker on the treadmill itself does not trip, you will need to replace the facility breaker with a high inrush type.
- Page 22 معلومات كهربائية مهمة تحذير قاطع دائرة GFCI, a = .جهاز التيار المتبقي )اﻹصدار اﻷمريكي a RCD } ﻻ تستخدم أب د ً ا • العطل المؤرضة( مقبس الحائط مع جهاز المشي هذا. وكما هو الحال مع أي جهاز مزود بمحرك عي...
- Page 23 تعليمات التأريض رض لخلل أو عطل مفاجئ في النظام . في حالة التع يجب تأريض هذه المنتجات الكهربائي لجهاز المشي، يوفر التأريض مسارً ا أقل مقاومة للتيار الكهربائي، مما يقلل .من خطر التعرض لصدمة كهربائية. هذا المنتج مجهز بكابل مزود بقابس وأداة تأريض كافة...
- Page 24 Wichtige elektrische Hinweise Warnung Für dieses Laufband niemals eine Steckdose eines FI-Schutzschalters (US Ver. = GFCI, ein Fehlerstromschutzschalter) verwenden. Wie bei jedem Gerät mit großem Motor löst der FI / GFCI-Schutzschalter häufig aus. Verlegen Sie das Netzkabel von allen beweglichen Teilen des Laufbandes, einschließlich Hebemechanismus und Transporträdern, weg.
- Page 25 Sicherungsschalter: Einige Sicherungsschalter sind nicht für hohe Einschaltströme ausgelegt, die auftreten können, wenn ein Laufband zum ersten Mal eingeschaltet wird oder sogar während des Betriebs. Wenn Ihr Laufband den Sicherungsschalter auslöst (obwohl dies die richtige Stromstärke ist), der Sicherungsschalter auf dem Laufband selbst jedoch nicht auslöst, müssen Sie den Sicherungsschalter durch einen Sicherungsschalter mit hohem Einschaltstrom ersetzen.
- Page 26 Consignes Renseignements importants en matière d’électricité Avertissement Ne jamais utiliser une prise murale RCD - Residual Current Device (U.S ver. = GFCI, un disjoncteur de fuite à la terre) avec ce tapis. Comme pour tout appareil avec un gros moteur, le disjoncteur différentiel (RCD/GFCI) se déclenchera souvent.
- Page 27 Disjoncteurs : Certains disjoncteurs utilisés dans les résidences ne sont pas conçus pour les courants d’appel élevés qui peuvent se produire lorsqu’un tapis démarre initialement ou même au cours de son utilisation. Si le tapis de course fait déclencher le disjoncteur de votre habitation, même s’il s’agit du courant approprié...
- Page 28 Belangrijke informatie betreffende elektriciteit Waarschuwing Gebruik nooit een stopcontact (UK = RCD, VS = GFCI) met met aardlekschakelaar voor deze loopband. Zoals bij elk apparaat met een grote motor, zal de aardlekschakelaar vaak uitslaan. Leid het netsnoer weg van bewegende delen van de loopband, met inbegrip van het hefmechanisme en de transportwielen.
- Page 29 Stroomonderbrekers: Sommige stroomonderbrekers zijn niet geschikt voor hoge startspanningen die kunnen optreden wanneer een loopband wordt ingeschakeld of zelfs tijdens gebruik. Als uw loopband de stroomonderbreker uitschakelt (zelfs als deze de juiste stroomsterkte heeft) maar de stroomonderbreker op de loopband zelf niet uitschakelt, moet u de stroomonderbreker vervangen door een hoger amperage.
-
Page 30: Important Operation Instructions
Important operation instructions Never operate this product without reading and completely understanding the results of any operational change you request from the console. Never use your treadmill during an electrical storm. Surges may occur in your household power supply that could damage treadmill components. Understand that changes in speed or incline do not occur immediately. - Page 31 Safety tether cord A safety tether cord is provided with this unit. It is a simple magnetic design that should be used at all times. It is for your safety should you fall or move too far back on the belt. Pulling this safety tether cord will stop belt movement.
- Page 32 إرشادات التشغيل المهمة .تجنب مطل ق ً ا تشغيل هذا المنتج دون قراءة نتائج أي تغيير تشغيلي تطلبه من وحدة التحكم • . قد تحدث تدفقات في مصدر الطاقة المنزلي قد ﻻ تستخدم جهاز المشي أثناء حدوث عاصفة كهربائية • في...
- Page 33 سلك السﻼمة المﻄول م مغناطيسي بسيط يجب فهو عبارة عن تصمي .يتم توفير سلك السﻼمة المطول مع هذه الوحدة إنه من أجل سﻼمتك إذا تعرضت للسقوط أو تحركت بعي د ً ا ج د ً ا على .استخدامه في جميع اﻷوقات :لﻼستخدام...
- Page 34 Wichtige Bedienungsanwei sungen Betreiben Sie dieses Produkt niemals, ohne die Ergebnisse einer von Ihnen über die Konsole angeforderten Betriebsänderung gelesen und vollständig verstanden zu haben. Benutzen Sie Ihr Laufband nie während eines Gewitters. In Ihrem Haushaltsnetzteil können Überspannungen auftreten, die die Laufbandkomponenten beschädigen können.
- Page 35 Sicherheitsleine Diesem Gerät liegt eine Sicherheitsleine bei. Es ist ein einfaches magnetisches Design, das jederzeit verwendet werden sollte. Es dient Ihrer Sicherheit, falls Sie fallen oder zu weit nach hinten auf das Band geraten sollten. Wenn Sie an dieser Leine ziehen, stoppt das Band.
- Page 36 Consignes d’utilisation importantes N’utilisez jamais ce produit sans lire ni comprendre pleinement les conséquences de tout changement opérationnel opéré sur la console. N’utilisez JAMAIS ce tapis pendant un orage. Des surtensions peuvent se produire dans l’alimentation électrique de votre maison, ce qui peut endommager les composantes du tapis de course.
- Page 37 Cordon de sécurité Cet appareil est fourni avec un cordon de sécurité. Il s’agit d’un élément magnétique simple à utiliser systématiquement. C’est pour votre sécurité en cas de chute, ou si vous reculez trop loin sur le tapis. Si vous tirez ce cordon de sécurité, le dispositif s’interrompt automatiquement.
- Page 38 Belangrijke bedieningsinstructies Gebruik dit product nooit zonder de resultaten te lezen en volledig te begrijpen van een eventuele operationele wijziging die u van de console vraagt. Gebruik uw loopband nooit tijdens onweer. Er kunnen spanningspieken in uw huishoudelijke stroomvoorziening optreden die componenten van de loopband kunnen beschadigen.
- Page 39 Veiligheidskoord Bij dit apparaat wordt een veiligheidskoord meegeleverd. Het is een eenvoudig magnetisch concept dat altijd moet worden gebruikt. Het is voor uw veiligheid als u valt of te ver naar achteren beweegt op de band. Als u aan dit veiligheidskoord trekt, stopt de band. Gebruik: Plaats de magneet op het ronde metalen gedeelte van de bedieningskop van de console.
-
Page 40: Features
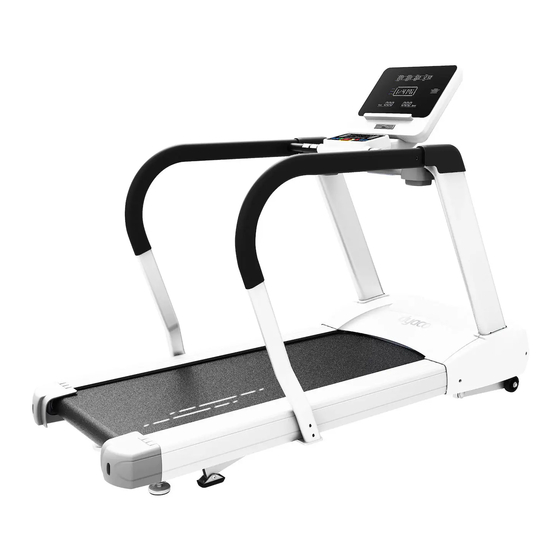
Features 4.0 T – Treadmill Parts and adjustments Console Handlebar with hand pulse grips Safety tether cord placement Water bottle holder Extended handrails Console mast 7. Motor cover 8. Belt 9. Side rail 10.Tracking / Tension adjustment bolts... -
Page 41: Assembly Instructions
Assembly instructions Unpacking Cut the straps, then lift the box over the unit and unpack. Carefully remove all parts from the carton and inspect for any damage or missing parts. If parts are damaged or missing, contact your dealer immediately. Locate the hardware package. - Page 42 Assembly Read each step’s instructions and study the drawing carefully to become familiar with all the parts and procedures before beginning each step. Step 1. Attach one Fixing Plate (66) and Left Console Mast (33) to Frame (1) using five Bolts (128), five Split Washers (130), and five Flat Washers (129). Do not tighten before put ting the console on.
- Page 43 Step 2. Connect Wires (41) with Handle Bar Wires (36A) from Handle Bar Frame (5). Do not pinch Wires (41 & 36A). Install Handle Bar Frame (3) onto the console masts using Bolts (131), Split Washers (102) and Flat Washers (166). Do not tighten before putting the console on.
- Page 44 Step 3. Attach Left Handrail (74) onto Frame (1) and Lower Console Assembly (3), at the top area using two Bolts (131), two Split Washers (102), two Flat Washers (166), one Bolt (132), one Curved Washer (133), one Bolt (137) and one Flat Washer (138) at the bottom area using two Bolts (135), two Split Washers (102) and two Flat Washers (166).
- Page 46 Step 4. Attach Console Frame (4) on Lower Console Assembly (3) using four Bolts (131), four Split Washers (102) and four Flat Washers (166). Connect the Wiring Harness (35.37.38.39.40.58) with Console (28), attach Console (28) on Console Frame (4) using two Screws (116), and two Screws (134).
- Page 47 Step 5. Attach Right & Left Lower Console Mast (26 & 27) on Frame (1) using four Screws (116) (Black). Attach Right & Left Upper Console Mast (64、65) on Right & Left Handrail (74.75) using four Screws (136) (Silver). Attach Console Back Cover (32) on Console Frame (4) using four Screws (116).
-
Page 48: Console Operation
Console operation 4.0 T Console Message window Dot matrix window Incline/Decline Quick Keys keys Speed Keys Program keys Function Keys Power on Power the treadmill on by plugging it into an appropriate wall outlet, then turn on the power switch located at the front of the treadmill below the motor hood. - Page 49 CSAFE feature Your console is equipped with a CSAFE feature. The Power (POWER) port can be used for powering a remote controlled audio-visual system by connecting a cable from the remote to the Power port at the back of the console. The Communication port (COMM) can be used to interact with software applications.
- Page 50 The product has a built in heart rate monitoring system. Simply grasping the hand pulse sensors, or wearing a heart rate chest belt transmitter will start the heart rate detection, The Message Window will display your heart rate, or Pulse, in beats per minute (this may take a few seconds).
- Page 51 Programmable features Each of the programs can be customized with your personal information and changed to suit your needs. Some of the information asked for is necessary to ensure the readouts are correct. You will be asked for your Age and Weight. Entering your Age ensures that the Heart Rate window shows the correct number.
- Page 52 Entering a program and changing settings When you enter a program (by pressing a program key, then Confirm key) you have the option of modifying the settings. If you want to begin without entering new settings just press the Start key. This will bypass the programming of data and take you directly to the start of the program.
- Page 53 Preset programs The treadmill has four different programs that have been designed for a variety of workout goals. These programs factory preset work level profiles for achieving different goals. The initial built-in level of difficulty for each program is set to a relatively easy level. You may adjust the level of difficulty (Max speed) for each program before beginning.
- Page 54 This program automatically sets a 5 Kilometer distance as your goal. The dot matrix will show how many track you have (one track is equivalent of 0.4 kilometers or 1/4 miles). When the program begins the Distance will count down; once it reaches zero the program ends. *Please note that the Speed readout is in MPH if the console is not set to Metric.
- Page 55 Custom program The custom program allows you to build and save a custom program. You can build your own custom program by following the instructions below. The custom program allows you to further personalize it by adding your facility name. Designing and saving a new program as a custom program.
- Page 56 Now you are asked to enter the grade of each segment. Repeat the process same as above speed setting, until all twenty four segments have been set. The Message Window will then tell you to press Confirm to save the program.
- Page 57 VO2 Test The VO2 program is based on the YMCA protocol and is a sub- maximal test that uses pre-determined, fixed work levels that are determined based on the heart rate readings measured as the test progresses. At the end of the test a VO2 score will be displayed. VO2 stands for Volume of Oxygen uptake which is a measurement of how much oxygen you need to perform a known amount of work.
- Page 58 Before the Gerkin/WFI test: Make sure you are in good health; check with your physician before performing any exercise if you are over the age of 35 or persons with pre- existing health conditions. Make sure you have warmed up and stretched before taking the test. Do not take in caffeine before the test.
- Page 59 Gerkin The Gerkin protocol, also known as the fireman’s protocol, is a sub-max Vo2 (volume of oxygen) test. The test will increase speed and elevation alternately until you reach 85% of your Max heart rate. The time it takes for you to reach 85% determines the test score (VO2max) as shown in the chart below.
- Page 60 The WFI test is a modified Gerkin protocol. The actual test is the same as the Gerkin chart above, but the score is calculated differently. Program Speed and Incline Chart TIME SPEED % Grade 0:00 - 1:00 3.0 mph (4.8 km/hr) 1:01 - 2:00 3.0 mph (4.8 km/hr) 2:01 - 3:00...
- Page 61 Navy A timed 1.5 mile (2.4 kilometer) run. You control the speed manually. Maximum time allowed to pass the test. For more detailed information, visit: http://bit.ly/SF-Navy Male Female Male Female 12:30 15:00 45-49 16:08 17:23 20-24 13:30 15:30 50-54 16:45 17:30 25-29 14:00...
- Page 62 A timed 1.5 mile (2.4 kilometer) run. You control the speed manually. Maximum time allowed to pass the test. For more detailed information, visit: https://www.fletc.gov/peb-scores-age- and-gender Coast guard A timed 1.5 mile (2.4 kilometer) run. You control the speed manually. Maximum time allowed to pass the test.
- Page 63 Test should be stopped if subject is showing overt signs of distress and exhaustion or RPE=18+ CTT Prediction is a submaximal test designed to predict aerobic capacity Same walk protocol as CTT Performance but wearing HR monitor Test is stopped when the subject reaches 80%HRMax or RPE=14 A VO2 score is given at the end of the test...
- Page 64 What the score means VO2max Chart for males and very fit females 18-25 26-35 36-45 46-55 56-65 years years years years years years excellent >60 >56 >51 >45 >41 >37 good 52-60 49-56 43-51 39-45 36-41 33-37 above average 47-51 43-48 39-42 35-38...
- Page 65 METs program METs stands for metabolic equivalent, which is one way that exercise physiologists estimate how many calories are burned during physical activity. 1 MET is essentially the amount of energy produced relative to body mass whilst at rest. As you sit here now reading you are expending 1 MET of energy.
- Page 66 Metabolic rate activity chart Physical activity Light intensity activities <3 sleeping watching television writing, desk wirk, typing walking, 1.7mph (2.7 km/h), level ground, strolling, very slow walking 2.5 mph (4 km/h) Moderate intensity activities 3 to 6 bicycling, stationary, 50 watts, very light effort walking 3.0 mph (4.8 km/h) calisthenics, home exercise, light or moderate effort, general walking 3.4 mph (5.5 km/h)
- Page 67 Heart rate program The old motto; “no pain, no gain” is a myth that has been overpowered by the benefits of exercising comfortably. A great deal of this success has been promoted by the use of heart rate monitors. With the proper use of a heart rate monitor, many people find that their usual choice of exercise intensity was either too high or too low and exercise is much more enjoyable by maintaining their heart rate in the desired...
- Page 68 If you enter your age during programming the console will perform this calculation automatically. Entering your age is used for the heart rate programs. After calculating your MHR you can decide upon which goal you would like to pursue. The two most popular reasons for, or goals, of exercise are cardiovascular fitness (training for the heart and lungs) and weight control.
- Page 69 The rate of perceived exertion (RPE), also known as the Borg scale, was developed by Swedish physiologist G.A.V. Borg. This scale rates exercise intensity from 6 to 20 depending upon how you feel or the perception of your effort. The scale is as follows: Rating perception of effort 6 Minimal 7 Very, very light...
- Page 70 Heart rate program programing To start the HR program follow the instructions below and follow the directions in the message window. Press the HR key to select the HR program (Target HR 65 Percent / Target HR 80 Percent / HR interval) and then press the Confirm key to enter. The Message Window will ask you to enter your Age.
-
Page 71: Using A Heart Rate Transmitter
Using a heart rate transmitter Note: The chest strap transmitter is not a standard part, but is a separate purchase. Most transmitters that operate at Bluetooth or ANT+ will also work. How to wear your wireless chest strap transmitter? Attach the transmitter to the elastic strap using the locking parts. Adjust the strap as tightly as possible as long as the strap is not too tight to remain comfortable. - Page 72 Your workout must be within range - distance between transmitter / receiver – to achieve a strong steady signal. The length of range may vary somewhat but generally stay close enough to the console to maintain good, strong, reliable readings. Wearing the transmitter immediately against bare skin assures you of proper operation.
-
Page 73: Maintenance
Maintenance The effect that the safety level of the equipment can be maintained only if it is examined regularly for damage and wear. The components which are most susceptible to wear: Belt, Idler, roller, Desk, Tread-belt. Belt and deck Your treadmill uses a very high-effi cient low-friction deck and belt. Performance is maximized when the bed is kept as clean as possible. - Page 74 Belt adjustments Running surface : 56 x 153 cm (22” x 60” ) Tread-belt tension adjustment Belt tension is not critical for most users. It is very important though for joggers and runners in order to provide a smooth, steady running surface.
- Page 75 Belt tracking adjustment The treadmill is designed so that the belt remains reasonably centered while in use. It is normal for some belts to drift near one side while in use, depending on a user’s gait and if they favor one leg. But if during use the belt continues to move toward one side, adjustments are necessary.
- Page 76 Troubleshooting Before contacting your dealer for aid, please review the following information. It may save you both time and expense. Problem Cause Display does not light 1. Tether cord not in position. 2. Circuit breaker on front grill tripped. Push circuit breaker in until it locks.
- Page 77 General maintenance Unplug treadmill before performing any maintenance. Task How To Daily Weekly Monthly Semi-Annually Annually Wipe down Damp cloth ● unit w/ water Clean under Towel or ● belt vacuum Check belt Feel/visual tension/tracki ● Clean under Vacuum ● motor cover carefully Check...
- Page 78 Maintenance mode in console software The console has built in maintenance/diagnostic software. The software will allow you to change the console settings from English to Metric and turn off the beeping of the speaker when a key is pressed for example. To enter the Maintenance mode press and hold down the Start, Stop and Confirm key.
- Page 79 Exploded view drawing...
- Page 80 4.0 T parts list Item Description Main Frame Incline Bracket Console Support Console Support Handle Bar Running Deck Stabilizer Assembly(A) Running Deck Stabilizer Assembly(B) Belt Guide(R) Belt Guide(L) Front Roller W/Pulley Rear Roller Running Deck Running Belt Cushion A Cushion B Drive Belt Aluminum Foot Rail(122×39×1390L) Aluminum Foot Rail(125×29×1390L)
- Page 81 Item Description 35 200m/m_Ground Wire 36 550m/m_Computer Cable (Upper/Lower) 37 900m/m_Handpulse W/Cable Assembly(XHP-4) 38 900m/m_Handpulse W/Cable Assembly(XHP-3) 39 600m/m_Computer Cable 40 600m/m_Computer Cable (Upper) Computer Cable(Lower) 42 300m/m_Connecting Wire 43 Incline Motor 44 AC Motor 46 Inverter 47 Filter 48 Inverter Board 49 Fan 50 Ø35 ×...
- Page 82 Item Description 69 Ø25 × Ø25 × 15T_Rubber Foot Pad 70 Ø19 × Ø14 × Ø10 × (5+4)_Bushing Foot Pad Bracket 72 Foot Pad 73 Adjustment Rail Pad 74 Handle Bar(L) 75 Handle Bar(R) 77 Ø38 × 3T × 90m/m_Handgrip Foam 78 Ø30 ×...
- Page 83 Item Description 107 Ø3/8" × Ø25 × 2.0T_Flat Washer 108 M10 × 40m/m_Socket Head Cap Bolt 109 M10 × 80m/m_Socket Head Cap Bolt 110 M10 × 100m/m_Socket Head Cap Bolt M8 × P1.25 × 55L_Flat Head Countersink Bolt 112 M8 × 35m/m_Flat Head Countersink Bolt 113 M3 ×...
- Page 84 Item Description 166 Ø8.5 × Ø16 × 1.5T_Flat Washer 167 M8 × 50m/m_Button Head Socket Bolt 168 25m/m × 50m/m_Square End Cap 169 Motor Cover Anchor(D) 170 Control Fixing Plate 171 Inverter Plate 172 Stable Wheel Spacer 173 Ø10 × Ø25 × 0.8T_Nylon Washer 174 3.5 ×...
Need help?
Do you have a question about the PT 4.0 T and is the answer not in the manual?
Questions and answers