Celestron PowerSeeker 60AZ Quick Setup Manual
Hide thumbs
Also See for PowerSeeker 60AZ:
- User manual ,
- Instruction manual (9 pages) ,
- Quick setup manual (2 pages)
Advertisement
Quick Links
Q U I C K S E T U P G U I D E
1 1
1
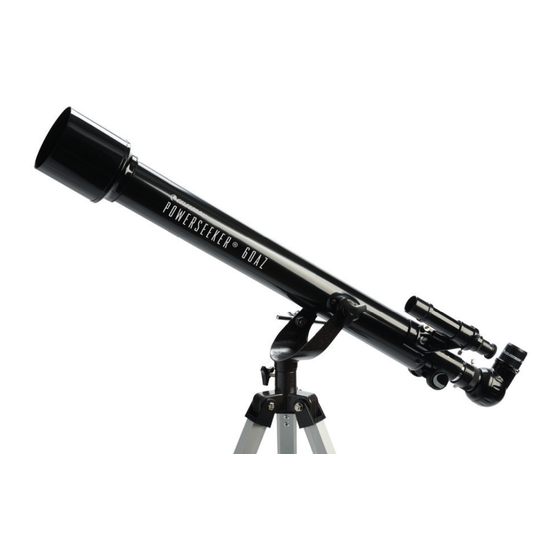
Unpack your telescope and verify that all parts are present. Your
PowerSeeker 60AZ includes: an optical tube with two threaded
mounting bolts, a tripod with center support bracket, two eyepieces,
a 3x Barlow lens, a fi nderscope, an erect image diagonal, a
smartphone adapter, and an eyepiece accessory tray.
4
4
Check to ensure that all three legs are the same height once
extended to provide a level platform for the telescope.
7 7
Locate the optical tube and insert the attached slow motion control
rod into the hole on the mount.
60AZ
#21057-DS
2 2
To set up the tripod, spread the legs outward until they are fully
extended and push down center leg brace.
5 5
5
Place the eyepiece accessory tray on top of the tripod's center leg
brace. Thread the tray into the threaded hole in the center of the leg
brace until it is fully seated.
8 8
Line up the tube with the holes on the mount and secure the tube
to the mount using the two threaded mounting bolts. Tighten to
secure in place.
3
3
Extend the center portion of each of the three tripod legs down about
6 to 12 inches. Use the tightening screw on each leg to secure the
extended leg in place.
6 6
If necessary, rotate the accessory tray counterclockwise until
the accessory holes are not covered by the leg brace arms as
shown here.
9
9
Remove the knurled nuts on the threaded posts at the focuser end
of the telescope tube.
Advertisement

Related Manuals for Celestron PowerSeeker 60AZ


Summary of Contents for Celestron PowerSeeker 60AZ
- Page 1 To set up the tripod, spread the legs outward until they are fully Extend the center portion of each of the three tripod legs down about PowerSeeker 60AZ includes: an optical tube with two threaded extended and push down center leg brace.
- Page 2 Remove the cap from the Barlow. For more information on this product or to download the instruction manual, please visit the respective product page on celestron.com SOLAR WARNING: Never attempt to view the sun through any telescope without a proper solar filter.
Need help?
Do you have a question about the PowerSeeker 60AZ and is the answer not in the manual?
Questions and answers