Advertisement

P
S
ower
eeker
InstructIon Manual
P
S
40AZ #21008
ower
eeker
P
S
60AZ #21041
ower
eeker
P
ower
S
®
erieS
P
ower
P
ower
P
S
76AZ #21044
ower
eeker
S
40
T
eeker
mm
eleScoPe
T
eleScoPeS
ENGLISH
S
50AZ #21039
eeker
S
70AZ #21036
eeker
#21008

Advertisement

Table of Contents
loading
Need help?

Need help?

Do you have a question about the PowerSeeker 40AZ and is the answer not in the manual?

Questions and answers

Summary of Contents for Celestron PowerSeeker 40AZ

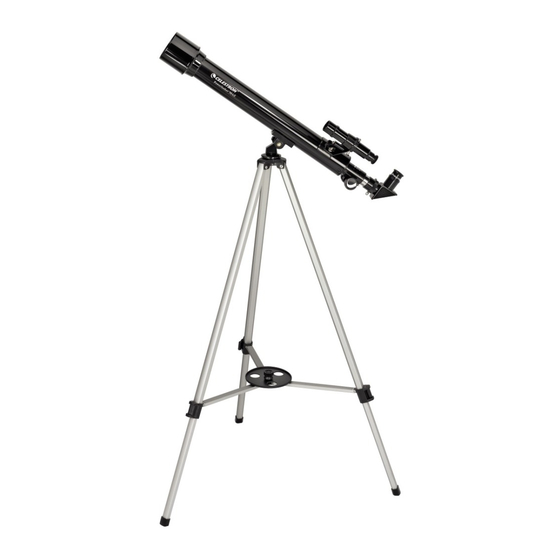
  • Page 1 ® ower eeker erieS eleScoPeS InstructIon Manual ENGLISH • 40AZ #21008 50AZ #21039 ower eeker ower eeker • 60AZ #21041 70AZ #21036 ower eeker ower eeker 76AZ #21044 ower eeker #21008 ower eeker eleScoPe...
  • Page 2: Table Of Contents

    Able of onTenTS IntroDuctIon ............... . . 3 assEMBlY .
  • Page 3: Introduction

    Congratulations on your purchase of a PowerSeeker PowerSeeker telescopes carry a two year limited warranty. telescope. The PowerSeeker Series of telescopes come For details see our website at www.celestron.com. in several different models and this manual covers four models mounted on Alt-Az Mounts ((an altazimuth is the Take time to read through this manual before embarking simplest type of mount with two motions – altitude (up and on your journey through the Universe. It may take a few down) and azimuth (side-to-side)) – 40 mm refractor, 50 mm observing sessions to become familiar with your telescope, refractor, 60 mm refractor, 70 mm refractor and a 76 mm so you should keep this manual handy until you have fully Newtonian. The PowerSeeker Series is made of the highest mastered your telescope’s operation. The manual gives quality materials to ensure stability and durability. All this detailed information regarding each step as well as needed adds up to a telescope that gives you a lifetime of pleasure reference material and helpful hints to make your observing with a minimal amount of maintenance. experience simple and pleasurable as possible. These telescopes were designed for the First Time Buyer Your telescope is designed to give you years of fun and offering exceptional value. The PowerSeeker series rewarding observations. However, there are a few things to features a compact and portable design with ample consider before using your telescope that will ensure your optical performance to excite any newcomer to the world safety and protect your equipment. of amateur astronomy. In addition, your PowerSeeker telescope is ideal for terrestrial observations which will open your eyes with its superb high power viewing. ome of The mAny STAndArd feATureS of The...
  • Page 4 1-1 P 60AZ r igure ower eeker efrAcTor 40AZ, 50AZ & 70AZ S ower eeker imilAr objective lens telescope optical tube Finderscope Eyepiece Diagonal Focus Knob altitude slow Motion rod assembly (not on 40aZ and 50aZ) accessory tray tripod azimuth lock (not on 40aZ & 50aZ) alt-az Mount altitude locking Knob (not on 40aZ &...
  • Page 5 1-2 P 76AZ n igure ower eeker ewToniAn Finderscope Eyepiece collimation adjustment screws (in rear) telescope optical tube Primary Mirror altitude slow Motion rod assembly azimuth lock accessory tray tripod alt-az Mount altitude lock Focus Knob...
  • Page 6: Assembly

    SSembly This section covers the assembly instructions for your 0.96” accessories – 20 mm eyepiece, 12 mm eyepiece PowerSeeker telescope. Your telescope should be set up (50AZ only), 8 mm eyepiece (40AZ only), 4mm eyepiece indoor the first time so that it is easy to identify the various (50AZ only), 3x Barlow lens (2x Barlow with 40AZ), and parts and familiarize yourself with the correct assembly 1.5x erecting eyepiece. The 60AZ, 70AZ and 76AZ procedure before attempting it outdoor. includes 1.25” accessories – 20 mm eyepiece (erect image for 76AZ), 4 mm eyepiece, 3x Barlow lens, erect image Each PowerSeeker comes in one box. The pieces in the diagonal for 60AZ. box for all models are – optical tube, altazimuth mount, and “The SkyX” CD-ROM. The 40AZ and 50AZ includes eTTing uP The riPod 1. Remove the tripod from the box (Figure 2-1). The tripod igure igure comes preassembled so that the set up is very easy. Each tripod is different for each model but looks somewhat similar to the photos shown below. 2. Stand the tripod upright and pull the tripod legs apart until each leg is fully extended and then push down slightly on the tripod leg brace (Figure 2-2). The very top of the tripod is called the tripod head (AZ mount). 3. Next, we will install the tripod accessory tray (Figure 2-3) onto the tripod leg brace (center of Figure 2-2). 4. On the bottom of the tripod tray is a screw attached to the center (except the 40AZ and 50AZ). The screw attaches into a threaded hole in the center of the tripod leg brace by turning it clockwise – Note: pull up slightly igure igure on the tripod leg brace to make it easy to attach. Continue turning the tray until hand tight – don’t over tighten the tray. The 50AZ is slightly different as you unthread a small knob in the center of the tray (see Figure 2-3a) and then put the tray over the threaded...
  • Page 7: Attaching The Telescope Tube To The Mount

    TTAching The eleScoPe ube To The ounT The telescope optical tube attaches to the altazimuth igure igure mount with the altitude slow motion rod assembly and the respective knobs for the 60AZ, 70AZ and 76AZ. The 40AZ and 50AZ attaches directly to the altazimuth mount head. Before starting, remove the objective lens cap (refractor) or the front opening cap (Newtonian). To mount the telescope tube to the mount for the 60AZ, 70AZ and 76AZ: 1. Remove the protective paper covering the optical tube. 2. Put the telescope optical tube inside the yoke (altazimuth) mount so that the altitude slow motion rod assembly is on the same side as the altitude locking screw (see Figure 1-1). Note that on some telescopes igure that the rod may be attached to the telescope optical tube. If the rod is not attached to the optical tube, remove the screw from the mechanism (with the provided tool) shown on the far left of Figure 2-7 and put the rod in place as shown in Figure 2-7. Then, 4. Put the rod of the assembly through the eyebolt and put the screw through the hole in the rod and into the then tighten the altitude locking knob – Figure 2-9. mechanism and tighten it. 5. Thread the two knobs (one on either side of the mount) 3. Thread the altitude locking knob out so the hole is clear through the top of the mount into the threaded holes in in the eyebolt (see Figure 2-8). the optical tube and tighten – Figure 2-7. 2-10 For the 40AZ and 50AZ, take the following steps: igure 1. Remove the protective paper covering the optical tube.
  • Page 8: Installing The Diagonal & Eyepiece (Refractor) - 60Az & 70Az

    ) – 60AZ 70AZ nSTAlling The iAgonAl And yePiece efrAcTor The diagonal is a prism that diverts light at a right angle to 2. Put the chrome barrel end of one of the eyepieces into the light path of the refractor. This allows you to observe in the diagonal and tighten the thumb screw. Again, when a position that is more comfortable than if you had to look doing this make sure the thumbscrew is not protruding straight through. This diagonal is an erect image model into the diagonal before inserting the eyepiece. that corrects the image to be right side up and oriented 3. The eyepieces can be changed to other focal lengths by correctly left-to-right which is much easier to use for reversing the procedure in step 2 above. terrestrial observing. Also, the diagonal can be rotated to 2-13 igure any position which is most favorable for you. To install the diagonal and eyepiece: 1. Insert the small barrel of the diagonal into the 1.25” eyepiece adapter of the focus tube on the refractor – Figure 2-13. Make sure the two thumbscrews on the eyepiece adapter do not protrude into the focuser tube before installation and the plug-up cap is removed from the eyepiece adapter. ) – 40AZ 50AZ nSTAlling The iAgonAl And yePiece efrAcTor The diagonal for the 50AZ is called a star diagonal where...
  • Page 9: Installing & Using The 1.5X Erecting Eyepiece - 40Az & 50Az

    – 40AZ 50AZ nSTAlling And Sing The recTing yePiece The PowerSeeker 50AZ comes with a 1.5x erecting When using the erecting eyepiece, the power with various eyepiece, primarily for daytime terrestrial viewing. This eyepieces is: eyepiece corrects the image you see in your telescope, so 50AZ that it’s both right side up and corrected from left to right. 50 mm with 20 mm eyepiece = 45x Install and use this eyepiece the same way you do with 50 mm with 12 mm eyepiece = 75x the Barlow Lens in the section above. You cannot use the 50 mm with 4 mm eyepiece = 225x Barlow lens when using this eyepiece. 40AZ 40 mm with 20 mm eyepiece = 38x 40 mm with 8 mm eyepiece = 94x 40AZ) nSTAlling The inderScoPe excePT To install the finderscope: 1. Locate the finderscope (it will be mounted inside the 2-17 finderscope bracket) – see Figures 1-1 and 1-2. igure 2. Remove the knurled nuts on the threaded posts on the optical tube – see Figure 2-17. 3. Mount the finderscope bracket by placing it over the posts protruding from the optical tube and then holding it in place thread on the knurled nuts and tightening them down.
  • Page 10 SPecificATionS And ProducT informATion viSiT celeSTron 2835 Columbia Street • Torrance, CA 90503 U.S.A. Telephone: 310.328.9560 • Fax: 310.212.5835 Product design and specifications are subject to change without prior notification. ©2010 Celestron Designed and intended for those 13 years of age and older. All rights reserved. • Printed in China • 10-10...

Table of Contents

Save PDF