Table of Contents
Advertisement
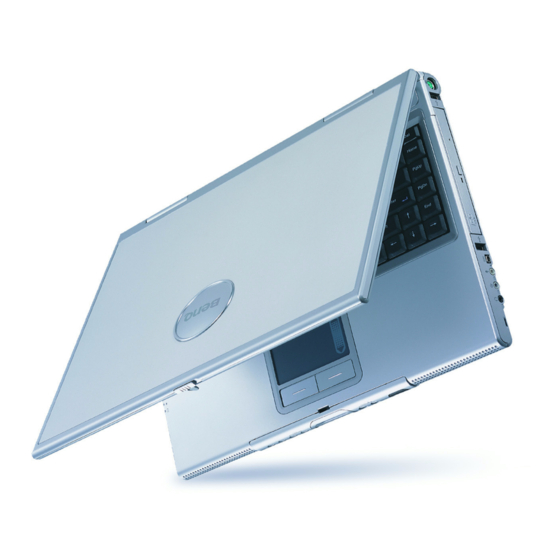
Joybook 3000 User Manual
Before using your Joybook, please read the Quick Start Guide to get
your computer up and running. Read this manual for more detailed
information that can help you use all of your Joybook's capabilities
more effectively and enjoyably.
Table of Contents
Joybook 3000 Features................................................................... 3
Function Hotkeys ........................................................................... 8
Getting Started with Windows XP ............................................ 10
Using the Q-Media Bar ................................................................ 11
Your Digital Entertainment Center --- BenQ Joybook 3000 ... 12
Sending and Receiving E-mail................................................ 13
Getting Online ........................................................................ 14
Watching Video and Making Your Own Movies.................. 16
Burning CDs ............................................................................ 20
Attaching External Display Devices ........................................... 22
Installing Additional Memory...................................................... 24
Recommendations and Troubleshooting................................... 26
Basic Specifications ...................................................................... 28
Advertisement
Table of Contents

Related Manuals for BenQ Joybook 3000


Summary of Contents for BenQ Joybook 3000
-
Page 1: Table Of Contents
Joybook 3000 User Manual Before using your Joybook, please read the Quick Start Guide to get Table of Contents your computer up and running. Read this manual for more detailed Joybook 3000 Features..............3 information that can help you use all of your Joybook's capabilities Function Hotkeys ................ - Page 2 Further, BENQ Corporation reserves the right to revise this publication and to make changes from time to time in the contents hereof without obligation of this company to notify any person of such revision or changes.
-
Page 3: Joybook 3000 Features
Lights up in blue when the computer is reading the card data. Customizable Hotkey 1 Can be set by the user to open the same application as the third icon on the Q-Media bar. Caps Lock Indicator Lights up in blue when the Caps Lock is Customizable Hotkey 2 engaged. - Page 4 200th song will be computer is turned off. Raise Volume displayed as the first one. Forward A song list can play at most 999 Increases the volume of CD playback. Stop/ Eject Allows fast forwards searching on songs. Each list is categorized as audio CDs.
- Page 5 Ethernet Port such as monitors and projectors. For connecting peripherals such as For dissipating heat and keeping the Allows the computer to connect to an mice, digital cameras and MP3 players computer at an optimal temperature. Ethernet 10/100BaseT network. that use the USB interface.
- Page 6 Allows the functionality of the currently not supported.) computer to be extended through and shut down all PC Card functions. the use of a wide variety of PC Card Wireless Network Card Push in, then release the PC modules available—for example, Four-in-One Slot...
- Page 7 Supports multi-functional optical For connecting peripherals such as Outputs optical sound. Can be For connecting external display devices, module for music CD, VCD and DVD. mice, digital cameras and MP3 players connected to optical audio-enabled such as monitors and projectors.
-
Page 8: Function Hotkeys
Function Hotkeys You can use the function hotkeys to access commonly used functions or make quick settings. To use the hotkeys, press and hold the Fn key in the lower left corner of the keyboard, and then press the desired hotkey. - Page 9 Functionally equivalent to clicking the Minimizes all windows. integrated in the keyboard. Provides the same function as the Start button on the Windows right touch pad button, bringing up a desktop. Shift + contextual pop-up menu. Caps Lock Capitalizes all text entered.
-
Page 10: Getting Started With Windows Xp
Getting Started with Windows XP Your Joybook 3000 comes installed with Windows XP Home Edition, Microsoft's latest operating system for consumer PCs. The first time you start up your computer, Windows XP will ask you a few questions. Answer the questions to ensure that your full rights are protected. -
Page 11: Using The Q-Media Bar
Not only does QMusic support playback of MP3 and audio CD music, but you can also use it to burn audio CDs from MP3s, or conversely to turn your audio CDs into compact MP3 files for storage on your hard disk drive or creating custom music compilations. If you want... -
Page 12: Your Digital Entertainment Center
Browse and edit digital photographs. Listen to music and creating your own custom music collections. Quickly and reliably burn CD-R disks. Convert music into the MP3 format and take your favorite tunes wherever you go. 12 Your Digital Entertainment Center --- BenQ Joybook 3000... -
Page 13: Sending And Receiving E-Mail
In order to use e-mail, you must have an account with an ISP (Internet service provider) and perform needed software configuration. For detailed information on accounts, passwords, e-mail servers and other settings, please consult your system administrator or ISP. -
Page 14: Getting Online
Address field. When traveling by air, please be sure to turn off wireless networking when the plane is taking off or landing to avoid any possible risks to flight safety. If your Joybook are loaded with the network card and the wireless network card, the system will optimize the working environment itself when you connect to the Internet. -
Page 15: Listening To Music And Creating Custom Music Collections
Listening to Music and Creating Custom Music Collections Qmusic is the perfect tool for playing your favourite music. You can use it to play music on audio CDs or MP3 files, burn MP3 songs to audio CDs, convert audio CD tracks to MP3 format for storage on your hard disk drive, or create custom music compilation. -
Page 16: Watching Video And Making Your Own Movies
To view an explanation of the function for any button on the control panel, place the on-screen cursor over the button. A floating tool tip will appear. Do not put non-standard size CDs into the DVD player. 16 Watching Video and Making Your Own Movies... - Page 17 The Joybook 3000 can help you edit video files to create a movie that you can share with family and friends. With a digital video camera or other source of digital video footage, you can take advantage of the Power Director software included with your Joybook 3000 to produce your very own cinematic masterpiece—or if you’re less ambitious, just the coolest home video ever!
-
Page 18: Viewing Digital Photographs And Creating Slide Shows
Viewing Digital Photographs and Creating Slide Shows Photo Explorer can help you manage your digital photographs and other images, letting you easily view, print, and edit them, as well as create customized slide shows. Customizable Toolbar Location Directory Tree Browse Pane... -
Page 19: Creating A Slide Show
It does not store the actual images, video, and sound files. If you wish to save a slide show to a CD for sharing with friends and family, or for archiving purposes, collect all its files in a single directory, and then burn this directory to a CD-R disk. -
Page 20: Burning Cds
Burning CDs You can use your Joybook 3000 when connected to a CD burner with the included CD-Maker software to burn different types of data to CD. Toolbar CD type Choose CD Recorder Steps Source Pane Windows Explorer Help Destination Pane... - Page 21 CD. In general, regardless of the burning format, two major steps are to be followed: Step 1 is to create the desired settings for the CD content. Step 2 is to burn the new CD. Three steps are required only for burning Mixed-Mode CD and CD Extra CD, as they have both data and audio track on the same disk, which are two different types.
-
Page 22: Attaching External Display Devices
Attaching a VGA display device When giving a presentation, you can ouput the Joybook 3000’s video signal to an external display device, such as a projector or monitor. Press the Fn + F3 hotkey combination to switch between the computer's own LCD panel and the attached display device, or use simultaneous display. - Page 23 S-Video Out The S-Video Out port allows you to output display signals to a television set or VCR for viewing or recording. Television Set Attaching External Display Devices 23...
-
Page 24: Installing Additional Memory
Installing Additional Memory Please contact BenQ distributor or customer service center, or check the module which can be used on the BenQ web site, before you upgrade or replace memory. If you wish to upgrade memory, you can replace the existing 128 MB or 256 MB module with a higher-capacity one. The product warranty as provided by BenQ does not cover any damage to the machine as a result of your own discretionary upgrade or memory replacement. - Page 25 Replace the cover, and use a screwdriver and then insert it. until the module locks into place. to secure it with the screws. Insert the bat- tery, and then connect the AC adapter. When you start the computer, it will automatically test and configure the new memory.
-
Page 26: Recommendations And Troubleshooting
Recommendations and Troubleshooting The following are descriptions of situations that you may encounter during use of the computer, along with basic troubleshooting steps. If you are not able to resolve the issue, immediately contact a BenQ service center for assistance. - Page 27 The region code of the DVD inserted must match that of the DVD playback software used. This region code can be set up to five times. If you have not reached this limit, a prompt will appear that will allow you to change the region code of the software to match that of the move.
-
Page 28: Basic Specifications
Basic Specifications Hardware Specifications Software Specifications Processor Intel P4-M 1.8 GHz Intel P4-DT 1.7 GHz Operating Microsoft Windows XP Home Edition System Memory 256 MB 128 MB Included Q-Media Bar Hard Disk Drive 30 GB HDD 20 GB HDD Software... -
Page 29: Information On Safety, Cleaning, And Battery Maintenance
Do not use cleaners containing alcohol or acetone. Instead, use cleaning fluids specially formulated for LCD screens. 11. Make sure that the modem port is used only with a regular analog phone line. Do not connect a digital phone line to the modem port, as this will cause damage to the modem.
Need help?
Do you have a question about the Joybook 3000 and is the answer not in the manual?
Questions and answers