Table of Contents
Advertisement
Quick Links
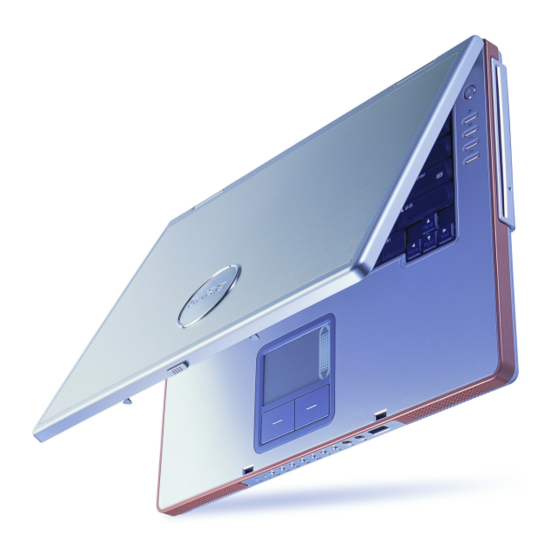
Joybook 8000 User Manual
Before using your Joybook, please read the Quick Start Guide to get
your computer up and running. Read this manual for more detailed
information that can help you use all of your Joybook's capabilities
more effectively and enjoyably.
1
Table of Contents
Copyright......................................................................................... 2
Joybook 8000 Features................................................................... 3
Function Hotkeys ........................................................................... 8
Getting Started with Windows XP ............................................ 10
Using the Q-Media Bar ................................................................ 11
Your Digital Entertainment Center --- BenQ Joybook 8000 ... 12
Sending and Receiving E-mail................................................ 13
Getting Online ........................................................................ 14
Watching Video and Making Your Own Movies.................. 16
Burning CDs ............................................................................ 20
Attaching External Display Devices ........................................... 22
Installing Additional Memory...................................................... 24
Recommendations and Troubleshooting................................... 26
Advertisement
Table of Contents

Related Manuals for BenQ Joybook 8000


Summary of Contents for BenQ Joybook 8000
-
Page 1: Table Of Contents
Joybook 8000 User Manual Before using your Joybook, please read the Quick Start Guide to get Table of Contents your computer up and running. Read this manual for more detailed information that can help you use all of your Joybook's capabilities Copyright.................. -
Page 2: Copyright
Further, BENQ Corporation reserves the right to revise this publication and to make changes from time to time in the contents hereof without obligation of this company to notify any person of such revision or changes. -
Page 3: Joybook 8000 Features
Starts up the Internet Explorer Web browser. Battery Indicator When the computer is in use, lights up in E-Mail Hoteky blue. When the battery is charging, turns Starts up the Outlook Express e-mail orange. Flashing blue indicates that the client. - Page 4 Switch/Wireless Net- work Card Shut Down When the computer is shut down, can be used to turn the Music DJ on and off. When the computer is on, acti- vates or deactivates the wireless net- working card, if installed. * When the computer is turned off, pressing this key will begin playback of music from an inserted audio CD.
- Page 5 Allows the computer to con- PDIF such as mice, digital cameras play devices, such as moni- nect to an Ethernet 10/ Outputs sound to digital and MP3 players that use the tors and projectors. 100BaseT network. audio-enabled speakers. USB interface. S-Video Out...
- Page 6 Before ejecting a PC Card, perform computer at an optimal temperature. puter to be extended through the use the following steps: of a wide variety of PC Card modules Quit all PC Card applications available—for example, wireless net- and shut down all PC Card IEEE 1394 Port working cards and mobile disks.
- Page 7 Stop/Eject button on the Music DJ. Do not insert disks of non-standard size into the optical drive. This drive is a slot-loading device. Gently insert the disk into the opening, and the drive will automatically pull the disk in. Do not force the disk inside.
-
Page 8: Function Hotkeys
Function Hotkeys You can use the function hotkeys to access commonly used functions or make quick settings. To use the hotkeys, press and hold the Fn key in the lower left corner of the keyboard, and then press the desired hotkey. - Page 9 Minimizes all windows. Activates the numeric keypad inte- Provides the same function clicking the Start button on grated in the keyboard. as the right touch pad but- the Windows desktop. ton, bringing up a contex- Shift + tual pop-up menu.
-
Page 10: Getting Started With Windows Xp
Getting Started with Windows XP Your Joybook 8000 comes installed with Windows XP Home Edition, Microsoft's latest operating system for consumer PCs. The first time you start up your computer, Windows XP will ask you a few questions. Answer the questions to ensure that your full rights are protected. -
Page 11: Using The Q-Media Bar
Not only does QMusic support playback of MP3 and audio CD music, but you can also use it to burn audio CDs from MP3s, or con- versely to turn your audio CDs into compact MP3 files for storage on your hard disk drive or creating custom music compilations. If you want to... -
Page 12: Your Digital Entertainment Center
Listen to music and creat- ing your own custom music collections. Convert music into the Quickly and reliably burn MP3 format and take CD-R or CD-RW disks. your favorite tunes wherever you go. 12 Your Digital Entertainment Center --- BenQ Joybook 8000... -
Page 13: Sending And Receiving E-Mail
ISP. If you are not familiar with Outlook Express, you can press the F1 key to bring up the Help window, where you can obtain assistance on using Outlook Express for the first time, or locate any information should you have any questions thereafter. -
Page 14: Getting Online
Address field. When traveling by air, please be sure to turn off wireless networking when the plane is taking off or landing to avoid any possible risks to flight safety. If your Joybook are loaded with the network card and the wireless network card, the system will optimize the working environment itself when you connect to the Internet. -
Page 15: Listening To Music And Creating Custom Music Collections
Listening to Music and Creating Custom Music Collections QMusic is the perfect tool for playing and organizing your favorite music. You can use it to play music on audio CDs or MP3 files, burn MP3 songs to audio CDs, convert audio CD tracks to MP3 format, and create custom compilations of your favorite music on your hard disk drive or on CD. -
Page 16: Watching Video And Making Your Own Movies
A floating tool tip will appear. Do not put non-standard size CDs into the DVD player The DVD player automatically draws the CD in when you gently push it. Do not push too hard. 16 Watching Video and Making Your Own Movies... - Page 17 The Joybook 8000 can help you edit video files to create a movie that you can share with family and friends. With a digital video camera or other source of digital video footage, you can take advantage of the Power Director software included with your Joybook 8000 to produce your very own cinematic masterpiece—or if you’re less ambitious, just the coolest home video ever!
-
Page 18: Viewing Digital Photographs And Creating Slide Shows
Viewing Digital Photographs and Creating Slide Shows Photo Explorer can help you manage your digital photographs and other images, letting you easily view, print, and edit them, as well as create cus- tomized slide shows. Customizable Toolbar Location Directory Tree... -
Page 19: Creating A Slide Show
* To use a sound file as the soundtrack for your slide ically, you should also set the duration show, drag it to a position before the first slide on the Slide Show Storyboard. -
Page 20: Burning Cds
Burning CDs You can use your Joybook 8000 with the included CD-Maker software to burn different types of data to CDs. Toolbar Choose CD CD type Recorder Steps Source Pane Windows Explorer Help Destination Pane CD Layout File Size Bar... - Page 21 In the Source Pane, select the files you wish to burn to CD and drag them to the Destination Pane. Then right-click on the right side of the CD icon in the CD Layout area and select Data CD Properties from the pop-up menu that appears.
-
Page 22: Attaching External Display Devices
Attaching a VGA display device When giving a presentation, you can ouput the Joybook 8000’s video signal to an external display device, such as a projector or monitor. Press the Fn + F3 hotkey combination to switch between the computer's own LCD panel and the attached display device, or use simultaneous display. - Page 23 S-Video Out The S-Video Out port allows you to output display signals to a television set or VCR for viewing or recording. Television Set Attaching External Display Devices 23...
-
Page 24: Installing Additional Memory
Installing Additional Memory Your Joybook 8000 comes with 256MB of system memory as one DDR (Double Data Rate) 266 SDRAM SoDIMM (Small Outline Dual Inline Mem- ory Module). Memory can be expanded to up to 1 GB. Your computer’s motherboard includes two memory slots, one of which contains the 256 MB module. If you wish to upgrade memory, you can install another memory module in the empty slot, or replace the existing module with a higher-capacity one. - Page 25 Replace the cover, and use a screw- and then insert it. until the module locks into place. driver to secure it with the screws. Insert the battery, and then connect the AC adapter. When you start the computer, it will automat- ically test and configure the new memory.
-
Page 26: Recommendations And Troubleshooting
Recommendations and Troubleshooting The following are descriptions of situations that you may encounter during use of the computer, along with basic troubleshooting steps. If you are not able to resolve the issue, immediately contact a BenQ service center for assistance. - Page 27 • The disk that you want to use is properly inserted in the optical drive. cations software on the computer. For further information, please con- sult the manual for the particular software.
-
Page 28: Information On Safety, Cleaning, And Battery Maintenance
Using the Computer Safely 11. Make sure that the modem port is used only with a regular analog phone line. Do not connect a digital phone line to the modem port, as this will When setting up or operating the computer, please pay special atten- cause damage to the modem. -
Page 29: Cleaning Your Computer
Turn off the computer, disconnect the AC adapter, and remove the bat- tery. Use a damp cloth to wipe the outer surface of the computer. Do not apply liquid or spray cleaners directly on the computer. Do not use cleaners containing alcohol or acetone. Instead, use cleaning fluids specially formulated for LCD screens.
Need help?
Do you have a question about the Joybook 8000 and is the answer not in the manual?
Questions and answers