FLIR BRICKSTREAM 3D Gen 2 Installation Manual
Hide thumbs
Also See for BRICKSTREAM 3D Gen 2:
- Advanced configuration manual (88 pages) ,
- Programmer's manual (43 pages)
Table of Contents
Advertisement
Advertisement
Table of Contents
Troubleshooting

Subscribe to Our Youtube Channel
Related Manuals for FLIR BRICKSTREAM 3D Gen 2


Summary of Contents for FLIR BRICKSTREAM 3D Gen 2
- Page 1 3D Gen 2 Release 6.2 – June 2021 6/25/2021 Names and marks appearing on the products herein are either registered trademarks or trademarks of FLIR Systems, Inc. and/or its subsidiaries. © 2016-2021 FLIR Integrated Imaging Solutions Inc. All rights reserved.
- Page 2 ACC-POE29U-1AF). L’utilisation de tout autre adaptateur ou injecteur risque d’endommager l’appareil et de causer un incendie ou des blessures. Trademarks Names and marks appearing on the products herein are either registered trademarks or trademarks of FLIR Systems, Inc. and/or its subsidiaries. Licensing...
-
Page 3: Table Of Contents
Brickstream® 3D Gen 2 Version 6.2 Contents Introduction About this Document What is Covered About the Brickstream 3D Gen 2 Sensor Hardware Components Software (Firmware) Components Licensing Data Quality Before You Begin Planning the Solution Design Selecting the Appropriate Lenses... - Page 4 Setting Batch Data Streaming Options Setting Real Time Data Delivery Options Setting Alert Delivery Options Setting Email Delivery Options Setting FTP Delivery Options 6/25/2021 Brickstream® 3D Gen 2 Installation Guide ©2016-2021 FLIR Integrated Imaging Solutions Inc. June 2021 All rights reserved.
- Page 5 Average Bandwidth Requirements Initial Bandwidth Requirements Ongoing Bandwidth Requirements Logical Port Specifications Connectivity Technical Specifications Shipping Weight Components Lenses LED Functionality Part Numbers 6/25/2021 Brickstream® 3D Gen 2 Installation Guide ©2016-2021 FLIR Integrated Imaging Solutions Inc. June 2021 All rights reserved.
- Page 6 Troubleshooting Wi-Fi or BLE Errors Troubleshooting Low-Ceiling Installations Relocation Solution Tracking Configuration Solution Resolving Inoperable 3D Gen 2 Issues Power Issue Connectivity Issue Software/Firmware Issue 6/25/2021 Brickstream® 3D Gen 2 Installation Guide ©2016-2021 FLIR Integrated Imaging Solutions Inc. June 2021 All rights reserved.
-
Page 7: Introduction
Brickstream® 3D Gen 2 Version 6.2 Introduction Welcome to the Brickstream 3D Gen 2 sensor. The sensor represents the next generation of video analytics. Brickstream 3D Gen 2 captures and analyzes traffic metrics in a single sensor for retail outlets, malls, transportation hubs, and smart buildings. -
Page 8: About The Brickstream 3D Gen 2 Sensor
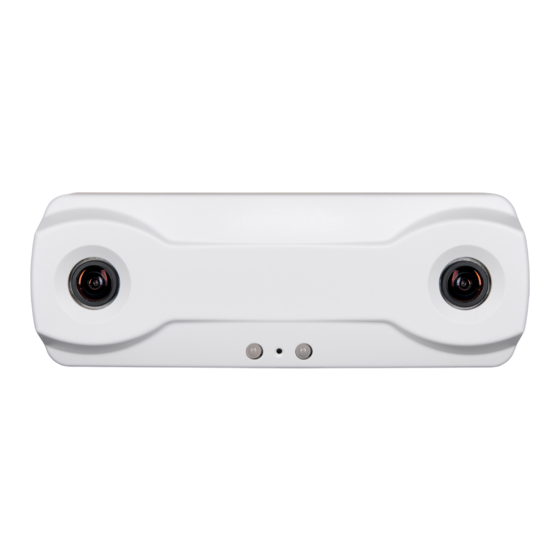
Brickstream® 3D Gen 2 Version 6.2 About the Brickstream 3D Gen 2 Sensor The sensor captures behavior and tracks physical movements that provide a basis for analytical algorithms, enabling it to generate traffic metrics, queue metrics, and service metrics in a single sensor for retail outlets, malls, transportation hubs, and smart buildings. -
Page 9: Software (Firmware) Components
With an advanced counting key license the sensor has access to the following features: Advanced counting up to 32 zones Tilt greater than 10° 6/25/2021 Brickstream® 3D Gen 2 Installation Guide ©2016-2021 FLIR Integrated Imaging Solutions Inc. June 2021 All rights reserved. -
Page 10: Data Quality
Note: Contact your FLIR Brickstream sales representative for pricing and availability. Data Quality FLIR Brickstream people counting sensors deliver accuracy with an average error rate of ±5% under the following conditions: A minimum of 100 people are counted over the validation period. - Page 11 Transparent or translucent objects Unpredictable Noisy data Unpredictable *Depending on the severity, this may appear as a calibration failure and be automatically detected. 6/25/2021 Brickstream® 3D Gen 2 Installation Guide ©2016-2021 FLIR Integrated Imaging Solutions Inc. June 2021 All rights reserved.
-
Page 12: Before You Begin
For detailed instructions see Setting up the Sensor. 6/25/2021 Brickstream® 3D Gen 2 Installation Guide ©2016-2021 FLIR Integrated Imaging Solutions Inc. June 2021 All rights reserved. -
Page 13: Planning The Solution Design
When planning the solution for a site, follow this process: Selecting the Appropriate Lenses Performing a Site Survey Determining How Many Sensors You Need Determining Installation Locations 6/25/2021 Brickstream® 3D Gen 2 Installation Guide ©2016-2021 FLIR Integrated Imaging Solutions Inc. June 2021 All rights reserved. -
Page 14: Selecting The Appropriate Lenses
2.2 m / 7.2 ft 7.0 m / 23.0 ft 6.0 mm 6 m / 19.7 ft 14 m / 45.9 ft 6/25/2021 Brickstream® 3D Gen 2 Installation Guide ©2016-2021 FLIR Integrated Imaging Solutions Inc. June 2021 All rights reserved. - Page 15 Coverage. Given the lens type, mounting height, and tilt, the coverage model can determine the floor area that a sensor can cover. 6/25/2021 Brickstream® 3D Gen 2 Installation Guide ©2016-2021 FLIR Integrated Imaging Solutions Inc. June 2021 All rights reserved.
- Page 16 2. Click the desired Coverage Tables tab to determine the correct lens type for the desired installation height. 3. Click the Coverage tab. 6/25/2021 Brickstream® 3D Gen 2 Installation Guide ©2016-2021 FLIR Integrated Imaging Solutions Inc. June 2021 All rights reserved.
-
Page 17: Lens Coverage
Coverage tab in the Coverage Calculator spreadsheet. This increased coverage assumes that there are walls bordering each side of the coverage width. Having walls on each side of 6/25/2021 Brickstream® 3D Gen 2 Installation Guide ©2016-2021 FLIR Integrated Imaging Solutions Inc. June 2021 All rights reserved. - Page 18 It is typically at least half a meter from the wall. Note: Coverage models with extra width are not valid when using sensors side-by-side to cover larger counting areas. 6/25/2021 Brickstream® 3D Gen 2 Installation Guide ©2016-2021 FLIR Integrated Imaging Solutions Inc. June 2021 All rights reserved.
-
Page 19: 2.5 Mm Lenses
No Zoom 100% No Zoom In standard mode, when mounting higher than 4.6 m, digital zoom should be applied to maintain tracking accuracy. 6/25/2021 Brickstream® 3D Gen 2 Installation Guide ©2016-2021 FLIR Integrated Imaging Solutions Inc. June 2021 All rights reserved. - Page 20 No Zoom 12.2 No Zoom 12.4 No Zoom 12.7 No Zoom 12.9 No Zoom 13.1 In wide mode, digital zoom is not required. 6/25/2021 Brickstream® 3D Gen 2 Installation Guide ©2016-2021 FLIR Integrated Imaging Solutions Inc. June 2021 All rights reserved.
-
Page 21: 6.0 Mm Lenses
13.6 100% No Zoom 11.0 13.7 100% No Zoom 11.1 13.8 100% No Zoom 11.2 13.9 100% No Zoom 11.3 14.0 100% 6/25/2021 Brickstream® 3D Gen 2 Installation Guide ©2016-2021 FLIR Integrated Imaging Solutions Inc. June 2021 All rights reserved. - Page 22 No Zoom 13.9 No Zoom 11.9 No Zoom 14.0 No Zoom 12.0 No Zoom In wide mode, digital zoom is not required. 6/25/2021 Brickstream® 3D Gen 2 Installation Guide ©2016-2021 FLIR Integrated Imaging Solutions Inc. June 2021 All rights reserved.
-
Page 23: Performing A Site Survey
(5 mm) type screws, one for the center and one on any of the four corners. (B) If installing below a dry wall, use four No. 8 (5 mm) screws, one in each corner. 6/25/2021 Brickstream® 3D Gen 2 Installation Guide ©2016-2021 FLIR Integrated Imaging Solutions Inc. June 2021 All rights reserved. - Page 24 RAM mount to a CCTV pole and then applying the sensor to the RAM mount’s universal camera mount mount. (Note: FLIR does not sell RAM mounts.) 6/25/2021 Brickstream® 3D Gen 2 Installation Guide ©2016-2021 FLIR Integrated Imaging Solutions Inc.
-
Page 25: Field Samples
Brickstream® 3D Gen 2 Version 6.2 Field Samples Surface Mount Recessed Mount 6/25/2021 Brickstream® 3D Gen 2 Installation Guide ©2016-2021 FLIR Integrated Imaging Solutions Inc. June 2021 All rights reserved. -
Page 26: Gathering Information During A Site Survey
Simple Installation Planning Calculator to determine the number of sensors needed, given the ceiling height at the sensor installation and the width of the entry way. 6/25/2021 Brickstream® 3D Gen 2 Installation Guide ©2016-2021 FLIR Integrated Imaging Solutions Inc. June 2021 All rights reserved. -
Page 27: Verify Site Accessibility
Traffic corral points, such as anti-theft pedestals and displays can affect the desired coverage area. Ideally, elongate the coverage area over the length of the common path as people walk through the door. 6/25/2021 Brickstream® 3D Gen 2 Installation Guide ©2016-2021 FLIR Integrated Imaging Solutions Inc. June 2021 All rights reserved. - Page 28 7. Use a standardized site survey document to ensure all necessary data is collected and retained. 6/25/2021 Brickstream® 3D Gen 2 Installation Guide ©2016-2021 FLIR Integrated Imaging Solutions Inc. June 2021 All rights reserved.
- Page 29 Brickstream® 3D Gen 2 Version 6.2 8. Identify and gather information about any additional space to be used for the solution. 6/25/2021 Brickstream® 3D Gen 2 Installation Guide ©2016-2021 FLIR Integrated Imaging Solutions Inc. June 2021 All rights reserved.
-
Page 30: Creating The Solution Design
You can gather this information from the following sources: Created and provided by someone else: Floor Plans – General Layout Reflective Ceiling Plans (RCP’s) 6/25/2021 Brickstream® 3D Gen 2 Installation Guide ©2016-2021 FLIR Integrated Imaging Solutions Inc. June 2021 All rights reserved. -
Page 31: Determining Installation Locations
For optimal performance, follow Mounting a 3D Gen 2 Sensor. Existing physical characteristics of the site may present design challenges. 6/25/2021 Brickstream® 3D Gen 2 Installation Guide ©2016-2021 FLIR Integrated Imaging Solutions Inc. June 2021 All rights reserved. - Page 32 When possible, avoid positioning sensors 1m or less from the door edge (in mall- type stores) – use more overlap instead. Optimal position for edge location 6/25/2021 Brickstream® 3D Gen 2 Installation Guide ©2016-2021 FLIR Integrated Imaging Solutions Inc. June 2021 All rights reserved.
- Page 33 90 cm (3 ft). NO side wall coverage gains NO coverage gains between two sensors 6/25/2021 Brickstream® 3D Gen 2 Installation Guide ©2016-2021 FLIR Integrated Imaging Solutions Inc. June 2021 All rights reserved.
-
Page 34: Verifying The Solution Design
5. Verify that the Site Installation Specifications correctly identifies the number of sensors and that the orientation for each sensor is correct. 6/25/2021 Brickstream® 3D Gen 2 Installation Guide ©2016-2021 FLIR Integrated Imaging Solutions Inc. June 2021 All rights reserved. -
Page 35: Setting Up The Sensor
IP address to a client network IP address. Note: The sensor's firmware version is in the footer of the sensor web interface. 6/25/2021 Brickstream® 3D Gen 2 Installation Guide ©2016-2021 FLIR Integrated Imaging Solutions Inc. June 2021 All rights reserved. - Page 36 Brickstream® 3D Gen 2 Version 6.2 6/25/2021 Brickstream® 3D Gen 2 Installation Guide ©2016-2021 FLIR Integrated Imaging Solutions Inc. June 2021 All rights reserved.
-
Page 37: Navigation
Defaults Restores the current values back to the factory defaults. The values are not permanently saved until you click the Save button. 6/25/2021 Brickstream® 3D Gen 2 Installation Guide ©2016-2021 FLIR Integrated Imaging Solutions Inc. June 2021 All rights reserved. -
Page 38: Preconfiguration Process
Note: No other network connections may be active during this process. 4. Click the Start icon and select Control Panel from the desktop of your PC. The Control Panel opens. 6/25/2021 Brickstream® 3D Gen 2 Installation Guide ©2016-2021 FLIR Integrated Imaging Solutions Inc. June 2021 All rights reserved. - Page 39 7. Click Wireless Network Connection and then click Disable this network device, if applicable. 8. Right-click on Local Area Connection and choose Properties. The Local Area Connection Properties window opens. 6/25/2021 Brickstream® 3D Gen 2 Installation Guide ©2016-2021 FLIR Integrated Imaging Solutions Inc. June 2021 All rights reserved.
- Page 40 If these settings are not configured to be obtained automatically, record the initial values here: TCP/IP Setting Initial Value on PC IP address Subnet mask Default gateway Preferred DNS server 6/25/2021 Brickstream® 3D Gen 2 Installation Guide ©2016-2021 FLIR Integrated Imaging Solutions Inc. June 2021 All rights reserved.
- Page 41 18. Plug a CAT5e Ethernet cable from the Hub/Switch or LAN or IN port of the PoE injector to the Ethernet port in your PC. Note: The port labels may vary depending on the manufacturer of the PoE injector. 6/25/2021 Brickstream® 3D Gen 2 Installation Guide ©2016-2021 FLIR Integrated Imaging Solutions Inc. June 2021 All rights reserved.
-
Page 42: Using The Configuration Wizard
1. On the Identification page, enter the information to identify the sensor with a site and division. This information is particularly useful if using the sensor with the FLIR Device Manager. 2. Select from the drop-down whether LED status lights remain always on (default) or if they should turn off after a selected time. -
Page 43: Step 2 Of 10-Date And Time
Step 2 of 10—Date and Time The date and time of the sensor can be set automatically through the time server or manually through the web interface. FLIR recommends using a time server as a manual setting is subject to drift and can become inaccurate. - Page 44 6. Alternatively, you can set the date and time manually and click Set Time. 7. Click Save & Next. Note: This information is also on the Settings->Basic Settings page, Date and Time tab. 6/25/2021 Brickstream® 3D Gen 2 Installation Guide ©2016-2021 FLIR Integrated Imaging Solutions Inc. June 2021 All rights reserved.
-
Page 45: Step 3 Of 10-User Management
5. Click Save & Next. You are then prompted to enter the name and password for authentication. Note: This information is also on the Settings->Basic Settings page, Web Server tab. 6/25/2021 Brickstream® 3D Gen 2 Installation Guide ©2016-2021 FLIR Integrated Imaging Solutions Inc. June 2021 All rights reserved. -
Page 46: Step 4 Of 10-Privacy Settings
2. AVI Capture is enabled by default. To disable, click the AVI Capture switch to OFF. 3. Click Save & Next. Note: This information is also on the Settings->Basic Settings Privacy page. 6/25/2021 Brickstream® 3D Gen 2 Installation Guide ©2016-2021 FLIR Integrated Imaging Solutions Inc. June 2021 All rights reserved. -
Page 47: Step 5 Of 10-Device Manager
Brickstream® 3D Gen 2 Version 6.2 Step 5 of 10—Device Manager If using the FLIR Device Manager, enter the following information to point the sensor to the Device Manager Server. 1. Click the Enabled switch to ON. The fields become active. -
Page 48: Step 6 Of 10-Http Proxy
6. To confirm that the settings are correct, click Test Settings. 7. Click Save & Next. Note: This information is also on the Settings->Basic Settings page, HTTP Proxy tab. 6/25/2021 Brickstream® 3D Gen 2 Installation Guide ©2016-2021 FLIR Integrated Imaging Solutions Inc. June 2021 All rights reserved. -
Page 49: Step 7 Of 10-Calibration (Part 1)
2. Is the camera installed indoors? 3. Do you want to calibrate the camera? If you select No, the wizard skips step 8. 4. Click Save & Next. 6/25/2021 Brickstream® 3D Gen 2 Installation Guide ©2016-2021 FLIR Integrated Imaging Solutions Inc. June 2021 All rights reserved. -
Page 50: Step 8 Of 10-Calibration (Part 2)
X and Y rotation should be within 10 degrees of visual angle estimate. 4. Click Save & Next. Note: This information is also on the Calibration page. 6/25/2021 Brickstream® 3D Gen 2 Installation Guide ©2016-2021 FLIR Integrated Imaging Solutions Inc. June 2021 All rights reserved. -
Page 51: Step 9 Of 10-Data Delivery
In the SNI Host Name field, enter the Server Name Indication (SNI) hostname or IP address for the host. 9. Click Test Settings to confirm entries. 10. Click Save & Next. 6/25/2021 Brickstream® 3D Gen 2 Installation Guide ©2016-2021 FLIR Integrated Imaging Solutions Inc. June 2021 All rights reserved. - Page 52 Brickstream® 3D Gen 2 Version 6.2 Note: This information is also on the Data Delivery->Batch page. 6/25/2021 Brickstream® 3D Gen 2 Installation Guide ©2016-2021 FLIR Integrated Imaging Solutions Inc. June 2021 All rights reserved.
-
Page 53: Step 10 Of 10-Networking
Note: If you change the IP address on a sensor and save your changes, you lose connectivity to the sensor for several seconds while it is being enabled with the new IP address. 6/25/2021 Brickstream® 3D Gen 2 Installation Guide ©2016-2021 FLIR Integrated Imaging Solutions Inc. June 2021 All rights reserved. -
Page 54: Configuring The Basic Settings
Setting up a LAN connection can be done on the Basic Settings page or in the Configuration Wizard. Setting up Wi-Fi can only be done on the Basic Settings page. 6/25/2021 Brickstream® 3D Gen 2 Installation Guide ©2016-2021 FLIR Integrated Imaging Solutions Inc. June 2021 All rights reserved. -
Page 55: Using A Lan
4. If your network does not use DHCP, click the switch to OFF and enter the following information: Sensor IP Address Network Mask Default Gateway DNS Server 5. Click Save. 6/25/2021 Brickstream® 3D Gen 2 Installation Guide ©2016-2021 FLIR Integrated Imaging Solutions Inc. June 2021 All rights reserved. -
Page 56: Using Wi-Fi
IP addresses for sensors at this location before choosing to use DHCP with the sensors. 6/25/2021 Brickstream® 3D Gen 2 Installation Guide ©2016-2021 FLIR Integrated Imaging Solutions Inc. June 2021 All rights reserved. -
Page 57: Setting The Web Server Information
Certificates must be in PEM format. The file names must be cert.pem and key.pem. Uploading certificate files is optional. FLIR provides a default set of files on the sensor. If there are no user-uploaded files, or if the uploaded files are incorrectly formatted or incompatible with each other, the sensor reverts to the default set of files. - Page 58 ! # $ / % ' ( ) [ ] { } + - . , | = < > _ * ; ~ ? ^ 6/25/2021 Brickstream® 3D Gen 2 Installation Guide ©2016-2021 FLIR Integrated Imaging Solutions Inc. June 2021...
- Page 59 ! # $ / % ' ( ) [ ] { } + - . , | = < > _ * ; ~ ? ^ c. In the Re-Enter Password field, re-enter the password. 6/25/2021 Brickstream® 3D Gen 2 Installation Guide ©2016-2021 FLIR Integrated Imaging Solutions Inc. June 2021 All rights reserved.
- Page 60 12. Enter your saved credentials and click Sign in. If entering the operator's credentials, your access to features is restricted to the operator level. If you lose your username or your password contact PCT-Support@flir.com. Once logged in, a user stays logged in as long as the browser window is open and for an additional 30 minutes after the window is closed.
-
Page 61: Setting The Date And Time
Setting the Date and Time The date and time of the sensor can be set automatically through the time server or manually through the web interface. FLIR recommends using a time server as a manual setting is subject to drift and can become inaccurate. - Page 62 IP address and port specified on the Date and Time Info page. A success or failure message is displayed at the top of the page. 6/25/2021 Brickstream® 3D Gen 2 Installation Guide ©2016-2021 FLIR Integrated Imaging Solutions Inc. June 2021 All rights reserved.
-
Page 63: Manual Time Setup
6. In the API Token field, enter the API token. An API token is a cryptic string of up to 255 characters, used to authenticate access to the HTTPS server. 6/25/2021 Brickstream® 3D Gen 2 Installation Guide ©2016-2021 FLIR Integrated Imaging Solutions Inc. June 2021 All rights reserved. -
Page 64: Setting The Device Manager Server
7. In the Connect Frequency field, enter the frequency (in milliseconds) that the sensor checks the Device Manager Server for connection requests. The default value is 10000. 6/25/2021 Brickstream® 3D Gen 2 Installation Guide ©2016-2021 FLIR Integrated Imaging Solutions Inc. June 2021 All rights reserved. -
Page 65: Configuring Proxy Settings
If you are using the Brickstream Device Manager to store metric data, you should set the Site ID. The Device Manager attempts to match the Site ID to a Site ID in the Operational Database in order to auto- 6/25/2021 Brickstream® 3D Gen 2 Installation Guide ©2016-2021 FLIR Integrated Imaging Solutions Inc. June 2021 All rights reserved. - Page 66 4. From the XML Data Format drop-down, select a format to use for output data. The default (and recommended) selection is Latest. More detailed information about XML formats can be found in the Programmer's Guide. 5. Click Save. 6/25/2021 Brickstream® 3D Gen 2 Installation Guide ©2016-2021 FLIR Integrated Imaging Solutions Inc. June 2021 All rights reserved.
-
Page 67: Setting Data Delivery Options
The sensor can deliver batch data to up to two servers. Set the batch data delivery options as follows. 1. Open the web interface to the Data Delivery> Batch page. 2. Click the Batch 1 switch to ON. 6/25/2021 Brickstream® 3D Gen 2 Installation Guide ©2016-2021 FLIR Integrated Imaging Solutions Inc. June 2021 All rights reserved. - Page 68 6. From the Aggregation Level list select how often to aggregate the count report in minutes (1, 5, 15, 30, or 60). 6/25/2021 Brickstream® 3D Gen 2 Installation Guide ©2016-2021 FLIR Integrated Imaging Solutions Inc. June 2021 All rights reserved.
-
Page 69: Setting Real Time Data Delivery Options
Note: Data is not buffered, therefore, retransmission of lost data packets is not supported. 6/25/2021 Brickstream® 3D Gen 2 Installation Guide ©2016-2021 FLIR Integrated Imaging Solutions Inc. June 2021 All rights reserved. - Page 70 7. In the Delivery Frequency field, enter the number of milliseconds between connection attempts from the sensor to the Device Manager Server. 6/25/2021 Brickstream® 3D Gen 2 Installation Guide ©2016-2021 FLIR Integrated Imaging Solutions Inc. June 2021 All rights reserved.
-
Page 71: Setting Alert Delivery Options
5. If the sensor needs to send alerts to a specific URL address in the HTTP POST, in the Destination field, enter the URL address. Note: Use ‘/’ if you have not been directed to change this 6/25/2021 Brickstream® 3D Gen 2 Installation Guide ©2016-2021 FLIR Integrated Imaging Solutions Inc. June 2021 All rights reserved. -
Page 72: Setting Email Delivery Options
1. Open the web interface to the Data Delivery> Email page. 2. Click the Email Delivery switch to ON. The fields become active. 6/25/2021 Brickstream® 3D Gen 2 Installation Guide ©2016-2021 FLIR Integrated Imaging Solutions Inc. June 2021 All rights reserved. - Page 73 6. In the Recipient Email Address field, enter the email address of the person to receive the email. Note: The field must contain a valid email address on the SMTP server. 6/25/2021 Brickstream® 3D Gen 2 Installation Guide ©2016-2021 FLIR Integrated Imaging Solutions Inc. June 2021 All rights reserved.
- Page 74 Note: If you receive an error message, see Troubleshooting. 12. If possible, check the recipient's email to ensure that the test email arrives. 6/25/2021 Brickstream® 3D Gen 2 Installation Guide ©2016-2021 FLIR Integrated Imaging Solutions Inc. June 2021 All rights reserved.
-
Page 75: Setting Ftp Delivery Options
1. Open the web interface to the Data Delivery> FTP page. 2. Click the FTP Delivery switch to ON. The fields become active. 6/25/2021 Brickstream® 3D Gen 2 Installation Guide ©2016-2021 FLIR Integrated Imaging Solutions Inc. June 2021 All rights reserved. - Page 76 Brickstream® 3D Gen 2 Version 6.2 6/25/2021 Brickstream® 3D Gen 2 Installation Guide ©2016-2021 FLIR Integrated Imaging Solutions Inc. June 2021 All rights reserved.
- Page 77 For the following examples, assume the site name is set to Grocery1 and the site ID is set to 987. File Naming Convention Field Resulting File Name #S.PCNT.#I.#D.#T.#M.dat Grocery1.PCNT.987.090226.140000.00-b0-9d-70-01-05.dat 6/25/2021 Brickstream® 3D Gen 2 Installation Guide ©2016-2021 FLIR Integrated Imaging Solutions Inc. June 2021 All rights reserved.
- Page 78 In the Active FTP area click the Port Range switch to ON. b. In the Lowest Port and Highest Port fields, enter the port range. 6/25/2021 Brickstream® 3D Gen 2 Installation Guide ©2016-2021 FLIR Integrated Imaging Solutions Inc. June 2021 All rights reserved.
-
Page 79: Setting Wi-Fi Options
3. In the IP or Host Name field, enter the IP address of the server to receive data from the sensor. 4. In the Server Port Number field, enter the port number to which the sensor should attempt to deliver data. 6/25/2021 Brickstream® 3D Gen 2 Installation Guide ©2016-2021 FLIR Integrated Imaging Solutions Inc. June 2021 All rights reserved. -
Page 80: Setting Traffic Map Delivery
1. Open the web interface to the Data Delivery > Traffic Maps Settings page. 2. Click the Traffic Maps switch to ON. The fields become active. 6/25/2021 Brickstream® 3D Gen 2 Installation Guide ©2016-2021 FLIR Integrated Imaging Solutions Inc. June 2021 All rights reserved. - Page 81 15 to 20 minutes. After a successful send, or after three failed attempts, the sensor deletes that batch of data. Once deleted the data cannot be recovered. 6/25/2021 Brickstream® 3D Gen 2 Installation Guide ©2016-2021 FLIR Integrated Imaging Solutions Inc. June 2021 All rights reserved.
-
Page 82: Setting Available Sensor Data Options
2. From the Delivery Method drop-down, select a format for data delivery. The options depend on which data delivery options are enabled on the Data Delivery page: Email Batch 1 Batch 2 6/25/2021 Brickstream® 3D Gen 2 Installation Guide ©2016-2021 FLIR Integrated Imaging Solutions Inc. June 2021 All rights reserved. -
Page 83: Setting Track Data Delivery Options
3. In the IP or Host Name field, enter the IP address of the server to receive data feeds from the sensor. 4. In the Port Number field, enter the port number to which the sensor should attempt to deliver data feeds. 6/25/2021 Brickstream® 3D Gen 2 Installation Guide ©2016-2021 FLIR Integrated Imaging Solutions Inc. June 2021 All rights reserved. -
Page 84: Setting Tailgating Delivery Options
The alert can be configured to send one to five images of the event. To generate data, tailgating must be enabled on a counting zone. 6/25/2021 Brickstream® 3D Gen 2 Installation Guide ©2016-2021 FLIR Integrated Imaging Solutions Inc. June 2021 All rights reserved. - Page 85 Click the Data Encryption switch to ON. b. In the SNI Host Name field, enter the Server Name Indication (SNI) hostname or IP address for the host. 6/25/2021 Brickstream® 3D Gen 2 Installation Guide ©2016-2021 FLIR Integrated Imaging Solutions Inc. June 2021 All rights reserved.
- Page 86 Select the number of images (1 to 5) to be delivered in the alert. 10. Click Test Settings to confirm entries. 11. Click Save. 6/25/2021 Brickstream® 3D Gen 2 Installation Guide ©2016-2021 FLIR Integrated Imaging Solutions Inc. June 2021 All rights reserved.
-
Page 87: Installing The 3D Gen 2 Sensor On-Site
We recommend using patch panels at the head-end and optional biscuit mounts at the sensor end of the home-run cables. Installer-provided patch cables 1 m to 2 m (3–6 ft) long should connect patch panels to POE switches. 6/25/2021 Brickstream® 3D Gen 2 Installation Guide ©2016-2021 FLIR Integrated Imaging Solutions Inc. June 2021 All rights reserved. -
Page 88: Poe Connection Options
The following table describes how to connect the 3D Gen 2 sensor to the network/PoE cables using one of the following methods. 6/25/2021 Brickstream® 3D Gen 2 Installation Guide ©2016-2021 FLIR Integrated Imaging Solutions Inc. June 2021 All rights reserved. - Page 89 Brickstream® 3D Gen 2 Version 6.2 Connect Option Diagram Legend Using... Etherne t switch Single- Single- port PoE port injector Injector 3. 3D Gen 2 sensor 6/25/2021 Brickstream® 3D Gen 2 Installation Guide ©2016-2021 FLIR Integrated Imaging Solutions Inc. June 2021 All rights reserved.
- Page 90 2. 3D switch Gen 2 sensor Etherne t switch Multi- port Multi- midspan port injector injector 3. 3D Gen 2 sensor 6/25/2021 Brickstream® 3D Gen 2 Installation Guide ©2016-2021 FLIR Integrated Imaging Solutions Inc. June 2021 All rights reserved.
-
Page 91: Enabling Wi-Fi/Ble Features (2510 Model Only)
Reboot, or power up the sensor. Once inserted, the presence of the USB device appears on the sensor's home page. 6/25/2021 Brickstream® 3D Gen 2 Installation Guide ©2016-2021 FLIR Integrated Imaging Solutions Inc. June 2021 All rights reserved. -
Page 92: Mounting A 3D Gen 2 Sensor
You can also use the Minimum Distance Calculator (available from your FLIR Brickstream representative) for more accurate positioning. If you cannot see both stereoscopic lenses of the sensor when looking up at it from the area you want to monitor, the view is obstructed and requires adjustment to surrounding objects, adjustment to sensor installation height, or use of the Minimum Distance Calculator. -
Page 93: Installing The Sensor
The site survey outcome provides information to build a site design with a Specification document and Bill of Materials (BOM) 6/25/2021 Brickstream® 3D Gen 2 Installation Guide ©2016-2021 FLIR Integrated Imaging Solutions Inc. June 2021 All rights reserved. -
Page 94: Installing A Surface Mount
7. For each surface mount, perform Installing a Surface Mount. Installing a Surface Mount A drilling template for surface mounts is available from your FLIR representative. 6/25/2021 Brickstream® 3D Gen 2 Installation Guide ©2016-2021 FLIR Integrated Imaging Solutions Inc. -
Page 95: Installing A Recessed Mount
Installing a Recessed Mount The following diagrams provide detailed information about the recessed mounts available for the 3D Gen 2 sensor. A cutting template for recessed mounts is available from your FLIR Brickstream representative. Note: For accurate size of the cutting template, the template must be printed at 100% (no scaling) on tabloid (11 x 17”) paper. - Page 96 10. Ensure that the LEDs are clearly visible through the small holes in the carrier. 11. Use the hardware provided in the zip-closure bag to secure the sensor in the carrier. 6/25/2021 Brickstream® 3D Gen 2 Installation Guide ©2016-2021 FLIR Integrated Imaging Solutions Inc. June 2021 All rights reserved.
-
Page 97: Installing A Ram Mount
Installing a RAM Mount Note: FLIR does not sell RAM mounts. Installing Brickstream 3D Gen 2 in an open ceiling requires pole drops to install the sensors at the designed height, typically 4.2 m (13 ft 9 in.) Above Finished Floor (AFF). Brickstream offers proprietary mounts for surface and recessed installations;... -
Page 98: Requirements
(Biscuit Jack) above each sensor's location. 2. Run a patch cable through the EMT down to the 3D Gen 2 as shown in the following image. 6/25/2021 Brickstream® 3D Gen 2 Installation Guide ©2016-2021 FLIR Integrated Imaging Solutions Inc. June 2021 All rights reserved. -
Page 99: Recommendations
A sample mounting solution that has been used to install the 3D Gen 2 in an open ceiling environment is shown here: 6/25/2021 Brickstream® 3D Gen 2 Installation Guide ©2016-2021 FLIR Integrated Imaging Solutions Inc. June 2021 All rights reserved. - Page 100 Note: This set screw should be applied in all circumstances including straight down installations to prevent movement. 6/25/2021 Brickstream® 3D Gen 2 Installation Guide ©2016-2021 FLIR Integrated Imaging Solutions Inc. June 2021 All rights reserved.
-
Page 101: Installing An Outdoor Mount
Features and Components Uses ¼"-20 screw to mount from bracket to sensor Water resistant enclosure Hardware for applying the mount not included 6/25/2021 Brickstream® 3D Gen 2 Installation Guide ©2016-2021 FLIR Integrated Imaging Solutions Inc. June 2021 All rights reserved. -
Page 102: Led Boot Sequence
We recommend that you attempt auto calibration before manually setting the sensor height and rotation. Complete the following steps to perform calibration. 1. Open the web interface. 2. Click Calibration. The Calibration page opens. 6/25/2021 Brickstream® 3D Gen 2 Installation Guide ©2016-2021 FLIR Integrated Imaging Solutions Inc. June 2021 All rights reserved. - Page 103 Select whether to use digital zoom of 20%, 40%, 60%, 80%, or 100% and click Save. 5. In the Video Pane, configure the calibration box. 6/25/2021 Brickstream® 3D Gen 2 Installation Guide ©2016-2021 FLIR Integrated Imaging Solutions Inc. June 2021 All rights reserved.
- Page 104 Calculated height should be within 20% of visual height estimate. X and Y rotation should be within 10 degrees of visual angle estimate. 6/25/2021 Brickstream® 3D Gen 2 Installation Guide ©2016-2021 FLIR Integrated Imaging Solutions Inc. June 2021 All rights reserved.
- Page 105 Select whether to use digital zoom of 20%, 40%, 60%, 80%, or 100%. Note that Zoom Level saving a new zoom level requires a recalibration of the sensor. Zones may need to be reconfigured. 6/25/2021 Brickstream® 3D Gen 2 Installation Guide ©2016-2021 FLIR Integrated Imaging Solutions Inc. June 2021 All rights reserved.
- Page 106 A good calibration shows a high percentage of yellow in the map pane. 6/25/2021 Brickstream® 3D Gen 2 Installation Guide ©2016-2021 FLIR Integrated Imaging Solutions Inc. June 2021 All rights reserved.
- Page 107 This fine tuning of the recorded height value is a normal and important part of the calibration process. 6/25/2021 Brickstream® 3D Gen 2 Installation Guide ©2016-2021 FLIR Integrated Imaging Solutions Inc. June 2021 All rights reserved.
-
Page 108: 3D Gen 2 Sensor Specifications
These heightened requirements are due to the need to access the sensor’s on-board Assumes single-zone counting captured/delivered at 5-min/15-min intervals Assumes 15-min time sync intervals, 15-min diagnostics intervals, and 30-sec proxy intervals 6/25/2021 Brickstream® 3D Gen 2 Installation Guide ©2016-2021 FLIR Integrated Imaging Solutions Inc. June 2021 All rights reserved. -
Page 109: Ongoing Bandwidth Requirements
Used by Device Adapter, but can be sent over another port as desired. We recommend using HTTPS for all data traffic to provide optimal security of your data. 6/25/2021 Brickstream® 3D Gen 2 Installation Guide ©2016-2021 FLIR Integrated Imaging Solutions Inc. June 2021 All rights reserved. -
Page 110: Connectivity
Software Upgrade TFTP, HTTP, HTTPS WiFI/BLE Support Optional (2510 model only) FTPS is different than SFTP. Brickstream does not currently support the SFTP protocol. 6/25/2021 Brickstream® 3D Gen 2 Installation Guide ©2016-2021 FLIR Integrated Imaging Solutions Inc. June 2021 All rights reserved. -
Page 111: Technical Specifications
0.6 pounds / 0.25 kg Outdoor mount 1.454 kg / 51.2 oz 1.191 kg / 42.0 oz Recessed mount, 9 in. .737 kg / 26 oz .377 kg / 13.3 oz 6/25/2021 Brickstream® 3D Gen 2 Installation Guide ©2016-2021 FLIR Integrated Imaging Solutions Inc. June 2021 All rights reserved. -
Page 112: Components
See Resetting the Sensor. Note: Contact Brickstream Support if you see a different LED combination than what is documented. 6/25/2021 Brickstream® 3D Gen 2 Installation Guide ©2016-2021 FLIR Integrated Imaging Solutions Inc. June 2021 All rights reserved. -
Page 113: Part Numbers
BPC-2510M-25W Brickstream 3D Gen 2 Stereo 2.5 mm Black with Wi-Fi BLE BPC-2510M-25B Brickstream 3D Gen 2 Brickstream 3D Gen 2 Stereo 6.0 mm White BPC-2500-60W Brickstream 3D Gen 2 Stereo 6.0 mm White with Wi-Fi BLE BPC-2510M-60W Brickstream 3D Gen 2 Stereo 6.0 mm Black with Wi-Fi BLE... -
Page 114: Troubleshooting
The following steps describe how to reset the 3D Gen 2 sensor: 6/25/2021 Brickstream® 3D Gen 2 Installation Guide ©2016-2021 FLIR Integrated Imaging Solutions Inc. June 2021 All rights reserved. - Page 115 Note: Contact Brickstream Support if you see a different LED combination than what is documented. 6/25/2021 Brickstream® 3D Gen 2 Installation Guide ©2016-2021 FLIR Integrated Imaging Solutions Inc. June 2021 All rights reserved.
-
Page 116: Troubleshooting Firmware Upgrades When Using A Tftp Server
FLIR Brickstream support website contains links to download firmware and driver updates, or contact your FLIR Brickstream representative for assistance. Drivers can be updated using the same method as upgrading firmware. Troubleshooting Low-Ceiling Installations The accuracy of the 3D Gen 2 can be compromised if the sensor is installed on a ceiling less than Brickstream's minimum supported mounting height. -
Page 117: Tracking Configuration Solution
Resolving Inoperable 3D Gen 2 Issues The following topics will help you troubleshoot problems you may experience with the sensor. Please review these topics before submitting a Support ticket or RMA form to FLIR. Power Issue Follow these steps to troubleshoot sensor power issues. -
Page 118: Software/Firmware Issue
Resetting the Sensor), contact your FLIR Brickstream Representative. 2. What software version is currently on the sensor? Verify the version of software that the sensor is running by checking the Release number displayed in the footer of the 3D Gen 2 web interface.
Need help?
Do you have a question about the BRICKSTREAM 3D Gen 2 and is the answer not in the manual?
Questions and answers