Table of Contents
Advertisement
Quick Links
Advertisement
Chapters
Table of Contents

Related Manuals for FLIR Fido X4


Summary of Contents for FLIR Fido X4
- Page 1 ® Fido Handheld Explosives Trace Detector Operations Manual...
- Page 2 WARRANTY The Fido X4 equipment that is the subject of this manual is covered by a standard warranty. The terms of the warranty are defined by the "Terms and Conditions of Sale" that was in effect at the time of purchase.
- Page 3 This documentation contains confidential and proprietary information that must be main- tained in confidence and used only in a manner consistent with the documentation and may not be disclosed to any third parties. 4226044 (Rev. C) © 2020 FLIR Systems, Inc.
- Page 4 3 Pickering Street #03-49 Nankin Row Singapore 048660 Tel: + 65.6822.1595 Europe, Africa, Middle East FLIR Detection, Inc. Luxemburgstraat 2 2321 Meer Belgium Tel: + 32 (0) 3665.5106 Fax: + 32 (0) 3303.5624 4226044 (Rev. C) © 2020 FLIR Systems, Inc.
-
Page 5: Table Of Contents
3.5.3 Reference standard 4 Getting Started 4.1 The Keypad 4.1.1 Overview 4.1.2 Using the Input Keys 4.1.2.1 Enter key 4.1.2.2 Menu key 4.1.2.3 Back key 4.1.2.4 Directional pad 4.2 Fido X4 Menus 4226044 (Rev. C) © 2020 FLIR Systems, Inc. -
Page 6: Figure 4-6: Sensitivity Menu
5.5.3 DATA command 5.5.4 FLAG command 5.5.5 ID command 5.6 Turn Off the Fido X4 6 Reviewing Data 6.1 Reviewing Sample Data 6.1.1 Reviewing individual sample records 6.2 Creating Reports 6.2.1 Erasing data 4226044 (Rev. C) © 2020 FLIR Systems, Inc. - Page 7 8.6.4 Other maintenance tasks 8.6.4.1 Inspecting and replacing O-rings 8.6.4.2 Checking the system for leaks 9 Understanding Alerts 9.1 Don’t Panic 9.2 Confirm and Investigate 9.3 Follow Organizational Protocols 10 Specifications Table of Figures 4226044 (Rev. C) © 2020 FLIR Systems, Inc.
- Page 8 Table of Contents Index 4226044 (Rev. C) © 2020 FLIR Systems, Inc.
-
Page 9: Introduction
"System Overview" on p. 14. 1.1 Technical Support This manual is only one of the ways you can learn about the Fido X4. Each Fido X4 kit pur- chase includes operator training and access to FLIR Detection’s customer service portal. Register your system at... - Page 10 Introduction Contact Information https://detectionsupport.com/explosives/ email: explosives.support@flir.com Tel (Toll-free): +1.877.692.2120 4226044 (Rev. C) © 2020 FLIR Systems, Inc.
-
Page 11: Safety
FLIR Fido® X4 Operations Manual Safety IMPORTANT: Before operating the Fido X4, you must read, understand, and follow all instructions, warn- ings, cautions, and legal disclaimers. 2.1 Safety Conventions and Labeling This section describes the safety labels and symbols used in this manual. Failure to observe these safety indicators could result in operator injury or system damage. -
Page 12: Wireless Capability Compliance Notices
This device complies with Industry Canada’s licence-exempt RSSs. Operation is subject to the following two conditions: (1) This device may not cause interference; and (2) This device must accept any interference, including interference that may cause undesired operation of the device. 4226044 (Rev. C) © 2020 FLIR Systems, Inc. - Page 13 L’exploitation est autorisée aux deux conditions suivantes: 1) l’appareil ne doit pas produire de brouillage; 2) l’appareil doit accepter tout brouillage radioélectrique subi, même si le brouillage est sus- ceptible d’en compromettre le fonctionnement. 4226044 (Rev. C) © 2020 FLIR Systems, Inc.
-
Page 14: System Overview
System Overview 3.1 Theory of Operation The primary concept of operation for the Fido X4 Handheld ETD is high throughput screening for trace explosives residues. The screening process consists of three basic steps: 1. Samples are collected from operational surfaces via reusable sample media (Sampling Swipes). -
Page 15: Figure 3-1: Fido X4 Kit Contents
X4 reference standard Spare battery Quick Start Guide X4 consumables Single-point harness (Sensing elements and sampling swipes) AC power supply USB-C to USB-A data cable 4226044 (Rev. C) © 2020 FLIR Systems, Inc. -
Page 16: Fido X4 Unit Overview
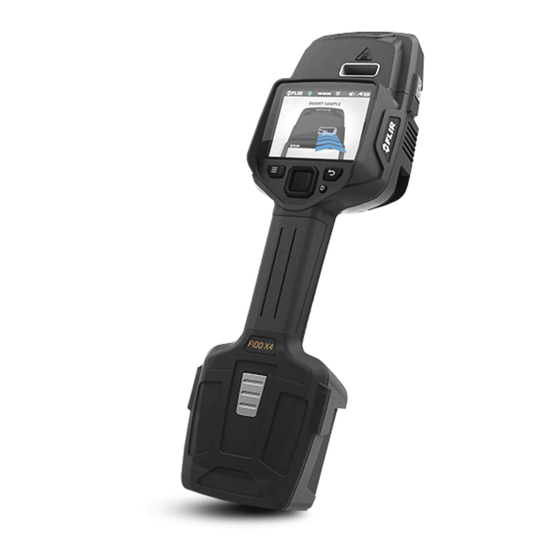
System Overview 3.3 Fido X4 Unit Overview Figure 3-2: Fido X4 (front) 4226044 (Rev. C) © 2020FLIR Systems, Inc. -
Page 17: Primary Hardware Components
FLIR Fido® X4 Operations Manual Figure 3-3: Fido X4 (back and right side) 3.4 Primary Hardware Components 3.4.1 Thermal desorption module (TD) The primary function of the thermal desorption module, or thermal desorber (TD), is to pro- cess trace particulate samples by heating a sample swipe, which vaporizes particulate mater- ial that was collected. ... -
Page 18: Display
For more information, see "The Keypad" on p. 22. 3.4.5 USB-C port The Fido X4 has one data port which can be used to connect the device to a PC. USB-C is a modern standard for Universal Serial Bus and is capable of powering the device and sending and receiving large amounts of data quickly. ... -
Page 19: Sensing Element
Figure 3-4: Sensing element (dot enlarged) The Fido X4 sensing element contains the highly sensitive and selective fluorescent and chemiluminescent sensing materials that make-up TrueTrace technology. During operation, the unmarked end of the sensing element is inserted into the thermal desorber and heated. -
Page 20: Sample Swipes
3.5.2 Sample swipes Figure 3-5: Sample swipe Fido X4 Sample swipes are made of thin, thermally stable materials that are designed to effi- ciently collect particulate samples from operational surfaces, and also effectively allow desorption of those particles during sample processing. - Page 21 FLIR Fido® X4 Operations Manual The Fido X4 reference standard is a core element of the system diagnostic functions. Its pur- pose is to verify that system performance meets a predetermined threshold for detection of trace explosives. The reference standard contains a trace amount of explosive material designed to elicit a metered response across the sensor array, when processed.
-
Page 22: Getting Started
Getting Started 4 Getting Started This chapter describes some basic features of the keypad and display of the Fido X4. 4.1 The Keypad 4.1.1 Overview The Fido X4 has rubberized tactile input keys (Figure 4-1) located below the display. -
Page 23: Menu Key
FLIR Fido® X4 Operations Manual 4.1.2.2 Menu key from most screens to bring up the Fido X4's Main Menu. If the Main Menu is already open, pressing will exit the menu and return to the active operational screen. For more information, see "Fido X4 Menus" on p. 25. -
Page 24: Figure 4-3: Example Of A Menu Screen
In a multi-item configuration screen (see Figure 4-4, R), highlights the next selectable item to the left. In a multi-item configuration screen, highlights the next selectable item to the right. Figure 4-4: Examples of configuration screens 4226044 (Rev. C) © 2020 FLIR Systems, Inc. -
Page 25: Fido X4 Menus
4.2 Fido X4 Menus Press to display the main menu of the Fido X4. The selections on the main menu rep- resent primary system functions. Each entry on a menu screen has its name in bold text near the left edge of the screen. Some menu entries include an icon to the left of the menu name as an additional visual cue. -
Page 26: Settings Menu
• Threat Table: The Threat Table option takes you to a glossary of substances that are detected by the Fido X4. For examples of the kind of information that is displayed in the threat table, see "ID command" on p. 46. -
Page 27: Scroll Bars On Menu Screens
Functions on the File Archive Menu allow you to access historical information on samples that have been collected. For a detailed description of File Archive functions, see "Reviewing Sample Data" on p. 47. Figure 4-8: File Archive menu 4226044 (Rev. C) © 2020 FLIR Systems, Inc. -
Page 28: Device Status Menu
4.2.5 Device Status menu Select the Device Status menu item from the main menu to access the following inform- ation about the Fido X4. The information on the Device Status menu is display only; you can- not modify it. Serial Number: Each Fido X4 ETD can be identified using its unique serial number. All data stored on the device will include this serial number. -
Page 29: Help
Select Help from the main menu to display the Help menu, where you can access short instructional videos demonstrating how to perform tasks. Press to highlight the video you want, then press to play it. Figure 4-10: Help menu 4226044 (Rev. C) © 2020 FLIR Systems, Inc. -
Page 30: Operating The Fido X4
Also, ensure that a sensing element is installed in the system. 5.1.1 Startup To turn on the Fido X4, press and hold the power button, releasing when the display back- light becomes visible, which takes about three seconds. After several seconds, the first of several FLIR splash screens will appear. -
Page 31: Startup Wizard
FLIR Fido® X4 Operations Manual 5.1.2.1 Startup Wizard While the Fido X4 is heating, you may choose to play the Startup Wizard. The Startup Wizard is a series of short videos, without sound, which show the procedure for verification, sampling, and changing the sensing element. Press during startup to begin the Startup Wizard. -
Page 32: Figure 5-5: Extending The Reference Standard
Figure 5-5: Extending the reference standard Step 3: With the holes facing toward the Fido X4 display, insert the reference standard into the thermal desorber (TD) slot as shown in Figure 5-6. Figure 5-6: Reference standard in TD slot... -
Page 33: Figure 5-7: Checking System Performance Screen
Store the closed reference standard in the kit. Step 8: When analysis is complete, the Fido X4 will automatically display the result: “Verify Pass," "Verify Fail," or an error message will appear. If “Verify Pass” appears (Figure 5-8), select OK. -
Page 34: Verification Failure
5-11). For more information, see "Replacing the Sensing Element" on p. 53. Figure 5-9: First Verify Fail screen Figure 5-10: Verify Fail screens Figure 5-11: Replace sensing element alert screen 4226044 (Rev. C) © 2020 FLIR Systems, Inc. -
Page 35: Reference Presentation Error
5.3 Collecting a Particulate Sample 5.3.1 Trace detection The Fido X4 is designed for trace detection of explosive particulate. Trace is defined as an amount of a substance or chemical that cannot readily be seen by the naked eye. Substance quantities are often less than 1 microgram. -
Page 36: How To Sample
Lift the swipe when repositioning. Figure 5-14: Bullseye design (not present on actual swipe) indicates Zone of Analysis 4226044 (Rev. C) © 2020 FLIR Systems, Inc. -
Page 37: Figure 5-15: Examples Of Bad (Top) And Good (Bottom) Swiping Technique
Figure 5-16: Insert Sample screen Step 4: Insert the swipe into the thermal desorber (TD) slot until the swipe rests against the bottom stop and release. The TD will automatically close when the swipe is detected. 4226044 (Rev. C) © 2020 FLIR Systems, Inc. -
Page 38: Figure 5-17: Sample Inserted In Td Slot
Operating the Fido X4 Figure 5-17: Sample inserted in TD Slot Step 5: When the TD closes, the Fido X4 will display the message “Gathering Particles” (Figure 5-18) and a meter bar will appear to indicate sample progress. Figure 5-18: Gathering Particles screen Sampling lasts for a maximum of 10 seconds. -
Page 39: Collecting A Vapor Sample
5.4 Collecting a Vapor Sample 5.4.1 Vapor Detection Mode The Fido X4 is capable of operating in two different sampling modes, Particle (see 5.3) Mode and Vapor Mode. While Particle Mode provides the most comprehensive means for threat detection based on various chemical and environmental principles, Vapor Mode provides some unique advantages for sampling and detecting specific threats with very high vapor pressures, or when contact with a sample is impossible. -
Page 40: Switching To Vapor Mode
Figure 5-21: System verification screen for Vapor Mode Follow the on-screen prompts or these instructions to perform the verification process: Step 1: Remove the cap from the Vapor Mode inlet adapter (Figure 5-22) by twisting counterclockwise. 4226044 (Rev. C) © 2020 FLIR Systems, Inc. -
Page 41: Figure 5-22: Vapor Mode Inlet Adapter
Step 3: Select Go to begin verification. A countdown of 3 seconds will display, then a screen similar to Figure 5-24 will appear: Figure 5-24: Preparing to Verify screen in Vapor Detection Mode 4226044 (Rev. C) © 2020 FLIR Systems, Inc. -
Page 42: Collecting A Vapor Sample
5.4.5.2 Search Search allows you to monitor system response graphically, in real time, through the display. When you select Sample, a graph which represents the response of each channel in the 4226044 (Rev. C) © 2020 FLIR Systems, Inc. -
Page 43: Sample Information
FLIR Fido® X4 Operations Manual sensing element (see 3.5.1), along with alarm thresholds, is displayed. The type of graph is determined by the Fido X4 Vapor Mode settings (5.4.2). Search mode does not provide category- or substance -level threat identification. Its main pur- pose is for sorting out possible threats from "noise."... -
Page 44: Sample Information: Threat Detected
Depending on the amount that was available for analysis and other factors, this presumptive threat identification may indicate only that a threat is present, the threat material class, or a specific substance. Sensitivity setting when sample was taken 4226044 (Rev. C) © 2020 FLIR Systems, Inc. -
Page 45: Data Command
To see the different types of flags, highlight the Flag command on a sample information screen, then press repeatedly. Figure 5-29: Flagged sample record 4226044 (Rev. C) © 2020 FLIR Systems, Inc. -
Page 46: Id Command
Figure 5-30:Threat details displayed by ID command 5.6 Turn Off the Fido X4 Press the power button and hold to power down the Fido X4. A message will display to acknowledge that the power key has been pressed. A countdown will display to show pro- gress toward initiating the shutdown sequence. -
Page 47: Reviewing Data
Browse Files will be highlighted. Press to select it. Figure 6-2: File Archive menu Step 2: On the Browse Date screen, press to navigate to the date you want. Press to select the date. 4226044 (Rev. C) © 2020 FLIR Systems, Inc. -
Page 48: Creating Reports
6.2 Creating Reports You can use the Fido X4 to generate reports, which include: • all individual data files from each sample recorded during a time period you select, including screen captures from the original sample analysis •... -
Page 49: Figure 6-5: Report Generation In Progress
After a summary report is generated, it is temporarily stored on the device. Reports can be accessed by connecting the Fido X4 to a computer, using the USB-C to USB-A data cable. To conserve storage space, reports are erased from the device after a power cycle. For more information, see "Connecting to a Computer"... -
Page 50: Erasing Data
For information on administrator passcodes, see the Fido X4 Administrator Guide. Note: To avoid data loss, back up Fido X4 files on a computer before erasing data. See "Connecting to a Computer" on p. 51. 4226044 (Rev. C) © 2020 FLIR Systems, Inc. -
Page 51: Connecting To A Computer
Service and Support Portal: https://flir.link/x4. 7.1 USB Connection Plug in the included USB cable to the Fido X4 USB port, then connect the USB end of the cable to your computer’s USB port (see Figure 3-3). The first time the Fido X4 is connected to a computer, there may be a delay as any necessary drivers are configured by the operating system. -
Page 52: Digital Manuals
Connecting to a Computer If a report is generated while the Fido X4 is connected to the computer via USB, the Fido X4 will briefly disconnect while the report is generated. The Fido X4 will then reconnect with the new report available. -
Page 53: System Maintenance
8 System Maintenance Fido X4 requires basic maintenance and cleaning to ensure optimal performance throughout operation. All basic maintenance can be completed by the end-user. Fido X4 does not require periodic calibration or factory-performed maintenance. 8.1 Replacing the Sensing Element The sensing element will periodically need to be replaced. -
Page 54: Figure 8-2: Opening The Sensing Element Compartment
Figure 8-2: Opening the sensing element compartment (1) Step 3: Pull the door out horizontally, parallel to the Fido X4, as shown in Figure 8-4, until it is fully extended in that direction. Figure 8-3: Opening the sensing element compartment (2) -
Page 55: Figure 8-4: Accessing The Sensing Element
FLIR Fido® X4 Operations Manual Step 4: Tilting the head of the Fido X4 downward at an approximately 45-degree angle as shown in Figure 8-11, lift the sensing element door up to expose the sensing element. Figure 8-4: Accessing the sensing element Figure 8-5: Sensing element in place Caution: The sensing element is HOT. -
Page 56: Installing The Sensing Element
Step 3: Hold it by the marked end (Figure 8-1). Step 4: Insert the unmarked end into the sensing element compartment in the Fido X4 (see Figure 8-5). Step 5: The sensing element will meet some initial resistance from the O-rings that it seats into. -
Page 57: Battery Handling
8.2.2 Replacing the battery During operation it may be necessary to replace the Fido X4 system battery when the charge becomes low. The system will notify the user when the battery needs to be replaced. ... -
Page 58: Removing And Attaching The Thermal Desorber
8.4.2 Attaching the thermal desorber To re-attach the TD: Step 1: Insert the tabs on the bottom of the TD into the holes located on the main sys- tem housing. Figure 8-8: Attaching the TD 4226044 (Rev. C) © 2020 FLIR Systems, Inc. -
Page 59: Replacing The Detector Inlet
Rotate the TD up to click the latches into place. 8.5 Replacing the Detector Inlet The Fido X4 is equipped with a user-replaceable detector inlet (3.4.2 , p.17). The inlet should only need to be replaced in the event of a serious clog or physical damage. A spare detector inlet and additional O-rings are provided in the maintenance kit. -
Page 60: Cleaning The System
8.6.1 Clean System menu Figure 8-10: Clean System menu Occasionally the Fido X4 system can become dirty or contaminated with residue or envir- onmental contaminants. The Clean System menu provides instructions on how to clean the Fido X4 to ensure optimal performance throughout operation. There are two types of clean- ing covered on this menu. -
Page 61: Cleaning The Thermal Desorber
Materials needed Alcohol swab or pad Procedure Step 1: Power off the Fido X4 and allow 15 minutes for surfaces to cool. Step 2: Remove the TD by depressing the tab latches on each side. Step 3: Using an alcohol swab or pad, clean the circular metal surface and the plastic sur- rounding it. -
Page 62: Other Maintenance Tasks
0 ccm during this process. By monitoring and checking that the flow rate on the device drops to 0, you can ensure that air is not entering the system through a leak, which would neg- atively impact performance during operation. 4226044 (Rev. C) © 2020 FLIR Systems, Inc. -
Page 63: Understanding Alerts
• Follow your protocols. 9.1 Don’t Panic It is important that the operator of the Fido X4 be able to maintain awareness and presence of mind. Do not indicate to the person responsible of the item begin screened that anything is wrong. -
Page 64: Follow Organizational Protocols
If a person has handled ammonium nitrate fer- tilizer, they might cause an alert. • Since the Fido X4 detects the elemental sulfur in black powder, a person might have recently handled match heads, or vulcanized rubber (vehicle tires) which will cause an alarm. -
Page 65: Specifications
USB-C (data and communication modes), toggleable WiFi, and Communication Bluetooth Data Storage 3,500 hours of continuous data logging Data Management On-device report generation; export to mass storage User Levels Operator and Administrator mode 4226044 (Rev. C) © 2020 FLIR Systems, Inc. - Page 66 3.2 lbs (1.5 kg) IP54-rated, molded magnesium and polymer composite casing Enclosure & Protection with anti-corrosive coating Unmanned Platform Integration UGV mounting bracket, inlet and screen protection, battery port Kit Components cover 4226044 (Rev. C) © 2020 FLIR Systems, Inc.
-
Page 67: Table Of Figures
FLIR Fido® X4 Operations Manual Table of Figures Figure 3-1: Fido X4 Kit Contents Figure 3-2: Fido X4 (front) Figure 3-3: Fido X4 (back and right side) Figure 3-4: Sensing element (dot enlarged) Figure 3-5: Sample swipe Figure 3-6: Reference standard, fully extended... - Page 68 Figure 8-6: Selecting the sensing element type Figure 8-7: Squeeze tabs to loosen TD Figure 8-8: Attaching the TD Figure 8-9: Inlet tool Figure 8-10: Clean System menu Figure 8-11: Cleaning adapter 4226044 (Rev. C) © 2020 FLIR Systems, Inc.
- Page 69 Bluetooth 51, 65 USB 14, 49, 51, 57, 65 wireless 51 detector inlet 11, 17, 28, 30, 59 display 18, 22, 25, 30, 47, 52, 56, 65 erasing data 50 firmware 28, 51 updating 51 flow rate 62 Help menu 29, 61 4226044 (Rev. C) © 2020 FLIR Systems, Inc.
- Page 70 14, 53 manuals 52 menu Help 29, 61 Settings 26, 39 Status 28 menus 18, 22, 25, 39, 47, 60 O-rings 56 PDF 48, 52 powering on 30 records 47 reference standard 11, 14, 31 reports 18, 47, 51, 65 accessing 18, 51 safety 11 4226044 (Rev. C) © 2020 FLIR Systems, Inc.
- Page 71 18 swipes 14, 28, 39 technical support 9, 18 theory of operation 14 thermal desorber (TD) 11, 17, 30, 32, 58 thermal desorption module (TD) 17 USB 14, 49, 51, 57, 65 videos 9, 29, 31, 62 4226044 (Rev. C) © 2020 FLIR Systems, Inc.
- Page 72 This document is changed in accordance with our Quality Management system. All changes are archived. Publ. No.: 4226044 Revision: C Language: en Issue date: April 15, 2020...
Need help?
Do you have a question about the Fido X4 and is the answer not in the manual?
Questions and answers