Table of Contents
Advertisement
Quick Links
Advertisement
Chapters
Table of Contents

Related Manuals for Vivax ACP-09CH25AEYI


Summary of Contents for Vivax ACP-09CH25AEYI
- Page 1 User manual...
- Page 2 SPLIT-TYPE ROOM AIR CONDITIONER Owner's Manual OP Series All Model Numbers IMPORTANT NOTE: Read this manual carefully before installing or operating your new air conditioning unit. Make sure to save this manual for future reference.
-
Page 3: Table Of Contents
Table of Contents Owner’s Manual 0 Safety Precautions ………………………………………………..… 4 1 Unit Specifications and Features ………………………...….. 6 2 Manual Operation (Without Remote) ………………..…….….….. 11 3 Care and Maintenance ………………………………………..……. 12 4 Troubleshooting ………………………………………………..…… 14 5 European Disposal Guidelines …………………………..……….. 18... - Page 4 Caution: Risk of fire/flamable materials WARNING: Servicing shall only be performed as recommended by the equipment manufacturer. Maintenance and repair requiring the assistance of other skilled personnel shall be carried out under the supervision of the person competent in the use of flammable refrigerants.
-
Page 5: Safety Precautions
Safety Precautions Read Safety Precautions Before Installation Incorrect installation due to ignoring instructions can cause serious damage or injury. The seriousness of potential damage or injuries is classified as either a WARNING or CAUTION. This symbol indicates that ignoring instructions may cause death or serious injury. - Page 6 ELECTRICAL WARNINGS • Only use the specified power cord. If the power cord is damaged, it must be replaced by the manufacturer or certified service agent. • Keep power plug clean. Remove any dust or grime that accumulates on or around the plug.
-
Page 7: Unit Specifications And Features
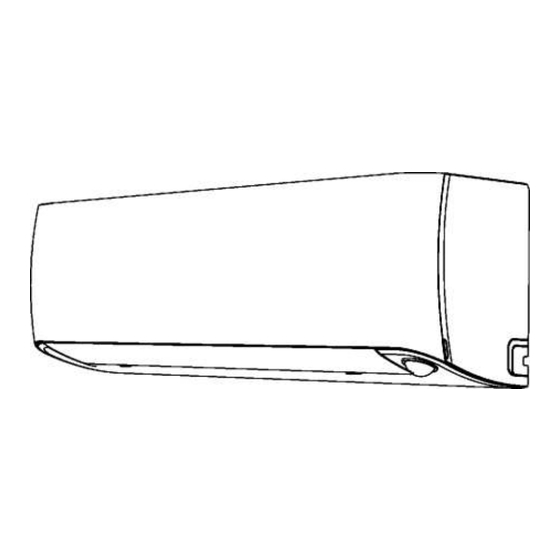
Unit Specifications and Features Unit parts Remote Power Cable Control (Some Units) Front Panel Holder Remote (Some Control Units) Louver Intelligent eye (some units) Air Freshening Filter (On back of Main Filter - Some Units) Display window The unit has a build-in light sensor to detect the ambient brightness. - Page 8 Achieving Optimal Performance Optimal performance for the COOL, HEAT, and DRY modes can be achieved in the following temperature ranges. When your air conditioner is used outside of these ranges, certain safety protection features will activate and cause the unit to perform less than optimally.
- Page 9 To further optimize the performance of your unit, do the following: Keep doors and windows closed. • Limit energy usage by using TIMER ON and TIMER OFF functions. • Do not block air inlets or outlets. • Regularly inspect and clean air filters. •...
- Page 10 people's activities in the room and adjust the Setting Angle of Air Flow horizontal angle of air flow to implement wind • Setting vertical angle of air flow follow people feature and wind flow away from people feature. NOTE: The wind flow flow follow people feature is only available for a While the unit is on, use the SWING (vertical...
- Page 11 Sleep Operation The SLEEP function is used to decrease energy use while you sleep (and don't need the same temperature settings to stay comfortable). This function can only be activated via remote control. Press the SLEEP button when you are ready to go to sleep. When in COOL mode, the unit will increase the temperature by 1°C (2°F) after 1 hour, and will increase an additional 1°C (2°F) after another hour.
-
Page 12: Manual Operation (Without Remote)
Manual Operation (Without Remote) How to operate your unit without the remote control In the event that your remote control fails to work, your unit can be operated manually with the MANUAL CONTROL button located on the indoor unit. Note that manual operation is not a long-term solution, and that operating the unit with your remote control is strongly recommended. -
Page 13: Care And Maintenance
5. Clean the large air filter with warm, Care and Maintenance soapy water. Be sure to use a mild detergent. 6. Rinse the filter with fresh water, Cleaning your indoor unit then shake off excess water. 7. Dry it in a cool, dry place, and refrain from exposing it to direct sunlight. - Page 14 Maintenance - CAUTION Long Periods of Non-Use Before changing the filter or cleaning, • If you plan not to use your air conditioner for an turn off the unit and disconnect its power extended period of time, do the following: supply.
-
Page 15: Troubleshooting
Troubleshooting SAFETY PRECAUTIONS If ANY of the following conditions occurs, turn off your unit immediately! • The power cord is damaged or abnormally warm • You smell a burning odor • The unit emits loud or abnormal sounds • A power fuse blows or the circuit breaker frequently trips •... - Page 16 Issue Possible Causes A rushing air sound may occur when the The indoor unit makes noises louver resets its position. A squeaking sound may occur after running the unit in HEAT mode due to expansion and contraction of the unit's plastic parts.
- Page 17 Troubleshooting When troubles occur, please check the following points before contacting a repair company. Problem Possible Causes Solution Temperature setting may be Lower the temperature higher than ambient room setting temperature The heat exchanger on the Clean the affected heat indoor or outdoor unit is exchanger dirty...
- Page 18 Problem Possible Causes Solution Power failure Wait for the power to be restored The power is turned off Turn on the power The unit is not working The fuse is burned out Replace the fuse Remote control batteries Replace batteries are dead The Unit's 3-minute Wait three minutes after...
-
Page 19: European Disposal Guidelines
DISPOSAL OF ELECTRICAL AND ELECTRONIC EQUIPMENT o protect our environment and to recycle the raw materials used as completely as possible, the consumer is asked to return unserviceable equipment to the public collection system for electrical and electronic. The symbol of the crossed indicates that this product must be returned to the collection point for electronic waste to feed it by recycling the best possible raw material recycling. - Page 20 AIR CONDITIONER REMOTE CONTROLLER MANUAL The design and specifications are subject to change without prior notice for product improvement. Consult with the sales agency or manufacturer for details. Thank you very much for purchasing our air conditioner. Please read this owner's manual carefully before using your air conditioner.
- Page 21 CONTENT Remote controller Specifications …………………………………………………. 21 Function buttons ……………………………………………………………………. 22 Handling the remote controller ……………………………………………………. 23 Remote LCD screen indicators …………………………………………………..24 How to use the basic functions ………………………………………………….… 25 How to use the advanced functions ……………………………………………….32...
-
Page 22: Remote Controller Specifications
REMOTE CONTROLLER SPECIFICATIONS Model RG66B3(2H)/BEGEF Rated Voltage 3.0V(Dry batteries R03/LR03X 2) Signal Receiving Range Environment -5°C 60°C NOTE: • Buttons design is based on typical model and might be slightly different from the actual one you purchased, the actual shape shall prevail. •... -
Page 23: Function Buttons
FUNCTION BUTTONS Before you begin using your new air conditioner, make sure to familiarize yourself with its remote control. The following is a brief introduction to the remote control itself. For instructions on how to operate your air conditioner, refer to the How to Use the Basic/Advance Functions section of this manual. -
Page 24: Handling The Remote Controller
HANDLING THE REMOTE CONTROLLER NOT SURE WHAT A FUNCTION DOES? Refer to the How to Use Basic Functions and How to Use Advanced Functions sections of this manual for a detailed description of how to use your air conditioner. SPECIAL NOTE - Button designs on your unit may differ slightly from the example shown. -
Page 25: Remote Lcd Screen Indicators
Remote LCD Screen Indicators Information are displayed when the remote controller is powered up. Horizontal louver auto swing display ON/OFF display Vertical louver auto swing display Appears when the unit is turned on, and disappears when the it is turned off. Wind flow follow people Wind flow away from people Transmission Indicator-... -
Page 26: How To Use The Basic Functions
HOW TO USE THE BASIC FUNCTIONS SETTING TEMPERATURE The operating temperature range for units is 16-30 C/60- F.You can increase or decrease the set temperature in F increments. AUTO operation In AUTO mode, the unit will automatically select the COOL, FAN, HEAT or DRY mode based on the set temperature. - Page 27 HOW TO USE THE BASIC FUNCTIONS DRY OPERATION (DEHUMIDIFYING) 1. Press the MODE button to select DRY mode. 2. Set your desired temperature using the Temp + or Temp — button. 3. Press the ON/OFF button to start the unit. NOTE: FAN SPEED can’t be changed in DRY mode.
- Page 28 HOW TO USE THE BASIC FUNCTIONS HEAT OPERATION 1. Press the MODE button to select HEAT mode. 2. Set your desired temperature using the Temp + or Temp — button. 3. Press the FAN button to select the fan speed in a range of Au%-F%, in conjunction with Temp + or Temp —...
- Page 29 SETTING THE TIMER FUNCTION Your air conditioning unit has two timer-related functions: • TIMER ON - sets the amount of timer after which the unit will automatically turn on. • TIMER OFF - sets the amount of time after which the unit will automatically turn off. TIMER ON function The TIMER ON function allows you to set a period of time after which the unit will automatically turn on, such as when you come home from work.
- Page 30 Note: This number indicates the amount of time after the current time that you want the unit to turn off. For example, if you set TIMER OFF for 5 hours, " 5.0h " will appear on the screen, and the unit will turn on after 5 hours.
- Page 31 Setting both TIMER ON and TIMER OFF at the same time Keep in mind that the time periods you set for both functions refer to hours after the current time. For example, say that the current time is 1:00 PM, and you want the unit to turn on automatically at 7:00 PM. You want it to operate for 2 hours, then automatically turn off at 9:00 PM.
- Page 32 Example: Setting the unit to turn on after 6 hours, operate for 2 hours, then turn off (see the figure below) Your remote display Timer is set to turn ON 6 hours from current time Timer is set to turn OFF 8 hours from current time...
-
Page 33: How To Use The Advanced Functions
HOW TO USE THE ADVANCED FUNCTIONS optimize the temperature around you and ECO function ensure maximum comfort. NOTE: This function is only available under COOL mode. Silence function • Used to enter the energy efficient mode. • Under cooling mode, press this button, Hold down Fan speed button for 2 the remote controller will adjust the seconds to activate/cancel Silent mode. - Page 34 function. The unit will operate at a setting temperature of 8°C. The indoor unit display shows “ FP “ HOW TO USE THE ADVANCED FUNCTIONS TURBO function The TURBO function makes the unit work NOTE: Press and hold Temp + and — extra hard to reach your present buttons together for 3 seconds will temperature in the shortest amount of time...
- Page 35 Izjavu o sukladnosti i presliku izvorne Izjave sukladnosti (EC Declaration of Conformity) možete jednostavno preuzeti na našoj internetskoj stranici www.msan.hr/dokumentacijaartikala CENTRALNI SERVIS: MR servis d.o.o, Dugoselska cesta 5, 10370 Rugvica Tel: +385 1 640 1111 Fax: +385 1 365 4982 E-mail za opće upite: info@mrservis.hr, E-mail za prodajne upite: prodaja@mrservis.hr, Web: www.mrservis.hr...
- Page 41 Poštovani, Zahvaljujemo Vam na kupovini proizvoda iz naše distribucije i nadamo se da ćete biti zadovoljni izborom. Molimo Vas da pre upotrebe proizvoda pažljivo pročitate tehničku dokumetaciju i da se prilikom upotrebe pridržavate priloženih uputstava . REKLAMACIJA U SLUČAJU NESAOBRAZNOSTI PROIZVODA U slučaju nesaobraznosti proizvoda možete izjaviti reklamaciju prodavcu - trgovcu kod koga ste uređaj kupili, radi ostvarivanja svojih prava iz člana 52.
- Page 42 OBAVEZE POTROŠAČA 1. Da se pridržava priloženog uputstva za upotrebu i pravilnika o upotrebi proizvoda 2. Da eksploataciju opreme vrši u skladu sa priloženim uputstvom za upotrebu, navedenim u pripadajućoj tehničkoj dokumentaciji. 3. Da obezbedi odgovarajući uslove u kome će uređaj biti smešten: •...
- Page 43 Ovlašćeni servis : KIM-TEC SERVIS d.o.o Beograd, Viline vode bb, Slobodna zona Beograd L12/3, Telefon: 011/207-06-84, E-mail: servis@kimtec.rs SERVISNI KUPON BR. 1 Naziv: Ser. broj: Datum prijema: Opis kvara: Datum predaje: Opis radova ugrađeni delovi: Servisirao: SERVISNI KUPON BR. 1 Naziv: Ser.
- Page 44 Za klima uređaje: Redovni godišnji servis vašeg klima uređaja, omogućava uređaju siguran i kvalitetniji rad. Godišnji servis korisnik nansira iz sopstvenih sredstava. S E R V I S N I P R E G L E D Servis / Montažer: Datum: Važi do: S E R V I S N I P R E G L E D...
- Page 48 POŠTOVANI Zahvaljujemo na kupovini Vivax uređaja i nadamo se da cete biti zadovoljni izborom. Ako u periodu u kojem imate pravo na reklamaciju bude potreban popravak proizvoda, molim savetujte se sa ovlašćenim prodavačem koji Vam je proizvod prodao il/i nas kontaktirajte na dolje navedene brojeve i adrese.
- Page 50 моделот и силата. • Во случај на појава на дефект кај клима уред Vivax cool се обврзуваме дека ќе извршиме поправка во најкраток можен рок а најдоцна до 30 дена. • Ако не може да се поправи уредот Vivax cool или не биде поправен во рок од 30 дена, ќе биде заменет со нов. • Ако поправката на клима уредот Vivax cool трае...
- Page 52 ...
- Page 53 TË NDERUAR BLERËS! Faleminderit për blerjen tuaj dhe shpresoj se ju do të jenë të kënaqur me përzgjedhjen. Nëse periudha e garancionit është e nevojshme për të riparuar produktin, ju lutem konsultohuni me shitësin Apo me me përsonin i cili jua shet produktin tone JU LUTEM LEXONI ME KUJDES PARA PËRDORIMIT PRODUKTIT DOKUMENTET TEKNIKE DHE MANUALET CILAT JANË...
- Page 55 KARTA GWARANCYJNA Gwarancja jest ważna wyłącznie z dowodem zakupu Model jednostki wewnętrznej Numer seryjny Model jednostki zewnętrznej Numer seryjny Pieczęć i podpis sprzedawcy Pieczęć i podpis instalatora Data sprzedaży: Data montażu: Numer faktury: Miejsce montażu: Nazwa i adres klienta Akceptuję warunki gwarancji oraz potwierdzam odbiór sprawnego sprz Data i podpis klienta...
- Page 56 Instrukcji Obsługi lub innym dokumencie o charakterze normatywnym. Wady oraz awarie klimatyzatora Vivax ujawnione w okresie gwarancji przed pierwszym przeglądem usuwane będą bezpłatnie przez Autoryzowanego instalatora wykonującego montaż...
- Page 57 na / całkowita: DANE MONTAŻOWE / całkowita: DANE MONTAŻOWE Chłodzenie Ssanie / tłoczenie: [bar] Ciśnienia pracy Grzanie Ssanie / tłoczenie: [bar] Chłodzenie Najwyższa / najniższa: [°C] Temperatury nawiewu jednostek wewnętrznych Grzanie Najwyższa / najniższa: [°C] Wewnętrzna Najwyższa / najniższa: [°C] Temperatura otoczenia Zewnętrzna Najwyższa / najniższa:...
- Page 58 GARANCIJSKI LIST GARANCIJSKA IZJAVA Lunta inženiring d.o.o., Zagrebška c. 100, 2000 Maribor izjavlja: Da bo izdelek v garancijskem roku brezhibno deloval, če ga boste uporabljali v skladu z njegovim namenom in navodili za uporabo Da bomo na vašo zahtevo, če bo seveda podana v garancijskem roku, na svoje stroške poskrbeli za odpravo okvar in pomanjklivosti na izdelku najkasneje v 45 dneh od dneva prijave okvare.
- Page 59 GARANCIJSKI LIST GARANCIJSKI LIST Številka garancijskega lista oz. Računa: Vrsta/Naziv izdelka: Proizvajalec: Datum prodaje/pričetka veljavnosti garancije: Kraj prodaje/trgovina: Žig in podpis trgovke-ca:_ SERVIS oz. ZAMENJAVA: Datum prevzema: Kraj prevzema: Prevzel: Vrsta okvare:_ Aparat popravljen: Drugo:_ Popravljeno dne: Opombe: Žig in podpis servisa: Pooblaščeni servis: Proelektronika d.o.o., Šmartinska cesta 152, 1000 Ljubljana TEL: 01/5411-924...
- Page 62 www.VIVAX.com...
Need help?
Do you have a question about the ACP-09CH25AEYI and is the answer not in the manual?
Questions and answers