Advertisement
©2018 Growers Supply
All Rights Reserved. Reproduction
is prohibited without permission.
Revision date: 06.07.18
GROWSPAN
GrowSpan
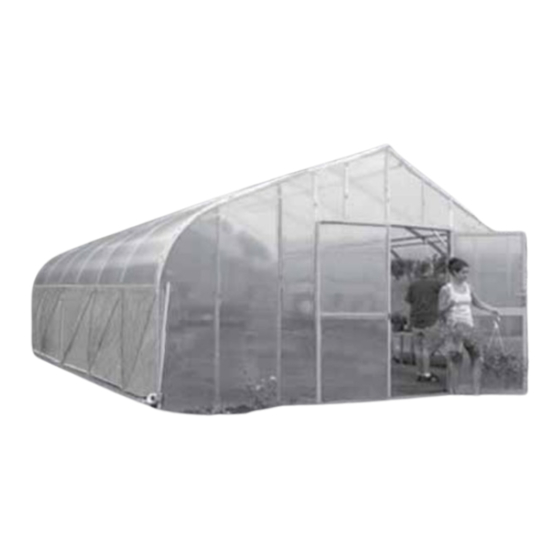
Gothic Pro Greenhouses and Systems
Photo may show a different but similar model.
GOTHIC PRO GREENHOUSES AND SYSTEMS
™
™
STK#
106306DD
106307DD
106308DD
106309DD
DIMENSIONS
26' W x 12' H x 28' L
26' W x 12' H x 36' L
26' W x 12' H x 48' L
26' W x 12' H x 72' L
1
Advertisement
Table of Contents

Related Manuals for FarmTek 106306DD


Summary of Contents for FarmTek 106306DD
- Page 1 ™ Gothic Pro Greenhouses and Systems Photo may show a different but similar model. STK# DIMENSIONS 106306DD 26' W x 12' H x 28' L 106307DD 26' W x 12' H x 36' L 106308DD 26' W x 12' H x 48' L ©2018 Growers Supply...
-
Page 2: Safety Precautions
GROWSPAN GOTHIC PRO GREENHOUSES AND SYSTEMS ™ LOCATION Choosing the proper location is an important step before you begin to assemble the structure. The following suggestions and precautions will help you determine whether your selected location is the best location. •... -
Page 3: Assembly Procedure
GROWSPAN GOTHIC PRO GREENHOUSES AND SYSTEMS ™ ASSEMBLY PROCEDURE PANEL AND RIDGE CAP INSTALLATION NOTE Following the instructions as presented will help ensure Depending on available equipment, it may be necessary to proper assembly of your greenhouse. Failing to follow construct a support structure to allow a person to reach top these steps may result in an improperly assembled and of greenhouse from outside. -
Page 4: Required Tools
GROWSPAN GOTHIC PRO GREENHOUSES AND SYSTEMS ™ REQUIRED TOOLS BASEBOARDS AND RIBBON BOARDS — REQUIRED The following list identifies main tools needed to Consult Main Cover Details diagram in Quick Start section assemble shelter. Additional tools and supports may also of this manual to determine where to install ribbon board. - Page 5 GROWSPAN GOTHIC PRO GREENHOUSES AND SYSTEMS ™ ASSEMBLY NOTE: Install Tek screws using a clutched drill driver running approximately 750 RPM while applying approximately 50 lbs of force. Do not use an impact driver to install Tek screws! The following graphics and photos will help you identify the different parts and show you how they are used.
- Page 6 GROWSPAN GOTHIC PRO GREENHOUSES AND SYSTEMS ™ H-CHANNEL INSTALLATION INSTRUCTIONS The new H-channel design requires installation of the flat side facing out with channel side toward the building. Some diagrams and photos in this document show installation of original H-channel with channel side facing out.
- Page 7 GROWSPAN GOTHIC PRO GREENHOUSES AND SYSTEMS ™ GrowSpan ™ Gothic Pro Greenhouses and Systems OVERVIEW See illustration below to identify main parts of greenhouse. 1. Locate required parts for each assembly procedure. 2. Assemble rafters and frame. Anchor frame. 3. Assemble and install end walls. ATTENTION: Position purlins evenly during 4.
- Page 8 GROWSPAN GOTHIC PRO GREENHOUSES AND SYSTEMS ™ LAY OUT THE BUILDING SITE 3. Use a transit or line level to drive the second corner post to the same depth as the first ground post. After the site is prepared, lay out the building site. 4.
-
Page 9: Rafter Assembly
GROWSPAN GOTHIC PRO GREENHOUSES AND SYSTEMS ™ ASSEMBLING THE GOTHIC PRO GREENHOUSE 2. Slide four (4) end purlin clamps (two on each side of FRAME COMPONENTS the peak) over the rafter pipes. Position all end clamps at the rafter pipe joints. Position the end clamps as After the site is prepared and an inventory of parts is shown. -
Page 10: Frame Assembly
GROWSPAN GOTHIC PRO GREENHOUSES AND SYSTEMS ™ RAFTER ASSEMBLY (continued) FRAME ASSEMBLY INTERIOR RAFTER ASSEMBLY After all ground posts are driven in place and rafters are assembled, assemble the frame. Complete the following steps for the interior rafters. 1. Select the pipes for the first interior rafter assembly and NOTE: The baseboards (required) shown in the diagrams position these on the ground as shown. - Page 11 GROWSPAN GOTHIC PRO GREENHOUSES AND SYSTEMS ™ FRAME ASSEMBLY (continued) 2. Secure the leg pipes to the ground posts using the 5/16" x 2 1/2" machine bolts and nuts. 4. From the location marked in the previous step, measure forty-eight inches (48") and make another Rafter mark on the assembled purlin.
- Page 12 GROWSPAN GOTHIC PRO GREENHOUSES AND SYSTEMS ™ FRAME ASSEMBLY (continued) 10. Move to the interior rafter and align the mark on the purlin with the center of the rafter to maintain the proper 5. As the second rafter is steadied, remove one section of spacing.
- Page 13 GROWSPAN GOTHIC PRO GREENHOUSES AND SYSTEMS ™ FRAME ASSEMBLY (continued) BASEBOARD INSTALLATION (REQUIRED) 18. Secure the purlin pipe joint with a Tek screw. Gather parts: 19. Repeat the above steps as needed to stand and secure • 2" x 6" (minimum) treated or recycled plastic lumber the remaining interior rafters and purlins to complete (supplied by customer).
- Page 14 GROWSPAN GOTHIC PRO GREENHOUSES AND SYSTEMS ™ SIDE STRUT INSTALLATION 3. Attach the remaining end of the strut to the baseboard using a lag screw or nut and bolt (not included). See There are four (4) side struts for the shelter. These struts the diagram that follows for location.
- Page 15 GROWSPAN GOTHIC PRO GREENHOUSES AND SYSTEMS ™ END WALL INSTALLATION • DO NOT REPOSITION THE END WALL VERTICALS USED AT THE SEAM OF TWO (2) POLYCARBONATE The steps to install the end walls for the greenhouse PANELS. include the following: •...
- Page 16 GROWSPAN GOTHIC PRO GREENHOUSES AND SYSTEMS ™ END WALL INSTALLATION (continued) 9. Measure the distance between the top of the base tube and band clamp (Step 7) to determine the length of the 4. Secure the base tube between the legs of the end first vertical section of the door frame tube.
- Page 17 GROWSPAN GOTHIC PRO GREENHOUSES AND SYSTEMS ™ INSTALL THE END WALL FRAME (continued) 17. Using a level (or other means), verify that one vertical door frame tube is plumb and tighten the band clamp 15. Using the marks on the base tube for the rough bolt to lock the first door frame member in place.
- Page 18 GROWSPAN GOTHIC PRO GREENHOUSES AND SYSTEMS ™ INSTALL THE END WALL FRAME (continued) 27. With the square-to-round tube connect bracket attached to the top of the frame member, place a 22. Use the end frame diagram to determine the number of square tube fitting on the bottom of the frame member.
- Page 19 GROWSPAN GOTHIC PRO GREENHOUSES AND SYSTEMS ™ INSTALL THE END WALL FRAME (continued) Use the following photos and diagrams to attach the end INSTALL END WALL FRAMING (BACK) wall cladding to the end wall frame. The greenhouse end walls (front and back) are identical except as noted below and on the end frame diagrams.
- Page 20 GROWSPAN GOTHIC PRO GREENHOUSES AND SYSTEMS ™ END PANEL INSTALLATION Complete the following general steps to install the end wall panels. After the end wall framing is attached to the greenhouse, attach the polycarbonate panels to the end wall framing. 1.
- Page 21 GROWSPAN GOTHIC PRO GREENHOUSES AND SYSTEMS ™ END PANEL INSTALLATION (continued) 4. Continue installing the polycarbonate panels as described for the front and back end walls. 3. Place the panel in position, attach it to the end wall framing using Neo-bonded washers and the long Tek ATTENTION: U-channel profile is installed along the screws.
- Page 22 GROWSPAN GOTHIC PRO GREENHOUSES AND SYSTEMS ™ DOUBLE DOOR ASSEMBLY (continued) 8. After assembling both doors, evenly space the hinges along the door frame of each door and attach the 5. Using the long Tek screws and neo-bonded galvanized hinges to the assembled doors using the short Tek washers to attach the panel to the horizontal cross tube screws.
- Page 23 GROWSPAN GOTHIC PRO GREENHOUSES AND SYSTEMS ™ DOUBLE DOOR ASSEMBLY (continued) c. Dashed line identifies where to attach the end cap profile. The end cap extends beyond the frame 10. Install the 6" chain bolt to the upper part of the inside members and into the rough opening to stop the of one door and the main latch assembly to the other door in the frame and to help seal the gap between...
- Page 24 GROWSPAN GOTHIC PRO GREENHOUSES AND SYSTEMS ™ INSTALL ROOF PANELS: OVERVIEW Install polycarbonate roof panels after installing end panels. These are the main steps to attach panels: 1. Set height of drop-down panel. 2. Prepare and install lower panels first along both sides for first two (2) bays (as shown). 3.
- Page 25 GROWSPAN GOTHIC PRO GREENHOUSES AND SYSTEMS ™ SET HEIGHT OF DROP-DOWN SIDE PANEL The desired height for drop-down side panel is determined and marked before installing polycarbonate roof panels. ATTENTION: Consult Main Cover Details diagram in the Quick Start section of this manual to verify height of drop-down panel.
- Page 26 GROWSPAN GOTHIC PRO GREENHOUSES AND SYSTEMS ™ POLYCARBONATE ROOF PANELS There are different ways to install polycarbonate roof panels. Individuals familiar with the installation of these panels and overall assembly of similar greenhouses may choose to install according to past experience. Since there are differences between buildings, read through the procedure that follows to better understand panel installation for this greenhouse.
- Page 27 GROWSPAN GOTHIC PRO GREENHOUSES AND SYSTEMS ™ POLYCARBONATE ROOF PANELS (continued) 6. With assistance, place panel against frame and align center of H-channel with center of second rafter. Position end with foil tape at top. Verify you have UV-protected surface of panel facing toward sun. (Panel was marked earlier during preparation—Step 1.) 7"...
- Page 28 GROWSPAN GOTHIC PRO GREENHOUSES AND SYSTEMS ™ POLYCARBONATE ROOF PANELS (continued) ALTERNATIVE INSTALLATION FOR ROOF PANELS 8. After installing first lower panel, select another 116051 During assembly, sometimes installing panel from the side panel (47-1/4" x 144") and prepare for installation as is challenging.
- Page 29 GROWSPAN GOTHIC PRO GREENHOUSES AND SYSTEMS ™ POLYCARBONATE ROOF PANELS (continued) 16. With assistant stationed inside and outside the frame, carefully set panel on frame and overlap top of lower 11. Next, measure from peak to top of lower panel and add panel by 6".
- Page 30 GROWSPAN GOTHIC PRO GREENHOUSES AND SYSTEMS ™ POLYCARBONATE ROOF PANELS (continued) 20. Take a section of ridge cap (CG96174) and predrill mounting holes in cap lip using 1/4" drill bit. Set first and last holes approximately 4" in from center of rafter at each end. Ridge cap length is 55", so it will extend beyond mid rafter. Next cap overlaps first.
- Page 31 GROWSPAN GOTHIC PRO GREENHOUSES AND SYSTEMS ™ POLYCARBONATE ROOF PANELS (continued) 27. After installing all panels, continue with the installation of overlap bracing and U-channel. IMPORTANT : BEFORE INSTALLING NEXT SET NOTE: If the overlap bracing and U-channel procedure OF UPPER PANELS, SKIP TO AND READ THE was completed during panel installation, skip the next SECTION THAT DESCRIBES THE INSTALLATION OF section and continue with ribbon board installation.
- Page 32 GROWSPAN GOTHIC PRO GREENHOUSES AND SYSTEMS ™ INSTALL OVERLAP BRACING AND U-CHANNEL 2. Move inside the frame and measure between rafters at point where upper and lower panels overlap. If bracing and U-channel trim were installed during panel installation, skip this section and continue with the 3.
-
Page 33: Frame Check
GROWSPAN GOTHIC PRO GREENHOUSES AND SYSTEMS ™ INSTALL OVERLAP BRACING AND U-CHANNEL — continued 5. With tube aligned and someone holding it in place 6. Repeat steps as needed to cut and attach additional inside the greenhouse, drive FA4484B Tek screws with 1.5"... - Page 34 GROWSPAN GOTHIC PRO GREENHOUSES AND SYSTEMS ™ RIBBON BOARD INSTALLATION BASEBOARDS AND RIBBON BOARDS The drop-down curtain requires a ribbon board to secure its 1. Attach first board of two-piece ribbon board to frame at upper section and a baseboard to secure its lower section. required height.
- Page 35 GROWSPAN GOTHIC PRO GREENHOUSES AND SYSTEMS ™ INSTALL THE DROP-DOWN CURTAIN 2. Measure 12" to 24" above the ribbon board along the end rafter, place the mounting plate against the end Locate these parts to attach the pulleys and drop-down wall, and align the plate mounting holes with the center curtain axle: of the end rafter.
- Page 36 GROWSPAN GOTHIC PRO GREENHOUSES AND SYSTEMS ™ INSTALL THE DROP-DOWN CURTAIN (continued) 10. Carefully lift the assembly and insert the tapered/free end of the 131S075 pipe through the 2" axle conduit 6. With the mounting plate attached to the end rafter, take hole in the end panel.
- Page 37 GROWSPAN GOTHIC PRO GREENHOUSES AND SYSTEMS ™ INSTALL THE DROP-DOWN CURTAIN (continued) 17. Select the final section of plain pipe (131P0XX where XX represents the length needed to reach the end of 13. Verify that the pipe is level and secure the band clamp your building.
- Page 38 GROWSPAN GOTHIC PRO GREENHOUSES AND SYSTEMS ™ INSTALL THE DROP-DOWN CURTAIN (continued) Polycarbonate Locate these parts to prepare the drop-down curtain for Panel Rafter installation and to attach it to the axle conduit: • 106816 (1/2" pipe conduit) 2" x 6" Board Washer •...
- Page 39 GROWSPAN GOTHIC PRO GREENHOUSES AND SYSTEMS ™ INSTALL THE DROP-DOWN CURTAIN (continued) 4. Continue adding conduit sections and taping each joint until the conduit is as long as the curtain panel. Install Curtain Conduit and Attach Rope 5. Complete the curtain conduit installation by cutting After installing all eye screws and pulleys, locate the curtain the conduit so that it extends from the panel pocket panel, 1/2"...
- Page 40 GROWSPAN GOTHIC PRO GREENHOUSES AND SYSTEMS ™ INSTALL THE DROP-DOWN CURTAIN (continued) 13. Drive two (2) FA4482 Tek screws with neo-bonded washers (102921) into the axle conduit where the 9. Locate the 1/8" curtain cord (CC5505) and cut a cord is located. Do not fully seat the Tek screws to the section of cord to the length determined in the previous conduit.
- Page 41 GROWSPAN GOTHIC PRO GREENHOUSES AND SYSTEMS ™ INSTALL THE DROP-DOWN CURTAIN (continued) Complete these steps to attach the lower edge of the curtain to the customer-supplied baseboard. 17. Repeat the above steps until all cords are attached to the first curtain panel along one side of the shelter. CAUTION: Do not attempt to attach the curtain to the baseboard during stormy or windy conditions or when such conditions are expected.
- Page 42 GROWSPAN GOTHIC PRO GREENHOUSES AND SYSTEMS ™ INSTALL THE ANTI-BILLOW ROPES The anti-billow rope is installed along the outside of the frame and stretches between ribbon board and baseboard. ATTENTION: Install rope in short sections along each side. DO NOT INSTALL ROPE AS A SINGLE PIECE. Complete these steps: 1.
- Page 43 GROWSPAN GOTHIC PRO GREENHOUSES AND SYSTEMS ™ SEAL POLYCARBONATE PANELS 5. Seal upper edge of both end walls with a bead of sealant. See dashed line in diagram below. The following steps describe one way to seal the installed Frame shown may differ from actual frame. panels.
- Page 44 GROWSPAN GOTHIC PRO GREENHOUSES AND SYSTEMS ™ SHELTER CARE AND MAINTENANCE Proper care and maintenance of the shelter is important. Space below is reserved for customer notes. Check these items periodically to properly maintain shelter: • Regularly check all polycarbonate panels to see these are secure and in good condition.
- Page 45 GROWSPAN GOTHIC PRO GREENHOUSES AND SYSTEMS ™ Space below is reserved for customer notes. Revision date: 06.07.18...
- Page 46 GROWSPAN GOTHIC PRO GREENHOUSES AND SYSTEMS ™ QUICK START GUIDE 26' Gothic Pro Greenhouse Frame shown may differ in length from actual frame. Revision date: 06.07.18...
- Page 47 GROWSPAN GOTHIC PRO GREENHOUSES AND SYSTEMS ™ Revision date: 06.07.18...
- Page 48 GROWSPAN GOTHIC PRO GREENHOUSES AND SYSTEMS ™ Revision date: 06.07.18...
- Page 49 GROWSPAN GOTHIC PRO GREENHOUSES AND SYSTEMS ™ Revision date: 06.07.18...
- Page 50 GROWSPAN GOTHIC PRO GREENHOUSES AND SYSTEMS ™ Revision date: 06.07.18...
- Page 51 GROWSPAN GOTHIC PRO GREENHOUSES AND SYSTEMS ™ Revision date: 06.07.18...
- Page 52 GROWSPAN GOTHIC PRO GREENHOUSES AND SYSTEMS ™ Revision date: 06.07.18...
- Page 53 GROWSPAN GOTHIC PRO GREENHOUSES AND SYSTEMS ™ Revision date: 06.07.18...
- Page 54 GROWSPAN GOTHIC PRO GREENHOUSES AND SYSTEMS ™ Revision date: 06.07.18...
- Page 55 GROWSPAN GOTHIC PRO GREENHOUSES AND SYSTEMS ™ Revision date: 06.07.18...
- Page 56 GROWSPAN GOTHIC PRO GREENHOUSES AND SYSTEMS ™ Revision date: 06.07.18...
- Page 57 GROWSPAN GOTHIC PRO GREENHOUSES AND SYSTEMS ™ Revision date: 06.07.18...
- Page 58 GROWSPAN GOTHIC PRO GREENHOUSES AND SYSTEMS ™ Revision date: 06.07.18...
- Page 59 GROWSPAN GOTHIC PRO GREENHOUSES AND SYSTEMS ™ Revision date: 06.07.18...
- Page 60 GROWSPAN GOTHIC PRO GREENHOUSES AND SYSTEMS ™ Revision date: 06.07.18...
- Page 61 GROWSPAN GOTHIC PRO GREENHOUSES AND SYSTEMS ™ Space below is reserved for customer notes. Revision date: 06.07.18...
Need help?
Do you have a question about the 106306DD and is the answer not in the manual?
Questions and answers