Advertisement
Quick Links
GTX600 SB
25k Maintenance
This is a guide on how to perform all 25k maintenances – 75k, 125k, 175k etc.
Use only original Spare Parts to keep your GTX600 SB always in best condition to get the best out of it.
Note that GTX600 SB is always updated with the latest firmware and driver.
Firmware, Driver and
Maintenance Tool:
Be aware that the GTX600 SB
must be updated with the latest
firmware and driver.
Maintenance Tool can be used
witth Windows Operation Sys-
tem only.
The 25k spare part kit:
To do
Clean surrounding/replace MIST FAN FILTER SET (2)
Clean surrounding/replace FLUSHING FOAM SET GTX6 SP (3)
Replace
Clean surrounding/replace
Clean surrounding/replace CARRIAGE FOAM SP SUPPLY ASSY (1) SC7418001
Content
1
Mist fan filter replacement
2
Flushing foam replacement
3
Wiper holder replacement
4
Cap set replacement
5
Carriage foam replacement
We share our experience to give you the
Necessary tools:
GTX600 Key
Cleaning Stick R
Cleaning Stick T
Cup and Cleaning Solution
Small flat screwdriver
Gloves
Vacuum cleaner
Waste cloth
Spare Part Name (Pieces)
25k SPARE PART KIT
WIPER HOLDER SUPPLY AS. GTX6 SB (6) SC7420001
CAP SET GTX6 SUPPLY SP (6)
CLEAN STICK R (50)
CLEAN STICK T (100)
2
4
6
8
11
best support.
Estimated time:
Around one hour
Spare Part Number Quantity
N40002427
1
SC5066001
1
SC7419001
1
1
SC7409001
1
1
SB7008001
1
N40001601
1
1 / 13
Advertisement

Subscribe to Our Youtube Channel
Related Manuals for Brother 25k SPARE PART KIT


Summary of Contents for Brother 25k SPARE PART KIT
- Page 1 Maintenance Tool can be used Gloves witth Windows Operation Sys- Vacuum cleaner tem only. Waste cloth The 25k spare part kit: To do Spare Part Name (Pieces) Spare Part Number Quantity 25k SPARE PART KIT N40002427 Clean surrounding/replace MIST FAN FILTER SET (2)
- Page 2 Mist fan filter replacement Necessary parts: Mist Fan Filter Set Necessary tools: Cleaning Sticks Vacuum cleaner Waste cloth Mist Fan Filter Maintenance Menu Receiving History Maintenance Part Clean/Replace Maintenance White Ink Circulation Printer Setting White tank agitation Total Print Humidification Temperature/Humidity Info Change humidifier water ...
- Page 3 Clean all areas around the Mist Fan Filter with Replace mist fan filter vacuum cleaner and cleaning sticks to remove all dust clumps. Replace the Mist Fan Filter. Do not use Cleaning Solution. Perform replacement Clean the doors of the Mist Fan Filter and the A: Position of the Mist Fan Filter surrounding area ...
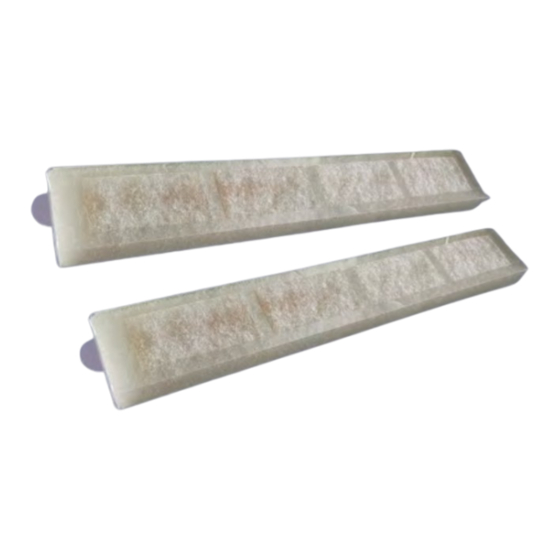
- Page 4 Replace mist fan filter Perform replacement Press [OK] Flushing foam replacement Necessary parts: Flushing Foam Set Necessary tools: GTX600 Cleaning Solution Cleaning Sticks R Waste cloth Gloves Flushing Foam Set The Carriage has to be moved to the right side of the GTX600 SB to replace the Flushing Foam Set, Wiper Holder Supply Assy GTX6 and Cap Foam Set.
- Page 5 Replace maintenance unit parts Replace maintenance unit parts Perform Replacement Carriage is Moving After the work is completed Press [OK] Open the cover door on the left side and the top cover of the GTX600 SB. Replace both Flushing Foams like shown in the following pictures: Make sure not to drop any white ink on parts used for CMYK or the other way around.
- Page 6 Make sure that the Flushing Foams do not ex- tend out off the outboard end portions of the maintenance unit If a Flushing Foam extends, it may result in non-ejection of ink-jet-droplets. After the work is completed press [ OK ] in the ...
- Page 7 Replace maintenance unit parts Replace maintenance unit parts Perform Replacement Carriage is Moving After the work is completed Press [OK] The Carriage has to be moved to the right side of the GTX600 SB to replace the Wiper Holder Supply Assy GTX6. Make sure to perform this replacement within 25 minutes.
- Page 8 Cap foam replacement Necessary parts: Cap Set GTX6 Supply SP Necessary tools: GTX600 Cleaning Solution Cleaning Sticks R Flat small screwdriver Gloves Prepare all six Cap Sets: Check that all Rubber Caps are fixed on their metal plates The Carriage has to be moved to the right side of the GTX600 SB to replace the Cap Set GTX6 Supply.
- Page 9 Maintenance Part Clean/Replace Replace maintenance unit parts Clean nozzle guard and cap Replace maintenance unit parts Head will move Replace mist fan filter for operation Press OK to Move Replace maintenance unit parts Replace maintenance unit parts Perform Replacement Carriage is Moving After the work is completed...
- Page 10 Reinstall a new Cap. Pay attention to install the Lay the Cap Sheet into the Cap Fixed Plate. Cap with the small hole on the left frontside. Replace maintenance unit parts Replace maintenance unit parts Check if all doors are closed Wiper is Moving Check doors and press [ OK] ...
- Page 11 Carriage foam replacement Necessary parts: Carriage Foam SP Supply Assy Necessary tools: GTX600 Key GTX600 Cleaning Solution Cleaning Sticks R Gloves Small mirror Carriage Foam SP Supply Assy The carriage has to be moved to the right side of the GTX600 SB to replace the Carriage Foam. Make sure to perform this replacement within 25 minutes.
- Page 12 Pull the Carriage Foam downwards. Position of the Carriage Foam Supply Assy Do not touch the Nozzle Plates of the Print Heads. B: Clean the Printhead and Nozzle Guards area, Remove the Carriage Foam by using the sliders a small mirror is helpful.
- Page 13 Slide up the new Carriage Foam until it touches both rear stoppers. Attach the Carriage Foam to the magnets of the carriage. D: Make sure that the Carriage Foam is correctly mounted and is not riding on the stoppers. Check that the foam plate has completely close contact to the carriage plate and that the nozzle plates protrude a little from the foam plate.
Need help?
Do you have a question about the 25k SPARE PART KIT and is the answer not in the manual?
Questions and answers