
Related Manuals for LePRESSO LP20BCMCFBK


Summary of Contents for LePRESSO LP20BCMCFBK
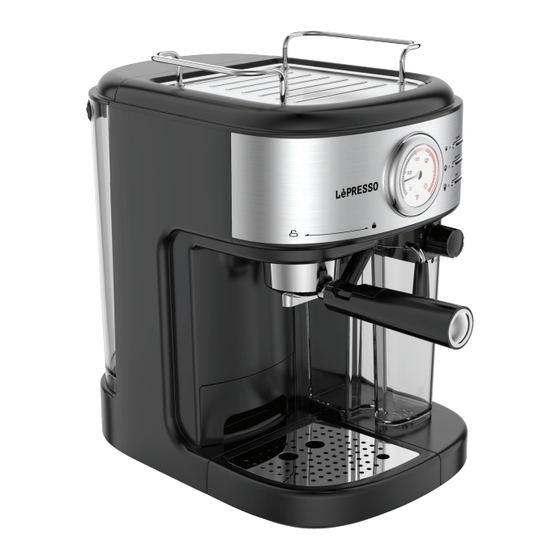
- Page 1 LePresso Coffee Machine 20 Bar Powerful Pressure Pump with Capsule Filter and Funnel SKU: LP20BCMCFBK...
-
Page 2: Table Of Contents
Table of Contents Safety Precautions Warning Specifications Schematic View Indicator Guideline Setup Guide Prepare the Unit Select the Correct Cup Select the Correct Coffee Filling the Device Filter Insertion Coffee Filling Procedure Placing the Funnel Placing the Cup Powering ON Sleep Mode Froth Guide Coffee Preparation... -
Page 3: Safety Precautions
Before installing and using the product, please carefully read this User Manual to guarantee correct usage and keep it secure for future reference. Safety Precautions Read all accompanying instructions thoroughly. Ensure the voltage of your outlet matches the voltage specified on the appliance's rating label. - Page 4 Do not remove the porta-filter while the coffee is brewing. Ensure the indicator lights show that it is safe to do so before removing the porta- filter for additional coffee preparation. Exercise caution due to hot metal parts and hold the porta-filter by the handle, using the filter retention clip to dispose of the coffee grounds.
-
Page 5: Warning
When cleaning the frothed milk dispensing tube: Place a large cup under the tube. Refill the milk reservoir with water and reattach it to the unit. Turn the control knob clockwise to the clean position , then press and hold the latte/clean button for three seconds to activate the cleaning function. -
Page 6: Specifications
Specifications LePresso Coffee Machine 20 Bar Powerful Pressure Pump Product with Capsule Filter and Funnel LP20BCMCFBK Voltage 220V ~ 240V (60/50Hz) Power 1050W ~ 1250W Pressure 20bar Water Tank Capacity 1.7L Milk Tank Capacity 500mL Temperature Control Preheating Time ≤90s Dimensions 274×227×300mm... -
Page 7: Indicator Guideline
Pressurized 1_cup filter 2 _cup filter funnel asm Coffee spoon Indicator Guideline Big Cup of Coffee and Manual Button Espresso Big Cup of Cappuccino Small Cup of Coffee and Manual Light and Milk Foam Light Cappuccino Small Cup of Cappuccino and Big Cup of Cappuccino Milk Foam Light and Milk Foam Button... -
Page 8: Prepare The Unit
Consult the instructions in the “Filter Insertion” section before placing or removing the pressurized filter from the unit. To clean the inside of the appliance, adhere to the steps listed in the “Preparing Cappuccino” section, using only water in both reservoirs and ensuring no coffee is in the filter. -
Page 9: Select The Correct Coffee
Beverage Type Ratio Single Espresso Double 60ml 119ml Cappuccino Single 178ml 355ml Double Latte Single 296ml 474ml Double Select the Correct Coffee Coffee The coffee should be freshly ground and dark roasted, ideally suited for espresso. Consider using a French or Italian roast. Pre-ground coffee maintains its flavor for approximately 7 to 8 days if stored in an airtight container in a cool, dark area. -
Page 10: Filling The Device
Important Note: Avoid using sugar-roasted ground coffee or sugar-roasted coffee beans as they can cause filter clogging and damage to the appliance. In the event of accidental use, discontinue operation and seek maintenance at the nearest service center. Periodic descaling is recommended to maintain the appliance's performance. -
Page 11: Filter Insertion
Choose the Filter Select the appropriate filter for use as follows: For a Single Shot: Use the filter designated for a single shot of espresso if using ground coffee. For a Double Shot: Use the filter designated for a double shot of espresso. Note: The pod filter included with your unit is specifically designed to work only with the pods recommended for your model. -
Page 12: Placing The Funnel
For Ground Coffee Fill the filter with fresh, finely ground espresso coffee, ensuring not to overfill. Note: The amount of ground coffee must not exceed the MAX mark. Tamp down and evenly compress the coffee grounds firmly. Remove any excess coffee from the rim to ensure a proper fit under the brew head. -
Page 13: Placing The Cup
Placing the Cup If using a small cup for brewing espresso, pull out the drip tray bracket. If brewing cappuccino with a larger cup, retain the drip tray bracket within its compartment. Similarly, keep the drip tray bracket inside its compartment when brewing latte with a larger cup. -
Page 14: Froth Guide
Froth Guide Preparation The unit offers the option to prepare froth milk separately. Press and hold the Cappuccino Button for 3 seconds if you desire more foam in your beverage or wish to prepare froth milk for other beverages like macchiatos, hot chocolate, Tea lattes, etc. - Page 15 The unit is capable of brewing espresso according to your preferences and can automatically stop brewing when the lights become solid, indicating completion of the process. Warning: After brewing, do not immediately remove the filter. Wait for 10 seconds before proceeding. Cappuccino Preparation Introduction A beverage comprised of approximately equal parts espresso, steamed...
-
Page 16: Descaling
Preparation Before preparing your latte, customize the quantity of frothed milk to your liking by adjusting the Froth Control Knob. Turn it to the right “ ” for more froth or to the left “ ” for less froth. Press the Latte Button once to brew a small cup of latte. Press the Latte Button twice to brew a large cup of latte. -
Page 17: Maintenance
Note: You can activate any function by pressing its corresponding button when the appliance prompts you to descale. The appliance will continue to remind you to descale even after completing the selected function. The descaling process can be halted at any time by pressing any button. However, the appliance will continue to remind you to descale until the entire descaling process is completed and it returns to normal standby mode. - Page 18 through the frothing tube; allow it to run until no milk is visible in the cup. Press the Latte/Clean button once to stop the process when finished. Dispose of any water remaining in the milk reservoir and return it to the unit.
- Page 19 Cleaning the Water Reservoir Empty the water reservoir by removing it and turning it upside down over the sink. It is advisable to wash the reservoir with soapy water, rinse thoroughly, and wipe it dry after each use. 3.The water reservoir is also dishwasher safe. Cleaning the Unit Clean the housing with a soft, damp cloth.
-
Page 20: Deliming
Deliming Notes: Mineral deposits build-up in the unit can impact the appliance' s operation. The appliance must be delimed when you begin to notice an increase in the time required to brew espresso, or when excessive steaming occurs. You may observe a build-up of white deposits on the surface of the brew head. -
Page 21: Instructions For Use
the “Deliming” steps outlined above. Switch the power button to the “Off” position and ensure the power cord is disconnected from the electrical outlet. Fill the reservoir with white vinegar above the minimum level. Insert the porta-filter (with the filter and without coffee) and place a jar, carafe, or regular cup on top of the drip tray and under the porta-filter. -
Page 22: Troubleshooting
is unplugged. Fill the unit with 400ml of white vinegar and 600ml of water in the water tank. Assemble the milk tank into the unit and turn the frothing control knob clockwise to the clean position. Turn the power switch to the "On" position. The Cappuccino and Latte indicators will blink alternately. -
Page 23: Disposal
Ensure there is enough water in the reservoir. Chill the milk and frothing Milk is not foamy after frothing, 1. Ran out of steam. pitcher before making or it does not come out of the 2. Milk is not cold enough. cappuccino. -
Page 24: Warranty
Warranty Products that you buy directly from our LePresso website or shop come with a 24-month warranty. The 24-month warranty applies to products purchased directly from our LePresso website or store. If LePresso products are bought from any of our verified retailers, then the product is eligible for only a 12-month warranty.
Need help?
Do you have a question about the LP20BCMCFBK and is the answer not in the manual?
Questions and answers