Subscribe to Our Youtube Channel
Summary of Contents for King Industrial KC-129DS
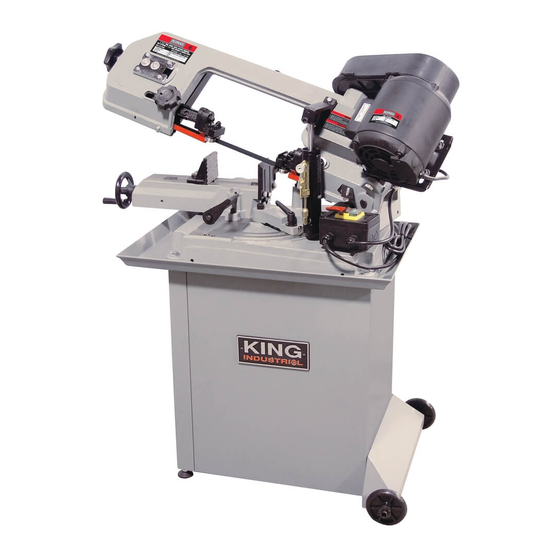
- Page 1 5” X 6” DUAL SWIVEL METAL CUTTING BANDSAW MODEL: KC-129DS INSTRUCTION MANUAL COPYRIGHT © 2008 ALL RIGHTS RESERVED BY KING CANADA TOOLS INC.
-
Page 2: Warranty Information
WARRANTY INFORMATION 2-YEAR KING CANADA TOOLS LIMITED WARRANTY OFFERS A 2-YEAR LIMITED WARRANTY FOR THIS METAL CUTTING BANDSAW FOR COMMERCIAL USE. PROOF OF PURCHASE Please keep your dated proof of purchase for warranty and servicing purposes. REPLACEMENT PARTS Replacement parts for this product are available at our authorized King Canada service centers across Canada. LIMITED TOOL WARRANTY King Canada makes every effort to ensure that this product meets high quality and durability standards. -
Page 3: General Safety Instructions
GENERAL & SPECIFIC SAFETY INSTRUCTIONS GENERAL SAFETY INSTRUCTIONS 1. KNOW YOUR TOOL 12. ALWAYS WEAR SAFETY GLASSES. Read and understand the owners manual and labels affixed to the Always wear safety glasses (ANSI Z87.1). Everyday eyeglasses tool. Learn its application and limitations as well as its specific only have impact resistant lenses, they are NOT safety glasses. -
Page 4: Electrical Information
SOURCE. FAILURE TO COMPLY MAY RESULT IN SERIOUS INJURY! KC-129DS POWER SUPPLY (120V-1 PHASE) WARNING: YOUR KC-129DS (120V) MUST BE CONNECTED TO A 120V, 15-AMP, BRANCH CIRCUIT. FAILURE TO CONNECT IN THIS WAY CAN RESULT IN INJURY FROM SHOCK OR FIRE. - Page 5 13) Belt tension lock knob 14) Auto shut-off push button switch (upon completion of the cut) 15) Cabinet wheels BANDSAW SPECIFICATIONS MODEL KC-129DS Cutting capacity at 90˚ Rect. 5” x 6” Diam. 5” Cutting capacity at 45˚ Rect. 4” x 2-15/16”...
- Page 6 ASSEMBLY & SETUP INSTRUCTIONS BEFORE OPERATING BANDSAW Assembling Cabinet Stand, Wheels and Wheel Bracket (Fig.3) 1) Assemble the cabinet stand panels (A & B) Fig.3 together using 6 hex. bolts, 12 washers and 6 hex. nuts as shown. 2) The next step is to assemble the wheels and wheel shaft to the wheel base (C).
- Page 7 ASSEMBLY & SETUP INSTRUCTIONS BEFORE OPERATING BANDSAW Assembling and Installation of the Work Stop The work stop assembly can be assembled to either side of the table to suit your needs and is usually used for repitious cuts of the same length. To assemble the work stop;...
- Page 8 SETUP & OPERATION INSTRUCTIONS BEFORE OPERATING BANDSAW Adjusting Auto Stut-off Off Switch The Off button lever stop bolt must be adjusted, so the bandsaw shuts off automatically when a cut is complete. To adjust the Off button lever stop bolt; 1) With the cutting head is completely in the down position, loosen stop bolt (A) Fig.11 and hex.
- Page 9 SETUP & OPERATION INSTRUCTIONS BEFORE OPERATING BANDSAW Blade Selection Material Speed (FPM) Belt groove used 60Hz Motor pulley Drive pulley 1) A 14 tooth per inch, general-use blade is furnished with this metal Tool, stainless or alloy cutting band saw. steel, bearingbronzes.
- Page 10 REPLACING/ADJUSTING BLADE & GENERAL MAINTENANCE Replacing/Changing Blade Blades should be changed when they become dull or damaged or when you are cutting materials that require a blade of a certain type or a specific number of teeth. To replace/change blade; 1) Make sure the bandsaw is disconnected from the power source.
-
Page 11: Troubleshooting Guide
TROUBLESHOOTING GUIDE CORRECTIVE ACTION PROBLEM POSSIBLE CAUSE Excessive blade 1. Materials loose in vise. 1. Clamp work securely. 2. Adjust speed or feed. breakage 2. Incorrect speed or feed. 3. Replace with a small teeth spacing blade. 3. Blade teeth spacing too large. 4.


Need help?
Do you have a question about the KC-129DS and is the answer not in the manual?
Questions and answers