Advertisement
Quick Links
EN
PL
after turning the ignition
EN - USER MANUAL
DAYTIME RUNNING LIGHTS
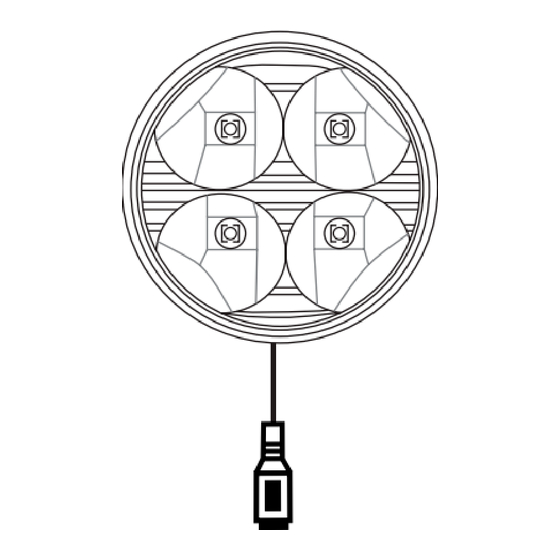
INSTALLATION GUIDE:
CONTROL BOX LK depending on how you connect - when you
turn on low beam - dim to 30% yield, or completely off the lights.
It also works in systems with 24V!
1. Output:
Connect the lights connectors (1|2) to the control box output.
2. Input:
–Black wire (3) connect to a negative battery cable or any
other metal element in a car [ground].
–Red wire (4) connect to the wire on which +12/24V appears
after turning the ignition switch (for example: +12/24V from
car lighter [depend on car] or +12/24V from gearbox reverse
sensor or ignition coil. You can also find such place in a fuse
box under the hood).
3. Method of connecting:
–Yellow wire (5) connect to +12/24V power cable of front
position lights. We obtain total switching off of lights. The
brown wire is not connected.
ATTENTIONS
NOTE: Do not connect DRL lights without the control box directly
to car's electrial system. The control box does not only control
lights, but also acts as a voltage regulator, interference eliminator
and short circuit protection device. Control boxes operate only
voltage of 12/24V.
ENVIRONMENTAL PROTECTION
This symbol indicates that this product should not be
disposed of with unsorted municipal waste. Electronic
equipment should not be disposed of with household waste.
According to the European Directive 2002/96/EC on waste
electrical and electronic equipment and its incorporation into
national law, waste electrical and electronic equipment must be
collected separately and recycled. You can also take your used
equipment to an electronic waste collection point, which
disposes of the equipment in accordance with the National
Recycling and Waste Act. It also helps to avoid potential damage
to the environment and human health and helps to conserve
natural resources.
(1
DECLARATION OF CONFORMITY AVAILABLE FROM
AMIO SP Z O.O. UL. HANDLOWA 3, 41 - 807 ZABRZE
PL - INSTRUKCJA OBSŁUGI
ŚWIATŁA DO JAZDY DZIENNEJ
INSTRUKCJA INSTALACJI:
CONTROL BOX LK W zależności od sposobu podłączenia, po
włączeniu świateł mijania lampy dzienne mogą się przygaszać
do 30% wydajności, lub wygaszać całkowicie. Działa również
w instalacjach z napięciem 24V.
1. Wyjście:
Podłączamy złączki świateł (1|2) do wyjść control box'a
2. Wejście:
–Czarny przewód (3) łączymy z biegunem ujemnym
akumulatora, lub jakimkolwiek metalowym elementem
samochodu [masa]
–Czerwony przewód (4) łączymy z przewodem na którym
pojawia się +12/24V dopiero po przekręceniu stacyjki
samochodu np. +12/24V z zapalniczki samochodowej
(zależnie od modelu samochodu), +12/24V z zasilania czujnika
biegu wstecznego lub cewki zapłonowej, można także
znaleźć takie miejsce w skrzynce bezpieczników pod maską
samochodu.
3. Opcje podłączenia:
–Żółty przewód (5) łączymy z przewodem +12/24V zasilającym
żarówkę przednich świateł pozycyjnych samochodu.
Uzyskujemy całkowite wyłączenie się świateł. Brązowy
przewód zostaje niepodłączony.
UWAGA!
Zabrania się podłączania świateł do jazdy dziennej bezpośrednio,
bez control boxa do instalacji elektrycznej samochodu ponieważ
służy on nie tylko do sterowania lamp, lecz także pełni funkcję
regulatora napięcia, filtra przeciwzakłóceniowego oraz
zabezpieczenia przeciwzwarciowego. Control boxy działają tylko
pod napięciem 12/24V.
DBAJ O ŚRODOWISKO!
Symbol ten wskazuje, że pozbywając się tego produktu nie
należy go wyrzucać razem z nieposortowanymi odpodami
P/N: 01524
2)
1
Advertisement

Related Manuals for AMiO 01524


Summary of Contents for AMiO 01524
- Page 1 P/N: 01524 after turning the ignition EN - USER MANUAL DECLARATION OF CONFORMITY AVAILABLE FROM AMIO SP Z O.O. UL. HANDLOWA 3, 41 - 807 ZABRZE DAYTIME RUNNING LIGHTS PL - INSTRUKCJA OBSŁUGI INSTALLATION GUIDE: ŚWIATŁA DO JAZDY DZIENNEJ CONTROL BOX LK depending on how you connect - when you turn on low beam - dim to 30% yield, or completely off the lights.
- Page 2 Zgodnie z Dyrektywą DECLARACIÓN DE CONFORMIDAD DISPONIBLE EN europejską 2002/96/WE w sprawie zużytego sprzętu elektrycznego AMIO SP Z O.O. UL. HANDLOWA 3, 41 - 807 ZABRZE i elektronicznego i jej włączenia do przepisów prawa krajowego zużyty sprzęt elektryczny i elektroniczny należy poddać zbiórce selektywnej CZ - UŽIVATELSKÁ...
- Page 3 ДЕКЛАРАЦІЯ ПРО ВІДПОВІДНІСТЬ ВІД zariadenia je možné odovzdať aj v zberni elektronického odpadu, AMIO SP Z O.O. UL. HANDLOWA 3, 41 - 807 ZABRZE ktorá zariadenia likviduje v súlade s národným zákonom o recyklácii a odpadoch. Pomáha tiež predchádzať potenciálnemu RU - РУКОВОДСТВО...
- Page 4 включением в национальное законодательство, отходы ΔΉΛΩΣΗ ΣΥΜΜΌΡΦΩΣΗΣ ΔΙΑΘΈΣΙΜΗ ΣΤΟ SDZIBIA электрического и электронного оборудования должны AMIO SP Z O.O. UL. HANDLOWA 3, 41 - 807 ZABRZE собираться отдельно и перерабатываться. Вы также можете сдать использованное оборудование в пункт приема электронных отходов, который утилизирует его в...
Need help?
Do you have a question about the 01524 and is the answer not in the manual?
Questions and answers