Advertisement
Instructions for our MON7005AHD V2.1
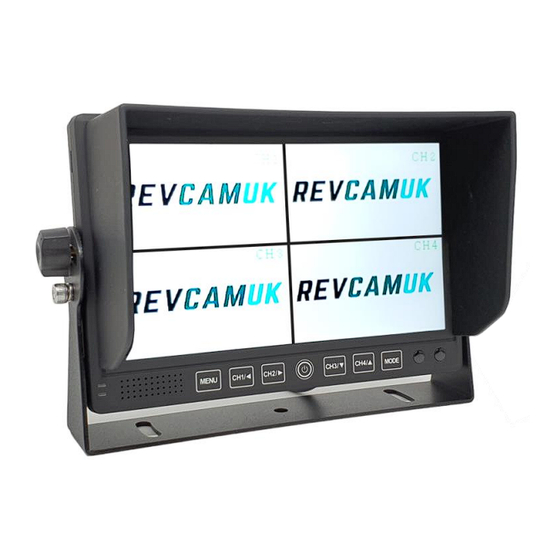
Quad Split Screen Monitor
This 4 channel vehicle monitor can be used to display various reversing
cameras and side cameras, as well as producing a split screen arrangement
if desired.
The menu system is quite powerful and allows for various functions and
adjustments. This booklet will help navigate you through some of these
features, as well as give some guidance on the wiring of the display.
Advertisement
Table of Contents

Related Manuals for REVCAMUK MON7005AHD


Summary of Contents for REVCAMUK MON7005AHD
- Page 1 Instructions for our MON7005AHD V2.1 Quad Split Screen Monitor This 4 channel vehicle monitor can be used to display various reversing cameras and side cameras, as well as producing a split screen arrangement if desired. The menu system is quite powerful and allows for various functions and adjustments.
- Page 2 Safety and Installation Precautions If you are not using a cigarette lighter to connect to the electrics then we recom- mend disconnecting the negative terminal of your vehicles battery. Be aware this may reset your clocks/computer/radio code. The panel of the monitor is delicate and pressing the front can cause the thin glass sheet inside to crack.
-
Page 3: Technical Specification
Technical Specification Power supply: 12 - 24v DC Dimensions: 180 x 121 x 23mm (not including bracket) TV system: PAL or NTSC Touch-sensitive switches Resolution: 1024 x R.G.B x 600 4 trigger wires to link to indicators or 7 inch Colour IPS panel display reversing light with time delay Working temperature: 0 - 60 degrees C On screen menu... -
Page 4: Button Layout
and left side view camera at the same time. Please see menu settings guide (page 7) for ACC delay when handling indicator lights. Please kindly note that these trigger wires are not required to be attached. If you do not want to wire up to your reverse lights etc then you can leave these wires blank. We usually recommend adding a bit of insulation tape over the ends just in case. -
Page 5: Split Screen Modes
CH2/Right Arrow - If you are not in the menu system, pressing this will full screen Channel 2. If you are in the menu system, pressing this will move the selection or adjust to the right. Standby / Power Logo - This will turn the monitor display ON/OFF CH3/Down Arrow - If you are not in the menu system, pressing this will full screen Channel 3. -
Page 6: Menu Guide
Menu Guide The monitor menu system can be accessed to change various settings. The following pages will guide you through the various options that you can modify. To access the menu press the menu button, then use the arrow keys to navigate around. - Page 7 Blue Screen As standard this is switched to OFF, which will show any empty channels as black backgrounds. Changing this to ON means that any empty channels will show as blue backgrounds on the screen. Language This monitor can be changed to a number of language settings for the on screen display.
- Page 8 We stock a range of brackets to fix the display to various locations in the vehicle. Optional Brackets for monitor Thanks again from the REVCAMUK team. Save travels.
Need help?
Do you have a question about the MON7005AHD and is the answer not in the manual?
Questions and answers